Table of Contents >> Show >> Hide
- Why Canning Apples Is Worth the Trouble
- Know the Safety Basics Before You Start
- Choosing the Best Apples for Canning
- How to Can Apples for Pie Filling
- How to Can Applesauce
- How to Can Sliced Apples
- What Else You Can Do With Canned Apples
- Common Mistakes to Avoid
- Storage Tips for Better Quality
- What the Experience of Canning Apples Is Really Like
- Final Thoughts
There are two kinds of people in autumn: the ones who buy a cute bag of apples and feel accomplished, and the ones who come home with enough fruit to start a small roadside empire. If you fall into the second category, canning apples is one of the smartest ways to turn that glorious haul into something practical, delicious, and deeply satisfying. A pantry shelf lined with jars of apple pie filling, applesauce, and sliced apples is basically a standing ovation for your future self.
Canning apples is not just about saving fruit before it goes soft and sad on the counter. It is also about convenience, thrift, and flavor. When you preserve apples correctly, you get ready-to-use ingredients for weeknight desserts, holiday pies, lunchbox snacks, quick breakfasts, and cozy baking projects all year long. One jar can become a bubbling pie. Another can rescue a rushed morning. A third can turn plain oatmeal into something that feels far more intentional than “I woke up late and panicked.”
The good news is that apples are one of the friendlier fruits for home canners. The even better news is that they are wildly versatile. You can preserve them as silky applesauce, firm slices for crisps and cobblers, or glossy pie filling ready to slide into a crust. You can also branch out into apple butter, juice, chutneys, and spiced specialties once you get comfortable.
Why Canning Apples Is Worth the Trouble
Let’s be honest: peeling, coring, slicing, blanching, and processing apples is not exactly a lazy-afternoon hobby. But the payoff is impressive. Canning lets you preserve peak-season flavor, reduce waste, and stock your kitchen with ingredients that save time later. Instead of starting every dessert from scratch, you can open a jar and already be halfway to something wonderful.
It also gives you more control over what goes into your food. You decide how sweet your applesauce is. You choose the spices. You decide whether your pie filling leans classic with cinnamon or goes a little rogue with nutmeg and allspice. That kind of control is especially helpful if you prefer simpler ingredients or want to avoid overly sweet commercial products.
There is also the practical side. Fresh apples are seasonal, but canned apples are ready whenever you are. In January, when the weather is dreary and your motivation is being held together by tea and stubbornness, a jar of homemade apples can feel like a tiny edible time capsule from fall.
Know the Safety Basics Before You Start
Here is where the cozy apron energy needs to make room for science. Safe canning depends on using tested methods, correct jar sizes, proper headspace, and accurate processing times for your altitude. Apples are high-acid fruit, which makes them suitable for boiling-water canning when you follow tested instructions. That does not mean improvising wildly is suddenly a great idea.
Use standard canning jars, two-piece lids, and recipes from trusted food preservation sources. Do not swap in random shortcuts from social media just because the video had soft lighting and a charming wooden spoon. Unsafe methods such as oven canning, open-kettle canning, or using a vacuum sealer as a replacement for heat processing may create a sealed jar, but a seal alone does not mean the food is safe.
Also, pay attention to altitude. Processing times change as elevation rises, and that is not bureaucratic nonsense. It is a real safety and quality issue. If you live at a higher elevation, your jars need longer processing times than someone at sea level.
What You Need
A solid setup makes the whole process smoother:
- Fresh, sound apples without serious bruising or decay
- A boiling-water canner or a deep canning pot with a rack
- Clean canning jars in the correct size for the recipe
- New lids and screw bands
- Jar lifter, bubble remover, and a clean damp cloth
- Large pot or preserving pan
- Apple peeler-corer-slicer, optional but sanity-saving
- Ascorbic acid or another approved anti-browning treatment for slices
- Clear Jel for pie filling, not flour and not ordinary cornstarch
That last point matters. For canned pie filling, Clear Jel is the thickener used in tested recipes because it holds up during canning and baking. Regular cornstarch, flour, tapioca, and other thickeners can create texture and safety problems. In other words, your filling may look confident in the pot and then turn into a swamp in the pie.
Choosing the Best Apples for Canning
The best apple for canning depends on what you plan to make. For applesauce, many home canners like a blend of sweet and tart apples for balanced flavor. Using only very sweet apples can make sauce taste flat, while using only tart apples can make your face pucker like you bit into a lemon with a personal grudge.
For pie filling and sliced apples, choose firm apples that hold their shape well during cooking and processing. You want slices that stay distinct instead of melting into apple-flavored mush. Good texture is just as important as flavor when the goal is pie, crisp, cobbler, or cake filling.
If you have a mixed batch from an orchard, separate them by best use. Firm, crisp apples are ideal for pie filling and canned slices. Softer fruit can be turned into sauce or butter. This is one of those satisfying kitchen moments where being organized makes you feel like the main character in a harvest movie.
How to Can Apples for Pie Filling
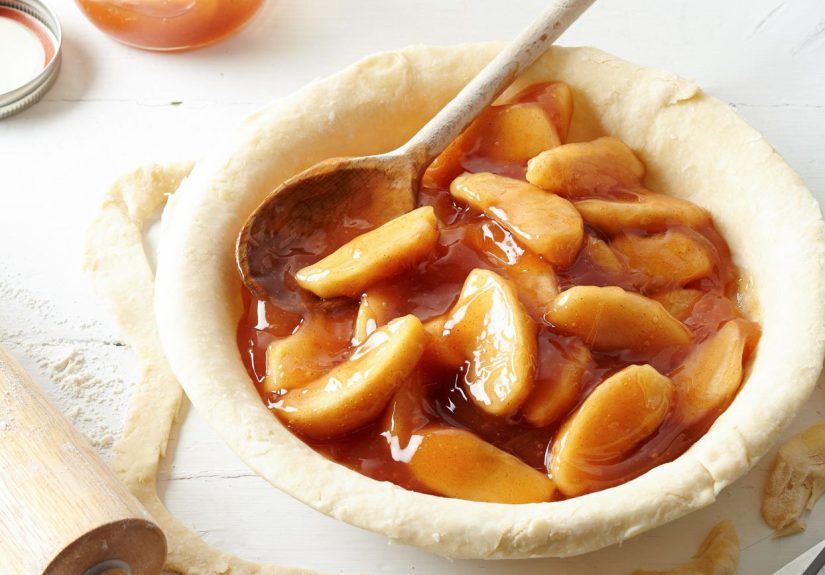
Apple pie filling is one of the most rewarding things you can put on a pantry shelf. It is rich, glossy, fragrant, and gloriously convenient. On a busy day, opening a jar of finished filling feels like your past self left you a handwritten note that says, “Relax, I handled dessert.”
Step 1: Prep the Apples
Wash, peel, core, and slice the apples. Keep the slices in an anti-browning solution while you work. This helps them stay attractive instead of turning fifty shades of beige before they reach the jar.
Blanch the apples as directed in a tested recipe. Blanching helps with texture, color, and pack quality. It is an extra step, yes, but it keeps the filling from becoming an odd combination of floating fruit and regret.
Step 2: Make the Filling Properly
The filling mixture is made with liquid, sugar, spices if desired, bottled lemon juice, and Clear Jel. The lemon juice is important, and the thickener is not an area for creative rebellion. This is one recipe category where “I made a few little changes” can become “Why is this runny?” or worse, “Was this even safe?”
Once the mixture thickens and bubbles, the drained apple slices are folded in and the hot filling is packed into jars right away. Apple pie filling typically uses more headspace than applesauce or plain slices, so pay close attention to the tested recipe you are following.
Step 3: Process Without Delay
Remove air bubbles, wipe the rims, apply lids fingertip tight, and process the jars promptly. That last part is important. Pie filling is not a “make it and let it loiter” kind of project.
The result is a pantry staple that can go straight into a pie shell, spoon over cheesecake, fill turnovers, top pancakes, or become the easiest last-minute dessert in your kitchen. Add a scoop of vanilla ice cream and suddenly everyone thinks you planned the evening better than you actually did.
How to Can Applesauce
Applesauce may be the most forgiving and family-friendly apple preserve. It is useful, comforting, and adaptable. You can make it smooth, chunky, sweetened, lightly sweetened, or unsweetened. You can flavor it with cinnamon or leave it plain. You can pack it in pints for lunchbox life or quarts for serious applesauce households.
Start With Tender Apples
For applesauce, the apples are cooked with a small amount of water until tender. Then they are pressed through a food mill or sieve for smooth sauce, or left a little chunky if you prefer more texture. Sugar is optional, which is good news for people who want the apple flavor to do the heavy lifting.
After the sauce is reheated to boiling, it is packed hot into jars with the proper headspace and processed according to the tested time for your altitude. Hot packing is the standard here because it improves quality and helps produce a better finished product.
Make It Yours, Carefully
This is where applesauce shines. You can keep it plain for maximum flexibility, or add approved flavor touches after opening the jar. Some people love a smooth, classic sauce. Others want a rustic texture with visible bits of fruit. Some want something tart enough to wake up a sleepy breakfast. Others want a mellow, sweet spoonful that tastes like autumn in sweatpants.
Applesauce is also useful beyond the bowl. It can be spooned over yogurt, served with pork, swirled into oatmeal, or used in baking. It is one of those quietly overachieving foods that never makes a fuss and still manages to be helpful.
How to Can Sliced Apples
If pie filling feels a little too committed, canned sliced apples are a brilliant middle ground. They are simple, flexible, and ready for all kinds of desserts. Think crisps, cobblers, galettes, dump cakes, bread puddings, skillet desserts, and emergency “company is coming over in 40 minutes” situations.
For the best quality, apples are peeled, cored, sliced, treated to prevent browning, and then hot-packed in water or syrup. Raw pack is not recommended for sliced apples because the texture and finished quality are poor. In other words, the shortcut is not worth it. Hot-packed slices settle better in the jar, look better on the shelf, and behave better in later recipes.
These slices are not pre-thickened like pie filling, which makes them more versatile. You can drain them for a cake, sweeten and spice them for a skillet topping, or combine them with a quick crumb mixture for an easy crisp. It is the kitchen equivalent of buying the practical shoes that still look good.
What Else You Can Do With Canned Apples
Once you have the basics down, apples become a full pantry category. Apple butter is deeper, darker, and more concentrated than applesauce, with rich flavor and spreadable texture. Apple juice can also be canned safely using tested methods. Some home preservers branch into spiced apple rings, chutneys, and fruit spreads, each with their own directions and charm.
The main rule is simple: match the product to a tested recipe. Apples may be versatile, but safe canning still depends on the exact food, jar size, acidity, thickness, and processing method. “It’s all apples” is not actually how preservation science works. That sentence has caused a lot of trouble in a lot of kitchens.
Common Mistakes to Avoid
- Using untested recipes: A family recipe may be delicious, but that does not mean it is canning-safe.
- Using the wrong thickener: Pie filling needs Clear Jel, not flour or regular cornstarch.
- Skipping anti-browning treatment: Your apples can darken quickly while you prep.
- Ignoring headspace: Too much or too little can affect sealing and quality.
- Overtightening bands: Fingertip tight is enough. The jars need to vent during processing.
- Forgetting altitude adjustments: Processing times are not one-size-fits-all.
- Using damaged fruit: Save questionable apples for immediate cooking, not shelf-stable canning.
- Trusting trendy shortcuts: Oven canning, open-kettle methods, and vacuum gadgets are not replacements for tested heat processing.
Storage Tips for Better Quality
After processing, let jars cool undisturbed for 12 to 24 hours. Check the seals, remove the screw bands for storage, wipe the jars if needed, label them, and store them in a cool, dark place. Good storage helps preserve both quality and shelf life.
For best flavor and texture, rotate through your jars within a year. That does not mean they magically become terrible on day 366, but quality is usually best when you use them sooner rather than later. Think of canned apples like a good sweater: technically useful for years, but nicest when it is fresh and still feels like a treat.
What the Experience of Canning Apples Is Really Like
The experience of canning apples is part kitchen work, part seasonal ritual, and part surprisingly effective therapy. It usually begins with optimism. You set out the jars, sharpen the peeler, wash the apples, and tell yourself this will be relaxing. Then you realize you bought or picked far more apples than any reasonable person would process on a single counter, and suddenly your kitchen looks like an orchard exploded.
But somewhere between the peeling and the simmering, the process becomes deeply satisfying. There is a rhythm to it. Peel, slice, dip, blanch, stir. Wipe the rim. Tighten the lid. Lower the jar into the canner. Repeat until you lose track of time and start measuring the afternoon in batches instead of hours. The scent alone is worth mentioning. Your kitchen fills with warm apple aroma, and if cinnamon is involved, the room begins to smell like every happy autumn cliché at once. It is impossible not to feel at least a little pleased with yourself.
There is also a practical joy in seeing order come out of abundance. A pile of apples feels temporary and slightly stressful. A shelf of neatly labeled jars feels calm, capable, and intentional. That transformation is one of the best parts of the whole project. You are not just cooking. You are preparing future desserts, future breakfasts, future gifts, and future moments when you will be tired, busy, or simply not in the mood to peel eight apples from scratch.
Another truth about canning apples is that every batch teaches you something. One year you may learn that your favorite eating apple turns mushy in pie filling. Another year you discover that blending sweet and tart apples makes a far better sauce than using only one variety. Sometimes you learn that your “efficient system” was not actually efficient at all, and that next year you should absolutely recruit help before you begin. These small lessons are part of why experienced home canners get better with time. The process rewards attention.
And then there is the moment the jars come out of the canner. They sit on the towel, hot and gleaming, while you pretend not to hover over them. Soon the lids begin to ping, one by one, and that sound is absurdly satisfying. It is tiny, metallic proof that the work paid off. Even people who claim not to be sentimental about food tend to pause for that sound.
Later, months after the apples were canned, the experience comes back in a different way. You open a jar on a cold evening, spoon pie filling into a crust, or warm applesauce for breakfast, and suddenly the effort makes perfect sense. Canning apples is labor, yes, but it is labor that keeps giving. It turns a busy fall day into practical comfort for the rest of the year. And honestly, that is a pretty wonderful trick for a humble piece of fruit.
Final Thoughts
Canning apples for pies, applesauce, and more is one of the most useful skills a home preserver can learn. It combines flavor, thrift, convenience, and old-fashioned satisfaction in a way few kitchen projects can. The key is to respect the method. Use tested recipes, choose the right product for the right process, and let food safety be the boring hero of the story.
Once you do, apples become far more than a seasonal fruit. They become ready-made desserts, quick sides, easy breakfasts, and edible evidence that you had your life together at least once this year. And that, in a well-stocked pantry, is no small achievement.