Table of Contents >> Show >> Hide
- What Counts as a “Furniture Makeover”?
- Before You Start: The 10-Minute Reality Check
- Your Makeover Toolkit (Keep It Simple)
- The Makeover Menu: Pick Your Path
- Option A: Paint (best for dramatic transformations)
- Option B: Stain or re-stain (best for showing off wood grain)
- Option C: Strip + refinish (best for “I want it perfect” results)
- Option D: Upholstery refresh (best ROI in comfort)
- Option E: Hardware + accents (best “weeknight makeover”)
- Option F: Metal refresh (best for outdoor or industrial pieces)
- Option G: Laminate rescue (best for budget furniture)
- Step-by-Step: Paint a Wood Dresser Like a Pro
- Step 1: Remove hardware and label parts
- Step 2: Clean like you mean it
- Step 3: Repair dings, chips, and loose joints
- Step 4: Sand (or at least scuff-sand)
- Step 5: Remove dust (this step is boring and crucial)
- Step 6: Prime the right way
- Step 7: Paint in thin coats (seriously, thin)
- Step 8: Lightly sand between coats (optional but magical)
- Step 9: Let it dry AND let it cure
- Step 10: Add hardware and final details
- Step-by-Step: Refinish or Re-Stain for a Natural Wood Look
- Fast Makeover Ideas That Look Custom
- Topcoats: When You Need One (and When You Don’t)
- Common DIY Furniture Makeover Problems (and How to Fix Them)
- Mini Case Studies: Makeovers That Actually Make Sense
- Conclusion: Your Best Furniture Makeover Is the One You’ll Finish
- Real-World Experiences: What DIYers Commonly Learn the Fun Way (About )
Old furniture has two destinies: (1) living forever in a dusty corner as a “temporary” holding spot for mail, or (2) getting a glow-up so good your friends ask what boutique you “splurged” at. This guide is for Destiny #2.
DIY furniture makeovers are basically home improvement’s greatest loophole: you can change the entire vibe of a room without buying an entire room. Paint, stain, new hardware, fresh fabrictiny moves with big “whoa” energy. And yes, you can do it without turning your garage into a sawdust-themed escape room.
What Counts as a “Furniture Makeover”?
A makeover is any intentional upgrade that changes how a piece looks and/or functions. That can be a full refinish (strip + sand + stain + topcoat), or a quick flip (paint + new pulls + done). The best DIY furniture makeovers match: the piece (solid wood vs. laminate), your patience level, and real-life use (a bedside table gets treated gently; a kitchen chair gets body-slammed daily).
Before You Start: The 10-Minute Reality Check
1) Identify the surface (this prevents heartbreak)
- Solid wood: the MVPcan be sanded, stained, painted, refinished multiple times.
- Veneer: real wood, thin layerbeautiful, but easy to sand through if you get aggressive.
- Laminate / melamine: smooth, non-porouspaint can stick, but prep + bonding primer matter.
- Metal: needs rust removal and the right primer/paint.
- Upholstered pieces: all about fabric choice, staples, and not being afraid of corners.
2) Decide the goal: “statement piece” vs. “invisible workhorse”
If it’s a high-touch surface (dining table, desk, dresser top), plan for durability: better prep, smoother finish, and a protective topcoat. If it’s decorative (small side table), you can prioritize style over tank-level protection.
3) Understand dry time vs. cure time (the #1 reason finishes fail)
Paint can feel dry quickly, but curingthe part where it hardens and becomes truly durabletakes longer. If you stack books on a “dry” painted shelf too soon, you’ll get the classic DIY souvenir: a permanent rectangle.
4) Safety: the un-fun part that keeps you… you
- Ventilation: open doors/windows, use fans, and avoid fumes in tight spaces.
- Dust control: sanding dust gets everywhere. Vacuum often and wipe down.
- Old paint caution: if a piece is old enough to have lead-based paint, don’t dry-sand it. Use safer methods and follow local guidance.
- Gloves/eye protection: especially when stripping, using solvents, or wire-brushing rust.
Your Makeover Toolkit (Keep It Simple)
You don’t need a workshop worthy of a TV montage. Start with basics and add tools when you’ve earned them (like a video game, but with more primer).
- Cleaner/degreaser, rags, and a tack cloth or microfiber
- Sanding sponges or sandpaper (common grits: 120, 180/220, 320)
- Putty/wood filler and a putty knife
- Good painter’s tape and drop cloth
- Primer (bonding primer for slick surfaces; stain-blocking primer for knotty wood)
- Paint (furniture-friendly enamel or cabinet/trim paint) or stain
- Quality brush + small foam roller (or a sprayer if you’re ready)
- Topcoat (water-based polycrylic/polyurethane or oil-based polyurethane depending on the job)
- Hardware screwdriver set (also known as “the easiest makeover ever”)
- Optional: respirator, orbital sander, wood stripper, staple gun (for upholstery)
The Makeover Menu: Pick Your Path
Option A: Paint (best for dramatic transformations)
Painting is the fastest way to modernize a piece: thrifted dressers become “custom built-ins,” and dated oak turns into crisp, modern storage. The secret is not the color. It’s prep + thin coats + patience.
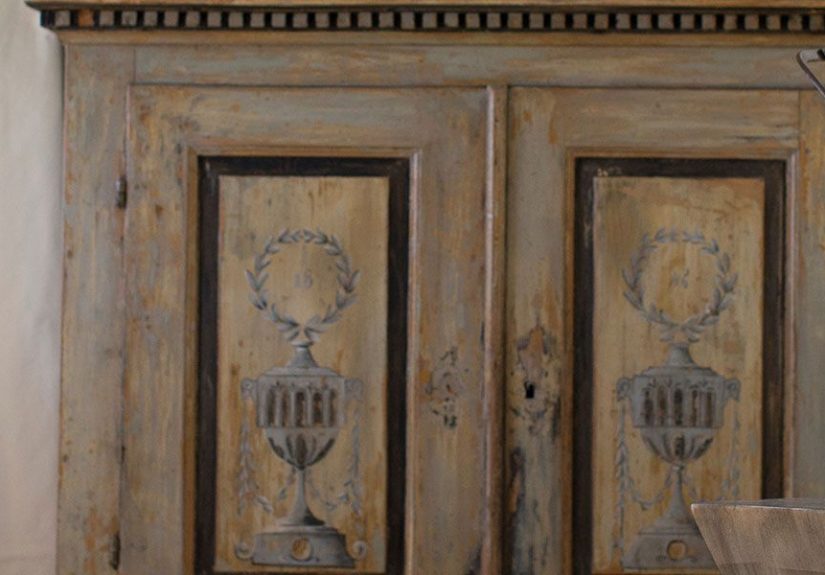
Option B: Stain or re-stain (best for showing off wood grain)
If the wood is worth showing off, a stain makeover can look expensive. It’s also less forgiving than paint: uneven sanding and missed spots can show through. Slow and steady wins.
Option C: Strip + refinish (best for “I want it perfect” results)
Stripping removes old finish so you can start fresh. It takes time, but it’s the route to that smooth, glowing wood look.
Option D: Upholstery refresh (best ROI in comfort)
Reupholstering a seat or bench looks intimidating until you realize it’s mostly: remove staples, cut fabric, add staples. Corners are where courage is tested.
Option E: Hardware + accents (best “weeknight makeover”)
New knobs/pulls can make a basic dresser look custom. Add trim, feet, or a fresh top panel and suddenly the piece has “designer” energy on a DIY budget.
Option F: Metal refresh (best for outdoor or industrial pieces)
Remove rust, prime, and spray in light coats. The finish can be shockingly smooth when you keep your distance and don’t try to “get coverage in one heroic pass.”
Option G: Laminate rescue (best for budget furniture)
Laminate can be paintedjust don’t skip scuff-sanding and a bonding primer. If you do, the paint may peel like a sunburn.
Step-by-Step: Paint a Wood Dresser Like a Pro
Let’s walk through the most common DIY furniture makeover: turning an outdated dresser into a modern showpiece. This same approach works for nightstands, sideboards, and cabinets.
Step 1: Remove hardware and label parts
Take off knobs/pulls, remove drawers, and stash screws in a bag. If drawers are similar, label them (Painter’s Tape is your friend).
Step 2: Clean like you mean it
Furniture collects oils, polishes, and mystery grime. Clean thoroughly so primer and paint can bond. Let it dry fully.
Step 3: Repair dings, chips, and loose joints
Fill dents with wood filler, let it dry, then sand smooth. Tighten or reglue wobbly joints nowpaint won’t fix structural issues.
Step 4: Sand (or at least scuff-sand)
If the finish is already smooth and stable, you often just need to scuff-sand (think: “dull it,” not “erase it”). For rough or peeling paint, sand more thoroughly. Always sand with the grain on wood.
Step 5: Remove dust (this step is boring and crucial)
Vacuum the piece, then wipe with a damp cloth or tack cloth. Dust left behind becomes gritty texture in your finish.
Step 6: Prime the right way
- Stain-blocking primer: great for knotty wood or pieces with tannin bleed risks.
- Bonding primer: great for slick surfaces and laminate.
Apply a thin, even coat. When dry, lightly sand with a fine grit (often 220–320) for a smoother topcoat. Remove dust again.
Step 7: Paint in thin coats (seriously, thin)
Use a quality angled brush for edges and a small foam roller for flat areas. Keep a “wet edge” so you don’t create lap marks. Two to three thin coats usually beat one thick coat every day of the week (and twice on Sunday).
Step 8: Lightly sand between coats (optional but magical)
For a silky finish, lightly sand between coats with a fine grit. You’re not removing color; you’re removing texture.
Step 9: Let it dry AND let it cure
Follow the label recoat times. Then give your piece real curing time before heavy use. If you rush this step, your “durable finish” becomes “soft finish with emotional damage.”
Step 10: Add hardware and final details
New pulls can change everything. A classic trick is mixing finisheslike matte black pulls on a warm painted tone for contrast that looks intentional and modern.
Step-by-Step: Refinish or Re-Stain for a Natural Wood Look
If your piece has good bones and decent grain, refinishing can look high-end. The tradeoff: it’s less forgiving than paint.
1) Decide: sand-only refresh or full strip?
If the old topcoat is thin and stable, you may be able to sand and recoat. If it’s thick, uneven, or you want a totally new stain color, stripping is often the cleaner route.
2) Strip (if needed), then neutralize/clean as directed
Use a stripper appropriate for the finish. Scrape gently, especially on veneer. Clean residue thoroughly so your new finish adheres.
3) Sand in stages
A common progression is medium grit to level, then finer grits to smooth (for example: 120 → 220). Don’t skip straight to ultra-fine early; it can reduce stain absorption.
4) Test stain colors (always test!)
Test on the underside or inside a drawer. Wood species and previous finish history affect coloryour “warm walnut” can become “why is it orange?” without a test.
5) Apply stain evenly
Work in manageable sections, wipe excess consistently, and let it dry fully.
6) Seal with a protective topcoat
For many indoor pieces, water-based clear coats stay clear and dry faster. For heavy-wear surfaces, polyurethane can offer strong protection. Apply thin coats, sand lightly between coats for smoothness, and keep dust under control.
Fast Makeover Ideas That Look Custom
1) Hardware swap + “faucet math”
Hardware is the jewelry of furniture. Measure hole spacing (center-to-center) before buying pulls. If you’re changing the size, plan to fill old holes and drill new ones.
2) Add trim or molding for instant upgrade
Flat drawer fronts can look custom with simple trim. Paint it all one color for a sleek look, or highlight trim for a subtle two-tone effect.
3) Update the feet
New legs can convert a squat, dated piece into a lighter, mid-century vibe. (It’s basically giving your dresser better posture.)
4) Line drawers and cabinets
Peel-and-stick wallpaper or drawer liner adds a surprise moment every time you open the piece. It’s low commitment, high delight.
5) Reupholster a chair seat (a perfect “first upholstery” project)
Remove the seat, pull old staples, use the old fabric as a pattern, staple the new fabric, and trim. Choose upholstery-grade fabric for durability.
Topcoats: When You Need One (and When You Don’t)
Some furniture paints are designed to be durable without a topcoat, but many makeovers benefit from extra protectionespecially tabletops, desktops, kitchen chairs, and any surface that meets keys, mugs, or toddlers with crayons.
- Water-based clear coats: dry faster and stay clearer on light colors.
- Oil-based polyurethane: can be very durable but may amber over time and often dries slower.
- Wax finishes: can look beautiful on certain painted styles, but need maintenance and aren’t always ideal for heavy use.
Common DIY Furniture Makeover Problems (and How to Fix Them)
Brush marks
Usually caused by thick paint, overworking, or low-quality tools. Fix: thin coats, quality brush/roller, and light sanding between coats.
Orange peel texture (especially with spray paint)
Often from spraying too far away, too heavy, or in poor conditions. Fix: light coats, consistent distance, and proper recoat timing.
Peeling paint on laminate
This is almost always a bonding issue. Fix: scuff-sand, clean well, and use a bonding primer before repainting.
Tannin bleed (yellow/brown stains showing through paint)
Common with certain woods. Fix: stain-blocking primer and adequate dry time before topcoating.
Sticky drawers
Paint buildup on edges can cause sticking. Fix: sand the contact points lightly after curing, and consider adding a little paste wax on drawer runners.
Mini Case Studies: Makeovers That Actually Make Sense
Case 1: Thrifted dresser → modern “custom” look
Approach: clean + scuff-sand + stain-blocking primer + two thin paint coats + upgraded pulls. Result: a dated piece reads as intentional, modern storage.
Case 2: Oak side table → warmer stain + satin topcoat
Approach: strip (if needed) + sand evenly + test stain + wipe-on application + protective clear coat. Result: the grain becomes the feature instead of the problem.
Case 3: Metal patio set → refreshed for outdoor season
Approach: wire brush rust + sand crevices + clean + rust-inhibiting primer + multiple light spray coats. Result: crisp finish with fewer drips and better coverage.
Case 4: Laminate bookshelf → painted without peeling
Approach: degrease + scuff-sand + bonding primer + durable enamel paint. Result: budget furniture that looks upgraded and holds up better to daily use.
Conclusion: Your Best Furniture Makeover Is the One You’ll Finish
The secret to great DIY furniture makeovers isn’t a magical paint brand or a viral hack. It’s the unglamorous stuff: cleaning, prep, thin coats, and letting finishes cure. Pick a project that fits your schedule, match products to the surface, and build your skills piece by piece.
Start small if you’re nervous. Swap hardware. Paint a nightstand. Reupholster a simple seat. Once you see that “before” turn into “wait, I did that?” you’ll be scanning thrift stores like you’ve been hired by a home makeover show.
Real-World Experiences: What DIYers Commonly Learn the Fun Way (About )
Here’s a truth nobody puts on the paint can: most DIY furniture makeovers go through an emotional arc. It starts with confidence (“This will take one afternoon!”), dips into doubt (“Why does it look worse now?”), and ends in pride (“I should charge admission to look at this dresser.”). If you’ve ever felt that arc coming on, welcomeyou’re doing it right.
One common experience is the “prep shock”. People expect painting to be the main event, but the real time goes to cleaning and sanding. The moment you wipe down a “clean” thrift-store table and your rag turns a suspicious shade of gray, you suddenly respect degreasers like they’re a sacred tool. After that, you stop skipping prepbecause you’ve seen what happens when paint tries to cling to furniture polish. (Spoiler: it doesn’t.)
Another frequent moment is the “thin coats revelation”. The first coat often looks patchy, and that’s when beginners panic and try to fix it with a thick second coat. That’s how drips are born. With a little experience, you learn to trust the process: thin coats level better, dry better, and look smoother. Many DIYers describe the second or third coat as the moment it finally “snaps into place,” where the piece stops looking like a project and starts looking like furniture again.
Then there’s hardware regreta surprisingly common plot twist. You paint a piece beautifully, reinstall old knobs, and suddenly the whole thing looks like it’s wearing gym socks with a tuxedo. The fix is simple: new hardware. People often say it feels like the final 10% that delivers 50% of the wow factor. Bonus: hardware is also a commitment-free style experiment. You can go modern, vintage, brass, black, or mixed metals without repainting the entire piece.
Many DIYers also learn the hard lesson of curing time. A dresser top feels dry, so a lamp goes on it. Then a day later, the lamp comes off… with the finish. That tiny disaster is annoying, but it’s also the moment you start treating cure time like part of the project, not an optional “suggestion.” People who wait the full cure window often say the difference is dramatic: fewer scuffs, fewer dents, and less “why is this still soft?” stress.
Finally, there’s the best experience of all: the identity shift. After one successful DIY furniture makeover, you stop seeing thrifted pieces as “used furniture” and start seeing them as “materials.” A scratched table becomes a candidate for stain. A basic cabinet becomes a paint-and-hardware upgrade. You build confidence, then skills, then a home that feels more like youbecause you literally made it that way.