Table of Contents >> Show >> Hide
- Why a DIY St. Patrick’s Day Wreath Works So Well
- The Best Style Direction for This Wreath
- Materials You Will Need
- How to Make This DIY St. Patrick’s Day Wreath
- Three Easy Variations to Try
- Common Mistakes to Avoid
- Budget-Friendly Tips That Actually Work
- How to Style the Wreath on Your Front Door
- Experience Section: What You Learn When You Actually Make a DIY St. Patrick’s Day Wreath
- Conclusion
There are two kinds of seasonal decorating people in this world: the ones who own twelve labeled storage bins and a glue gun holster, and the ones who suddenly remember a holiday is tomorrow and start eyeing a roll of ribbon like it owes them money. This article is for both groups. If you want a cheerful, stylish, and surprisingly easy front-door upgrade, a DIY St. Patrick’s Day wreath is one of the best projects you can make.
It is festive without being fussy, customizable without becoming a three-day craft marathon, and budget-friendly enough that you can still afford coffee after buying faux florals, ribbon, and that one tiny shamrock sign you absolutely did not plan to buy. Better yet, a good St. Patrick’s Day wreath bridges winter and spring beautifully. It brings in fresh green color, playful charm, and just enough seasonal personality to make your entryway look awake again.
In this guide, you will learn how to make a DIY St. Patrick’s Day wreath idea that looks polished, lasts through the season, and does not scream “I panic-crafted this at 11:48 p.m.” We will cover the best materials, step-by-step instructions, design variations, styling tips, common mistakes, and real-world crafting lessons that make the finished wreath look far more expensive than it actually is.
Why a DIY St. Patrick’s Day Wreath Works So Well
A wreath is one of the easiest ways to decorate for a holiday because it instantly creates a focal point. You do not need to repaint your porch, replace your doormat, or transform your entire living room into an Irish countryside fantasy. You just need one thoughtfully designed piece in the right colors and textures.
The best St. Patrick’s Day wreath ideas usually combine a few signature elements: shades of green, shamrocks or clovers, natural texture, and one playful accent like gold ribbon, a rainbow detail, gingham, or a small seasonal sign. The secret is balance. You want the wreath to feel lucky and lively, not like a leprechaun lost a bet.
A strong design also works beyond March 17. If you skip anything too novelty-heavy, your wreath can stay up for most of early spring. Think fresh greenery, muted green ribbon, soft white flowers, and subtle gold. It still nods to the holiday, but it also looks refined enough for everyday front-door decor.
The Best Style Direction for This Wreath
For a modern, easy-to-make design, the sweet spot is a mixed-texture wreath. Start with a sturdy base, then layer in soft ribbon, faux greenery, clover details, and one standout focal point. That focal point could be a shamrock cutout, a bow, a tiny “Lucky” sign, or a cluster of white flowers with gold accents.
This particular DIY St. Patrick’s Day wreath idea uses a classic green-and-white palette with touches of gold. Why? Because it looks clean, bright, and seasonal without becoming cartoonish. It also works with farmhouse, cottage, traditional, and modern spring decor styles.
Materials You Will Need
- One wreath form, either grapevine, foam, or wire
- Green ribbon in one or two shades
- Thin white ribbon or gingham ribbon for contrast
- Faux greenery such as eucalyptus, clover picks, or small leafy stems
- Felt shamrocks, wooden clover cutouts, or cardstock clovers
- Small faux white flowers for softness
- Optional gold ribbon, gold coins, or metallic accents
- Hot glue gun and glue sticks
- Floral wire or green pipe cleaners
- Scissors and wire cutters
- A bow for the top or bottom
- Ribbon loop or hook-friendly hanger on the back
If you are decorating outside, choose materials that can handle a little weather. Faux greenery and sturdy ribbon usually hold up well. Paper clovers can work indoors, but on an exterior door they may wave the white flag after the first damp day.
How to Make This DIY St. Patrick’s Day Wreath
Step 1: Choose and prep your wreath base
Your base determines the overall look. A grapevine wreath gives you natural texture and a more rustic feel. A foam ring creates a neat, full design when wrapped in ribbon or fabric. A wire form is great when you want a looser, more airy look with mesh, ribbon loops, or lots of attached stems.
For a polished front-door design, a grapevine or foam form is the easiest choice. If you are using grapevine, check for loose twigs and trim anything that looks wild in a “bird built a condo here” kind of way. If you are using foam, wrap it completely with green ribbon first so no white shows through.
Step 2: Build the color foundation
Before you add decorations, establish the main color story. Wrap sections of the wreath with green ribbon, then layer in a thin white ribbon or a green gingham ribbon. You do not need to cover every inch. Leave some of the base visible for texture. A wreath looks richer when it has contrast and breathing room.
If you want a slightly more playful look, weave in one touch of gold ribbon. Keep it minimal. Gold works best as jewelry, not as the entire outfit.
Step 3: Add greenery first
Start attaching faux greenery in small clusters. Place the stems at an angle and let them flow in one direction so the wreath feels intentional. Greenery gives your design fullness and movement, and it helps hide any awkward gaps before the decorative pieces go on top.
Try not to place identical sprigs evenly all the way around unless you want a very formal look. A more modern wreath often looks best with fuller embellishment on one side or in the lower third.
Step 4: Create your St. Patrick’s Day focal point
Now comes the fun part. Add your shamrocks, clovers, or “Lucky” sign. A cluster of three clovers works especially well because it feels balanced without being stiff. You can also make a larger focal grouping with one white flower bundle, one shamrock, and one ribbon bow layered together.
If you want a true St. Patrick’s Day wreath idea with extra personality, tuck in one small rainbow detail or a subtle coin accent near the base of the bow. Do not overdo it. One wink is charming. Twelve winks start to feel like a theme park.
Step 5: Add flowers for softness
White faux flowers are a smart addition because they break up all the green and make the wreath feel more spring-like. Use a few small stems rather than giant blooms. This is a holiday wreath, not a floral wrestling match.
Nestle the flowers near the clovers or bow to create one unified design zone. Scattering flowers too evenly can make the wreath look busy instead of composed.
Step 6: Finish with a bow
A bow can make the entire wreath feel finished. Choose ribbon that complements your palette: green gingham, white satin, soft burlap with green edging, or a striped ribbon with a touch of gold. Place it at the top for a traditional look, or on the lower side for something more current.
Fluff the loops, trim the tails cleanly, and make sure the ribbon scale fits the wreath. Tiny bows disappear. Massive bows look like the wreath got gift-wrapped against its will.
Step 7: Check balance and hang it properly
Before hanging the wreath, step back and look at it from a few feet away. This is when you will notice whether one side feels too heavy, one shamrock is floating off on its own, or the bow is trying to stage a coup.
Attach a sturdy loop to the back if needed. If hanging on a door, make sure the surface is clean first and the hanger method is appropriate for the wreath’s weight. Adding a felt backing can help protect delicate surfaces and prevent scratches.
Three Easy Variations to Try
1. Farmhouse shamrock wreath
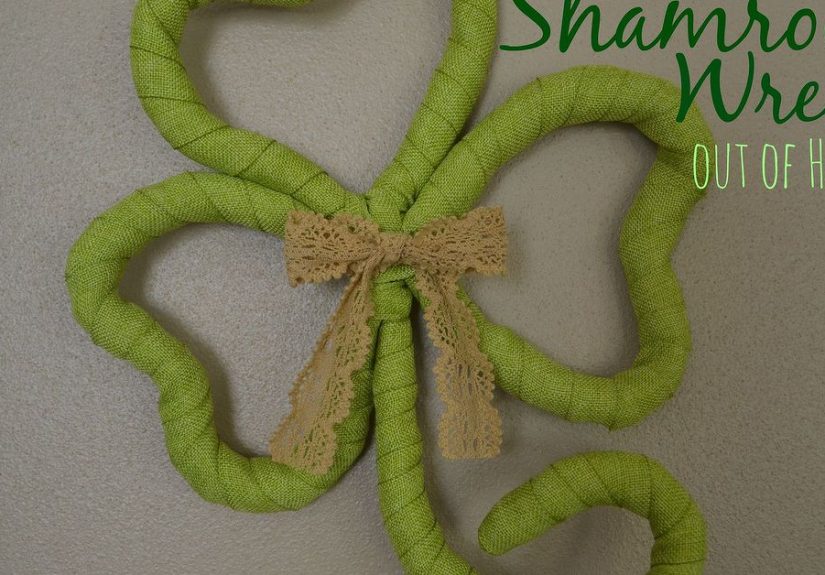
Use a grapevine base, muted green ribbon, burlap, moss, and a wooden shamrock cutout. This version feels rustic, relaxed, and easy to pair with planters or a neutral doormat.
2. Rainbow and gold wreath
Start with a yarn-wrapped wreath and add a small rainbow arc, a few gold coin accents, and white clover details. This one is more playful and works especially well indoors or in family spaces.
3. Floral spring-meets-St. Patrick’s wreath
Use lots of green eucalyptus, small white flowers, a gingham bow, and one tasteful shamrock accent. This is the best option if you want your wreath to stay up after the holiday without looking out of place.
Common Mistakes to Avoid
The biggest mistake in DIY wreath-making is trying to include every cute thing at once. Shamrocks, hats, coins, rainbows, signs, mesh, feathers, glitter, pom-poms, and five different ribbons may sound festive, but together they can look chaotic. Choose one style direction and commit to it.
Another common issue is poor scale. Tiny decorations on a large wreath look lost. Oversized embellishments on a small wreath look cramped. Match your elements to the size of your form, and leave a little open space so the design can breathe.
Finally, do not forget durability. If the wreath will hang outdoors, secure everything well and avoid flimsy paper pieces unless they are protected. The goal is “seasonal charm,” not “craft debris migrating across the porch.”
Budget-Friendly Tips That Actually Work
You do not need luxury craft-store energy to make a beautiful wreath. Start with a base you already own and refresh it seasonally. Reuse leftover ribbon from Christmas or spring projects. Cut shamrocks from felt or cardstock instead of buying pre-made ones. Shop faux greenery in small bundles and mix textures rather than buying giant matching sprays.
Another smart trick is to create a neutral base wreath and swap out only the holiday focal accents. That means your greenery, ribbon foundation, and flower arrangement can stay mostly the same while you rotate shamrocks in March, eggs in April, flags in summer, and leaves in fall. Your wallet will breathe easier, and your glue gun will still feel useful.
How to Style the Wreath on Your Front Door
A wreath looks even better when the rest of the entry supports it. Pair it with a simple doormat, a lantern, or planters with green foliage. If your wreath has subtle gold details, repeat that tone in a planter, house number, or porch light finish. These little echoes make the entire entry feel intentional.
If your door is a bold color, keep the wreath palette simple so the two do not compete. On a black, navy, or natural wood door, green-and-white wreaths really pop. On a bright green door, use deeper or more muted shades so the wreath still stands out.
Experience Section: What You Learn When You Actually Make a DIY St. Patrick’s Day Wreath
Here is the part nobody tells you before you start: making a DIY St. Patrick’s Day wreath is a tiny masterclass in optimism. You begin with a wreath form, some ribbon, a few shamrocks, and the very confident belief that this will take “maybe twenty minutes.” Then the hot glue strings appear. The bow becomes emotionally complicated. One clover leans left for no reason. Suddenly you are negotiating with mesh ribbon like it is a difficult coworker. And yet, somehow, this is exactly why the project is so satisfying.
The first real lesson is that texture matters more than quantity. Most people think they need more decorations to make a wreath look full, but fullness usually comes from layering a few smart materials well. A wrapped base, a bit of greenery, a soft bow, and one standout St. Patrick’s Day detail often look better than a wreath packed to the edges. The project teaches restraint, which is not the most glamorous lesson, but it is the one that saves the wreath from becoming a green traffic jam.
The second lesson is that color has mood. Bright shamrock green gives a cheerful, playful feel. Deeper moss and emerald tones make the wreath look more elegant. White flowers calm everything down. A little gold adds warmth and makes the piece feel finished. Once you start moving elements around by hand, you can literally see the mood change. That is the fun of DIY decor: you are not just assembling supplies, you are shaping the personality of the final piece.
Another experience that tends to surprise people is how important placement becomes. You can use the exact same materials and still end up with two completely different wreaths depending on where the bow sits, where the greenery flows, and whether the shamrocks are clustered or scattered. A bottom-side focal point feels current and designer-ish. A centered top bow feels classic. A more asymmetrical design looks custom. This is where the craft starts feeling less like a holiday project and more like styling.
There is also something very practical about making your own wreath. You begin to notice how seasonal decor works in real homes, not just in perfect catalog photos. You think about door color, weather, storage, and whether the wreath will survive your front door slamming three times a day. You choose better materials because you know what actually holds up. You get smarter about hooks, ribbon quality, and weight. By the time the wreath is finished, you have not just made a decoration. You have gained a surprisingly useful little education in design, durability, and creative problem-solving.
Most of all, the experience reminds you that seasonal decorating does not need to be expensive or overly serious to feel special. A St. Patrick’s Day wreath is small, yes, but it changes the tone of your entryway. It says someone here is paying attention. Someone here likes a little joy on the front door. Someone here possibly owns more green ribbon than expected, but that is a separate issue. And once you hang the finished wreath and see it against the door, the fiddly parts start to feel worth it. That is the magic of a good DIY project: a pile of random supplies becomes something welcoming, personal, and just polished enough to make guests think you absolutely knew what you were doing the whole time.
Conclusion
A great DIY St. Patrick’s Day wreath idea is not about throwing every lucky symbol onto a circle and hoping for the best. It is about combining color, texture, and a few thoughtful details into a design that feels festive, fresh, and genuinely welcoming. Whether you go rustic with moss and rope, playful with rainbow accents, or elegant with greenery and white florals, the best wreath is the one that fits your home and feels fun to make.
Keep the palette focused, build your layers slowly, and do not underestimate the power of a good bow. With the right mix of shamrocks, greenery, and spring charm, your front door can look ready for the holiday without tipping into overdone territory. In other words, lucky, not loud.