Table of Contents >> Show >> Hide
- Why a Broken-Tile Mosaic Path Works So Well
- Project Overview: The “Easy” Method (That Still Looks Fancy)
- Materials & Tools
- Step-by-Step: Make Mosaic Stepping Stones from Broken Tiles
- Step 1: Plan a design that won’t make you cry halfway through
- Step 2: Break tiles safely (and avoid the “surprise shard” problem)
- Step 3: Prep the stone base for better adhesion
- Step 4: Mix thin-set mortar to the right texture
- Step 5: Spread mortar and set your tile pieces
- Step 6: Let it cure (this is not the moment to “just check it”)
- Step 7: Grout the mosaic
- Step 8: Seal the grout (especially outdoors)
- How to Install Your Mosaic Stones into a Garden Path
- Design Ideas That Look High-End (Without High-End Effort)
- Common Mistakes (and How to Avoid Them)
- Maintenance: Keep Your Mosaic Path Looking Great
- Safety Notes (Because We Want DIY, Not ER)
- Conclusion: Your Yard, But Make It Art
- Real-World DIY Experiences (): What People Learn the Hard Way
Broken tiles are basically the confetti cannons of home improvement: messy, colorful, and strangely full of potential. If you’ve got a box of leftover backsplash pieces, a couple of chipped ceramic plates, or that “I swear I’ll fix it” floor tile that never got fixedcongrats. You’re holding the raw materials for a garden pathway mosaic that looks custom, costs less than buying new pavers, and makes your yard feel like it has a personality (the good kind, not the “talks to strangers in elevators” kind).
This guide breaks down an easy approach inspired by the popular broken-tile pathway idea you’ve probably seen on DIY communities: create mosaic-topped stepping stones (or pavers), then install them into a stable path base. It’s beginner-friendly, flexible, and forgivingbecause outdoor projects should be fun, not an unpaid apprenticeship.
Why a Broken-Tile Mosaic Path Works So Well
A mosaic pathway isn’t just pretty. It’s practical. Stepping stones help protect grass from foot traffic, reduce mud being tracked around, and create a clear walking route through beds or across a yard. And when you add mosaic tile, you get all that function plus a “wow, did you buy that?” lookwithout actually buying that.
Best places to use mosaic stepping stones
- Between raised beds where soil gets soft and shoes get sad
- Along a side yard to keep your path from turning into a muddy slip’n’slide
- Through mulch where everything loves to stick to your feet like it pays rent
- As a mini walkway to a shed, compost bin, or patio seating area
Project Overview: The “Easy” Method (That Still Looks Fancy)
There are a few ways to build an outdoor mosaic path. The simplest (and most durable for most DIYers) is:
- Make mosaic stepping stones using precast concrete stones or poured molds.
- Set them into a prepared path base (compacted gravel + leveling layer).
- Seal and maintain so weather doesn’t wreck your masterpiece.
This approach gives you control over your mosaic surface while keeping the installation manageable. If one stone chips years later, you can replace a single “tile-cookie” instead of redoing the whole “tile-cake.”
Materials & Tools
For the mosaic stones
- Precast concrete stepping stones or concrete mix + molds
- Broken ceramic tiles, plates, or porcelain pieces (avoid anything super crumbly)
- Thin-set mortar rated for exterior use
- Sanded grout (often best for wider joints outdoors)
- Notched trowel or a sturdy spreader
- Sponge, bucket, clean water, soft cloth (for buffing haze)
- Grout sealer (ideally penetrating and suitable for outdoors)
For breaking and shaping tile safely
- Safety glasses
- Heavy gloves (rubber or work gloves)
- Old towel or cloth (to cover tile while breaking)
- Hammer and/or tile nippers
For installing the pathway
- Spade/shovel
- Hand tamper (your future biceps will thank you)
- Crushed stone base (often called “stone pack” or “road base”)
- Leveling material: sand or stone dust
- Landscape fabric (optional but helpful for weeds)
- Edging (optional but great for keeping things tidy)
- Gravel or mulch (depending on the path style you want)
Step-by-Step: Make Mosaic Stepping Stones from Broken Tiles
Step 1: Plan a design that won’t make you cry halfway through
Keep it simple if it’s your first time. Think “geometric,” “scatter,” “sunburst,” or “random-but-intentional.” A helpful trick is to sort tile pieces by color families (blues together, neutrals together, etc.) so you can build patterns without hunting like a raccoon in a craft drawer.
Pro tip: Leave consistent gaps between pieces for grout. If everything is jammed together, grout won’t lock it in properlyand your path will slowly become a tile scavenger hunt.
Step 2: Break tiles safely (and avoid the “surprise shard” problem)
Cover tiles with an old cloth before breaking. Wear safety glasses and gloves. Use a hammer to create larger chunks, then tile nippers to refine edges and sizes. You’re aiming for pieces that sit flat and don’t have knife-like spikes.
Comfort rule: If you wouldn’t want to step on it barefoot, it doesn’t belong on a walkway stone. Your guests should not be forced into involuntary ballet.
Step 3: Prep the stone base for better adhesion
If you’re using precast concrete stepping stones, clean them first. Many DIY instructions recommend thoroughly wetting the concrete surface before spreading thin-set mortar so the dry concrete doesn’t steal water from the mortar too quickly. Damp is goodsoaking wet puddles are not.
Step 4: Mix thin-set mortar to the right texture
Follow the package directions. The goal is a spreadable consistencyoften described as “peanut butter,” but let’s be honest: more like “peanut butter that got left in a warm car for ten minutes.” Spreadable, not soupy.
Work in sections. Thin-set starts to firm up, and you don’t want to wrestle mortar that’s already decided it’s done cooperating.
Step 5: Spread mortar and set your tile pieces
Spread a layer of thin-set across part of the stone using a notched trowel or sturdy spreader. Press tile pieces gently into the mortar. Add a little extra under thinner pieces so the surface ends up fairly even.
Practical detail: You don’t need a perfectly level mosaic face like a kitchen backsplash. You do need a walkable surface where edges aren’t sticking up like tiny speed bumps.
Step 6: Let it cure (this is not the moment to “just check it”)
Let the mortar dry fullyoften overnight. If you grout too soon, pieces can shift, and your neat pattern will turn into abstract regret.
Step 7: Grout the mosaic
Mix grout and pack it into the joints. Press firmly so gaps fill completely. Scrape away excess and use a damp sponge to wipe the surface. Rinse often. Wipe lightlyover-wiping can pull grout back out of joints.
After it dries, buff the haze with a soft cloth. This is the “suddenly looks professional” moment. Enjoy it.
Step 8: Seal the grout (especially outdoors)
Once grout is fully cured and dry, apply a grout sealer. Outdoors, sealing helps reduce staining, slows moisture absorption, and makes maintenance easier. Reapplication depends on exposure and traffic, but regular resealing is a smart habit for long-term durability.
How to Install Your Mosaic Stones into a Garden Path
Even the most beautiful mosaic stones will wobble, sink, or crack if the base is sloppy. The secret to an “easy” pathway that lasts is base prep.
Step 1: Lay out the path
Use a hose or rope to sketch your shape. Curves look charming and hide small mistakes. Straight lines look crisp and reveal every tiny mistake like a spotlight. Choose your adventure.
Step 2: Dig and compact
Remove soil to form a trench. Compact the soil at the bottom. Skipping compaction is how paths become lumpy ankle-traps.
Step 3: Add a crushed stone base and compact again
Add a layer of crushed stone base (often a few inches), rake level, lightly dampen to reduce dust, and compact until firm. This creates a stable foundation that resists shifting.
Step 4: Use landscape fabric (optional, but your future self will thank you)
Landscape fabric helps reduce weeds and keeps base materials from mixing with soil over time. Pin it down so it doesn’t bunch up.
Step 5: Add a leveling layer
Add a thin leveling layer (sand or stone dust). This helps you fine-tune each stone’s height so your walkway feels comfortable underfoot.
Step 6: Set the mosaic stones
Place stones, press into the leveling layer, and check for wobble. Adjust until stable. Keep spacing consistent. For most people, stepping stones are comfortable around an average stridetest it by walking the layout before you commit.
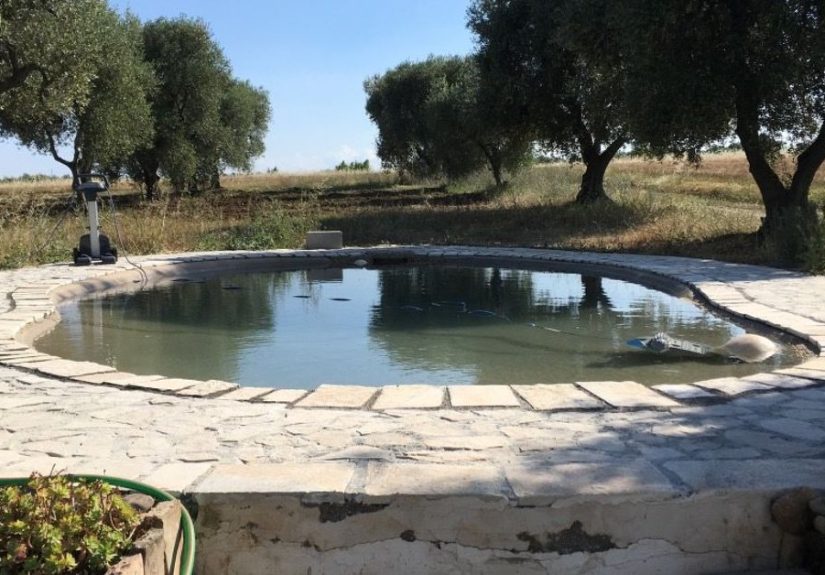
Step 7: Think about drainage (seriously)
Outdoor surfaces need water to move along and off the area instead of pooling. If you’re setting mosaic stones in a more “continuous” tiled surface look (rather than separated stepping stones), slope and drainage become even more important.
Design Ideas That Look High-End (Without High-End Effort)
1) The “Color Gradient” trick
Start with darker colors at the edges and move lighter toward the center. It hides dirt near borders and looks intentional.
2) The “Found Object” sparkle
Add a few glass gems, marbles, or smooth stones. Use them sparingly so it feels curated, not like a craft store exploded.
3) The “Story Stone” approach
Make each stepping stone its own theme: one floral, one geometric, one ocean colors, one desert colors. It turns a simple path into a mini outdoor gallery.
4) The “Frame it” method
Create a border ring (all one color) around each stone. Borders make even random tile placements look purposeful.
Common Mistakes (and How to Avoid Them)
Mistake: Using the wrong adhesive
For outdoor use, choose a thin-set mortar that’s rated for exterior installations. Indoor-only adhesives and some mastics can break down with moisture and temperature swings.
Mistake: Sharp edges sticking up
If an edge is proud of the surface, press it down while mortar is fresh or swap it out. Walkways should be friendly to feet, paws, and sandals.
Mistake: Not enough mortar coverage
Outdoor tile work benefits from strong contact between tile and base. Make sure pieces are pressed into mortar well, and don’t leave hollow spots that can collect water.
Mistake: Rushing cure times
Concrete, mortar, and grout all need time. Treat the cure time like a slow cooker recipe: rushing just makes the result disappointing and slightly tragic.
Maintenance: Keep Your Mosaic Path Looking Great
- Regular cleaning: Sweep grit off so it doesn’t act like sandpaper.
- Gentle wash: Mild soap and water is usually enough.
- Reseal grout: Especially if the path is exposed to rain, sprinklers, and heavy foot traffic.
- Winter check: In freeze-thaw climates, watch for cracking or loose pieces and repair early.
Safety Notes (Because We Want DIY, Not ER)
- Eye protection: Tile chips fly like they have tiny grudges.
- Gloves: Tile edges are sharp. Respect them.
- Dust control: Cutting or grinding cement/tile products can release hazardous dust. If you cut tile, use appropriate controls (wet methods, ventilation) and protective gear.
- Concrete caution: Wet concrete can irritate skin; wash up and avoid prolonged contact.
Conclusion: Your Yard, But Make It Art
An easy garden pathway mosaic from broken tiles is one of those rare DIY projects that hits the sweet spot: creative, practical, budget-friendly, and genuinely impressive. Start small with a few mosaic stepping stones, install them into a well-prepped path base, and you’ll end up with something that looks custombecause it is. And every time you walk across it, you’ll get the deeply satisfying feeling of turning “trash pile leftovers” into “I made that.”
Real-World DIY Experiences (): What People Learn the Hard Way
Most DIYers go into a broken-tile mosaic pathway project thinking the hard part is the design. Plot twist: the hard part is everything you didn’t realize counts as “design,” like grout spacing, tile thickness, and the fact that your favorite blue pieces somehow all disappear the moment you start placing them.
A common experience is the “sorting spiral.” At first, you dump the tile pieces into a bin like you’re making trail mix. Ten minutes later, you’re sorting by color, then by shade, then by “pieces that look like a triangle but aren’t trying hard enough.” This is normal. The sorting phase is where your mosaic goes from random to intentional. People who skip it usually end up with a path that looks like a clearance aisle argument.
Another big “aha” moment: tile thickness matters. If you mix chunky porcelain with thinner ceramic, you’ll get high spots that catch toes and low spots that collect dirt. Many DIYers end up doing a “tile audition,” choosing pieces that sit similarly flator using extra mortar under thinner pieces to even things out. The first time someone steps on a raised edge and does an unplanned hop, they immediately become passionate about leveling.
Grout is its own emotional journey. Newbies often wipe too aggressively, too soon, or with a sponge that’s basically a portable puddle. Then they wonder why their joints look shallow or patchy. The more experienced DIYers tend to follow a rhythm: pack grout firmly, scrape excess, wipe gently, rinse often, and walk away before you “fix it” into a worse situation. Also, grout haze is sneaky. It can look fine while damp and then dry into a chalky film that makes you question your life choicesuntil you buff it off and everything suddenly looks polished.
Outdoor reality also teaches people about water and dirt. A mosaic path that looks perfect on day one will collect soil in tiny texture points (especially if you love rustic, crackled tiles). That’s not failure; that’s outdoors being outdoors. DIYers who stay happiest are the ones who plan for easy maintenance: sealing grout, sweeping grit, and accepting that a garden path is allowed to look like it lives in a garden.
Finally, almost everyone has a “next time” list: “Next time I’ll use fewer tiny pieces,” “Next time I’ll keep a consistent border,” “Next time I’ll make two extra stones so repairs are easy,” and “Next time I’ll wear better gloves because tile edges are basically miniature swords.” That’s the beauty of this project: it’s scalable. You can start with one stone, learn what you love, and build a whole pathway that feels like your styleone broken piece at a time.