Table of Contents >> Show >> Hide
- Why a File Cabinet Makeover Is Worth It
- Before You Start: The Smart Plan Beats the Fast Plan
- Supplies You May Need
- How to Prep a File Cabinet for a Makeover
- The Best Paint Approaches for a File Cabinet Makeover
- Step-by-Step File Cabinet Makeover Process
- Popular File Cabinet Makeover Styles
- Don’t Forget the Inside: Organize It So It Earns Its Keep
- Common File Cabinet Makeover Mistakes to Avoid
- Budget-Friendly File Cabinet Makeover Tips
- Real-Life Uses for a Finished File Cabinet
- Experiences Related to a File Cabinet Makeover
- Conclusion
- SEO Tags
If there is one piece of furniture that has spent decades quietly lowering the mood of home offices everywhere, it is the humble file cabinet. It is practical. It is sturdy. It is also, in many cases, about as glamorous as a tax form in February. The good news? A file cabinet makeover is one of the easiest ways to turn a clunky metal box into a piece that actually looks like it belongs in your space.
Whether you found a battered cabinet at a thrift store, inherited one from a former office setup, or have been side-eyeing the same beige beast since 2014, a little creativity can go a long way. With the right prep, paint, hardware, and organization system, you can create a filing cabinet that looks polished on the outside and works harder on the inside. In other words: less “corporate basement,” more “smart home office hero.”
Why a File Cabinet Makeover Is Worth It
A good filing cabinet makeover does more than improve appearances. It can help you reclaim useful storage, reduce paper clutter, and make your workspace feel more intentional. That matters whether you work from home full-time, run a side hustle from the dining room table, or just want a better place to stash warranties, tax documents, school papers, and the mysterious pile labeled “important stuff, probably.”
Makeovers are also budget-friendly compared with buying a brand-new designer storage piece. Metal cabinets are built to last, and many older models are sturdier than newer flat-pack alternatives. If the frame is solid and the drawers still glide, a cosmetic update can give you a custom look for a fraction of the price of replacing it.
Before You Start: The Smart Plan Beats the Fast Plan
Before you break out the paint, take a minute to decide what kind of makeover you want. Not every cabinet needs the same treatment. Some need only a color refresh. Others need rust removal, new hardware, drawer liners, labels, or a complete role reversal from “boring office storage” to “stylish craft station.”
Ask These Questions First
- Will the cabinet stay in a home office, bedroom, craft room, mudroom, or garage?
- Is it metal, wood, or a combination of materials?
- Does it have dents, rust, peeling paint, sticky residue, or broken hardware?
- Do you want a sleek modern finish, a vintage look, a colorful statement piece, or something neutral?
- Will it store paperwork only, or also office supplies, electronics, or household records?
Once you know the goal, the makeover becomes much easier. A cabinet for a bright craft room might look amazing in glossy teal or sunflower yellow. A cabinet for a calm home office may work better in matte black, olive green, warm white, or charcoal. If you want it to blend in, match the wall or desk color. If you want it to stand out, go bold and let it earn the attention it has been craving for years.
Supplies You May Need
The exact shopping list depends on the condition of your cabinet, but most file cabinet makeover projects use a variation of the same cast of characters:
- Degreaser or all-purpose cleaner
- Microfiber cloths or rags
- Painter’s tape
- Drop cloth or protective covering
- Sandpaper or sanding sponge
- Wire brush for rust spots
- Metal primer
- Paint for metal surfaces or spray paint
- Foam roller, brush, or spray paint applicator
- Drawer pulls, knobs, or label holders
- Contact paper, peel-and-stick wallpaper, or drawer liners
- Labels, hanging folders, and file tabs
If your cabinet is older and has multiple layers of old paint, be extra cautious. For pieces from older homes or unknown sources, safe prep matters. The makeover is supposed to improve your office, not launch a side quest involving regret and a dust cloud.
How to Prep a File Cabinet for a Makeover
Prep is the part that separates a gorgeous makeover from a peeling disaster six weeks later. It is not the glamorous phase, but it is the reason the glamorous phase works.
1. Empty Everything Out
Take out every hanging folder, paperclip, mystery key, and ancient sticky note. Remove drawers if possible. This gives you better access to corners and makes painting easier and cleaner.
2. Clean Like You Mean It
Metal cabinets collect dust, oil from fingerprints, adhesive residue, and random office grime. Wipe every surface thoroughly, especially handles and drawer fronts. If the cabinet has lived in a garage or basement, clean it twice. Once for the dirt you can see, and once for the dirt that was hiding and laughing at you.
3. Deal With Rust and Loose Paint
If you see flaky paint or rust, remove the loose material with a wire brush or sandpaper. The goal is not to punish the cabinet; it is to create a sound surface. Smooth away rough patches and wipe off the dust afterward.
4. Scuff-Sand the Surface
Even a cabinet that looks pretty smooth still benefits from light sanding. Scuffing shiny surfaces helps primer and paint stick better. You do not need to strip it down to bare metal unless the finish is badly damaged. A light, even rough-up is usually enough.
5. Tape Off What You Don’t Want Painted
Protect drawer tracks, label frames, lock mechanisms, or any sections you want to keep unpainted. This small step prevents the kind of detail work that causes people to say things like, “Well, that was avoidable.”
The Best Paint Approaches for a File Cabinet Makeover
There are several ways to paint a file cabinet, and the best option depends on the finish you want and how comfortable you are with the tools.
Spray Paint
Spray paint is a favorite for metal file cabinet makeovers because it can create a smooth, factory-like finish with minimal brush marks. It works especially well for modern styles, curved edges, and detailed hardware. The secret is patience: use several light coats instead of one heavy coat, and keep the can moving.
Brush and Foam Roller
If you prefer more control or are working indoors where overspray is a concern, a foam roller and small brush can give excellent results. This method is especially useful if you are using paint designed for metal or a durable cabinet enamel. Thin, even coats matter here too.
Chalk Paint or Specialty Finishes
Some DIYers love chalk paint for a matte, vintage-inspired look. It can work beautifully on a file cabinet, particularly if the goal is decorative rather than industrial-sleek. Just be sure the product and topcoat you choose make sense for the cabinet’s daily use. A file cabinet gets touched, slid open, bumped, and occasionally kicked by accident during an intense email session.
Step-by-Step File Cabinet Makeover Process
Prime First
Apply a primer made for metal, especially if you sanded down to bare metal or exposed rust-prone spots. Primer helps with adhesion, blocks stains, and creates a more even final finish. Let it dry fully according to the label.
Paint in Thin, Even Coats
Once primed, start painting. Build color gradually. Two or more light coats usually look far better than one thick one. Allow each coat to dry before the next. This part rewards patience and punishes chaos.
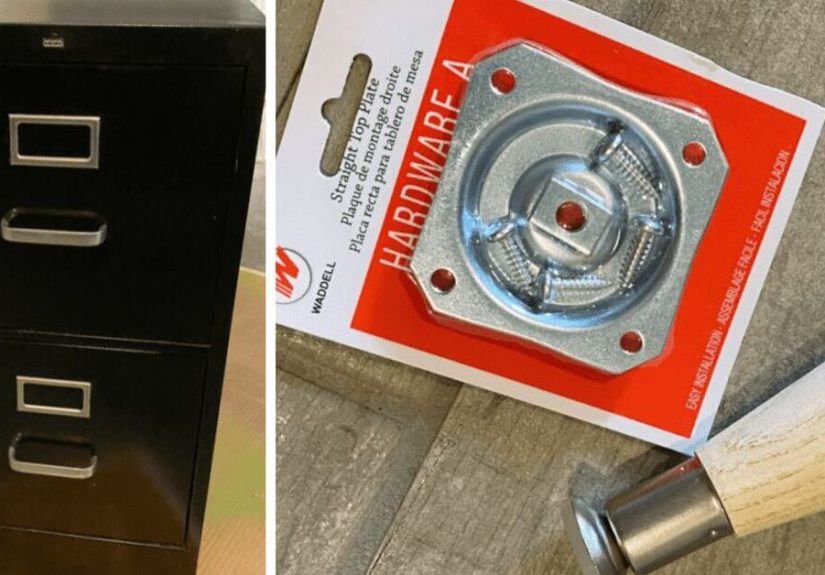
Refresh the Hardware
One of the easiest ways to elevate a file cabinet makeover is by changing or upgrading the hardware. New drawer pulls, label slots, brass cup pulls, or matte black handles can dramatically change the vibe. This is where a $30 cabinet starts acting like it has a personal stylist.
Add Decorative Details
Want more personality? Consider these file cabinet makeover ideas:
- Add peel-and-stick wallpaper to drawer fronts
- Use stencils for a geometric or botanical pattern
- Create a two-tone look with contrasting drawers and frame
- Attach wood trim to flat fronts for a more furniture-like appearance
- Line drawer interiors with patterned contact paper
- Add caster wheels for a mobile office storage piece
Popular File Cabinet Makeover Styles
Modern Minimalist
Think matte black, soft gray, or creamy white with clean hardware. This style works well in home offices with simple desks, neutral walls, and warm wood accents.
Vintage Office Charm
Deep green, navy, rust red, or muted mustard can make a cabinet feel old-school in the best way. Pair with brass label holders or antique-style pulls.
Playful Color Pop
Coral, cobalt, sage, lemon, or blush can turn the cabinet into an accent piece. This works especially well in creative studios, kids’ homework areas, or cheerful home offices.
Industrial Chic
Lean into the cabinet’s metal roots with graphite, gunmetal, or hammered finishes. This style pairs nicely with exposed shelving, black frames, and reclaimed wood desks.
Don’t Forget the Inside: Organize It So It Earns Its Keep
A file cabinet makeover should not stop at paint. The outside gets the compliments, but the inside does the work. A cabinet that looks good but still contains a chaotic paper avalanche is basically wearing a nice jacket over pajama pants.
Create Simple Categories
Keep categories broad and obvious. Overcomplicated filing systems look great for two days and then collapse under the weight of real life.
Useful categories may include:
- Taxes
- Home records
- Medical documents
- Insurance
- Warranties and manuals
- School records
- Business documents
- Active paperwork
- Permanent records
Use Hanging Folders and Clear Labels
Hanging folders keep paper upright and accessible. Labels should be short and easy to scan. “Insurance” works better than “Various Policy and Related Paper Materials That Might Be Needed Later.” Your future self will be busy enough.
Separate Active and Permanent Files
One of the smartest filing habits is to divide frequently used papers from long-term records. Active files should be easy to reach. Permanent files can live farther back or in a lower drawer. This simple tweak makes the cabinet much more functional.
Common File Cabinet Makeover Mistakes to Avoid
- Skipping prep: Paint will not stick well to dirt, grease, rust, or glossy surfaces.
- Using thick coats: Heavy paint tends to drip, pool, and look rough.
- Rushing dry time: If the surface is not fully cured, drawers can stick and finishes can scratch.
- Ignoring hardware: Fresh paint with dingy handles is like wearing sneakers with a tuxedo.
- Making the filing system too complex: If it takes a committee meeting to file one receipt, the system will fail.
Budget-Friendly File Cabinet Makeover Tips
You do not need a giant budget to get a great result. Many of the best file cabinet makeover ideas are surprisingly affordable:
- Shop thrift stores, office surplus sales, or online marketplaces
- Use leftover paint if it is suitable for metal and still in good condition
- Swap hardware only if the cabinet’s finish is still decent
- Use peel-and-stick details instead of expensive custom fronts
- Repurpose the cabinet in a new room instead of buying new storage
Even a small makeover can make a dramatic difference. A coat of paint and new labels may be all it takes to transform “forgotten office lump” into “surprisingly stylish storage.”
Real-Life Uses for a Finished File Cabinet
Once your file cabinet makeover is complete, the cabinet does not have to stay in a traditional office role. These pieces are versatile and can work in several spaces:
- Home office document storage
- Craft room organization
- Mudroom paper drop zone
- Kids’ art and school paper archive
- Small business inventory records
- Bedroom nightstand alternative with storage
- Entryway command center for mail and family paperwork
Experiences Related to a File Cabinet Makeover
One of the most relatable things about a file cabinet makeover is that almost nobody begins the project because they woke up wildly inspired by filing. They begin because they are tired of looking at an ugly cabinet, tired of losing paperwork, or tired of pretending the stack of papers on the desk is “a system.” That is what makes this kind of makeover so satisfying: the before-and-after is not just visual. It is emotional. The cabinet goes from being a daily annoyance to something that quietly makes life easier.
A common experience is underestimating how much grime an old file cabinet can collect. What looks like a simple Saturday paint job often begins with a strong realization that the cabinet is somehow coated in dust, sticky fingerprints, faded labels, and a residue that appears to be equal parts office coffee and history. Cleaning it is rarely glamorous, but it is oddly rewarding. Once the cabinet is wiped down and sanded, you can finally see its potential instead of just its problems.
Another shared experience is surprise at how dramatic paint can be. A cabinet that seemed hopeless in beige, putty, or scratched gray suddenly looks custom when painted deep green, bright white, navy blue, or matte black. The transformation can change the whole mood of a room. Many people start out thinking they are “just fixing a cabinet” and end up reorganizing the entire workspace because the makeover makes everything else look like it needs to get its act together too.
Then there is the hardware moment. This is the point where the project starts to feel less like repair and more like design. Swapping old handles for brass pulls, sleek black bars, or simple label frames often gives the cabinet a finished look that paint alone cannot achieve. It is the design equivalent of adding earrings before leaving the house: a small detail that suddenly makes the whole thing look intentional.
On the practical side, people often discover that the inside makeover matters as much as the outside. Once the drawers are emptied, there is usually a reckoning with expired warranties, mystery receipts, duplicate forms, and papers that have absolutely no business surviving this long. Sorting those documents can feel tedious at first, but it is also the moment the cabinet becomes useful again. A freshly painted cabinet filled with clearly labeled folders is deeply satisfying. It is one of those grown-up victories that deserves more applause than it gets.
There is also a confidence boost that comes with finishing a file cabinet makeover. It is a manageable DIY project, but it still teaches the same lessons as bigger makeovers: prep matters, patience matters, and details matter. When the cabinet is done, it often inspires other projects because it proves that even the plainest, most overlooked furniture can be improved with a little planning and effort. Not every makeover has to be a full room renovation. Sometimes the little metal cabinet in the corner is enough to make the whole space feel smarter, neater, and far more pulled together.
Conclusion
A file cabinet makeover is one of those projects that delivers more than expected. It upgrades your storage, improves your workspace, and gives new life to a practical piece that probably did not get much love before now. With proper prep, a durable finish, thoughtful hardware, and a sensible filing system, you can turn an old cabinet into something stylish, functional, and genuinely helpful.
So yes, your file cabinet can be more than a dull box full of paper. It can be organized, attractive, and maybe even a little smug about how good it looks. Frankly, it has earned that.