Table of Contents >> Show >> Hide
- What Is a Glass Erlenmeyer Flask?
- Why the Shape Matters
- Common Uses of a Glass Erlenmeyer Flask
- Borosilicate Glass: The Material That Makes It Lab-Worthy
- Popular Sizes and How to Choose One
- Narrow Mouth vs. Wide Mouth Erlenmeyer Flasks
- Graduations: Helpful, But Not Precision Measurement
- Glass Erlenmeyer Flask vs. Beaker
- Glass Erlenmeyer Flask vs. Volumetric Flask
- Safety Tips for Using a Glass Erlenmeyer Flask
- Cleaning and Care
- Buying Guide: What to Look For
- Real-World Examples of Use
- Common Mistakes to Avoid
- Experience Notes: What Working With a Glass Erlenmeyer Flask Teaches You
- Conclusion
A glass Erlenmeyer flask is one of those laboratory tools that looks simple until you actually use it. Then it becomes obvious why this cone-shaped classic has survived chemistry classes, research labs, biology benches, industrial testing rooms, and every science poster that needed one object to say, “Yes, serious thinking happens here.” With its flat bottom, sloped sides, narrow neck, and sturdy glass body, the Erlenmeyer flask is designed for mixing, swirling, heating, holding, and handling liquids with more control than a basic beaker can offer.
Named after the German chemist Emil Erlenmeyer, who designed the flask in the nineteenth century, this piece of glassware has earned a permanent spot in scientific work because it solves several practical problems at once. It reduces splashing, allows comfortable swirling, works well with stoppers, fits easily under funnels, and provides enough visibility to watch reactions, solutions, color changes, sediments, or bubbles doing their tiny dramatic performances.
In this guide, we will explore what a glass Erlenmeyer flask is, how it works, why borosilicate glass matters, when to use it, when not to use it, how to choose the right size, and how to care for it without turning a useful lab tool into a glittering pile of regret.
What Is a Glass Erlenmeyer Flask?
A glass Erlenmeyer flask is a conical laboratory container with a broad flat base, sloping sides, and a short cylindrical neck. In American labs, it is commonly called an Erlenmeyer flask; in many other places, it may be called a conical flask. Either name points to the same basic idea: a stable, cone-shaped vessel built for general laboratory work.
The design is not random. The wide base keeps the flask steady on a bench, hot plate, or lab mat. The tapered sides make swirling easier by guiding liquid in a circular motion. The narrow neck helps reduce splashes and evaporation compared with a wide-open beaker. That neck also makes it easier to use a stopper, foil cover, cotton plug, screw cap, or lab film when temporary closure is needed.
Most high-quality glass Erlenmeyer flasks are made from borosilicate glass, often described as Type I or 3.3 borosilicate glass in labware listings. This type of glass is valued for chemical resistance, heat tolerance, transparency, and better resistance to thermal shock than ordinary soda-lime glass. In plain English: it is tougher under lab conditions, though it is still glassnot a superhero in a cape.
Why the Shape Matters
The Erlenmeyer flask’s shape is the whole reason it is famous. A beaker is great for pouring, rough measuring, and general holding, but it can splash if you swirl it with enthusiasm. A volumetric flask is excellent for preparing one precise volume, but it is not made for vigorous mixing or routine heating. The Erlenmeyer flask sits comfortably between these tools. It is the practical middle child: flexible, dependable, and surprisingly good at avoiding drama.
The Wide Base Adds Stability
A flat, wide base lets the flask sit securely on a lab bench. This is especially useful when working with magnetic stirrers, heating plates, or simple classroom experiments. The broad bottom also provides more contact area when placed on a hot plate, though heating should always follow the glassware manufacturer’s instructions and lab safety rules.
The Sloped Sides Make Swirling Easier
Swirling is one of the Erlenmeyer flask’s signature moves. Because the walls slope inward, liquids can move in a controlled circular pattern without immediately leaping over the rim. This makes the flask useful for dissolving solids, mixing solutions, growing cultures in appropriate lab settings, and performing titrations where a color change needs to be evenly distributed.
The Narrow Neck Helps Control Splashes
The neck is not there for decoration, although it does give the flask its stylish “science trophy” silhouette. A narrower opening helps limit splashing during swirling and slows the escape of vapors compared with a wide-mouthed container. It also supports funnels during filtration or transfer, which is helpful when you do not want half your liquid taking a scenic route across the bench.
Common Uses of a Glass Erlenmeyer Flask
A glass Erlenmeyer flask is used across chemistry, biology, environmental science, food testing, education, and quality control. It is not a precision measuring instrument, but it is excellent for many general-purpose tasks.
Mixing Solutions
One of the most common uses is mixing liquids or dissolving solids in a solvent. The flask’s conical shape allows controlled swirling, making it easier to combine materials without needing a separate stirring rod every time. For example, a student might use a 250 mL Erlenmeyer flask to dissolve a solid sample in water before transferring the solution to a more precise measuring device.
Titration Work
In titration, an Erlenmeyer flask often holds the analyte solution while a burette delivers another solution drop by drop. The user swirls the flask to mix each addition evenly. The sloped walls help prevent splashing, and the clear glass makes it easier to spot color changes from indicators. It is basically the stage where the titration’s tiny color-changing magic trick happens.
Heating Liquids
Borosilicate glass Erlenmeymeyer flasks are often suitable for heating liquids when they are designed for that purpose. However, heating should be done carefully. Avoid sudden temperature changes, direct contact with unsuitable heating elements, or using damaged glassware. A flask with chips, scratches, or cracks should be retired, not given one last heroic mission.
Temporary Storage
With the right closure, an Erlenmeyer flask can temporarily hold solutions, samples, or media. Some flasks have screw caps, ground-glass joints, or reinforced rims. For long-term storage, chemical compatibility, cap material, labeling, evaporation, contamination risk, and pressure buildup all matter. A flask is useful, but it is not a magic jar that makes storage rules disappear.
Filtration Setup
Standard Erlenmeyer flasks can support funnels for gravity filtration. Special side-arm filtering flasks, sometimes called vacuum flasks or Büchner flasks, are designed differently and are made for reduced-pressure filtration. A regular thin-walled Erlenmeyer flask should not be used under vacuum unless it is specifically rated for that purpose.
Borosilicate Glass: The Material That Makes It Lab-Worthy
When shopping for a glass Erlenmeyer flask, “borosilicate glass” is one of the most important terms to look for. Borosilicate glass contains boron oxide along with silica and other components, giving it a low coefficient of thermal expansion. That means it expands and contracts less dramatically when temperatures change, reducing the chance of cracking from ordinary lab heating and cooling conditions.
This does not mean borosilicate glass is unbreakable. Drop it on the floor, slam it against a sink, heat it unevenly, or chill it too suddenly, and it may break. The benefit is that quality borosilicate lab glassware is much better suited to laboratory use than ordinary household glass.
Transparency is another advantage. Clear glass allows users to observe color, clarity, bubbles, precipitates, layers, and changes during mixing or heating. In many lab tasks, seeing what is happening is not just convenient; it is part of the process.
Popular Sizes and How to Choose One
Glass Erlenmeyer flasks come in many sizes, from tiny 25 mL flasks to large multi-liter vessels. The right size depends on the task, the liquid volume, the need for headspace, and how the flask will be handled.
Small Flasks: 25 mL to 125 mL
Small Erlenmeyer flasks are useful for small-volume reactions, sample preparation, demonstrations, and classroom work. They are easy to handle and require less storage space. However, small openings and limited volume can make cleaning a little more annoying. Tiny flasks are adorable, but they still expect respect.
Medium Flasks: 250 mL to 500 mL
These are the everyday workhorses. A 250 mL or 500 mL glass Erlenmeyer flask is common in teaching labs, research benches, and general testing environments. These sizes offer enough room for swirling without being awkward to carry, clean, or store.
Large Flasks: 1 L and Above
Larger flasks are useful for preparing bigger batches of solutions, media, or samples. They need more careful handling because weight, thermal stress, and breakage risk increase with size. When heating larger volumes, even heat distribution becomes especially important.
Narrow Mouth vs. Wide Mouth Erlenmeyer Flasks
Not all Erlenmeyer flasks have the same neck opening. Narrow-mouth flasks are excellent for controlled swirling and reducing splashes. Wide-mouth flasks are easier to fill, clean, and use with larger tools, powders, or pipettes.
A narrow-mouth glass Erlenmeyer flask is often preferred for titration, mixing, and general solution handling. A wide-mouth version may be better when adding solids, cleaning by hand, or transferring thicker liquids. Choosing between them is less about which is “best” and more about which one will annoy you least during the actual job.
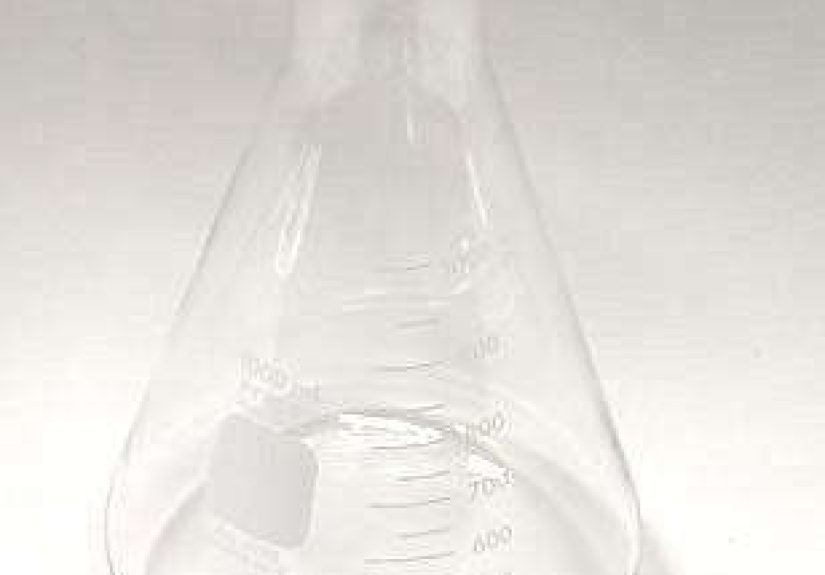
Graduations: Helpful, But Not Precision Measurement
Many glass Erlenmeyer flasks include printed graduation marks. These marks are useful for approximate volume checks, but they are not intended for high-precision measurement. If a lab procedure requires exact volume, use a volumetric flask, burette, pipette, or graduated cylinder designed for that level of accuracy.
This is a common beginner mistake. The flask says 250 mL, so it feels natural to trust the mark as exact. But Erlenmeyer graduations are usually approximate. Think of them like a weather forecast: helpful, often close, but not something you use to land a spacecraft.
Glass Erlenmeyer Flask vs. Beaker
A beaker has straight sides, a wide opening, and usually a pouring spout. It is excellent for rough mixing, pouring, heating, and holding materials. An Erlenmeyer flask, with its tapered body and narrow neck, is better for swirling liquids with less splashing.
Use a beaker when you need easy access, convenient pouring, or a wide opening. Use an Erlenmeyer flask when you need controlled mixing, reduced splash risk, temporary closure, or a better shape for titration. Both tools deserve a place in the lab. They are not enemies; they are coworkers with different job descriptions.
Glass Erlenmeyer Flask vs. Volumetric Flask
A volumetric flask is designed to contain one exact volume at a specified calibration mark. It usually has a round or pear-shaped body and a long narrow neck. It is the tool for preparing accurate standard solutions.
An Erlenmeyer flask is more versatile but less precise. It is designed for mixing, heating, holding, and swirlingnot for exact solution preparation. If accuracy matters, prepare the final volume in a volumetric flask. If motion, mixing, and practicality matter, the Erlenmeyer flask gets the spotlight.
Safety Tips for Using a Glass Erlenmeyer Flask
Glassware safety sounds boring until someone ignores it. Then it becomes very exciting in the worst possible way. The good news is that most problems can be avoided with simple habits.
Inspect Before Use
Check the flask for chips, cracks, scratches, star cracks, rough rims, or cloudy stress marks. Damaged glassware can fail during heating, stirring, or ordinary handling. If you can see or feel damage, remove the flask from service according to your lab’s disposal rules.
Use the Right Glass for Heat
Only heat glassware that is designed for heating. Borosilicate glass is preferred for lab heating, but quality, wall thickness, age, damage, and heating method all matter. Avoid sudden temperature changes, such as moving a hot flask directly onto a cold surface.
Do Not Seal Hot or Reactive Contents
Sealing a flask can create pressure buildup, especially if contents are hot, gas-forming, volatile, or reacting. Use closures only when appropriate, and never assume a stopper turns a flask into a pressure vessel. It does not. It turns it into a possible surprise, and laboratories are not improved by surprises.
Do Not Use Regular Erlenmeyer Flasks Under Vacuum
Vacuum work requires glassware designed for reduced pressure, shielding, and proper equipment. A standard glass Erlenmeyer flask is not the same as a heavy-walled filtering flask. Using the wrong vessel under vacuum can be dangerous.
Wear Proper PPE
Safety glasses, gloves appropriate to the material handled, and a lab coat are standard expectations in many lab settings. The exact protection depends on the task. When heat, chemicals, or breakage risk are involved, do not rely on optimism as personal protective equipment.
Cleaning and Care
Cleaning a glass Erlenmeyer flask properly helps preserve clarity, reduce contamination, and extend service life. Rinse the flask soon after use whenever possible. Dried residues are like bad houseguests: the longer they stay, the harder they are to remove.
Use an appropriate lab detergent, warm water, and a flask brush when needed. Avoid abrasive tools that scratch the glass. Rinse thoroughly with tap water, then with deionized or distilled water if the application requires it. Let the flask drain upside down on a rack where air can circulate.
For stubborn residues, laboratories may use specialized cleaning solutions based on the material involved and safety procedures. Never mix cleaning chemicals randomly, and never use household shortcuts in a scientific setting without knowing the compatibility and risk.
Buying Guide: What to Look For
When choosing a glass Erlenmeyer flask, start with material. Look for borosilicate glass, especially Type I or 3.3 borosilicate when heating, chemical resistance, and durability matter. Check whether the flask meets relevant ASTM or labware standards if your lab requires documented specifications.
Next, consider the rim. A reinforced or beaded rim can improve durability and reduce chipping. If you need closures, decide whether you want a standard neck, screw cap, or ground-glass joint. For biological shaking or culture work, baffled Erlenmeyer flasks may improve mixing and gas exchange, though the exact choice depends on the application.
Finally, think about quantity and use frequency. A classroom may need economical packs. A research lab may prefer premium brands with certificates or tighter quality control. A hobby display shelf may only need one clean, attractive flask. A serious lab, however, should buy from reputable scientific suppliers, not from a mystery listing that describes glassware as “probably heat resistant, good luck.”
Real-World Examples of Use
In a general chemistry class, a 250 mL glass Erlenmeyer flask might hold an acid solution during titration while a student adds base from a burette. The flask allows swirling after each drop, helping the indicator reveal the endpoint evenly.
In a biology lab, a larger Erlenmeyer flask may be used to prepare or hold culture media before sterilization, depending on the lab protocol and flask type. In environmental testing, flasks may hold water samples during preparation steps. In food science, they can be used for solution preparation, extraction steps, or controlled mixing.
Across all these examples, the flask’s value is the same: it makes liquid handling easier, safer, and more controlled than many open containers.
Common Mistakes to Avoid
The first mistake is using an Erlenmeyer flask as if it were precision measuring glassware. Its printed marks are helpful estimates, not exact calibration lines.
The second mistake is heating any glass flask just because it looks like lab glass. Confirm the material and intended use. Borosilicate labware is built for more demanding work, but cheap, damaged, or unsuitable glass may fail.
The third mistake is carrying a large filled flask by the neck. Support it from the body and base, especially if it contains warm liquid. The neck may look convenient, but convenience is not the same as safety.
The fourth mistake is storing chemicals in an unlabeled flask. Labels matter. Future-you should not have to play “guess the mysterious clear liquid.” Future-you has enough problems.
Experience Notes: What Working With a Glass Erlenmeyer Flask Teaches You
After spending time around laboratory glassware, you begin to appreciate the glass Erlenmeyer flask for reasons that do not always show up in product descriptions. Yes, it is made for mixing, heating, and holding solutions. Yes, borosilicate glass is useful. Yes, the sloped sides are practical. But the real experience of using one teaches small lessons about patience, control, and respecting simple tools.
The first lesson is that swirling is a skill. Beginners often swirl like they are trying to wake up a sleeping volcano. The liquid climbs the wall, threatens the rim, and everyone nearby takes one respectful step backward. With practice, the motion becomes smoother. A good swirl keeps the solution moving in a steady circular path without splashing. During titration, that smooth motion can make the difference between a clean endpoint and an “oops, that was definitely too much” moment.
The second lesson is that the flask’s shape quietly improves workflow. When adding powder through a funnel, the narrow neck helps keep materials directed into the vessel. When mixing a solution, the broad base gives the flask stability. When observing a color change, the clear glass lets you see what is happening from the side, not just from above. It is one of those designs that feels obvious only after someone else has already invented it.
The third lesson is about heat. A borosilicate glass Erlenmeyer flask can handle many lab heating tasks, but it rewards careful behavior. Gradual heating, even contact, and avoiding sudden cold surfaces are all habits that protect the glass. The flask may tolerate temperature changes better than ordinary glass, but it does not appreciate being treated like cookware in a slapstick comedy.
The fourth lesson is that cleanliness affects results. A flask that looks clean may still hold invisible residue, especially around the bottom curve or neck. In routine educational work, a thorough wash and rinse may be enough. In more sensitive laboratory procedures, proper cleaning and rinsing can affect accuracy, contamination control, and repeatability. The flask is transparent, but that does not mean it tells you everything.
The fifth lesson is that size matters more than people expect. A 125 mL flask may be perfect for a small sample but annoying for vigorous mixing. A 1 L flask may be spacious but awkward if only 40 mL of liquid is inside. A good rule of thumb is to leave enough headspace for swirling, foaming, or mixing while still choosing a size that is practical to handle.
The sixth lesson is that labels save sanity. Whether in a classroom, home teaching setup, or professional lab, a flask without a label quickly becomes a tiny glass mystery novel. What is inside? When was it prepared? Who made it? Is it water, buffer, salt solution, or something that should not be sitting there? Proper labeling turns chaos into order, and order is the secret ingredient in good lab work.
The final experience-based lesson is simple: respect the ordinary tools. A glass Erlenmeyer flask is not flashy. It does not beep, blink, connect to Wi-Fi, or require a firmware update. It simply does its job well when used correctly. That reliability is exactly why it remains one of the most recognizable and useful pieces of laboratory glassware in the world.
Conclusion
A glass Erlenmeyer flask is more than a familiar laboratory shape. It is a smart, efficient, and versatile vessel built for real scientific work. Its conical body allows easy swirling, its narrow neck reduces splashing, its flat base adds stability, and its borosilicate glass construction makes it suitable for many demanding lab tasks. Whether used in chemistry titrations, biology media preparation, environmental testing, classroom demonstrations, or general solution mixing, the Erlenmeyer flask remains a dependable favorite.
The key is using it correctly. Choose borosilicate glass when heat and chemical resistance matter. Do not rely on its graduations for precision measurement. Inspect it before use. Avoid thermal shock. Never use a standard flask for vacuum or pressure unless it is specifically designed for that purpose. Clean it well, store it safely, and label contents clearly.
In the crowded world of laboratory glassware, the glass Erlenmeyer flask earns its place because it is practical, durable, and wonderfully efficient. It may not be glamorous, but in the lab, reliability is its own kind of elegance.
Note: This article is written as original educational content based on real laboratory glassware specifications, museum history records, and established lab safety guidance. It is intended for general information and should not replace your institution’s laboratory safety procedures or manufacturer instructions.


