Table of Contents >> Show >> Hide
- Why Proper Clarinet Assembly Matters
- Know the Parts Before You Start
- How to Assemble a Clarinet: 15 Steps
- Step 1: Wash and dry your hands
- Step 2: Put the case on a flat, stable surface
- Step 3: Take out the reed and moisten it
- Step 4: Check the corks and apply cork grease only if needed
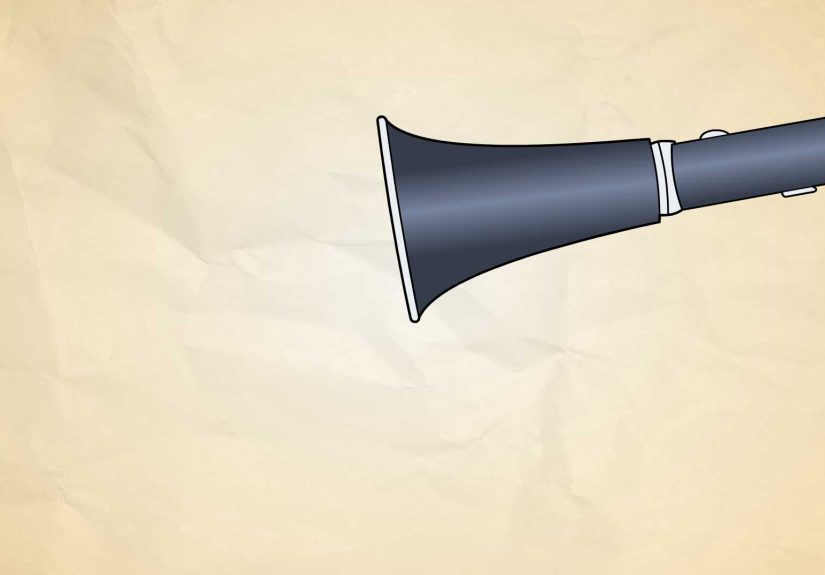
- Step 5: Attach the bell to the lower joint
- Step 6: Prepare to connect the upper and lower joints
- Step 7: Raise and protect the bridge key
- Step 8: Twist the upper and lower joints together
- Step 9: Attach the barrel to the upper joint
- Step 10: Remove the mouthpiece cap and ligature
- Step 11: Attach the mouthpiece to the barrel
- Step 12: Slide the ligature onto the mouthpiece
- Step 13: Place the reed on the mouthpiece
- Step 14: Tighten the ligature gently
- Step 15: Do a final alignment and readiness check
- Common Clarinet Assembly Mistakes to Avoid
- Tips for a Smooth Setup Every Time
- What to Do After Playing
- Conclusion
- Beginner Experiences: What Assembling a Clarinet Really Feels Like
- SEO Tags
If you have ever opened a clarinet case and thought, “Lovely. I appear to have purchased a puzzle,” you are in good company. A clarinet looks elegant once it is assembled, but before that moment it can feel like a collection of suspiciously delicate parts that cost too much money to experiment with. The good news is that learning how to assemble a clarinet is not hard. It just requires the right order, a gentle touch, and the wisdom to avoid wrestling with the keys like you are trying to open a pickle jar.
This beginner-friendly guide walks you through how to assemble a clarinet in 15 clear steps, with practical tips on clarinet reed placement, mouthpiece alignment, cork grease, and protecting the bridge key. Whether you are a new band student, a parent helping before school, or someone returning to the instrument after a long break, this guide will help you put together a clarinet safely and confidently.
Why Proper Clarinet Assembly Matters
A clarinet is not just a tube with ambitions. It is a precise instrument made of fitted joints, cork tenons, pads, springs, and keys that need to line up correctly. If you force the pieces together, twist the wrong area, or bump the bridge key, you can end up with sticky pads, bent rods, air leaks, or a clarinet that suddenly sounds like it is protesting your life choices.
Proper clarinet assembly matters for three big reasons. First, it protects the instrument. Second, it makes playing easier because the keys and pads work the way they should. Third, it helps beginners build good habits from day one. That last point matters more than most people realize. A student who learns to assemble a clarinet carefully tends to treat the instrument better, sound better faster, and spend less time in repair purgatory.
Know the Parts Before You Start
Before you begin, make sure you can identify the main clarinet parts. A standard B-flat clarinet usually includes the mouthpiece, ligature, reed, barrel, upper joint, lower joint, and bell. You will also likely have a mouthpiece cap, cork grease, and a swab in the case.
The upper and lower joints are the two main body sections. The bell goes on the bottom, the barrel goes on the top, and the mouthpiece attaches above the barrel. The reed and ligature go on the mouthpiece last. That “reed last” rule is worth remembering because reeds are fragile, and putting one on too early is a great way to chip it before you even play a note.
How to Assemble a Clarinet: 15 Steps
-
Step 1: Wash and dry your hands
Start with clean, dry hands. This small step helps keep oil, dirt, lotion, snack crumbs, and general human chaos off the clarinet’s body and keywork. A clarinet is not impressed by potato chip fingerprints.
-
Step 2: Put the case on a flat, stable surface
Set the clarinet case on a table, desk, or other steady surface with the case facing the correct direction. Open it carefully. Do not balance it on your knees if you can avoid it. Beginners already have enough drama without launching a mouthpiece onto the floor.
-
Step 3: Take out the reed and moisten it
Remove the reed from its protective case and moisten the thin tip. Some players wet it with saliva, while others use a little clean water. The goal is simple: a dry reed does not vibrate well, and an unhappy reed makes an unhappy clarinetist. Set the reed aside somewhere safe while you assemble the body.
-
Step 4: Check the corks and apply cork grease only if needed
Look at the cork-covered tenons on the joints and mouthpiece. If the cork feels dry or the joints are tight, apply a small amount of cork grease. Small is the keyword here. You are helping the pieces slide together, not marinating the instrument. Rub the grease in evenly, and wipe off excess from your fingers before touching the keys.
-
Step 5: Attach the bell to the lower joint
Pick up the lower joint by an area without delicate key rods. Then gently twist the bell onto the bottom cork of the lower joint. Use a slow twisting motion rather than pushing straight on. The clarinet likes persuasion, not brute force.
-
Step 6: Prepare to connect the upper and lower joints
This is the step where many beginners either become careful musicians or future repair customers. Hold the upper joint in your left hand and the lower joint in your right. Avoid grabbing the silver keys or squeezing the rods. Those parts bend more easily than people think.
-
Step 7: Raise and protect the bridge key
On the upper joint, press the appropriate ring key or upper keys so the bridge key lifts slightly. This helps prevent the bridge mechanism from colliding when the two joints come together. If the bridge key gets bent, the lower pads may not seal properly, and the clarinet will respond with the musical equivalent of a sigh.
-
Step 8: Twist the upper and lower joints together
Align the joints and connect them with a gentle twisting motion. As you do, make sure the bridge keys line up correctly and do not crash into each other. Also align the front tone holes and keywork in a straight line. This is one of the most important parts of how to put together a clarinet correctly, so do not rush it.
-
Step 9: Attach the barrel to the upper joint
Take the barrel and place its larger end onto the top of the upper joint. Twist gently until it fits snugly. Do not force it. The barrel is also the part you later adjust slightly for tuning, so it should be secure but not wedged on like it is never meant to come off again.
-
Step 10: Remove the mouthpiece cap and ligature
Take the mouthpiece out of the case, remove the cap, and loosen or remove the ligature. Set the cap somewhere safe. A mouthpiece cap may look boring, but it is the tiny helmet that saves your mouthpiece from unnecessary tragedy.
-
Step 11: Attach the mouthpiece to the barrel
Twist the mouthpiece gently onto the narrow end of the barrel. The flat side, called the table, should align so the reed will sit on the same side as the register key. In everyday terms, when the clarinet is held correctly, the reed belongs on the back side of the instrument.
-
Step 12: Slide the ligature onto the mouthpiece
Place the loosened ligature over the mouthpiece. Keep it loose enough to insert the reed without scraping it. A tight ligature at this stage is like buttoning your coat before putting on your shirt. Technically possible, deeply inconvenient.
-
Step 13: Place the reed on the mouthpiece
Hold the reed by the thicker end, sometimes called the heel. Slide it under the ligature with the flat side against the mouthpiece table. Be careful not to touch or chip the thin tip. The reed should sit centered, with its tip lined up neatly with the tip of the mouthpiece.
-
Step 14: Tighten the ligature gently
Once the reed is centered, tighten the ligature screws just enough to hold it in place. Do not over-tighten. An overly tight ligature can make the clarinet harder to play and can wear out the screws faster. Secure is good. Overconfident is not.
-
Step 15: Do a final alignment and readiness check
Look over the instrument before you play. The bell, lower joint, upper joint, barrel, and mouthpiece should all be straight. The bridge key should align correctly. The reed should be centered. The thumb rest should face the back, and the mouthpiece should line up with the register key. Now your clarinet is assembled and ready for action, applause, or at least a respectable first note.
Common Clarinet Assembly Mistakes to Avoid
Even a good beginner clarinet guide is more useful when it tells you what not to do. The biggest mistake is grabbing the instrument by the keys. Always hold the clarinet by parts of the body where there are no delicate rods to bend. Another common mistake is using too much cork grease. If it looks like frosting, you have gone too far.
Beginners also tend to force tight joints, rush the bridge key alignment, and tighten the ligature like they are securing cargo on a ship. None of those choices help. The clarinet rewards patience and punishes panic. Another easy mistake is putting the reed on too early. Assemble the body first, then attach the reed. It is safer and far less likely to end with a chipped tip and instant disappointment.
Tips for a Smooth Setup Every Time
If your clarinet is wooden, let it warm to room temperature before playing, especially in cold weather. Sudden temperature and humidity changes are not kind to wood. Keep a swab, reed case, cork grease, and mouthpiece cap in the case at all times. That simple maintenance kit can save you from a surprising number of beginner problems.
It also helps to build a routine. Use the same order every time: reed first to moisten, body next, mouthpiece after that, reed and ligature last. Once you repeat the sequence enough, clarinet assembly steps become second nature. That is when setup stops feeling stressful and starts feeling like the calm little ritual that gets you ready to make music.
What to Do After Playing
Assembly is only half the story. Disassembly matters too. Remove the reed first, wipe off excess moisture, and store it in a reed case so it can dry flat. Swab the inside of the clarinet to remove moisture, wipe the outside with a soft cloth, and put the pieces back in the case in reverse order. Always use the mouthpiece cap when storing or transporting the instrument.
If you leave the reed on the mouthpiece, skip the swab, or toss everything into the case like it just lost an argument, the clarinet will remember. Moisture can damage pads, shorten reed life, and create hygiene problems nobody wants to discuss before lunch.
Conclusion
Learning how to assemble a clarinet is one of the first real wins for any player. It teaches patience, care, and attention to detail before a single scale begins. Once you understand the parts, protect the bridge key, use cork grease wisely, and place the reed correctly, the process gets much easier. Soon enough, you will open the case, assemble the instrument in a few calm minutes, and wonder why it ever felt complicated in the first place.
The trick is not speed. It is consistency. A carefully assembled clarinet plays better, lasts longer, and gives beginners one less thing to worry about. And in the world of starting a new instrument, one less thing to worry about is basically a standing ovation.
Beginner Experiences: What Assembling a Clarinet Really Feels Like
For many beginners, the first experience of assembling a clarinet is equal parts curiosity, caution, and mild terror. The case opens, the parts appear, and suddenly everyone becomes very aware that this shiny, innocent-looking instrument has a surprising number of keys that should probably not be bent. The first few attempts are rarely graceful. Someone holds the bell upside down for too long. Someone else wonders why the reed looks like a tiny wooden leaf. Almost everyone has a moment of staring at the barrel and thinking, “You seem important, but I am not entirely sure why.” That is completely normal.
Parents often have their own version of this experience. They are trying to be supportive while silently hoping the school band director sends diagrams, videos, and perhaps emotional backup. They learn quickly that the phrase “just twist it gently” is doing a lot of heavy lifting. They also learn that a clarinet reed can be damaged by the kind of casual handling most people would use on a bookmark. One family might spend ten minutes figuring out which end of the barrel is wider. Another might discover that cork grease is somehow both essential and easy to overuse. It becomes a small household ceremony: open case, find parts, protect keys, nobody panic.
Students usually improve faster than they expect. After a few days, the mystery fades. The upper and lower joints begin to make sense. The bridge key stops looking like a trap set by engineers. The reed goes on straighter. The ligature gets tightened with more confidence and less brute force. And then something magical happens: assembly turns from a nerve-racking challenge into a routine. The player starts recognizing when a joint feels too dry, when the reed is crooked, or when the mouthpiece is slightly off-center. That awareness is not just about setup. It is the beginning of musicianship.
There is also a funny emotional shift that happens once a beginner becomes comfortable with clarinet assembly. At first, assembling the instrument feels like a test. Later, it feels like a warm-up. The process becomes a quiet signal that it is time to focus. Case open. Reed ready. Joints aligned. Mind settling down. Even students who were once intimidated by the instrument often start to enjoy this part. It becomes familiar. It becomes theirs.
And yes, even experienced players have had awkward moments. Reeds get dropped. Ligatures end up backward. A mouthpiece cap disappears into another dimension. But that is part of the clarinet experience too. The goal is not flawless perfection every time. The goal is to build habits that are safe, repeatable, and calm. If a beginner can assemble a clarinet carefully, they are already learning one of the most valuable lessons in music: great sound starts long before the first note.