Table of Contents >> Show >> Hide
- Introduction: Your Refrigerator Called. It Wants a Spa Day.
- Why Use Vinegar to Clean a Refrigerator?
- Before You Start: Food Safety First
- Method 1: The Full Vinegar Deep Clean
- Method 2: The Quick Vinegar Shelf-and-Drawer Refresh
- Method 3: The Vinegar Odor, Gasket, and Detail Clean
- What Not to Do When Cleaning a Refrigerator with Vinegar
- How Often Should You Deep Clean Your Refrigerator?
- Helpful Refrigerator Organization Tips After Cleaning
- Real-Life Experiences: What Cleaning a Fridge with Vinegar Actually Feels Like
- Conclusion: Vinegar Makes Refrigerator Cleaning Simple
Note: This article is based on synthesized guidance from reputable U.S. food-safety agencies, appliance manufacturers, university extensions, and home-care resources. Always check your refrigerator owner’s manual before using any cleaning solution on specialty finishes, smart panels, water dispensers, or delicate parts.
Introduction: Your Refrigerator Called. It Wants a Spa Day.
Your refrigerator works harder than almost anything else in your kitchen. It guards the milk, shelters the leftovers, chills the midnight snacks, and somehow becomes the final resting place for half-used jars of mustard from three summers ago. So when sticky juice, mystery crumbs, onion odor, and “what even is that?” stains start taking over, it is time for a proper deep clean.
The good news: you do not need a laboratory of harsh chemicals to freshen things up. Learning how to deep clean your refrigerator with vinegar is simple, affordable, and surprisingly satisfying. White distilled vinegar is acidic, which makes it useful for loosening sticky food residue, cutting light grease, reducing odors, and wiping down many refrigerator surfaces. It is not a magic potion, and it is not the same as a registered disinfectant, but for routine refrigerator cleaning, it is one of the most practical tools in the pantry.
In this guide, you will learn three easy vinegar-based methods: a full refrigerator reset, a fast shelf-and-drawer clean, and a targeted odor-and-gasket refresh. We will also cover what to remove, what to toss, how to protect your food, and how to avoid common cleaning mistakes. By the end, your fridge should smell less like “forgotten leftovers” and more like “responsible adult lives here.”
Why Use Vinegar to Clean a Refrigerator?
White distilled vinegar is popular for refrigerator cleaning because it is inexpensive, widely available, food-adjacent, and effective against many everyday messes. A simple solution of equal parts vinegar and warm water can help soften dried spills, loosen sticky residue, and deodorize interior surfaces. It is especially helpful on shelves, bins, drawers, and walls where food splashes tend to hide.
That said, vinegar has limits. It is best used as a cleaner and deodorizer, not as your only safety plan after a raw meat leak or major contamination. Cleaning removes dirt, food debris, and some germs from surfaces. Sanitizing or disinfecting is a separate step that reduces germs to safer levels or kills specific pathogens. If raw poultry juice, seafood liquid, or spoiled food has leaked, clean first, then follow a proper sanitizing method recommended by food-safety guidance and your appliance manual.
Best Vinegar for Refrigerator Cleaning
Use white distilled vinegar. It is clear, affordable, and does not contain coloring that could stain surfaces. Avoid balsamic vinegar, apple cider vinegar, wine vinegar, or flavored vinegar unless you want your refrigerator to smell like a salad dressing convention.
What You Will Need
- White distilled vinegar
- Warm water
- Spray bottle
- Microfiber cloths or soft sponges
- Mild dish soap
- Baking soda for stubborn odors or gentle scrubbing
- Old toothbrush or small soft brush
- Cooler with ice packs for perishable food
- Trash bag for expired food
- Clean towel for drying shelves and bins
Before You Start: Food Safety First
A deep clean should not turn into a food-safety problem. Keep cold foods cold while you work. Perishable items such as meat, dairy, eggs, seafood, cooked leftovers, and cut produce should not sit at room temperature for long periods. Place them in a cooler with ice packs if your cleaning session will take more than a few minutes.
As a general rule, your refrigerator should stay at or below 40°F, and your freezer should stay at 0°F. A simple appliance thermometer is a smart investment because refrigerator dials do not always show the real internal temperature. Once you finish cleaning and restock the fridge, check that it returns to a safe temperature.
Should You Unplug the Refrigerator?
For a light cleaning, you usually do not need to unplug it. For a deep clean involving removable parts, standing with the door open, or wiping near controls, many appliance-care instructions recommend turning the refrigerator off or unplugging it for safety. Check your manual first. If you do unplug it, work efficiently and keep food in a cooler.
Method 1: The Full Vinegar Deep Clean
This is the best method when your refrigerator has sticky shelves, strong odors, expired food, and enough crumbs to qualify as a tiny ecosystem. Plan to use this approach every three to four months, or sooner after spills.
Step 1: Empty the Refrigerator
Remove everything from the fridge. Yes, everything. That includes condiments, drawers, leftovers, produce bags, and the jar in the back that appears to be developing a personality. Place perishable foods in a cooler. Group similar items together so restocking is easier later.
As you unload, check expiration dates and quality. Toss spoiled food, leaking packages, dried-out produce, questionable leftovers, and anything you cannot identify without a tiny archaeology brush.
Step 2: Remove Shelves, Drawers, and Bins
Take out removable shelves, crisper drawers, door bins, and deli drawers. Let glass shelves warm up slightly before washing them with warm water. Sudden temperature changes can crack glass, and nobody wants their cleaning day to become a kitchen crime scene.
Step 3: Mix Your Vinegar Cleaning Spray
In a spray bottle, combine:
- 1 cup white distilled vinegar
- 1 cup warm water
This 1:1 vinegar and water solution is strong enough for many refrigerator messes while still being gentle for routine wiping. For extra greasy spots, clean first with mild dish soap and warm water, then follow with the vinegar spray to help deodorize.
Step 4: Spray and Wipe the Interior
Spray the inside walls, ceiling, floor, door liner, and built-in compartments. Let the vinegar solution sit for two to five minutes on sticky spots. Then wipe with a microfiber cloth or soft sponge. Work from top to bottom so loosened crumbs and drips fall onto areas you have not cleaned yet.
Pay special attention to corners, shelf tracks, drawer grooves, and the back wall. These areas collect drips and crumbs because apparently gravity and tomato sauce are best friends.
Step 5: Wash Shelves and Drawers
Wash removable parts in the sink with warm water and mild dish soap. Rinse well. For stubborn residue, spray with the vinegar solution and let it sit for a few minutes before wiping. Dry every part completely before putting it back. Moisture trapped under drawers or shelves can encourage odors and mildew.
Step 6: Wipe Food Containers Before Restocking
Before returning items to the fridge, wipe jars, bottles, cartons, and containers with a damp cloth. Sticky rings under jam jars and sauce bottles are often the reason shelves get messy again so quickly. This small step makes a huge difference.
Step 7: Restock Smartly
Put food back in zones. Keep raw meat, poultry, and seafood sealed and stored on the lowest shelf in a tray or container to prevent leaks onto ready-to-eat foods. Place leftovers where you can see them, not in the forgotten shadow realm behind the orange juice.
Method 2: The Quick Vinegar Shelf-and-Drawer Refresh
This method is perfect when your refrigerator is not disastrous, just mildly embarrassing. It works well for weekly maintenance, after a small spill, or before grocery shopping.
Step 1: Clear One Section at a Time
Instead of emptying the entire refrigerator, work shelf by shelf. Move food from the top shelf to another area or into a cooler, clean that shelf, dry it, and return the food. Then move to the next section.
This approach keeps the refrigerator door open for less time and helps protect perishable foods. It also makes the task feel less dramatic. You are not deep cleaning the fridge; you are simply “handling one shelf.” Very sneaky. Very effective.
Step 2: Use Vinegar Spray for Light Messes
Spray your 1:1 vinegar and warm water solution onto the shelf or drawer surface. Wipe with a microfiber cloth. For dried spills, press a damp cloth over the spot for a minute to soften it, then wipe again.
Step 3: Use Baking Soda Separately for Stubborn Spots
If vinegar alone does not remove a stain, use baking soda as a gentle scrub. Sprinkle a small amount of baking soda onto a damp sponge and rub the area lightly. Then rinse with a clean damp cloth and follow with a vinegar wipe if odor remains.
Do not rely on the dramatic fizz of vinegar and baking soda as your main cleaning method. The bubbling looks exciting, like your fridge is hosting a tiny science fair, but the reaction can reduce the cleaning power of both ingredients. For best results, use them separately: baking soda for gentle scrubbing and odor absorption, vinegar for acidic cleaning and deodorizing.
Step 4: Dry Before Replacing Food
Use a clean towel to dry shelves, drawers, and bins. A dry refrigerator stays fresher and helps prevent water spots, slick surfaces, and trapped moisture.
Method 3: The Vinegar Odor, Gasket, and Detail Clean
This method focuses on the sneaky areas: door seals, creases, handles, drip spots, and odor zones. Use it when the fridge looks clean but smells suspicious.
Step 1: Clean the Door Gasket Gently
The rubber door gasket seals cold air inside the refrigerator. It also collects crumbs, drips, and mildew-like grime in its folds. Dip a soft cloth or old toothbrush into warm soapy water and gently clean the gasket. For lingering odor, wipe with diluted vinegar, then rinse with a clean damp cloth and dry thoroughly.
Avoid aggressive scrubbing, sharp tools, or harsh chemicals on the gasket. Damaging the seal can make your refrigerator work harder and may affect temperature control.
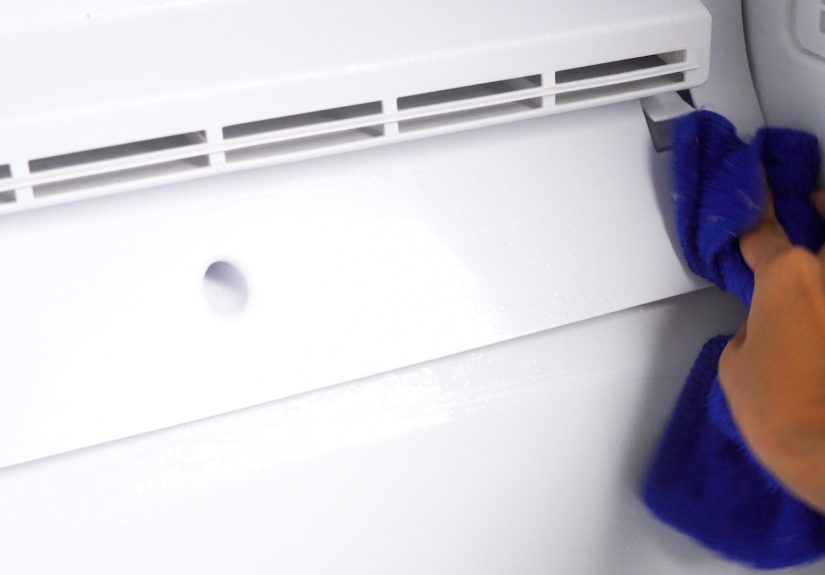
Step 2: Detail the Handles and Door Edges
Refrigerator handles are high-touch surfaces. Wipe handles with warm soapy water first, then use a vinegar-water cloth for deodorizing. If your refrigerator has stainless steel doors, avoid soaking the surface and wipe with the grain. For specialty finishes, follow the manufacturer’s instructions.
Step 3: Attack Odors at the Source
Vinegar can help reduce odors, but it cannot save spoiled food. Remove old leftovers, uncovered onions, leaking produce, and anything with mold. Wipe the interior with vinegar solution, dry it, then place an open box or shallow dish of baking soda in the back of the refrigerator to absorb lingering smells.
Step 4: Clean the Drain Area if Accessible
Some refrigerators have a small drain opening or channel that can collect residue. If your manual shows an accessible drain area, wipe around it gently with a damp cloth. Do not force tools into openings or pour vinegar into parts unless your manufacturer’s instructions say it is safe.
What Not to Do When Cleaning a Refrigerator with Vinegar
Do Not Mix Vinegar with Bleach
Never mix vinegar with bleach. Vinegar is acidic, and combining it with bleach can create dangerous chlorine gas. If you need to sanitize after cleaning, rinse away vinegar residue first, use a properly diluted sanitizer according to food-safety guidance and product directions, and ventilate the area.
Do Not Use Abrasive Pads
Steel wool, rough scrubbers, and abrasive powders can scratch plastic liners, glass shelves, and coated surfaces. Use microfiber cloths, soft sponges, or a soft toothbrush for crevices.
Do Not Spray Electrical Controls
Keep liquid away from control panels, vents, lights, fans, and electronic areas. Spray your cloth instead of spraying directly near sensitive parts.
Do Not Forget to Dry Everything
A damp refrigerator may smell clean for a day and then develop a new musty odor. Dry shelves, drawers, bins, seals, and interior walls before restocking.
How Often Should You Deep Clean Your Refrigerator?
Wipe spills immediately. Do a quick shelf refresh weekly or before grocery shopping. Deep clean the refrigerator every three to four months, or sooner if there is a spill, power outage, food leak, or strong odor. Door handles and exterior surfaces may need cleaning more often because they are touched constantly.
A simple routine keeps the job from becoming overwhelming. When you wipe one shelf at a time, check leftovers twice a week, and store raw foods properly, deep cleaning becomes less of an event and more of a maintenance habit.
Helpful Refrigerator Organization Tips After Cleaning
Once your refrigerator is clean, organize it so it stays that way. Store raw meats in leakproof containers on the bottom shelf. Keep ready-to-eat foods above raw foods. Use clear bins for snacks, dairy, condiments, and produce. Label leftovers with dates so they do not become mysterious science projects.
Do not overpack the refrigerator. Cold air needs room to circulate. A packed fridge may have warm spots, especially near the door. Keep frequently used items visible and place soon-to-expire foods near the front. This reduces waste and prevents forgotten food from becoming the villain of next month’s cleaning session.
Real-Life Experiences: What Cleaning a Fridge with Vinegar Actually Feels Like
The first time many people deep clean a refrigerator with vinegar, they expect a quick wipe-down. Then they remove the top shelf and discover a dried puddle of something that may once have been barbecue sauce, grape jelly, or a message from another dimension. That is when the vinegar spray earns its place. A few minutes of soaking often turns hard, sticky residue into something that wipes away without a battle.
One of the most useful habits is cleaning before grocery shopping. When the fridge is already half-empty, the job feels easier. You can move items around without playing refrigerator Tetris, and you can quickly see what needs to be tossed. A vinegar spray bottle, a cloth, and ten focused minutes can make the inside look dramatically better before the new groceries arrive.
Another practical experience: odor usually comes from a source, not from the air itself. People often try to fix a smelly fridge by adding baking soda, lemon slices, coffee grounds, or vinegar bowls. Those can help, but they work best after the spoiled food, sticky spill, or damp drawer has been cleaned. If the crisper drawer smells bad, remove it completely, wash it, dry it, and check underneath. The real offender is often hiding below the drawer, wearing a tiny disguise made of lettuce slime.
Vinegar is also helpful for condiment zones. Door bins collect sticky rings from ketchup, hot sauce, salad dressing, maple syrup, and juice bottles. A quick vinegar-water wipe breaks up the tacky feeling and removes the sour-sweet odor that builds up over time. Wiping bottle bottoms before putting them back is one of those small chores that feels almost too simple, but it prevents a surprising amount of future mess.
For families, shared apartments, or busy kitchens, a “leftover review” can be part of the cleaning routine. Pick two days a week to check containers. If nobody remembers what it is, when it was cooked, or whether it was supposed to be that color, it is time to say goodbye. A clean refrigerator is not only about shine; it is about knowing what food you have and whether it is still safe and appealing.
One more lesson: do not rush the drying step. Many people clean the shelves beautifully, slide them back in damp, and then wonder why the refrigerator smells musty later. Drying with a towel takes only a few extra minutes and makes the finished result feel crisp and fresh. It also prevents containers from sticking to wet glass shelves.
The best part of deep cleaning your refrigerator with vinegar is the reset feeling afterward. The shelves sparkle, the drawers slide smoothly, the door closes without a suspicious crunch, and the fridge finally looks like a place where food belongs. It is not glamorous, exactly, but it is deeply satisfying. Few chores offer such an immediate reward: cleaner food storage, fewer odors, less waste, and the quiet confidence of knowing there is no ancient yogurt plotting in the back corner.
Conclusion: Vinegar Makes Refrigerator Cleaning Simple
Deep cleaning your refrigerator with vinegar is one of the easiest ways to refresh your kitchen without overcomplicating the job. A 1:1 solution of white distilled vinegar and warm water can loosen sticky spills, deodorize shelves, and brighten up drawers, bins, and interior walls. For heavier grime, pair your vinegar routine with warm soapy water and use baking soda separately as a gentle scrub.
The key is to clean safely: keep food cold, toss spoiled items, avoid harsh abrasives, dry every part, and never mix vinegar with bleach. Use vinegar for routine cleaning and odor control, but use proper sanitizing steps when raw meat juices or serious contamination are involved. With three easy methodsthe full deep clean, the quick shelf refresh, and the gasket-and-odor detail cleanyou can keep your refrigerator fresher, safer, and much less terrifying when guests open the door.


