Table of Contents >> Show >> Hide
- Before You Format Anything: Know What the Xbox 360 Expects
- How to Format a Hard Drive for Xbox 360: 12 Steps
- Step 1: Pick a compatible hard drive (don’t overthink it… too much)
- Step 2: Back up anything you care about (future you says thanks)
- Step 3: Make sure your Xbox 360 is updated
- Step 4: Plug the hard drive into the Xbox 360 (directly, not through a hub)
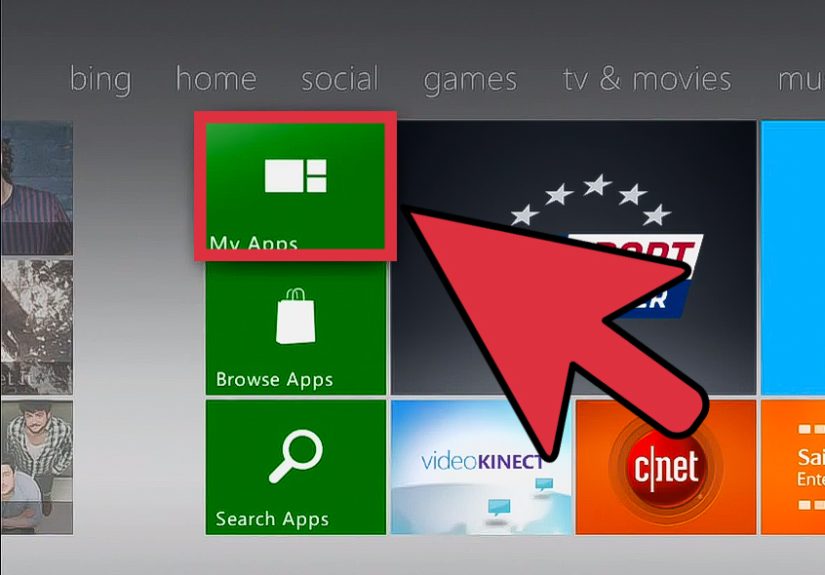
- Step 5: Go to the dashboard’s Settings area
- Step 6: Open System Settings
- Step 7: Select Storage (or Memory)
- Step 8: Choose the USB Storage Device
- Step 9: Pick “Configure Now” (easy mode) or “Customize” (control freak mode)
- Step 10: Confirm the warning (the point of no return)
- Step 11: Verify the new storage shows up correctly
- Step 12: Move content and test with a real download or install
- Troubleshooting: When Your Xbox 360 Won’t Format the Drive
- Pro Tips for a Smoother Xbox 360 Storage Life
- Real-World Experiences: of “Learn From My Mistakes”
- Conclusion
Your Xbox 360 is a classic. It’s also a tiny digital hoarder. Profiles, saves, DLC, game installs, arcade titlesyour console collects them like they’re limited-edition trading cards. Then one day you try to download something simple and the dashboard hits you with: “Not enough space.” (Rude.)
The fix is refreshingly old-school: plug in a hard drive, let the Xbox 360 format it, and suddenly you’ve got room to breathe. This guide walks you through how to format a hard drive for Xbox 360 in 12 clear steps, plus troubleshooting and real-world tips so you don’t accidentally nuke the wrong drive and spend the evening yelling at inanimate objects.
Before You Format Anything: Know What the Xbox 360 Expects
Internal drive vs. external USB hard drive
The Xbox 360 can use storage in two main ways:
- Internal Xbox 360 hard drive (the official style that fits inside the console). This is the “native” option for many models.
- External USB storage (USB flash drives or external hard drives). This is the easiest upgrade for most people because it doesn’t require opening anything or buying a specific proprietary module.
How big can your USB hard drive be?
If you remember a tiny storage limit, you’re not imagining things. Early on, Xbox 360 USB storage support was much smaller (think “this will hold three demos and a crushed dream”). Later system updates expanded support dramaticallyup to 2TB on an external USB hard drive for Xbox 360 storage, depending on your console software version.
What file system do you need?
For Xbox 360 USB storage, FAT32 compatibility is the name of the game. If you format on a computer first, FAT32 is the safest pick. The console can also configure the drive itself, which is usually the best route because it sets up the structure the Xbox expects.
Quick reality check: formatting wipes data. This is not a “tidy up” button. It’s a “new beginning” button.
How to Format a Hard Drive for Xbox 360: 12 Steps
-
Step 1: Pick a compatible hard drive (don’t overthink it… too much)
Choose a USB hard drive that’s reliable and powered appropriately. Most portable drives work fine. If it has weird “security unlock” software, a built-in virtual CD feature, or it needs a special driver on your PC, it can be more finicky on a console.
Baseline checklist:
- At least 1GB free (otherwise the Xbox 360 may refuse to configure it).
- USB 2.0 or better (USB 3.0 drives are typically backward compatible).
- Up to 2TB is commonly supported with later Xbox 360 updates.
-
Step 2: Back up anything you care about (future you says thanks)
Formatting a hard drive erases what’s on it. If your external drive currently holds family photos, taxes, or that folder named “Important Stuff (DO NOT DELETE),” move it to a computer or another drive first.
If you’re formatting an existing Xbox 360 storage device, consider copying profiles, saves, and content elsewhere before you proceed.
-
Step 3: Make sure your Xbox 360 is updated
Storage support improved over the Xbox 360’s lifetime. If your console hasn’t been online in years (no judgmentsome of us are still emotionally recovering from “subscription renewal”), connect it to the internet and run system updates.
Updated consoles are more likely to recognize larger external drives and behave nicely during setup.
-
Step 4: Plug the hard drive into the Xbox 360 (directly, not through a hub)
Use one of the Xbox 360’s USB ports and plug the drive in directly. Avoid USB hubs if you canespecially unpowered onesbecause they can cause detection issues.
If your external hard drive has its own power supply, plug that in too. The Xbox 360’s USB ports can’t reliably power every drive on earth.
-
Step 5: Go to the dashboard’s Settings area
From the Xbox 360 dashboard, navigate to Settings. The exact layout varies slightly by dashboard version, but you’re looking for the system configuration menusnot game settings.
-
Step 6: Open System Settings
Choose System Settings. This is where the Xbox 360 hides all the important stuff, like storage, display options, and the ability to make you feel old by showing your account creation date.
-
Step 7: Select Storage (or Memory)
Find and select Storage (sometimes labeled Memory depending on dashboard version). You should see your existing storage devices listed, like the internal hard drive, memory unit, and any connected USB storage.
-
Step 8: Choose the USB Storage Device
Highlight the external drive. If it’s brand new or not in an Xbox-friendly setup yet, it may show as Unformatted or simply as a USB device needing configuration.
If the drive doesn’t appear at all, jump to the troubleshooting sectiondon’t panic-format it on your PC just yet.
-
Step 9: Pick “Configure Now” (easy mode) or “Customize” (control freak mode)
The Xbox 360 typically offers two options:
- Configure Now: Wipes the drive and sets it up for Xbox 360 storage using the maximum allocation it decides is appropriate.
- Customize: Lets you choose how much space to allocate for Xbox 360 content (useful if you want to keep some space for PC files).
If you want the simplest setup for games, saves, and downloads, pick Configure Now.
-
Step 10: Confirm the warning (the point of no return)
The console will warn you that it’s about to erase everything. This is the Xbox 360’s version of asking, “Are you absolutely sure you want to do this?”because it knows humans are chaotic.
Confirm. Wait while it formats/configures the drive. Large drives can take longer than you expect, so use this time to stretch, hydrate, and maybe apologize to the drive for what’s about to happen.
-
Step 11: Verify the new storage shows up correctly
After formatting, the USB storage device should appear in the Storage list with a visible capacity and options for managing content.
Click into it and make sure you can:
- See available space
- Move/copy content
- Use it as a destination for downloads (depending on your settings)
-
Step 12: Move content and test with a real download or install
Now do a practical test:
- Move a small profile or save file to the new drive
- Download a small demo or DLC item
- Try installing part of a game (if supported for that title)
If everything works, congratulationsyou have successfully formatted a hard drive for Xbox 360 use without summoning any storage gremlins.
Troubleshooting: When Your Xbox 360 Won’t Format the Drive
The drive doesn’t show up at all
- Try a different USB port on the console.
- Skip USB hubs and plug directly into the Xbox.
- Check power: some drives need more power than the console provides.
- Listen for spin-up (for HDDs). If it’s silent and warm, that’s… not ideal.
The Xbox sees it, but “Configure” options are missing
This often happens when the device doesn’t have enough free space (the Xbox 360 typically expects at least 1GB available) or the drive’s behavior is odd due to special partitioning/encryption.
If you must prep it on a PC, do a simple single partition and try FAT32, then return to the console to configure.
“But Windows won’t let me format this big drive as FAT32!”
That’s a very Windows thing to do. Some built-in Windows tools won’t offer FAT32 for large drives in the standard format dialog. In those cases, you can:
- Let the Xbox 360 handle the configuration (often easiest).
- Use Windows command-line methods or reputable disk tools that support FAT32 on large volumes.
Media playback vs. Xbox storage are not the same thing
If you’re using the drive mainly for videos/music, you may want to keep a portion as regular FAT32 storage for your PC files. If you configure the whole thing strictly for Xbox storage, it’s optimized for console content managementnot as a general “plug anywhere” media drive.
Remember the FAT32 file-size limit
FAT32 has a classic limitation: a single file can’t exceed 4GB. That matters if you’re trying to play huge video files from the drive. For Xbox 360 content like saves and typical downloads, it’s usually not a dealbreakerbut for giant media files, you’ll want to split them or compress them.
Pro Tips for a Smoother Xbox 360 Storage Life
Use “Customize” if you want both Xbox storage and PC storage
If you want your external hard drive to pull double duty (some space for Xbox 360 downloads, some space for normal files), “Customize” is your friend. Allocate what you need for the console, keep the rest for your computer.
Don’t chase speed miracles
A faster drive can feel snappier, but the Xbox 360 is still an Xbox 360. The biggest win is usually more space and a reliable drive, not turning your console into a teleportation device.
Label your drive like an adult
Give it a recognizable name in storage settings. “USB0” is a missed opportunity. “Xbox 360 Treasure Chest” is better. “DO NOT FORMAT AGAIN” is best.
Real-World Experiences: of “Learn From My Mistakes”
The first time I formatted a hard drive for an Xbox 360, I treated it like microwaving leftovers: set it, forget it, come back when it beeps. That was mistake number onebecause drives have personalities, and some of them are dramatic.
My drive showed up as “Unformatted,” and the console offered Configure Now. I clicked it with the confidence of someone who absolutely did not back anything up. The Xbox politely warned me that everything would be erased. I, in my infinite wisdom, interpreted that as “Probably not everything.” Spoiler: it was everything. If you’re reading this guide, please be smarter than Past Me. Backup first. Always.
Next, I discovered the joy of power requirements. Some portable external hard drives sip power gently; others chug it like they’re training for a hydration contest. My Xbox 360’s USB port did its best, but the drive kept disconnecting mid-format. The fix was simple: use a drive with a dedicated power adapter or a different enclosure that doesn’t demand more power than the console can provide. Once I did that, the format completed without the storage equivalent of a soap-opera fainting spell.
Then there was the “Windows won’t format FAT32” moment. On my PC, the drive only offered NTFS and exFAT. I thought, “Surely the Xbox will adapt.” The Xbox 360 did not adapt. It stared at my choices like I’d tried to feed it a Blu-ray disc. I learned that even if modern consoles handle exFAT more gracefully, the Xbox 360 is happiest when you let it configure the drive itselfor when you prep it with FAT32 in a way the console recognizes. Lesson: don’t fight the console’s era. The 360 is from a time when memes were younger and file systems were… simpler.
Finally, I tripped over the 4GB single-file limit when I tried to play a big HD video file from the drive. Everything else workedsaves, downloads, profilesso I assumed media would be fine. The Xbox 360 could see the drive, but the file was basically too chunky to fit through the FAT32 doorframe. Splitting the file solved it, and suddenly movie night was back on.
The takeaway? Formatting for Xbox 360 is easy when you follow the stepsbut the smoothest experience comes from tiny habits: label your drive, avoid weird “smart” drive features, power it properly, and let the console do what it was designed to do. Your Xbox 360 doesn’t need fancy. It needs compatible. And maybe a little respect for its vintage soul.
Conclusion
Formatting a hard drive for Xbox 360 use isn’t complicatedit’s mostly about letting the console configure the drive, choosing the right option (Configure Now vs. Customize), and knowing the common gotchas like power issues and FAT32 limitations. Follow the 12 steps above and you’ll have clean, usable Xbox 360 storage for downloads, profiles, saves, and morewithout the stress.