Table of Contents >> Show >> Hide
- Why Greasing and Flouring a Pan Matters
- What You Need
- How to Grease and Flour Baking Pans Step by Step
- When to Use Parchment Paper Instead
- How to Prep Different Types of Baking Pans
- Common Mistakes to Avoid
- Quick Answers to Common Questions
- The Best Rule of All: Follow the Recipe, Then Use Judgment
- Experience Matters: What Bakers Learn After a Few Stuck Cakes
- Conclusion
- SEO Tags
There are few kitchen heartbreaks more dramatic than baking a beautiful cake, letting it cool just enough to build suspense, flipping the pan with confidence, and then hearing the soft, devastating sound of half the cake staying behind. It is the baking equivalent of stepping on a LEGO: surprising, painful, and strangely humbling.
That is why learning how to grease and flour baking pans properly is such a useful kitchen skill. It sounds tiny. It sounds almost too basic. But this small step can make the difference between a cake that slides out like a dream and one that clings to the pan like it still owes rent. Whether you bake layer cakes, loaf cakes, muffins, brownies, or the occasional ambitious Bundt that makes you feel like you should own a cake stand and a theme song, proper pan prep matters.
In this guide, you will learn exactly how to grease and flour baking pans, when to use parchment paper instead, what kind of grease works best, how to handle tricky pan shapes, and which common mistakes quietly ruin good bakes. By the end, you will know how to prep pans with the calm confidence of someone who has seen things and would like the cake to come out in one piece this time.
Why Greasing and Flouring a Pan Matters
Greasing creates a protective layer between batter and metal. Flouring adds another thin barrier that helps prevent sticking and, in many cakes, gives the batter a better chance to rise evenly along the sides instead of slipping back down. Together, these two steps improve release, protect delicate edges, and make cleanup far less annoying.
This matters most for cakes and quick breads that bake directly against the surface of the pan. Dense batters, sugary batters, and decorative pans all have a higher chance of sticking. And while many modern pans are labeled nonstick, experienced bakers still treat pan prep like cheap insurance: maybe you will not need it, but you will be very glad it is there when things get dramatic.
What You Need
Basic Tools
You do not need a fancy kit. A few simple items will do the job well:
Solid vegetable shortening, softened butter, or baking spray with flour; all-purpose flour or unsweetened cocoa powder for chocolate cakes; a pastry brush, folded paper towel, or your clean fingers; and parchment paper for flat-bottom pans when you want extra release insurance.
The Best Grease to Use
Shortening is a favorite for many bakers because it coats evenly, reaches corners well, and does not contain water the way butter does. Butter works too and adds flavor, but it can sometimes brown faster or leave patchy coverage if applied carelessly. Baking spray with flour is a convenient shortcut, especially for busy bakers and intricate molds. Oil alone can work in some situations, but it tends to be thinner and less reliable for detailed pans.
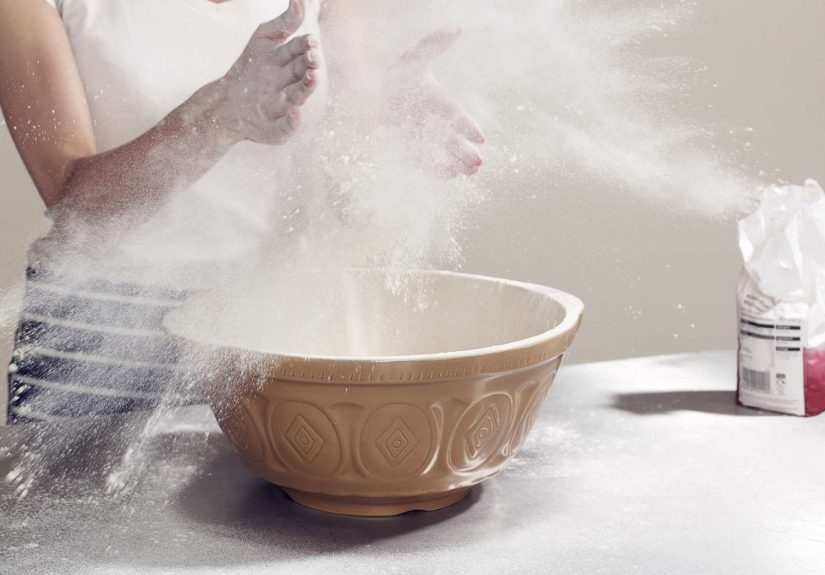
How to Grease and Flour Baking Pans Step by Step
1. Start with a Clean, Dry Pan
This sounds obvious, but baking disasters often begin with a pan that was rinsed quickly and not dried well, or a pan with invisible residue from the last bake. Any leftover crumbs, grease, or moisture can interfere with an even coating. Before you start, make sure the pan is completely clean and totally dry.
2. Apply a Thin, Even Layer of Grease
Add a small amount of shortening or butter to the inside of the pan. Use a pastry brush, paper towel, or your fingertips to spread it over the bottom and sides. The key word here is thin. You want coverage, not wallpaper paste. Thick streaks of grease can pool, collect flour, and leave gummy patches on the finished cake.
Pay special attention to corners, seams, and the spot where the side meets the bottom. These are classic sticking zones. If you are using a loaf pan, many bakers lightly grease the bottom and lower sides, rather than slathering the entire wall from bottom to top. If you are using a Bundt pan, go into every groove, ridge, and tiny decorative valley like you are painting a miniature sculpture.
3. Add Flour
Once the pan is greased, spoon in a little flour. You do not need much. For most standard cake pans, a tablespoon or two is enough. Tilt, rotate, and tap the pan so the flour slides over every greased surface. Keep moving until the bottom and sides have a light, dusty coating.
If you are making a chocolate cake, use unsweetened cocoa powder instead of flour. It performs the same job without leaving a pale white film on the outside of a dark cake. That one small swap can make your finished cake look cleaner and more polished.
4. Tap Out the Excess
When the pan looks evenly coated, turn it upside down and tap out the extra flour. You want a whisper-thin layer, not a snowdrift. Excess flour can bake into thick patches and leave a chalky look on the crust. If you notice shiny spots after tapping, touch up those areas with a little more grease and flour.
5. Add Batter Soon After Prepping
Do not prep the pan and then wander off to reorganize your spice drawer, answer texts, and wonder whether you should start sourdough. In many kitchens, especially warm ones, greasing too early can cause fat to slide downward and pool at the bottom. For best results, grease and flour the pan close to the moment you are ready to add the batter.
When to Use Parchment Paper Instead
Parchment paper is the overachiever of pan prep. For round, square, and rectangular pans with flat bottoms, it adds a major layer of release protection. Grease the pan lightly, line the bottom with parchment, then grease the parchment and flour the sides if the recipe calls for it. This is especially useful for delicate layer cakes, sticky batters, carrot cake, and any bake you truly do not want to negotiate out of a pan with a spatula and a prayer.
Parchment is less useful for highly detailed pans like fluted tube pans and many decorative molds. In those cases, classic greasing and flouring or a baking spray with flour tends to work better.
How to Prep Different Types of Baking Pans
Round and Square Cake Pans
These are the easiest. Grease the bottom and sides, add flour, tap out the excess, and consider a parchment circle on the bottom for extra security. If you are baking a celebration cake and your patience is already being used up by frosting, parchment is a very smart choice.
Loaf Pans
Loaf pans can be sneaky. Banana bread, pound cake, and quick breads often release best when the bottom and lower sides are well greased and lightly floured. For very delicate loaves, a parchment sling that extends over two long sides makes lifting easier.
Muffin Tins
If you are not using paper liners, grease the cups carefully and completely. A pastry brush helps reach the bottoms and rounded sides. Flouring is sometimes helpful for cake-style muffins, though many recipes only require greasing. Do not forget the top surface around the cups if your batter tends to rise over the edges.
Bundt and Fluted Tube Pans
These pans are beautiful, dramatic, and absolutely not interested in your feelings. Every groove matters. Use a brush to apply shortening or baking spray with flour into every curve. Dust lightly with flour if needed, then tap out all extra. Too much grease can blur the final design, but too little can cause a decorative disaster. Bundt pans reward precision and punish laziness almost immediately.
Sheet Pans and Jelly Roll Pans
For sheet cakes, bars, and roll cakes, greasing and flouring can work, but parchment often wins for speed and reliability. If a recipe specifically says to grease and flour, follow that. For cookie sheets, ordinary greasing is not always ideal because it can encourage spreading, so always match the prep method to the recipe.
Common Mistakes to Avoid
Using Too Much Grease
More is not better here. Thick grease layers can lead to fried-looking edges, uneven crust, or patches where flour sticks too heavily. Aim for a light, even film.
Leaving Bare Spots
One missed corner is all it takes. The cake will find it. The cake always finds it.
Forgetting to Tap Out Extra Flour
Too much flour leaves residue on the crust and can affect appearance. A proper coating should be thin and even, not dusty and obvious.
Using the Wrong Pan Prep for the Recipe
Some recipes want only greasing. Some want greasing and flouring. Some want parchment. Some want liners. Good baking is part science, part listening. Follow the recipe when it gives specific instructions.
Assuming Nonstick Means No Prep Needed
Nonstick pans are helpful, but they are not magic. Over time, coatings wear down. Even new nonstick pans often benefit from a little prep when the stakes are high.
Quick Answers to Common Questions
Can I use cooking spray instead of greasing and flouring?
Yes, especially if it is a baking spray that already contains flour. That is a handy shortcut for cake pans, loaf pans, muffin tins, and Bundt pans. Regular cooking spray can work, but it may not be as effective in decorative pans.
Can I use cocoa powder instead of flour?
Yes. Cocoa powder is a great substitute when baking chocolate cakes because it prevents the white residue that flour can leave behind.
Should I grease a nonstick pan?
Usually yes, at least lightly, unless the recipe specifically says otherwise. It gives you a better chance of easy release and helps reduce unpleasant surprises.
Do brownies always need a greased and floured pan?
Not always. Many brownie recipes work better with parchment or just greasing, since flour can leave a visible coating on the edges. Recipe instructions should guide you here.
The Best Rule of All: Follow the Recipe, Then Use Judgment
Baking is wonderfully precise, but pan prep still leaves room for common sense. A sticky carrot cake, a dense pound cake, and a delicate sponge do not all behave the same way. If a recipe says to grease and flour, do it. If it says line with parchment, trust that instruction. If it gives options, choose the method that fits the pan, the batter, and how much emotional energy you have available for risk.
In general, flat cake pans love parchment, loaf pans appreciate thoughtful greasing, muffin tins benefit from careful coverage, and Bundt pans demand respect. If that sounds dramatic, it is only because Bundt pans are dramatic.
Experience Matters: What Bakers Learn After a Few Stuck Cakes
There is a certain kind of kitchen wisdom that only shows up after a few mildly tragic baking moments. You can read every instruction perfectly, understand the theory, and still learn the most memorable lesson from the day a cake refuses to leave the pan like it has signed a lease. That is part of why pan prep becomes such a beloved ritual for experienced bakers. It is not glamorous, but it saves the day more often than the frosting does.
One of the most common experiences bakers talk about is the false confidence of the “it’s a nonstick pan, so I’m sure it’s fine” phase. Nearly everyone has had it. The batter goes in, the cake bakes beautifully, the aroma is fantastic, and then the unmolding goes sideways. That moment teaches something important: nonstick is helpful, but it is not a substitute for thoughtful prep. A few seconds with shortening, flour, or parchment can save an hour of disappointment later.
Another experience many home bakers recognize is the difference between a simple round pan and an intricate Bundt pan. Round pans are forgiving. Bundt pans are more like tiny edible architecture projects. They reward careful brushing, patient flouring, and full attention to detail. Skip one inner ridge, leave one shiny patch, or let spray pool in the bottom, and the final release may come out looking like a topographic map of regret. Once a baker has lost part of a cake design to the pan, they usually never rush that step again.
Loaf pans teach a different lesson. Bakers often discover that quick breads and pound cakes do not always need a heavy hand. Too much grease can make the crust greasy or encourage odd texture near the edges. Too little, of course, leads to sticking. Over time, many bakers develop a feel for the right amount: just enough to coat the pan evenly, just enough flour to leave a thin dry layer, and just enough restraint to avoid turning the inside of the pan into a butter sculpture.
Then there is parchment paper, the silent hero that many bakers do not fully appreciate until they start making layer cakes regularly. Cutting parchment rounds may feel like a mildly annoying extra task, but it often becomes a favorite trick because it adds consistency. Experienced bakers love consistency. They do not want to guess whether today is a cake-release day or a cake-repair day. Parchment makes the odds a lot better.
Perhaps the biggest experience-based lesson is that pan prep is not really about fear. It is about confidence. When you know your pan is ready, you pour batter differently. You bake more calmly. You flip the cake with less suspense. You stop treating unmolding like a dramatic season finale. Good bakers are not lucky. They are prepared. And in baking, preparation often looks like a pastry brush, a spoonful of flour, and the quiet decision to do the boring step properly.
So yes, greasing and flouring baking pans may sound small. But it is one of those small skills that makes everything else feel easier. It protects your work, improves your results, and keeps your desserts looking like they belonged on purpose, not like they were rescued after a structural collapse. That is a pretty good return on a two-minute investment.
Conclusion
Knowing how to grease and flour baking pans is one of the simplest ways to improve your baking right away. The method is easy: start with a clean, dry pan, apply a thin even layer of grease, dust lightly with flour or cocoa if appropriate, tap out the excess, and add the batter without delay. For flat-bottom pans, parchment paper is often the extra insurance policy that makes release almost effortless. For detailed pans, especially Bundts, careful coverage is everything.
It is not the flashiest baking skill, but it is one of the most practical. Master it once, and you will save yourself a long list of future frustrations. And perhaps more importantly, you will get to keep your cake in cake form, which is really the whole point.


