Table of Contents >> Show >> Hide
- Why a Canvas Tote Bag Is Worth Making
- What You Need to Make a DIY Canvas Tote Bag
- Choose Your Materials Like You Mean It
- How to Make a Canvas Tote Bag Step by Step
- How to Make Your Tote Look Better Than Basic
- Mistakes That Make a Homemade Tote Feel Homemade
- How to Care for a Canvas Tote Bag
- Experience Notes: What You Learn After Actually Using a Handmade Canvas Tote Everywhere
- Final Stitch
A great canvas tote bag is one of those rare objects that earns its keep immediately. It hauls library books, survives farmers market impulse buys, holds a laptop without drama, and somehow still manages to look charming while doing grunt work. In other words, it is the golden retriever of bags: friendly, dependable, and always ready to go somewhere.
The good news is that making a DIY canvas tote bag is not some mysterious advanced sewing challenge reserved for people with a studio full of color-coded thread. It is one of the best beginner-friendly sewing projects around, and it is also satisfying enough for experienced sewists who want a bag that feels personal, sturdy, and genuinely useful. The trick is not just sewing a rectangle with handles. The trick is making a tote that feels good on your shoulder, stands up to daily use, and does not collapse like a sandwich bag the first time you toss in a water bottle.
This guide walks you through the full process, from choosing the right canvas and interfacing to sewing strong handles, boxing the corners, adding a lining, and finishing the top edge so the bag looks polished instead of painfully homemade. We will also cover the details that make people actually reach for a handmade tote every day, because “cute” is nice, but “cute and capable” is how a bag becomes a favorite.
Why a Canvas Tote Bag Is Worth Making
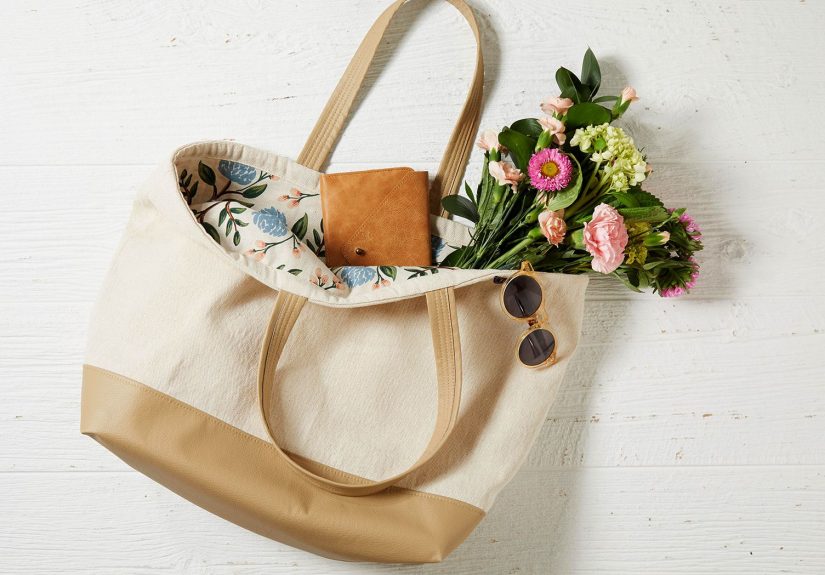
There is a reason the canvas tote bag never really goes out of style. It is practical, washable, endlessly customizable, and casual in a way that works with almost everything. A well-made tote can go from grocery run to weekend trip to coffee shop work session without looking out of place. That versatility is exactly why it is such a smart sewing project.
When you make your own tote, you get to control the features that store-bought bags often get wrong. You can choose a heavier canvas so it feels substantial. You can make the straps long enough to fit comfortably over a coat. You can add a lining that does not look like an afterthought. You can box the bottom so it holds shape. You can even add pockets for your phone, keys, or the lip balm that always seems to disappear into another dimension.
And perhaps best of all, a handmade tote bag can be built for your real life instead of some imaginary minimalist life where you only carry one paperback and a vague sense of calm.
What You Need to Make a DIY Canvas Tote Bag
For a roomy everyday tote, gather these supplies:
- Midweight to heavyweight canvas or cotton duck for the exterior
- Cotton or other sturdy woven fabric for the lining
- Fusible interfacing or fusible fleece for structure
- Matching all-purpose thread
- Denim or heavy-duty sewing needle
- Fabric scissors or rotary cutter and mat
- Measuring tape or quilting ruler
- Iron and ironing board
- Clips or pins
- Sewing machine
- Optional: webbing, inside pocket fabric, magnetic snap, fabric paint, stencil, iron-on patch, or embroidery
If you want a beginner-friendly size, use this simple cutting plan:
- 2 outer body pieces: 16 x 18 inches
- 2 lining pieces: 16 x 18 inches
- 2 handle pieces from fabric: 4 x 26 inches
- 2 strips of interfacing for handles: 1.5 to 2 inches wide by 26 inches long
- Optional pocket: 8 x 10 inches
With 2-inch boxed corners, this gives you a tote with enough depth to carry everyday essentials without turning into a flat, awkward envelope.
Choose Your Materials Like You Mean It
Canvas for the Exterior
The outer fabric does most of the heavy lifting, literally. Choose a canvas that feels durable but still manageable under your sewing machine. If it is too flimsy, the bag will sag. If it is too thick, your machine may stage a mild rebellion when you hit layered seams. Cotton duck, utility canvas, and other sturdy woven fabrics are all solid choices for a tote bag that needs to last.
Prewash your fabric before cutting, especially if you expect the finished bag to be washable. This helps with shrinkage, softens the fabric a bit, and can remove finishing agents that interfere with interfacing or paint. It is not the most glamorous step, but neither is remaking a tote because it came out of the wash looking like it lost an argument.
Lining Fabric
A lining matters more than many beginners think. It hides raw seams, gives the inside a finished look, and makes the bag feel intentional. A quilting cotton or other woven cotton works well. If the exterior is neutral, the lining is a great place to add personality with floral, stripes, checks, or a bold print that makes you smile every time you open the bag.
Interfacing and Structure
If you want your tote to hold its shape, add interfacing. Even a casual tote benefits from a little support, especially around the top edge and bottom area. A structured bag feels better in use because it opens easily, sits more neatly, and handles weight with less droop. Think of interfacing as the bag’s posture coach.
Needles and Stitch Settings
Heavy fabrics need the right needle. A denim or jeans needle is often the smartest choice for canvas, particularly when you are sewing through handles, seams, and interfacing. A slightly longer stitch length can also help when working with thicker fabric, producing cleaner, stronger-looking seams.
How to Make a Canvas Tote Bag Step by Step
Step 1: Cut the Fabric
Cut your outer pieces, lining pieces, handle pieces, and any optional pocket pieces. If you are using interfacing, cut that as well. Accuracy matters here because a tote bag is basically geometry with ambition. Crooked cuts lead to wobbly seams, and wobbly seams lead to a bag that looks slightly annoyed with itself.
Fuse interfacing to the wrong side of the outer panels or the areas you want reinforced, following the product directions. If you only want moderate structure, add it to the upper bag and bottom section rather than the whole body.
Step 2: Make the Handles
Fold each long handle strip in half lengthwise and press to mark the center. Open it back up, fold each long edge toward the center crease, then fold again so the raw edges are enclosed. Press well. Insert the narrow strip of interfacing inside if you want extra support.
Topstitch along both long edges of each handle. This strengthens the straps and gives them a crisp, professional look. Handles are not the place to be shy with reinforcement. They need to survive groceries, books, gym clothes, and the occasional irrational decision to carry three beverages at once.
Step 3: Add a Pocket if You Want One
For a basic inside pocket, fold the top edge of your pocket piece down twice and stitch it. Then fold and press the other edges under. Place the pocket on one lining panel, pin it in position, and stitch around the sides and bottom. You can divide the pocket into sections with a vertical line of stitching if you want one side for your phone and one for smaller items.
This single step dramatically improves daily usability. A tote without a pocket is charming. A tote with a pocket is civilized.
Step 4: Sew the Outer Bag
Place the two outer panels right sides together and sew the side seams and bottom seam using a 1/2-inch seam allowance. Backstitch at the beginning and end. Press the seams open or to one side, depending on what your fabric allows.
Now create boxed corners. At each lower corner, flatten the bag so the side seam aligns with the bottom seam, forming a triangle. Measure 2 inches from the point, draw a straight line across, and sew along that line. Trim the excess fabric. Repeat on the other side. These boxed corners give the tote depth and help it sit better when filled.
Step 5: Sew the Lining
Repeat the same process with the lining pieces, but leave a 4- to 5-inch opening in the bottom seam. That opening will let you turn the whole bag right side out later. Box the corners on the lining the same way so everything fits together neatly.
Step 6: Attach the Handles
Turn the outer bag right side out. Position each handle on the outside of the bag, spacing them evenly from the side seams. A good starting point is about 3.5 to 4 inches in from each side. Make sure the straps are not twisted, because that is the kind of detail you only notice after everything is sewn and your soul briefly leaves your body.
Baste the handles in place near the top raw edge. Then stitch a square or rectangle with an X inside at the handle ends if you want extra reinforcement. This classic handle reinforcement is strong, tidy, and made for real-world wear.
Step 7: Join Outer Bag and Lining
Place the outer bag inside the lining so right sides are together. Match the side seams and top edges, then clip or pin all the way around. Sew around the top edge with a 1/2-inch seam allowance, catching the handles securely between the layers.
Pull the bag through the opening in the lining. Once the bag is fully turned right side out, sew the lining opening closed, either by machine or with a neat hand stitch.
Step 8: Press and Topstitch
Tuck the lining into the bag and press the top edge carefully. Then topstitch all the way around the upper edge. This final row of stitching adds strength, keeps the lining in place, and makes the entire tote look far more polished. Topstitching is one of those details that quietly whispers, “Yes, I know what I’m doing.”
How to Make Your Tote Look Better Than Basic
A plain canvas tote has clean, timeless appeal, but personalization is where the fun starts. If you want your bag to look less like a giveaway and more like a favorite accessory, small design upgrades make a big difference.
Add Surface Design
Fabric paint, stencils, freezer paper shapes, iron-on letters, appliqué, and embroidery all work beautifully on canvas. A simple monogram, bold graphic shape, or hand-drawn design can transform a blank tote into something that feels boutique-worthy. Just remember to prewash before painting or fusing, and always test placement first.
Play with Contrast
One of the easiest ways to elevate a canvas tote bag is mixing textures or colors. Pair natural canvas with black straps, a striped lining, or a printed pocket. Contrast topstitching can also look fantastic if you keep it neat and consistent.
Upgrade the Function
Add a magnetic snap, key leash, inside zip pocket, or exterior slip pocket if you want more organization. A great tote is not just good-looking. It helps you find your keys before they become an archaeological event.
Mistakes That Make a Homemade Tote Feel Homemade
There is nothing wrong with a project looking handmade. There is, however, a difference between handmade and hastily assembled in the middle of a fabric-fueled identity crisis.
The most common mistake is using fabric that is too thin. Without enough body, the bag feels floppy and wears out faster. Another issue is skipping interfacing entirely when the design needs support. Uneven handle placement can also make the bag look off-balance and feel awkward when carried.
Pressing is another detail people underestimate. Press the handles, press the seams, press the top edge. Sewing without pressing is like trying to frost a cake that is still in the oven. Technically, you are involved, but the outcome will not thank you.
Finally, do not rush thick seams. Slow down over bulky intersections, use clips instead of forcing pins where they do not belong, and swap in a fresh heavy-duty needle if your stitches start skipping. Canvas is sturdy, but it still appreciates patience.
How to Care for a Canvas Tote Bag
If you prewashed your fabrics and used washable materials, your tote should be fairly easy to maintain. Shake it out regularly, spot-clean small marks, and wash it gently when needed. Let it air-dry or dry it on low if the materials allow. If you used paint, specialty trims, faux leather, or a magnetic closure, treat those according to their care needs.
A tote that gets used often will pick up character over time, and that is part of its charm. Softening canvas, slightly broken-in straps, and a bit of honest wear can make the bag look even better. The goal is not museum preservation. The goal is a bag that earns compliments while carrying snacks.
Experience Notes: What You Learn After Actually Using a Handmade Canvas Tote Everywhere
The most interesting thing about making a canvas tote bag is that the real lesson starts after the sewing is done. On the table, almost any tote can look good. It is only after a week of actual use that the truth comes out. Suddenly, you understand why strap length matters, why boxed corners are not optional on a carryall, and why one inside pocket can save an unreasonable amount of daily frustration.
The first time you carry a handmade tote to a grocery store, you notice structure. A bag with a little interfacing feels easier to pack because it stays open long enough for you to use both hands. A bag without structure folds inward like it is trying to protect its feelings. That may be fine for a lightweight book tote, but for errands or commuting, shape matters more than many people expect.
Then there is the handle issue. On paper, almost any strap can look adequate. In practice, straps that are too short dig into your shoulder, especially over a jacket. Straps that are too thin can feel uncomfortable once the bag gets heavy. The best everyday tote usually has handles wide enough to distribute weight and long enough to slip over the shoulder without a wrestling match. It is a small design choice with a giant impact on whether the bag becomes your go-to or your “nice effort” project.
Another real-life surprise is how much the lining affects your relationship with the bag. A contrasting lining is not just pretty. It makes the inside brighter, which means you can actually find things without turning the bag upside down like a desperate magician. Dark interiors may look sleek, but they are excellent at hiding earbuds, receipts, and your dignity.
Daily use also teaches you that reinforcement is worth every extra minute. Handles stitched down with a box-and-X pattern simply feel safer. Topstitched upper edges keep the tote looking crisp instead of rumpled. Even the humble pocket earns its moment of glory once you stop losing your keys in the main compartment. After a few trips out in the world, it becomes obvious that a successful tote is less about decoration and more about thoughtful construction.
There is also a quieter kind of satisfaction that comes from carrying something you made yourself. People notice. They ask where you bought it. You get to say you made it, which is always slightly more fun than it should be. Better still, you know why it works. You know what is inside the seams, why the straps hold, why the base sits flat, and why the whole thing feels sturdier than many store-bought options. That knowledge changes the way you see everyday objects.
And perhaps that is the best part of the experience. A handmade canvas tote bag is not just a practical sewing project. It is a reminder that useful things can still have personality. They can be tough, attractive, washable, and tailored to the way you actually live. Once you have carried one you made yourself, it becomes very difficult to get excited about flimsy bags with scratchy handles and no pockets. You have seen the better version, and now you know how to make it.
Final Stitch
If you want a sewing project that is practical, stylish, and endlessly customizable, a canvas tote bag is hard to beat. It is beginner-friendly enough to feel approachable, but it also leaves plenty of room for thoughtful upgrades like lining, interfacing, pockets, paint, embroidery, and polished topstitching. Make it sturdy, make it useful, and make it look like something you would be proud to carry on an ordinary Tuesday. That is the real secret to a tote you will take everywhere.