Table of Contents >> Show >> Hide
- Why Make DIY Christmas Ornaments?
- Basic Supplies for Homemade Christmas Ornaments
- Safety Tips Before You Start Crafting
- How To Make Salt Dough Christmas Ornaments
- How To Make Dried Orange Slice Ornaments
- How To Make Felt Christmas Ornaments
- How To Make Clear Fillable Christmas Ornaments
- How To Make Photo Christmas Ornaments
- How To Make Paper Christmas Ornaments
- How To Make Rustic Wood Slice Ornaments
- How To Make Yarn and Twine Ornaments
- How To Make Upcycled Christmas Ornaments
- How To Choose a Theme for DIY Christmas Ornaments
- Tips for Making DIY Ornaments Look Professional
- DIY Christmas Ornaments as Handmade Gifts
- How To Store Handmade Christmas Ornaments
- Personal Experience: What Actually Works When Making DIY Christmas Ornaments
- Conclusion
There are two kinds of Christmas trees: the ones that look like they were decorated by a department-store stylist with a stepladder and a velvet blazer, and the ones that actually tell a story. DIY Christmas ornaments belong proudly in the second group. They may not all be perfectly symmetrical, and yes, one salt dough star may look suspiciously like a potato with ambition, but handmade ornaments bring warmth, personality, and a little holiday mischief to your tree.
Learning how to make DIY Christmas ornaments is also one of the easiest ways to decorate on a budget, personalize gifts, keep kids busy during winter break, and turn ordinary craft supplies into keepsakes. With a few basicspaper, felt, ribbon, yarn, wood slices, dried oranges, clear baubles, paint, and glueyou can create homemade Christmas ornaments that look charming, festive, and completely unique.
This guide walks you through practical ornament ideas, beginner-friendly techniques, material tips, safety notes, and creative examples you can adapt to your style. Whether your home leans rustic farmhouse, minimalist Scandinavian, colorful kid-chaos, or “I found glitter in my sock again,” there is a handmade ornament here for you.
Why Make DIY Christmas Ornaments?
DIY Christmas ornaments are more than decorations. They are tiny memory machines. A store-bought ornament can be beautiful, but a handmade ornament usually comes with a story: the year your child learned to write their name, the winter you hosted your first holiday party, the afternoon your family tried crafting and somehow glued a pom-pom to the dog’s tail. Accidentally, of course.
Making your own Christmas ornaments also gives you control over color, size, theme, and budget. Instead of buying a dozen matching ornaments, you can create a full set using leftover ribbon, cardboard, fabric scraps, cinnamon sticks, pinecones, old greeting cards, beads, or photos. DIY ornaments can also double as gift toppers, party favors, place cards, stocking stuffers, teacher gifts, or sentimental presents for grandparents.
Basic Supplies for Homemade Christmas Ornaments
You do not need an entire craft room to make beautiful ornaments. Start with a simple supply kit and build from there. The best DIY ornament supplies are easy to find, affordable, and flexible enough for multiple projects.
Essential Craft Supplies
- Clear plastic or glass fillable ornaments
- Felt sheets in holiday colors
- Cardstock, scrapbook paper, or old Christmas cards
- Ribbon, twine, yarn, embroidery floss, or baker’s twine
- Wood slices, craft sticks, clothespins, or small wooden shapes
- Acrylic paint, paint pens, and permanent markers
- Craft glue, low-temperature hot glue, or glue dots
- Beads, buttons, bells, sequins, mini pom-poms, and faux greenery
- Cookie cutters for tracing shapes or cutting dough ornaments
- Scissors, hole punch, ruler, pencil, and paintbrushes
If you are crafting with kids, choose washable paint, blunt-tip scissors, shatterproof ornament blanks, and larger embellishments that are easier to handle. For homes with small children or pets, avoid tiny loose pieces on lower tree branches. A cat can mistake a jingle bell for prey, and honestly, the cat may win.
Safety Tips Before You Start Crafting
Holiday crafting should be festive, not frantic. Before making ornaments, set up a clean table, cover it with newspaper or a washable cloth, and keep sharp tools, hot glue guns, and small parts away from younger children. Use non-toxic paints and adhesives when possible. If you are drying citrus slices in the oven, use low heat and check them often. Paper ornaments should be kept away from candles, fireplaces, stovetops, and any open flame.
For family crafting, assign jobs by age. Younger children can paint, sprinkle glitter, thread large beads, or press shapes into dough. Older kids and adults can handle cutting, baking, sealing, and hot glue. Nobody needs to become a holiday legend because they touched the glue gun nozzle. That is not the kind of Christmas miracle we are chasing.
How To Make Salt Dough Christmas Ornaments
Salt dough ornaments are classic for a reason. They are cheap, customizable, and perfect for handprints, stars, snowflakes, gingerbread shapes, initials, and pet paw prints. They also smell faintly like a kitchen experiment, which is part of their charm.
Materials
- 2 cups all-purpose flour
- 1 cup salt
- 1 cup warm water
- Cookie cutters
- Straw or skewer for making hanging holes
- Acrylic paint
- Ribbon or twine
- Clear sealant, Mod Podge, or craft varnish
Steps
- Mix flour and salt in a large bowl.
- Add warm water slowly and stir until a dough forms.
- Knead the dough for several minutes until smooth.
- Roll it out to about 1/4 inch thick.
- Cut shapes with cookie cutters.
- Use a straw to make a hole near the top of each ornament.
- Bake at 200°F for 2 to 3 hours, or until fully dry.
- Let ornaments cool completely before painting.
- Paint, decorate, seal, and add ribbon for hanging.
For a polished look, paint the entire ornament white first, then add details after it dries. For a rustic look, leave the dough natural and decorate with twine, tiny pine sprigs, or stamped letters. Salt dough is not edible, despite looking like a cookie that gave up on dessert, so store it away from pets and very young children.
How To Make Dried Orange Slice Ornaments
Dried orange ornaments bring a warm, old-fashioned glow to a Christmas tree. When the lights shine through the slices, they look like little stained-glass windows made by Mother Nature, who apparently has excellent seasonal taste.
Materials
- Oranges, lemons, limes, or grapefruit
- Baking sheet
- Parchment paper
- Twine, ribbon, or ornament hooks
- Optional: cinnamon sticks, cloves, star anise, or small bells
Steps
- Slice citrus fruit into thin, even rounds, about 1/8 to 1/4 inch thick.
- Pat both sides with paper towels to remove extra juice.
- Place slices on a parchment-lined baking sheet.
- Bake at 180°F to 200°F for 3 to 4 hours, flipping occasionally.
- Remove when dry but not burned.
- Cool completely, then poke a small hole near the rind.
- Add twine and hang on the tree.
You can keep them simple or dress them up with cinnamon sticks and tiny greenery bundles. These ornaments work beautifully on rustic, woodland, farmhouse, and natural Christmas trees. They also make your home smell like you are a person who has everything together, even if there are still shipping boxes hiding in the hallway.
How To Make Felt Christmas Ornaments
Felt ornaments are soft, colorful, and nearly impossible to break, which makes them excellent for kids, pets, and anyone who has ever dropped a glass ornament and heard the soundtrack of regret. Felt is easy to cut, sew, glue, and layer, so it works for beginners and experienced crafters alike.
Easy Felt Ornament Ideas
- Felt Christmas trees with button “ornaments”
- Stuffed felt stars with blanket stitching
- Gingerbread people with white paint-pen icing
- Mini stockings with embroidered initials
- Snowmen with felt scarves and bead buttons
- Animal ornaments shaped like cats, dogs, birds, or reindeer
Basic Felt Ornament Method
- Draw or print a simple shape template.
- Trace it twice onto felt and cut out both pieces.
- Decorate the front piece with buttons, beads, stitching, or paint.
- Glue or sew the two pieces together, leaving a small opening.
- Add a little fiberfill for puffiness.
- Close the opening and attach a ribbon loop.
If sewing sounds intimidating, use fabric glue. If fabric glue sounds too slow, use low-temperature hot glue. If hot glue sounds dramatic, welcome to crafting: dramatic but worth it.
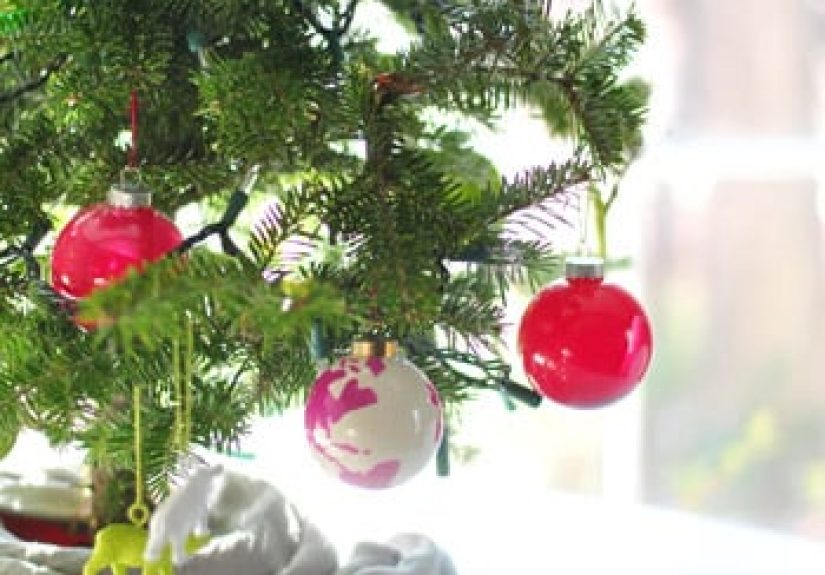
How To Make Clear Fillable Christmas Ornaments
Clear fillable ornaments are the blank canvases of Christmas crafting. You can fill them with almost anything lightweight and pretty, from faux snow to curled paper strips. Plastic versions are especially useful for family craft nights because they are less fragile than glass.
Creative Fill Ideas
- Faux snow and mini bottle brush trees
- Curled strips of old Christmas cards
- Glitter, sequins, and tiny stars
- Family photos cut into circles
- Ribbon scraps in coordinated colors
- Small pinecones, faux berries, or artificial greenery
- Kids’ wish lists written on rolled paper
To make them look professional, choose one theme per ornament. For example, fill one with white faux snow and a tiny tree, another with red ribbon curls, and another with a rolled family photo. Too many elements inside one ornament can look like a craft drawer had a sneeze.
How To Make Photo Christmas Ornaments
Photo ornaments are wonderful for families, couples, pet owners, newlyweds, new parents, and anyone who wants a tree that doubles as a memory album. They also make thoughtful gifts because they feel personal without requiring you to knit a sweater, which is good because sweaters have sleeves and sleeves are where optimism goes to suffer.
Simple Photo Ornament Ideas
- Place a small photo inside a clear ornament with faux snow.
- Glue a photo to a wood slice and add a ribbon hanger.
- Use a metal lid or mason jar ring as a frame.
- Cut photos into circles and mount them on cardstock.
- Make a mini accordion photo booklet and tie it with ribbon.
For best results, print photos on matte paper or cardstock. Add the year on the back so future-you can remember when everyone had that haircut. Photo ornaments are especially meaningful when made annually. Over time, your tree becomes a timeline of holidays, milestones, vacations, school years, and pets who refused to look at the camera.
How To Make Paper Christmas Ornaments
Paper ornaments are budget-friendly and surprisingly elegant. They can be folded, layered, curled, punched, stitched, or glued into stars, trees, angels, snowflakes, rosettes, and garlands. Use cardstock for structure, scrapbook paper for pattern, old book pages for vintage charm, or leftover wrapping paper for coordinated holiday style.
Paper Star Ornament
- Cut five equal strips of cardstock.
- Fold each strip gently into a loop or point shape.
- Glue the ends together to form star points.
- Glue all five points together in the center.
- Add a bead, button, or paper circle to cover the center.
- Punch a hole at the top and add twine.
Paper ornaments are lightweight, so they are ideal for smaller tabletop trees or branches in a vase. Keep them dry and store them flat when possible. They are also great for classroom projects, holiday parties, and last-minute decorating when the budget says “not this year, buddy.”
How To Make Rustic Wood Slice Ornaments
Wood slice ornaments add natural texture to a tree and are easy to personalize. You can paint them, stamp them, burn designs into them if you have the right safe equipment and experience, or keep them simple with handwritten names.
Materials
- Small wood slices with pre-drilled holes
- Acrylic paint or paint pens
- Twine or ribbon
- Optional: stamps, stencils, greenery, bells, or plaid fabric
Design Ideas
- Paint white snowflakes on natural wood.
- Write family names in black or gold paint pen.
- Add a tiny painted wreath with red berry dots.
- Glue a mini bow and greenery sprig to the top.
- Make personalized gift tags that become ornaments later.
For a clean finish, lightly sand rough edges and wipe away dust before painting. A thin coat of clear sealer helps protect the design. Wood slice ornaments pair beautifully with dried oranges, pinecones, burlap ribbon, and warm white lights.
How To Make Yarn and Twine Ornaments
Yarn ornaments are cozy, forgiving, and perfect for using up leftover craft supplies. Wrap yarn around cardboard shapes, foam balls, cookie cutters, or clear ornament blanks. The result can be rustic, colorful, or modern depending on your color palette.
Yarn-Wrapped Star Ornament
- Cut a star shape from sturdy cardboard.
- Tape or glue one end of yarn to the back.
- Wrap yarn around the star until the cardboard is covered.
- Add small dots of glue near the points to secure the yarn.
- Glue the final end to the back.
- Add a loop for hanging.
Try cream yarn for a soft farmhouse look, red and green for traditional cheer, or metallic thread for sparkle. You can also wrap cookie cutters in baker’s twine and use them as ornaments, gift toppers, or kitchen-themed decorations.
How To Make Upcycled Christmas Ornaments
Some of the best DIY Christmas ornaments come from items you already have at home. Upcycled ornaments reduce waste and give old materials a festive second act. It is basically holiday recycling with better lighting.
Upcycled Ornament Ideas
- Turn old greeting cards into layered paper baubles.
- Use jar lids as mini photo frames.
- Transform wine corks into reindeer or tiny trees.
- Make snowflakes from clothespins.
- Use puzzle pieces to create wreath ornaments.
- Wrap cardboard letters with twine for personalized initials.
- Fill clear ornaments with ribbon scraps or shredded wrapping paper.
Upcycled ornaments are especially fun because they do not need to be perfect. The charm comes from the transformation. A cardboard box becomes a star. A jar lid becomes a frame. A lonely button becomes a snowman’s belly. Somewhere, your junk drawer is finally feeling appreciated.
How To Choose a Theme for DIY Christmas Ornaments
A theme helps your handmade ornaments look intentional instead of random. You do not need every ornament to match, but choosing a color palette or style can pull the tree together.
Popular DIY Ornament Themes
- Rustic farmhouse: wood slices, burlap, dried oranges, pinecones, twine
- Classic Christmas: red, green, gold, plaid, bells, candy canes
- Winter woodland: felt animals, mushrooms, acorns, birds, snowflakes
- Minimalist: white clay, simple stars, wood beads, neutral ribbon
- Kid-made colorful: pom-poms, stickers, bright paint, foam shapes
- Vintage-inspired: old cards, lace, sheet music, metallic paper
If your tree already has store-bought ornaments, create DIY pieces that complement them. For example, if your tree is mostly silver and blue, make white salt dough snowflakes and blue ribbon photo ornaments. If your tree is colorful, make paper ornaments from bright scrapbook paper and add pom-pom details.
Tips for Making DIY Ornaments Look Professional
Handmade does not have to mean messy. A few small details can make DIY ornaments look polished and gift-worthy.
- Use a limited color palette of two to four colors.
- Repeat one material, such as twine or ribbon, across multiple ornaments.
- Paint base coats before adding details.
- Let each layer dry fully before handling.
- Use templates for consistent shapes.
- Add the year on the back for keepsake value.
- Finish with a neat ribbon loop instead of plain string.
- Store delicate ornaments in tissue paper or divided boxes.
Also, step away before adding “just one more” embellishment. Crafting has a dangerous final stage where you believe every ornament needs six more sequins and a tiny bow. Sometimes it does. Often, it does not. Trust the ornament. Let it breathe.
DIY Christmas Ornaments as Handmade Gifts
Homemade Christmas ornaments make excellent gifts because they are personal, affordable, and easy to mail. Create a set of three to six ornaments in a coordinated theme, package them in a small box with tissue paper, and add a handwritten tag. You can make family name ornaments, pet portrait ornaments, first-home ornaments, baby’s first Christmas ornaments, teacher ornaments, or “year in review” photo ornaments.
For coworkers, neighbors, or party guests, choose simple designs that are easy to repeat, such as dried orange slices, wood slice snowflakes, or clear ornaments filled with ribbon curls. For close family, add photos, names, dates, or meaningful symbols. The best handmade gifts do not need to be complicated. They need to feel thoughtful.
How To Store Handmade Christmas Ornaments
After the holidays, store DIY ornaments carefully so they survive until next year. Wrap salt dough, clay, wood, and photo ornaments in tissue paper. Keep dried citrus ornaments in a dry container, and replace them if they show signs of moisture. Store felt ornaments in a sealed bag or box to protect them from dust. Paper ornaments should be laid flat or placed in sturdy boxes so they do not bend.
Label your storage containers by theme or room. Future-you, standing in December chaos with tape stuck to one sleeve, will be deeply grateful.
Personal Experience: What Actually Works When Making DIY Christmas Ornaments
The biggest lesson from making DIY Christmas ornaments is simple: prepare the table before you invite creativity to sit down. The first time many people try homemade ornaments, they imagine a cozy scene with cocoa, soft music, and angelic concentration. Five minutes later, someone cannot find the scissors, glitter has crossed state lines, and the ribbon spool is rolling under the couch like it owes money. A little setup changes everything.
Start by choosing only two or three ornament projects for one crafting session. Salt dough, felt ornaments, and clear fillable baubles are a great combination because each project has a different pace. Salt dough needs baking and cooling time, felt ornaments need cutting and decorating, and clear ornaments give instant results. This keeps everyone busy without turning the table into a holiday obstacle course.
Another practical experience: make a sample ornament first. A sample helps you test the size, colors, glue, drying time, and hanging method before everyone commits. It also gives kids a visual goal without forcing them to copy it exactly. Children usually create better ornaments when they understand the basic steps but still have room to make a purple reindeer with seven buttons and no explanation. Honestly, that may become the family favorite.
For adults, the best results often come from working in batches. Paint all wood slices at once. Cut all felt shapes at once. Bake all citrus slices together. Add ribbon loops at the end. Batch crafting saves time and helps the finished ornaments look more coordinated. It also prevents the classic DIY problem of completing one perfect ornament and then realizing you have enough supplies for eleven more but no emotional energy left.
When making ornaments as gifts, personalization matters more than complexity. A simple wood slice with a name and date can feel more meaningful than an elaborate ornament that took three hours and involved five kinds of adhesive. Photo ornaments are especially powerful because they capture a specific moment. Add a school photo, a vacation snapshot, a pet picture, or a tiny printed note. Years later, that ornament becomes more than decoration; it becomes a memory you can hang on a branch.
One more honest tip: accept imperfections. Handmade ornaments are not supposed to look machine-made. Uneven paint, slightly crooked stars, fingerprint marks, and lumpy dough edges are part of the charm. Those details prove a real person made the ornament with real hands, probably while eating cookies and wondering where the tape went. The goal is not perfection. The goal is a tree that feels alive with stories.
Finally, take photos during the crafting process. Capture the messy table, the painted hands, the cooling tray of salt dough, the pile of ribbon, and the finished ornaments before they go on the tree. These behind-the-scenes photos can become part of next year’s photo ornaments. That is the secret magic of DIY Christmas ornaments: one year’s craft becomes the next year’s memory, and the tree slowly turns into a family scrapbook with lights.
Conclusion
Learning how to make DIY Christmas ornaments is one of the simplest ways to bring more personality, creativity, and meaning into your holiday decor. From salt dough keepsakes and dried orange slices to felt animals, photo ornaments, paper stars, wood slices, and upcycled treasures, handmade decorations can match any style and budget. They are fun for families, thoughtful as gifts, and charming enough to become yearly traditions.
The best part is that you do not need perfect supplies or professional skills. You need a few materials, a little patience, and permission to enjoy the process. Some ornaments will look elegant. Some will look hilarious. All of them will make your Christmas tree feel more like home.


