Table of Contents >> Show >> Hide
- What Does It Mean to Merge Cells in Excel?
- Before You Merge: The Most Important Warning
- How to Merge Cells in Excel: 4 Easy-to-Follow Steps
- How to Merge Cells Without Losing Data
- How to Unmerge Cells in Excel
- Why Is Merge & Center Grayed Out?
- When Should You Merge Cells in Excel?
- When Should You Avoid Merging Cells?
- The Best Alternative: Center Across Selection
- Common Mistakes When Merging Cells
- Practical Example: Creating a Clean Report Header
- Keyboard Shortcut for Merging Cells in Excel
- of Real-World Experience: What Merging Cells Teaches You After Enough Spreadsheet Battles
- Final Thoughts
- SEO Tags
Merging cells in Excel is one of those tiny spreadsheet tricks that feels almost too simpleuntil your worksheet starts behaving like it has had three cups of coffee and a personal grudge against clean formatting. Used correctly, merged cells can make headers, titles, forms, dashboards, and printable reports look polished. Used carelessly, they can make sorting, filtering, copying, and formulas more dramatic than a reality TV reunion episode.
This guide explains exactly how to merge cells in Excel using four easy-to-follow steps. You will also learn when to use Merge & Center, when to choose other merge options, how to unmerge cells, how to avoid losing data, and why many Excel pros secretly whisper, “Use Center Across Selection instead,” whenever someone reaches for the merge button.
Whether you are creating a neat report title, formatting a budget sheet, building an invoice, or trying to make a spreadsheet look less like a digital junk drawer, this tutorial will help you merge cells in Excel the smart way.
What Does It Mean to Merge Cells in Excel?
To merge cells in Excel means to combine two or more selected cells into one larger cell. For example, if you select cells A1 through D1 and merge them, Excel turns those four individual cells into one wide cell that stretches across the same area. This is commonly used for worksheet titles, section headers, labels, printable forms, and dashboard layouts.
The most familiar command is Merge & Center. It combines selected cells and centers the content inside the new larger cell. Excel also offers related options such as Merge Across, Merge Cells, and Unmerge Cells. Each option has a different job, and choosing the right one can save you a surprising amount of spreadsheet cleanup later.
Before You Merge: The Most Important Warning
Here is the big warning: when you merge multiple cells that contain data, Excel keeps only the value from the upper-left cell in a left-to-right worksheet. The other values are discarded from the merged area. Excel usually warns you before this happens, but many people click through the warning faster than they close a pop-up ad.
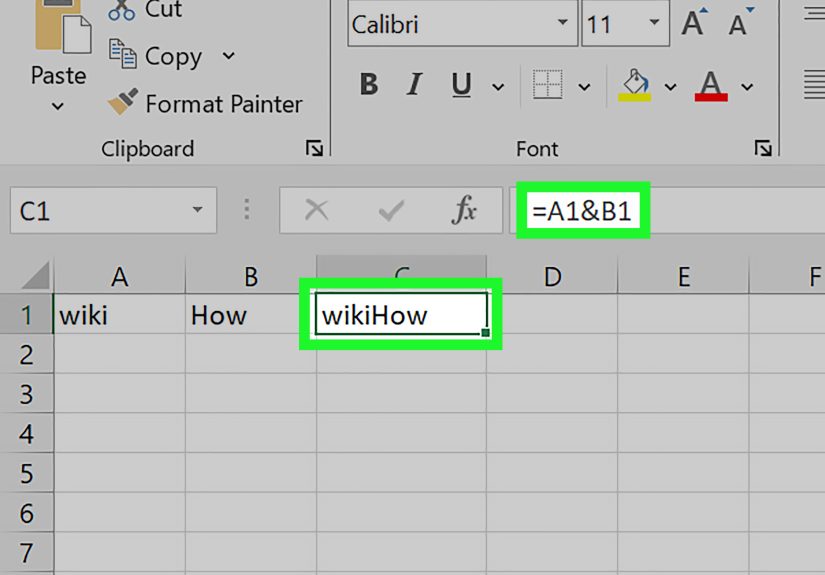
For example, suppose cell A1 says “Quarterly,” B1 says “Sales,” and C1 says “Report.” If you select A1:C1 and use the standard merge command, Excel keeps “Quarterly” and removes the other separate cell values from the merged area. If your goal was to combine the words into “Quarterly Sales Report,” merging cells is not the right tool. You should use a formula such as =A1&" "&B1&" "&C1, CONCAT, or TEXTJOIN instead.
Think of merging cells as a formatting tool, not a data-combining tool. It changes the shape of the worksheet grid; it does not safely join multiple pieces of information into one complete sentence.
How to Merge Cells in Excel: 4 Easy-to-Follow Steps
Here is the simple, beginner-friendly method for merging cells in Excel. These steps work in modern desktop versions of Excel, including Microsoft 365 and recent standalone versions of Excel. The layout may vary slightly depending on your version, but the core process is the same.
Step 1: Select the Cells You Want to Merge
Open your Excel worksheet and highlight the cells you want to combine. You can select cells in a single row, a single column, or a rectangular block. For example, to create a centered title across a report, you might select cells A1 through F1.
Make sure the cells are next to each other. Excel is not fond of merging random scattered cells across the worksheet. It likes a nice, tidy selectionbasically the spreadsheet version of “please stand in line.”
Also check whether more than one selected cell contains important data. If several cells contain text, numbers, dates, or formulas, copy that information somewhere safe before merging. This small habit can prevent a large “where did my data go?” moment.
Step 2: Go to the Home Tab
Once the cells are selected, go to the Home tab on the Excel ribbon. This is where many common formatting tools live, including font settings, number formatting, alignment, borders, fill color, and the merge command.
In the Alignment group, look for the Merge & Center button. It usually appears near the alignment icons. If you use Excel often, this button may become one of those tools you can find without thinkinglike your favorite snack in the kitchen cabinet.
Step 3: Click Merge & Center or Choose Another Merge Option
Click Merge & Center if you want Excel to combine the selected cells and center the content. This is the most common choice for headings and report titles.
If you click the small arrow next to Merge & Center, Excel displays additional options:
- Merge & Center: Combines selected cells into one larger cell and centers the content.
- Merge Across: Merges cells across each selected row separately. This is useful when you select multiple rows and want each row merged horizontally on its own.
- Merge Cells: Combines selected cells without automatically centering the content.
- Unmerge Cells: Splits a merged cell back into individual cells.
For a simple report title, Merge & Center is usually the fastest choice. For a form label or layout area where you want custom alignment, Merge Cells may be better because it lets you decide the alignment afterward.
Step 4: Adjust the Formatting
After merging the cells, format the new larger cell so it looks intentional. You can change the font size, apply bold styling, add a border, fill the cell with a background color, or adjust vertical alignment.
For example, if you merged A1:F1 for a title, you might use bold text, a larger font, and a subtle fill color. A clean title instantly makes the worksheet easier to scan. It is the spreadsheet equivalent of putting a sign above the door instead of making people guess which room they are entering.
Here is a simple example:
- Select A1:F1.
- Type Monthly Expense Report in A1.
- Click Home > Merge & Center.
- Apply bold formatting and increase the font size.
Now your worksheet has a clear, professional title across the top.
How to Merge Cells Without Losing Data
If your goal is to combine the contents of several cells into one cell, do not use the merge button by itself. Use a formula first, then merge only if needed for formatting.
For example, suppose:
- A2 contains John
- B2 contains Smith
- C2 contains Sales
To combine those values into one cell, use:
=A2&" "&B2&" - "&C2
This returns:
John Smith – Sales
You can also use:
=TEXTJOIN(" - ",TRUE,A2:C2)
This is helpful when you want a delimiter such as a space, comma, dash, or line break between values. After the formula gives you the result you want, copy it and paste it as values if necessary. That way, you keep the combined information instead of accidentally deleting parts of it through a standard cell merge.
How to Unmerge Cells in Excel
Unmerging cells is just as easy as merging them. Select the merged cell, go to the Home tab, click the arrow beside Merge & Center, and choose Unmerge Cells.
When you unmerge a cell, Excel returns the area to separate cells. However, the content usually remains in the upper-left cell of the unmerged range. The other cells become blank. If you need the same value repeated across the newly separated cells, you will need to fill those cells manually or use a formula or fill command.
This is especially important when cleaning up imported reports. Many exported spreadsheets use merged cells for appearance, but those merged areas can become a headache when you need to sort, filter, analyze, or build formulas. Unmerging them is often the first step in turning a pretty report into usable data.
Why Is Merge & Center Grayed Out?
Sometimes the Merge & Center button is unavailable. This usually happens for one of several reasons:
- You are currently editing a cell.
- The selected range is formatted as an Excel Table.
- The worksheet may be protected.
- The workbook may be shared or restricted in a way that limits formatting changes.
First, press Enter or Esc to exit cell-editing mode. Then check whether your range is part of an Excel Table. Merging cells directly inside structured tables is often restricted because tables rely on a consistent row-and-column structure. If the sheet is protected, you may need permission to make formatting changes.
When Should You Merge Cells in Excel?
Merging cells is best for presentation. It works well when you are creating:
- Report titles
- Dashboard headers
- Printable forms
- Invoice headings
- Calendar layouts
- Section labels in templates
In these cases, merging can make a worksheet easier to read. A large centered heading across multiple columns tells the reader, “This section belongs together.” That is useful, especially when the spreadsheet will be printed, exported as a PDF, or shared with people who care more about readability than formulas.
When Should You Avoid Merging Cells?
You should avoid merged cells in ranges that need to be sorted, filtered, copied, pasted, referenced by formulas, converted into tables, or used for analysis. Merged cells can disrupt the normal grid structure of Excel. Since Excel is built around rows and columns, combining cells can make some operations less predictable.
For example, sorting a list that contains merged cells may produce errors if the merged areas are not the same size. Copying and pasting can also become awkward because Excel may not know how to fit the merged structure into the destination range. It is not that Excel is being difficult for funwell, probably not. It is that merged cells change the shape of the grid, and many data tools expect a consistent structure.
As a rule of thumb, merge cells for visual layout, not for raw data. If the worksheet is mainly for analysis, keep the grid clean. If the worksheet is mainly for presentation, merging may be acceptable in headers and decorative areas.
The Best Alternative: Center Across Selection
If you want text to appear centered across several columns without actually merging cells, use Center Across Selection. This option gives you a similar visual effect while preserving the individual cells underneath.
To use it:
- Select the cells across which you want the text centered.
- Press Ctrl + 1 to open the Format Cells dialog box.
- Go to the Alignment tab.
- Open the Horizontal dropdown.
- Choose Center Across Selection.
- Click OK.
This is excellent for horizontal headings. It keeps the cells separate, which makes sorting, filtering, selecting, and formula work much cleaner. The downside is that it works horizontally, not vertically. Still, for many titles and labels, it is the smarter option.
Common Mistakes When Merging Cells
Mistake 1: Merging Cells That Contain Separate Values
This is the classic mistake. Someone selects several cells, clicks merge, and then wonders why only one value remains. Always combine text with a formula first if the data matters.
Mistake 2: Using Merged Cells in Data Tables
Data tables work best when every row and column follows the same structure. Merged cells interrupt that structure and can cause problems with sorting, filtering, and formulas.
Mistake 3: Merging Too Many Areas in a Report
A few merged headers can look professional. Too many merged cells can make a workbook hard to edit. If every other row is merged, the worksheet may look fancy but behave like a folding chair with one loose screw.
Mistake 4: Forgetting About Future Editing
Before merging cells, ask yourself: will someone need to sort this, filter it, paste into it, or build formulas around it later? If yes, consider keeping the cells separate.
Practical Example: Creating a Clean Report Header
Imagine you are building a sales report with columns for Region, Product, Units Sold, Revenue, Cost, and Profit. You want a title across the top of the worksheet.
Here is a clean approach:
- Type Annual Sales Performance Report in cell A1.
- Select cells A1:F1.
- Click Home > Merge & Center.
- Apply bold text, increase the font size, and add a light fill color.
- Keep the actual data table below unmerged.
This gives you a polished report title while keeping the data area functional. The title looks good, and the table below can still be sorted, filtered, and analyzed. Everyone wins, including your future self, who will not have to untangle formatting chaos at 4:58 p.m. on a Friday.
Keyboard Shortcut for Merging Cells in Excel
Excel does not have a single universal one-key shortcut for merging cells, but Windows users can use ribbon key sequences. For example, pressing Alt, then H, then M opens the merge menu on the Home tab. From there, you can choose the merge option you need.
Common sequences include:
- Alt + H + M + C: Merge & Center
- Alt + H + M + A: Merge Across
- Alt + H + M + M: Merge Cells
- Alt + H + M + U: Unmerge Cells
These shortcuts may vary slightly depending on Excel version, language, and operating system, but the ribbon sequence is useful if you prefer keyboard navigation.
of Real-World Experience: What Merging Cells Teaches You After Enough Spreadsheet Battles
After working with enough Excel files, you start to notice a pattern: merged cells are usually created with good intentions. Nobody wakes up and says, “Today I shall sabotage a workbook.” People merge cells because they want a title to look centered, a form to look neat, or a report to look like it belongs in a meeting instead of a recycling bin. And honestly, that is fair. Visual clarity matters.
The trouble begins when a worksheet that was designed for presentation later becomes a worksheet used for analysis. A manager asks someone to sort it by date. A teammate wants to filter by region. Another person tries to paste new rows into the middle. Suddenly, those elegant merged headers and grouped labels become tiny spreadsheet speed bumps. They are not always disastrous, but they do make routine tasks more complicated.
One practical habit I recommend is separating “presentation zones” from “data zones.” The top few rows of a report can use merged cells for titles, subtitles, and branding. That is usually harmless. But once the actual table begins, keep the grid clean. Every column should have one clear header. Every row should represent one record. Every cell should hold one kind of value. This structure makes sorting, filtering, PivotTables, formulas, and charts much easier.
Another lesson: do not use merging to hide layout problems. If a column is too narrow, adjust the column width. If a heading needs more space, wrap the text. If you want a title centered across columns, try Center Across Selection. If you need a printable form, merged cells may be finebut build it knowing that the file is mainly for viewing or printing, not heavy data manipulation.
It is also smart to save a backup before making major formatting changes. This sounds boring because it is boring. But boring habits rescue exciting disasters. Before unmerging a large imported report, duplicate the sheet. Before merging a big range, check whether the cells contain values. Before sending a workbook to others, test common actions like sorting, filtering, printing, and copying. A five-minute test can prevent a thirty-minute cleanup session.
In team environments, merged cells can also create confusion because not everyone understands what they do. One person may think merging combines data. Another may think it only changes appearance. A third person may paste over a merged area and accidentally break the layout. If a workbook will be shared, keep formatting simple and predictable. The best Excel files are not just attractive; they are easy for the next person to understand.
My practical rule is simple: merge cells when the result improves readability and does not interfere with the worksheet’s purpose. Use them for report titles, section headers, dashboards, and printable forms. Avoid them in datasets, tables, lists, and anything that needs analysis. In other words, merged cells are like hot sauce: excellent in the right place, regrettable when poured over everything.
Final Thoughts
Learning how to merge cells in Excel is easy. Learning when not to merge cells is where the real spreadsheet wisdom begins. The basic process is simple: select your cells, go to the Home tab, choose Merge & Center or another merge option, and format the result. That is all it takes to create a clean title or polished layout.
However, always remember that merging is mainly a formatting feature. It does not safely combine the contents of multiple cells. If you need to join text or values, use formulas like &, CONCAT, or TEXTJOIN. If you want the look of a centered heading without changing the worksheet structure, use Center Across Selection.
Used wisely, merged cells can make your Excel files more readable and professional. Used everywhere, they can turn a spreadsheet into a puzzle box. Keep your data areas clean, merge only where it helps presentation, and your future self will thank youpossibly with coffee.


