Table of Contents >> Show >> Hide
- Step 1: Figure Out If Your Lawn Is Actually Dying
- Step 2: Know Your Grass Type & Perfect Timing
- Step 3: Start with the Soil (The Root of the Problem)
- Step 4: Clear, Mow Low, and Prep the Surface
- Step 5: Choose the Right Grass Seed
- Step 6: Overseed Like a Pro
- Step 7: Water for Recovery, Not Drama
- Step 8: Feed, But Don’t Burn
- Step 9: Tackle Weeds, Pests & Disease the Smart Way
- Step 10: Lock In Your New Lawn with Better Habits
- Real-Life Lawn Comeback Experiences & Practical Lessons
- Conclusion
If your lawn crunches under your feet, looks like it’s auditioning for a desert movie, or has more bald spots than a rec league bowling team, take a breath. A tired, brown, patchy yard doesn’t always mean you need a full, expensive restart. In many cases, you can bring it backdenser, greener, and tougher than beforewith a smart, step-by-step lawn rejuvenation strategy.
This guide pulls together practical recommendations from turf specialists, university extensions, and pro landscapers and distills them into a clear plan you can actually followno mystery potions, no gimmicks, and no “just water more” nonsense.
Step 1: Figure Out If Your Lawn Is Actually Dying
Dormant vs. dead grass
Brown grass isn’t always dead; sometimes it’s simply in survival mode. Cool-season grasses (like Kentucky bluegrass, perennial ryegrass, tall fescue) often go dormant in heat or drought. Warm-season grasses (like Bermuda, zoysia, St. Augustine) can tan out in cooler months. Dormant grass has living crowns at the base; dead grass is dry all the way through.
Do a quick test: grab a handful and gently tug. If the turf offers resistance and the base near the soil still shows a hint of cream or pale green, there’s life. If it lifts like an old doormatroots and allit’s gone in that spot and will need reseeding or resodding.
Look for patterns, pests, and problems
Before you fix anything, diagnose the “why”:
- Spots near sidewalks/driveways: Heat or salt damage.
- Thin lawn under trees: Shade stress and root competition.
- Soft, spongy layer: Excess thatch holding water and suffocating roots.
- Loose turf with chewed roots: Possible grubs or other insects.
- Irregular, spreading patches: Disease, compaction, or poor drainage.
The revival plan works best when tailored to the real cause. Guessing is how people waste money on products that don’t help.
Step 2: Know Your Grass Type & Perfect Timing
Rejuvenation success is 50% technique, 50% timing.
- Cool-season lawns (North & Transition Zone): Best renovation window is late summer to early fall, when soil is warm, air is cooler, and weeds are less aggressive.
- Warm-season lawns (South): Best time is late spring to early summer once the grass is fully greened up and actively growing.
Working with your grass’s growth cycle gives new seed or recovering turf the best chance to root deeply and outcompete weeds.
Step 3: Start with the Soil (The Root of the Problem)
Test your soil
Healthy lawns start with balanced soil. A professional or extension-service soil test tells you pH and nutrient levels so you’re not guessing with fertilizers.
- Target pH: Around 6.0–7.0 for most turfgrasses.
- If pH is low: Add lime as recommended.
- If pH is high: Elemental sulfur or organic amendments may be advised.
Correcting soil issues can quietly fix “mystery” weak lawns that never seem to respond to water or fertilizer.
Relieve compaction & thatch
Compacted soil and thick thatch block air, water, and nutrients from reaching roots. That’s how lawns slowly suffocate.
- Core aeration: Use a machine that pulls plugs of soil out of the ground. Focus on high-traffic, compacted, or thin areas.
- Dethatching: If thatch exceeds about 1/2 inch, use a dethatching rake or power dethatcher.
Aeration plus dethatching sets the stage for seed-to-soil contact and deeper rootingthe backbone of any real lawn comeback.
Step 4: Clear, Mow Low, and Prep the Surface
Now it’s time to clean up what’s left so new growth has room to thrive.
- Mow existing grass short (about 2 inches for most cool-season types) to open the canopy.
- Bag or rake up clippings, leaves, sticks, and dead material.
- Loosen bare soil lightly with a rake so it’s crumbly, not crusted.
A rough, open surface is ideal: your seed should land on soil, not sit on a slick layer of debris hoping for a miracle.
Step 5: Choose the Right Grass Seed
Putting random bargain-bin seed on your lawn is like patching a leather sofa with duct tape. Technically something is there, but you’ll regret it.
- Match your region and sun exposure.
- Look for improved, disease-resistant blends.
- Avoid mixes heavy in annual ryegrass if you want long-term results.
- Use shade-tolerant blends for areas under trees instead of forcing full-sun grasses to suffer.
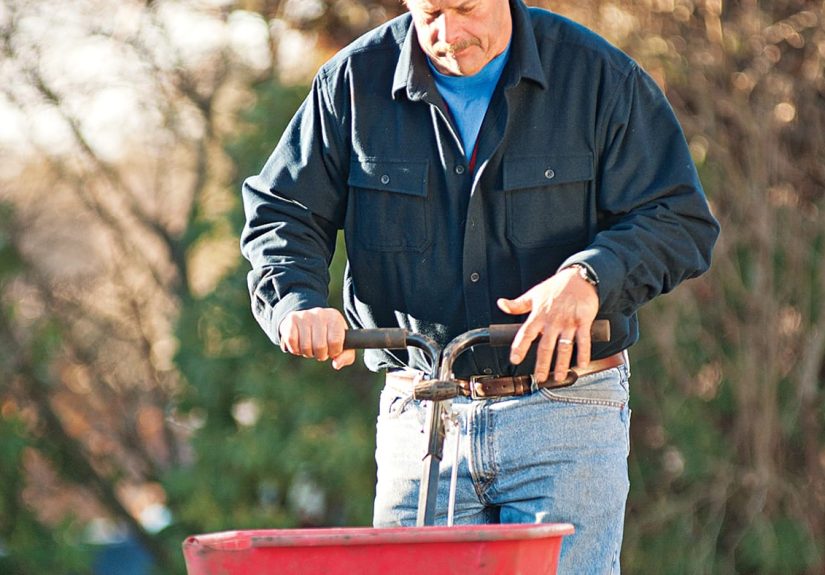
Step 6: Overseed Like a Pro
Spread evenly
Use a broadcast or drop spreader so you’re not creating polka-dot grass. Apply seed in two passes at right angles to each other for consistent coverage based on the bag’s overseeding rate.
Topdress smartly
Lightly rake to pull seed into the top 1/8–1/4 inch of soil. Then add a thin layer of compost or high-quality topsoiljust enough to cover about 30–50% of the seed. This protects from birds, keeps moisture more stable, and feeds microbes that support root growth.
Step 7: Water for Recovery, Not Drama
Watering makes or breaks your lawn revival. The goal: keep the top layer consistently damp for new seed, then transition to deeper, less frequent watering.
- Weeks 1–2 (germination): Light, frequent watering 2–3 times a day to keep the surface moist, not soggy.
- Weeks 3–4: Reduce frequency, increase depth. Aim for about 1 inch of water per week total from rainfall plus irrigation.
- After establishment: Deep, infrequent watering (about 1 inch once or twice per week) to train roots downward.
If water is running off, you’re applying too fast. If the soil is constantly swampy, roots will rot and weeds will party.
Step 8: Feed, But Don’t Burn
Rejuvenating lawns need nutrition, but precision beats “more.”
- Use a starter fertilizer at seeding time if your soil test recommends phosphorus.
- Choose a slow-release nitrogen product to sustain steady growth without surge-and-crash.
- Avoid heavy fertilizing in extreme heat or drought when grass is stressed.
Think of fertilizer as balanced fuel, not an energy drink chugged on an empty stomach.
Step 9: Tackle Weeds, Pests & Disease the Smart Way
Your lawn is trying to heal; don’t suffocate it in chemicals unless they’re truly needed and correctly timed.
- Weeds: Hand-pull or spot-treat broadleaf weeds once your new grass has been mowed a few times. Skip pre-emergent herbicides at seedingthey also block grass seed.
- Pests: If whole sections lift easily and roots are gone, consider a grub issue. Use labeled products at proper timing if confirmed.
- Disease: Improve drainage, avoid evening watering, don’t overfertilize. Fungicides are a last step, not the first.
The thicker and healthier your turf becomes, the fewer weed and disease problems you’ll fight next year.
Step 10: Lock In Your New Lawn with Better Habits
Rejuvenation isn’t just a one-time project; it’s a reset of how you treat your yard.
- Mow high: For most cool-season grasses, 3–4 inches. Taller blades shade soil, discourage weeds, and deepen roots.
- Follow the 1/3 rule: Never remove more than one-third of the blade height in a single mowing.
- Leave clippings: Mulched clippings return nutrients and organic matter.
- Protect high-traffic areas: Use paths or pavers where people actually walk.
- Plan an annual tune-up: Light aeration and overseeding keep your lawn young.
Real-Life Lawn Comeback Experiences & Practical Lessons
The theory is great, but nothing beats seeing how this works in real yards. Here are experience-based insights drawn from homeowners, lawn pros, and renovation projects that mirror a classic “This Old House” approachcareful diagnosis, solid prep, and patient follow-through.
Experience #1: The “Burned-Out Suburban Front Yard”
A typical cool-season lawn spent one summer under brutal heat and random watering. By fall it was 60% brown, compacted from parking, and full of crabgrass. Instead of tearing everything out, the homeowner:
- Ran a soil test and discovered low pH and low potassium.
- Core-aerated twice in different directions.
- Topdressed with compost and overseeded with a tall fescue/bluegrass blend.
- Watered lightly 2–3 times a day for two weeks, then shifted to deep watering.
By the next spring, the lawn was thicker than pre-damage levels. The big lesson: fixing compaction plus using region-appropriate seed beat any quick-fix fertilizer binge.
Experience #2: Shaded Backyard with “Permanent Bald Spots”
This yard had trees that grew fuller each year while the grass underneath slowly disappeared. Repeated reseeding with full-sun mixes never worked. The turnaround came when the owner:
- Switched to a shade-tolerant grass blend instead of fighting nature.
- Pruned lower branches to allow filtered light and better airflow.
- Added a thin compost layer to improve moisture retention and soil life.
- Accepted that very deep shade needed mulch and paths, not turf.
The result wasn’t just greener; it was stable. Key takeaway: choose the right grassand in the darkest zones, choose not to force grass at all.
Experience #3: “Patchwork Lawn” from Dog Spots and Neglect
Here, the problem was concentrated damage: pet urine spots, kids’ play zones, and no consistent care. The owners:
- Scraped out dead patches down to soil and lightly tilled.
- Flushed recent pet spots with water to dilute salts.
- Overseeded patches using the same blend as the rest of the yard for a uniform look.
- Set a simple routine: weekly mowing at 3.5 inches and measured watering.
Within a season the lawn looked cohesive instead of quilted. Lesson learned: small, targeted repairs plus consistent habits beat starting over every spring.
Experience #4: Full Renovation vs. Rescue
Some lawns truly are too far gonefilled with weedy grasses, riddled with thatch, or destroyed by long-term neglect. In one case, a homeowner debated between endless patching and a clean slate. After assessing that more than 70% of the lawn was undesirable turf and invasive weeds, they:
- Used a non-selective herbicide according to label directions to remove existing vegetation.
- Waited the recommended period, then aerated, graded low spots, and improved soil with compost.
- Seeded carefully in the ideal season with a quality blend.
The result: a healthier lawn that actually needed less water and fewer chemicals long-term. The experience highlights an important truth: sometimes the smartest “rejuvenation” is a well-planned restart instead of nursing a lawn that’s 90% wrong grass.
Across these scenarios, a pattern emerges: diagnose first, respect timing, improve soil, choose the right seed, and commit to simple, repeatable maintenance. That’s the real “pro secret” behind dramatic before-and-after results.
Conclusion
A dying lawn isn’t a verdictit’s feedback. When you read the signs, work with your grass type and climate, and build healthier soil, your yard can come back thicker, greener, and more resilient than it’s ever been. Skip the gimmicks, trust the process, and in a season or two you’ll have the kind of lawn that looks like it belongs on a classic home show: earned, not faked.
sapo: Is your lawn more beige than green and embarrassingly crunchy underfoot? Don’t rip it out yet. This in-depth guide shows you exactly how to diagnose what went wrong, rebuild your soil, overseed the right way, water smarter, and lock in healthier, thicker turfusing proven techniques trusted by lawn pros and extension experts. Follow these practical steps (plus real-world success stories) to transform your tired yard into a lush, durable lawn without wasting money on quick fixes that don’t last.


