Table of Contents >> Show >> Hide
- Why Screw Holes Fail in Chipboard
- Tools and Materials You May Need
- Step 1: Remove the Screw and Clean the Hole
- Step 2: Choose the Right Repair Method
- Method 1: Repair a Small Stripped Screw Hole with Toothpicks and Wood Glue
- Method 2: Use a Wood Dowel for a Stronger Particle Board Screw Hole Repair
- Method 3: Fix a Large or Crumbling Hole with Epoxy Putty
- Method 4: Fill Cosmetic Screw Holes with Wood Filler
- Method 5: Use a Larger or Longer Screw Carefully
- Method 6: Install Threaded Inserts for Repeated Assembly
- How to Repair a Loose Cabinet Hinge in Chipboard
- How to Prevent Screw Holes from Stripping Again
- Common Mistakes to Avoid
- When Replacement Is Better Than Repair
- Practical Examples
- Experience-Based Notes: What Actually Works in Real-Life Chipboard Repairs
- Conclusion
Chipboard, also called particle board, is the budget-friendly superhero of flat-pack furniture, cabinets, shelves, desks, and storage units. It does its job quietly until one day a hinge loosens, a screw spins like it has no purpose in life, or a drawer slide wobbles every time you open it. The problem? Particle board is made from compressed wood particles and resin, so once a screw hole strips out, the material around it can crumble instead of gripping like solid wood.
The good news is that you do not have to throw out the whole cabinet, bookcase, or nightstand just because one screw hole has given up. With the right repair method, you can rebuild the hole, restore grip, and make the piece useful again. This guide explains how to repair screw holes in chipboard using practical methods such as wood glue and toothpicks, dowel plugs, epoxy putty, wood filler, larger screws, threaded inserts, and better pilot-hole technique.
Whether you are fixing a loose cabinet hinge, a stripped screw hole in particle board furniture, or a blown-out hole in a chipboard shelf, the secret is simple: choose the repair based on how damaged the hole is and how much weight the screw needs to hold. Tiny cosmetic hole? Easy. Door hinge hanging on for dear life? Bring out the dowel or epoxy, my friend.
Why Screw Holes Fail in Chipboard
Particle board is not weak in every situation, but it is less forgiving than plywood or solid wood. A screw depends on surrounding material to bite into its threads. In chipboard, that surrounding material is made of small wood particles bonded together. Once those particles crush, swell, or break loose, the screw no longer has a strong path to grip.
Common causes of stripped screw holes
- Over-tightening: Driving a screw too hard can crush the fibers around the hole.
- Repeated assembly: Taking flat-pack furniture apart and putting it back together can weaken the original holes.
- Moisture damage: Particle board swells when exposed to water, and swollen board loses holding power.
- Wrong screw type: Fine-thread screws often do not bite well in low-density board.
- No pilot hole: Forcing a screw into chipboard can split or crumble the material.
- Heavy stress: Hinges, drawer slides, brackets, and shelf supports put repeated pressure on screw holes.
Before you start the repair, inspect the hole. If the board is dry and mostly intact, a simple glue-and-toothpick repair may work beautifully. If the hole is oversized, cracked, or carrying weight, use a dowel, epoxy, or threaded insert for a stronger fix.
Tools and Materials You May Need
You will not need every item on this list. Choose based on the repair method that fits your project.
- Wood glue
- Wooden toothpicks, matchsticks, bamboo skewers, or dowels
- Two-part epoxy putty or epoxy wood filler
- Wood filler for small cosmetic holes
- Utility knife or flush-cut saw
- Drill and drill bits
- Screwdriver or driver with adjustable clutch
- Sandpaper, 120- to 220-grit
- Putty knife
- Clamps, if needed
- Replacement screws, preferably coarse-thread screws for particle board
- Threaded inserts or wood anchors for high-stress repairs
- Dust mask or respirator, eye protection, and a vacuum
Safety matters here. Sanding or drilling particle board can create fine dust, so work in a ventilated area, wear eye protection, and control dust with a vacuum or dust collection. If the piece is old, water-damaged, or crumbly, be extra careful because the board may release more dust while you work.
Step 1: Remove the Screw and Clean the Hole
Start by removing the loose screw and any attached hardware. If the screw spins without backing out, gently pull the hardware away while turning the screw counterclockwise. Avoid yanking because chipboard can tear out in chunks, and nobody wants a repair project to become a small indoor demolition event.
Once the screw is out, clean the hole. Use a small brush, toothpick, or vacuum nozzle to remove loose particles. If there are raised edges around the hole, trim them lightly with a utility knife. The repair material needs a clean surface to bond properly.
Step 2: Choose the Right Repair Method
There is no single best way to repair screw holes in chipboard. The right method depends on the size of the damage and the function of the screw.
Use this quick guide
- Small stripped hole: Use toothpicks or matchsticks with wood glue.
- Medium hole: Use a glued dowel or bamboo skewer.
- Large blown-out hole: Use epoxy putty or drill and plug with a dowel.
- Cosmetic unused hole: Use wood filler.
- High-stress hinge or bracket: Use a dowel plug, threaded insert, or relocation method.
- Weak repeated-use joint: Consider threaded inserts or confirmat-style fasteners.
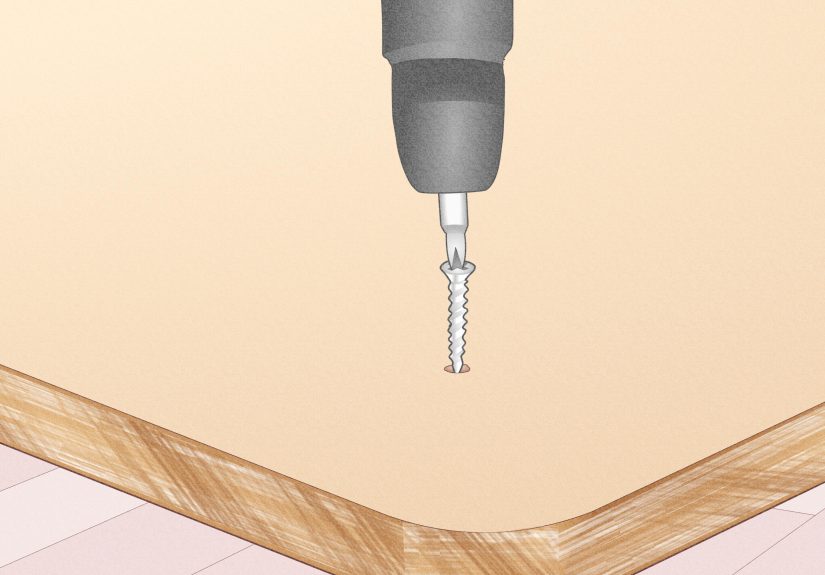
Method 1: Repair a Small Stripped Screw Hole with Toothpicks and Wood Glue
This is the classic quick fix, and it works surprisingly well for light-duty repairs. It is best for small screws in cabinet hinges, drawer slides, trim, lightweight brackets, and furniture panels where the surrounding chipboard is still solid.
How to do it
- Remove the screw and hardware.
- Dip several wooden toothpicks or matchsticks in wood glue.
- Push them firmly into the stripped screw hole until the hole is packed tightly.
- Break or cut the toothpicks flush with the surface.
- Wipe away excess glue with a damp cloth.
- Let the glue cure fully according to the label.
- Drill a small pilot hole in the center.
- Reinstall the screw by hand or with a low-torque driver setting.
The toothpicks give the screw fresh wood fibers to bite into, while the glue bonds everything together. Do not rush the drying time. If you drive the screw back in while the glue is still wet, the repair may feel tight at first but loosen later.
Method 2: Use a Wood Dowel for a Stronger Particle Board Screw Hole Repair
For a stronger and cleaner repair, drill out the damaged screw hole and glue in a wood dowel. This method is excellent for cabinet hinges, bed frames, desks, shelves, and particle board furniture that carries more stress.
How to repair with a dowel plug
- Choose a dowel slightly larger than the damaged hole.
- Drill the stripped hole to match the dowel diameter.
- Test-fit the dowel. It should slide in snugly without splitting the board.
- Apply wood glue inside the hole and around the dowel.
- Insert the dowel and tap it gently until seated.
- Let the glue cure completely.
- Trim the dowel flush with a saw or utility knife.
- Sand smooth if needed.
- Mark the screw location and drill a pilot hole.
- Reattach the hardware.
A dowel repair is stronger than simply filling the hole because it replaces the crushed particle board with a solid wood core. For hinge screws, this is often the most dependable DIY repair. If the original hole is near an edge, drill carefully and avoid making the new hole so large that the edge breaks apart.
Method 3: Fix a Large or Crumbling Hole with Epoxy Putty
When the hole is too damaged for toothpicks and too irregular for a simple dowel, epoxy putty can save the day. Two-part epoxy wood repair products harden into a durable material that can often be sanded, drilled, and shaped after curing.
This method is useful when the particle board has a crater, missing chunks, or crushed fibers around the screw hole. It is also helpful when you need to rebuild the surface before drilling a new pilot hole.
How to use epoxy putty
- Remove all loose particles from the damaged area.
- Lightly roughen the inside of the hole so the epoxy can grip.
- Mix the epoxy putty exactly as directed by the manufacturer.
- Press the epoxy firmly into the hole and surrounding damaged area.
- Shape it slightly proud of the surface so you can sand it flush later.
- Let it cure fully. Do not guess; check the product label.
- Sand the repair smooth.
- Drill a pilot hole before reinstalling the screw.
Epoxy is strong, but it is not magic concrete from the woodworking gods. If the board around the repair is soft from water damage, the epoxy may hold while the surrounding chipboard fails. In that case, reinforce the area with a larger plate, move the screw location, or replace the damaged panel.
Method 4: Fill Cosmetic Screw Holes with Wood Filler
If the screw hole no longer needs to hold a screw, use wood filler. This is the best option for old hardware holes, small dents, nail holes, and visible gaps you want to hide before painting or refinishing.
How to fill unused holes
- Clean the hole and remove loose material.
- Press wood filler into the hole with a putty knife.
- Overfill slightly to allow for shrinkage or sanding.
- Let it dry fully.
- Sand flush with the surface.
- Prime and paint, or touch up the finish as needed.
Wood filler is not usually the strongest choice for screws that must carry load. Some fillers can be drilled, but for a hinge or bracket, a dowel or epoxy repair is more reliable. Think of filler as makeup, not muscle.
Method 5: Use a Larger or Longer Screw Carefully
Sometimes you can repair a stripped screw hole in particle board by using a slightly larger screw. This works only when the surrounding board is still strong and there is enough material for the screw to grip.
Choose a screw that is slightly wider, not wildly larger. A screw that is too large can split the board, bulge the surface, or poke through the other side. If you use a longer screw, measure the panel thickness first. The goal is repair, not creating a surprise metal spike on the outside of your furniture.
Tips for better screw grip
- Use coarse-thread screws for chipboard and particle board.
- Drill a pilot hole slightly smaller than the screw core.
- Drive the screw slowly.
- Use a screwdriver for final tightening.
- Stop as soon as the screw is snug.
Over-tightening is one of the fastest ways to ruin the repair. Particle board does not reward brute force. It rewards patience, pilot holes, and not pretending your drill is a race car.
Method 6: Install Threaded Inserts for Repeated Assembly
If the screw will be removed and reinstalled often, consider threaded inserts. These small metal inserts create durable machine threads inside the board. They are useful for desks, modular furniture, removable panels, and knock-down furniture that needs stronger connections.
To install one, drill the correct-size hole, drive the insert into place, and use a matching machine screw. Follow the insert manufacturer’s size chart closely. In particle board, the hole must be accurate: too small and the board may split; too large and the insert may spin.
How to Repair a Loose Cabinet Hinge in Chipboard
Cabinet hinges are one of the most common particle board repairs because cabinet doors move constantly. A loose hinge screw may start as a tiny wobble and end as a door that hangs like it has lost all enthusiasm.
Best approach for hinge screws
For a light wobble, try the toothpick-and-glue method. For a hinge that has pulled out or enlarged the hole, use a dowel repair. If the hinge cup area is damaged, use epoxy putty to rebuild the surrounding surface, then drill fresh pilot holes. For severe damage, move the hinge slightly and use a hinge-mounting plate if the cabinet design allows it.
When reinstalling the hinge, align the door before tightening every screw. Tighten each screw gradually instead of cranking one screw all the way down first. This keeps the hinge seated evenly and reduces stress on the repaired holes.
How to Prevent Screw Holes from Stripping Again
The best repair is the one you do not have to repeat next month. After fixing the hole, use better fastening habits to protect the board.
Preventive tips
- Always drill pilot holes in chipboard before driving screws.
- Use coarse-thread particle board screws or screws designed for composite wood.
- Avoid removing and reinstalling the same screw repeatedly.
- Use a clutch setting on your drill to prevent over-driving.
- Hand-tighten the final turns for better control.
- Keep particle board furniture away from moisture.
- Use washers or mounting plates when hardware needs a wider bearing surface.
- Do not hang heavy loads from thin chipboard panels unless the design supports it.
Moisture is especially important. Once particle board swells, it rarely returns to its original strength. If you are repairing a bathroom cabinet, kitchen sink base, laundry shelf, or garage storage unit, check for water sources before you repair the screw holes. Fix the leak first, then fix the board.
Common Mistakes to Avoid
Using only glue in a large hole
Wood glue works well when it bonds wood to wood. It does not work well as a giant blob of structure by itself. If the hole is oversized, add toothpicks, dowels, or another solid filler material.
Skipping cure time
Most repairs fail because someone gets excited and drives the screw back in too soon. Let glue, filler, or epoxy cure fully before drilling and reinstalling hardware.
Driving screws too fast
High speed and high torque can strip particle board instantly. Use slow speed, light pressure, and a pilot hole.
Repairing rotten or soaked board
If the chipboard is swollen, flaky, or soft far beyond the screw hole, a local repair may not last. Reinforce the area or replace the damaged panel.
Using the wrong filler for load-bearing screws
Standard wood filler is fine for appearance, but it may not hold screws under stress. Use a dowel, epoxy, insert, or relocation method for structural repairs.
When Replacement Is Better Than Repair
Repair is practical when the surrounding board is dry and stable. Replacement is smarter when the particle board is badly swollen, cracked across the panel, moldy, or crumbling in a wide area. A cabinet side panel that has lost its structure will continue to fail even if one screw hole is patched perfectly.
For furniture with sentimental value or a piece that fits your room perfectly, reinforcement may be worth the effort. Add a backing block, metal bracket, repair plate, or new internal cleat to spread the load. For cheap flat-pack furniture that has already survived three moves and one mysterious basement flood, replacement may be the kinder option.
Practical Examples
Example 1: Loose bookcase shelf pin
If a shelf pin hole is enlarged, fill the hole with epoxy putty, let it cure, and drill a new hole using a shelf-pin jig for accuracy. If several holes are damaged, consider installing a vertical shelf standard instead.
Example 2: Drawer slide screw keeps spinning
Remove the slide, pack the hole with glue-coated toothpicks, let it cure, drill a pilot hole, and reinstall the screw. If the drawer carries heavy items, use a slightly longer screw only if the panel thickness allows it.
Example 3: Cabinet door hinge pulled out
Drill the damaged holes clean, glue in wood dowels, trim flush, drill new pilot holes, and reinstall the hinge. For severe damage, add a hinge repair plate to spread the stress across a larger area.
Experience-Based Notes: What Actually Works in Real-Life Chipboard Repairs
After working with particle board furniture, one lesson becomes obvious very quickly: the board usually fails slowly before it fails suddenly. A hinge starts with a tiny wiggle. A drawer slide begins to click. A screw turns one extra quarter-turn without tightening. That is the furniture politely whispering, “Please help me before I embarrass us both.” The sooner you repair the hole, the easier the job becomes.
For small repairs, the toothpick-and-glue method is often more effective than people expect. The trick is to pack the hole tightly, not casually drop in one lonely toothpick and hope for a miracle. Use enough wood pieces to create resistance, add glue generously but not messily, and let it dry. When the screw goes back in, drive it slowly. You should feel the threads bite. If the screw spins again, the hole was too damaged for that method, and it is time to upgrade to a dowel or epoxy repair.
For cabinet hinges, dowels are usually the most satisfying fix. They turn a crumbly hole into a fresh wood core. A common mistake is using a dowel that is too small. If the dowel is loose in the drilled hole, the repair depends too much on glue thickness. A snug fit is better. Another helpful habit is marking the drill bit with tape so you do not drill through the cabinet wall. Particle board panels are often thin, and drilling through the finished outside surface is the kind of mistake that makes a person stare silently at a wall for several minutes.
Epoxy putty is the rescue tool for ugly damage. It is especially useful when a screw hole has become a crater or when the surface around the hole has broken away. However, epoxy needs clean, firm material around it. If the chipboard is swollen from water, the repair may look strong but fail later because the surrounding board keeps crumbling. In wet areas, sealing exposed edges after repair can help slow future moisture damage.
Another experience-based tip: do not use full drill power when reinstalling hardware. A driver can go from “almost snug” to “congratulations, you stripped it again” in one second. Set the clutch low or finish by hand. Particle board responds well to gentle pressure and properly sized pilot holes. It responds badly to impatience, oversized screws, and heroic torque.
Finally, think about load. A tiny screw holding a decorative panel can survive a simple filler repair. A hinge holding a heavy cabinet door needs something stronger. A shelf loaded with books needs reinforcement, not wishful thinking. The smartest repair is not always the fastest one; it is the one that matches the job the screw has to do. When in doubt, strengthen the hole, spread the load, and let the repair cure longer than you think. Future you will appreciate not having to fix the same wobbly hinge again next weekend.
Conclusion
Repairing screw holes in chipboard is completely doable when you match the fix to the damage. For small stripped holes, wood glue and toothpicks can restore grip quickly. For stronger particle board screw hole repair, a glued dowel creates a fresh anchor point. For large, crumbling, or blown-out holes, epoxy putty can rebuild missing material before you drill a new pilot hole. Cosmetic holes can be filled with wood filler, while high-stress or repeatedly assembled joints may need threaded inserts or repair plates.
The biggest rule is simple: do not treat chipboard like solid hardwood. Drill pilot holes, use coarse-thread screws, avoid over-tightening, protect the board from moisture, and give glue or epoxy enough time to cure. Do that, and your furniture can go from wobbly disaster to sturdy comeback story. Not bad for a material that once looked like it was one screw turn away from retirement.