Table of Contents >> Show >> Hide
- What Makes a Saree Blouse Different?
- Tools and Materials You Will Need
- How to Sew a Blouse for a Saree: 14 Steps
- Step 1: Take Accurate Body Measurements
- Step 2: Choose the Right Fabric
- Step 3: Prewash and Press the Fabric
- Step 4: Draft or Select a Basic Saree Blouse Pattern
- Step 5: Add Seam Allowances and Mark the Grainline
- Step 6: Cut a Muslin Test Blouse First
- Step 7: Cut the Final Fabric and Lining
- Step 8: Transfer All Markings
- Step 9: Staystitch the Neckline and Armholes
- Step 10: Sew the Darts
- Step 11: Join the Shoulder and Side Seams
- Step 12: Finish the Neckline with Facing or Bias Binding
- Step 13: Sew and Attach the Sleeves
- Step 14: Add Closures, Finish Seams, and Press
- Common Fitting Problems and Quick Fixes
- Design Ideas for a Custom Saree Blouse
- Experience Notes: What Sewing a Saree Blouse Teaches You
- Conclusion
- SEO Tags
A well-fitted saree blouse can make even a simple saree look polished, elegant, and wonderfully intentional. It supports the drape, frames the neckline, balances the pallu, andwhen sewn correctlylets you move, sit, dance, eat, and breathe without negotiating with your outfit every five minutes. That is the dream, isn’t it?
Learning how to sew a blouse for a saree may look intimidating at first because the garment is small, structured, and close-fitting. Unlike a loose top, a saree blouse depends on accurate measurements, smart dart placement, clean neckline finishing, and careful pressing. But the process becomes much easier when you break it into clear steps. Think of it like making a tiny tailored jacket, except prettier and less likely to attend a board meeting.
This guide explains how to sew a saree blouse in 14 practical steps, from taking body measurements to attaching sleeves, finishing hooks, and checking the final fit. You can use this method for a classic short blouse with front or back opening, a lined blouse, or a beginner-friendly cotton practice version before cutting into silk, brocade, satin, or embroidered fabric.
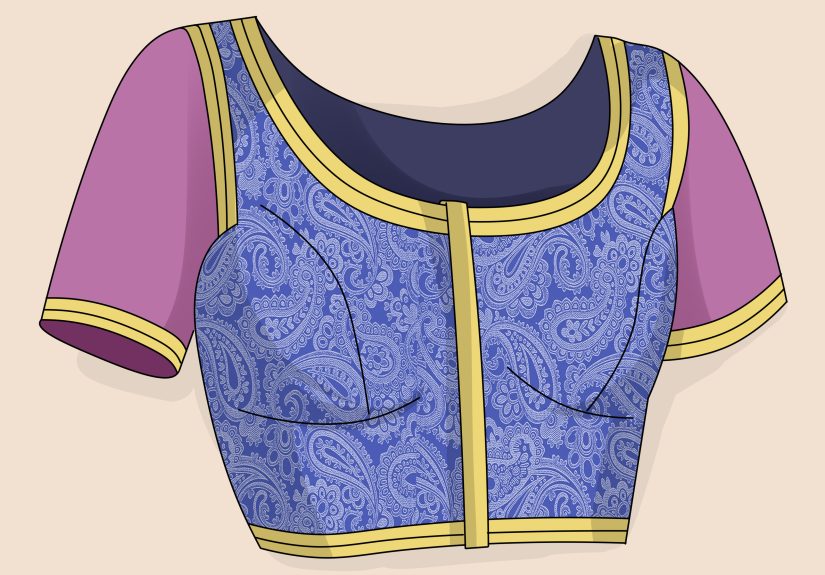
What Makes a Saree Blouse Different?
A saree blouse is designed to sit close to the body and work with the saree drape. It is usually cropped, shaped at the bust and waist, and finished with hooks, buttons, ties, or a zipper. The fit matters more than almost anything else. A blouse that is too loose at the shoulder will slip. A blouse that is too tight at the bust will pull. A blouse with an armhole that is too high will make waving hello feel like advanced engineering.
The secret is balance: enough structure to support the saree, enough ease to move comfortably, and enough neat finishing to make the blouse look professional from every angle.
Tools and Materials You Will Need
- Fashion fabric such as cotton, silk, brocade, raw silk, satin, linen blend, or blouse fabric that matches the saree
- Lining fabric, preferably lightweight cotton or soft voile for comfort
- Matching thread
- Measuring tape
- Pattern paper or newspaper for drafting
- Fabric scissors or rotary cutter
- Tailor’s chalk, washable marker, or tracing wheel
- Sewing pins or clips
- Sewing machine
- Iron and pressing cloth
- Hooks and eyes, snaps, buttons, or zipper
- Bias strips or facing pieces for neckline finishing
- Interfacing for plackets, necklines, or structured areas
How to Sew a Blouse for a Saree: 14 Steps
-
Step 1: Take Accurate Body Measurements
Start with careful measurements. This is the moment where your future blouse either becomes a graceful masterpiece or a tiny fabric argument. Measure the full bust, high bust, waist, shoulder width, back width, blouse length, front neck depth, back neck depth, armhole, sleeve length, sleeve round, and underbust if you want a more contoured fit.
Wear the same type of bra or undergarment you plan to wear with the finished blouse. Bust shape changes with support, and darts need to point toward the correct bust apex. Also decide whether the blouse will open at the front, back, or side. A front-opening blouse is practical for many beginners because hooks are easier to reach, while a back-opening blouse gives a cleaner front look.
-
Step 2: Choose the Right Fabric
For your first saree blouse, choose a stable woven fabric such as cotton, cotton silk, or lightweight brocade. Very slippery fabrics like satin and silk charmeuse are beautiful, but they can wiggle around on the cutting table like they have weekend plans. If you are sewing with delicate silk or sheer fabric, use extra pins, pattern weights, and a fine needle.
If your saree is heavily embroidered, you do not always need an equally dramatic blouse. A plain contrast blouse can look modern and elegant. If your saree is simple, a textured, printed, or embellished blouse can become the star of the outfit.
-
Step 3: Prewash and Press the Fabric
Prewash washable fabrics before cutting. Cotton can shrink, and a blouse that fits beautifully before washing should not become a doll-sized souvenir afterward. If the fabric is dry-clean only, steam press it gently with a pressing cloth instead of soaking it.
Press the fabric flat before placing the pattern. Wrinkles can distort the grainline and make your pieces uneven. Sewing rewards patience, especially the boring-looking patience involving an iron.
-
Step 4: Draft or Select a Basic Saree Blouse Pattern
You can use a commercial blouse pattern, trace an old blouse that fits well, or draft a basic saree blouse pattern from your measurements. A classic pattern usually includes front bodice pieces, back bodice pieces, sleeves, neckline facing or bias strips, waist band or lower edge allowance, and placket strips for hooks.
For a fitted blouse, darts are essential. Most traditional saree blouse drafts use front darts, back darts, and sometimes side or waist darts to shape the fabric around the bust and waist. If you prefer a smoother, more tailored look, you can convert some dart shaping into princess seams, but beginners should start with darts because they are easier to adjust.
-
Step 5: Add Seam Allowances and Mark the Grainline
Add seam allowances before cutting. A common allowance is 1/2 inch for side seams, shoulder seams, and sleeve seams, though you may want extra at the side seams for fitting adjustments. Add enough allowance at the front or back opening for the placket and hooks. Add hem allowance at the lower edge and sleeve hem.
Mark the grainline on each pattern piece. The grainline helps the blouse hang correctly and prevents twisting. Place the pattern so the grainline is parallel to the selvage or fold. Measure from both ends of the grainline arrow to the selvage; if the distance is equal, the pattern is straight.
-
Step 6: Cut a Muslin Test Blouse First
Before cutting expensive fabric, sew a test version from muslin, scrap cotton, or inexpensive fabric with a similar weight. This step is especially useful if you are sewing a blouse for a wedding, festival, performance, or important event. Nobody wants to discover a shoulder problem two hours before leaving the house.
Sew the muslin quickly with long stitches, then try it on. Check the bust, shoulder, neckline, armhole, waist, and blouse length. Mark any areas that pull, gape, wrinkle, or feel uncomfortable. Transfer those adjustments to the paper pattern before cutting the final fabric.
-
Step 7: Cut the Final Fabric and Lining
Lay the fabric right side down on a flat surface. Place the pattern pieces carefully, respecting the grainline, motifs, borders, and directional prints. If your fabric has embroidery or a large design, plan where the motifs will appear on the front and back. Symmetry is not required, but accidental awkward placement can be visually distracting.
Cut the main fabric first, then cut the lining using the same bodice pieces. If the blouse has thick embroidery, consider trimming bulky seams from the lining or using a plain matching fabric for comfort. Label each piece on the wrong side with chalk or small paper tags.
-
Step 8: Transfer All Markings
Mark darts, bust apex, center front, center back, shoulder points, sleeve notches, neckline, armholes, waistline, and placket fold lines. Accurate markings are the GPS of garment sewing. Skip them, and you may still arrive somewhere, but it might not be where you intended.
Use tailor’s tacks, chalk, washable marker, or tracing paper depending on the fabric. For delicate fabrics, test your marking tool on a scrap first. Some marks vanish politely; others move in permanently like difficult relatives.
-
Step 9: Staystitch the Neckline and Armholes
Staystitch around curved edges such as the neckline and armholes. Stitch just inside the seam allowance using a regular stitch length. This prevents curves from stretching while you handle the fabric.
This step is small but powerful. Saree blouses often have deep necklines, curved backs, and close armholes. If these areas stretch before finishing, the blouse may gape or sit unevenly. Staystitching keeps everything calm, behaved, and less dramatic than a soap opera.
-
Step 10: Sew the Darts
Fold each dart with right sides together, matching the dart legs. Pin from the wide end toward the point. Sew from the wide end to the tip, tapering smoothly. Do not backstitch at the dart point because it can create a bump. Instead, leave thread tails and knot them by hand.
Press vertical darts toward the center and bust darts downward or as directed by your pattern. Use a tailor’s ham or rolled towel to press curved areas without flattening the bust shape. Well-sewn darts create a smooth, flattering blouse; poorly pressed darts create little fabric mountains. We prefer elegance over geography.
-
Step 11: Join the Shoulder and Side Seams
With right sides together, stitch the shoulder seams. Press the seams open or toward the back, depending on fabric thickness and lining method. Then stitch the side seams, leaving extra allowance if you want room for final fitting adjustments.
Try the blouse on at this stage. Check whether the shoulder sits correctly, the bust has enough room, the neckline lies flat, and the waist feels secure but not suffocating. A saree blouse should fit close, not behave like a decorative corset designed by a villain.
-
Step 12: Finish the Neckline with Facing or Bias Binding
You can finish the neckline with a shaped facing, bias binding, or lining. For a structured blouse, facing gives a crisp edge. For a lightweight blouse, bias binding can be neat and less bulky. Apply lightweight interfacing to the facing if the fabric needs support.
Place the facing and blouse right sides together, match seams and notches, and stitch around the neckline. Trim and grade the seam allowances to reduce bulk. Clip inward curves carefully without cutting the stitching. Turn the facing inside, press, and understitch where possible so the facing stays hidden.
-
Step 13: Sew and Attach the Sleeves
Stitch each sleeve seam with right sides together. Press the seam open or toward the back. Hem the sleeve edge or attach any decorative trim before setting the sleeve into the armhole.
Turn the blouse wrong side out and the sleeve right side out. Slide the sleeve into the armhole so right sides meet. Match the sleeve seam to the underarm seam, then match the sleeve cap notches to the front and back armhole. Pin generously. Stitch slowly around the armhole, easing the sleeve cap smoothly. If puckers appear, remove a few stitches and try again. Sleeves are not enemies, but they do enjoy testing your character.
-
Step 14: Add Closures, Finish Seams, and Press
Prepare the front or back placket by folding and pressing the allowance. Add interfacing if the fabric is soft. Sew hooks and eyes by hand or machine, spacing them evenly so the blouse closes smoothly without gaps. You can also use snaps, buttons, tie strings, or a concealed zipper depending on the design.
Finish raw seams with zigzag stitching, serging, pinking shears, French seams, or binding. Hem the lower edge and sleeves. Give the blouse a final pressing from the wrong side using a pressing cloth. Let it cool flat before wearing; this helps the seams set beautifully.
Common Fitting Problems and Quick Fixes
The Bust Pulls Across the Front
If horizontal wrinkles appear across the bust, the blouse may need more bust width or a full bust adjustment. You can release the side seam slightly if you added extra seam allowance. If the pattern is the issue, adjust the dart position so it points toward the bust apex without ending exactly on it.
The Neckline Gapes
A gaping neckline often means the neckline stretched during handling or the pattern needs a small dart, tuck, or contour adjustment. Staystitching helps prevent this problem. For a finished blouse, you can sometimes correct minor gaping by tightening the shoulder seam or adding a small hidden dart near the neckline.
The Armhole Feels Tight
If the armhole cuts into the underarm, lower it slightly and reshape the curve. If the sleeve feels tight, check the bicep width. A saree blouse must allow arm movement because you will be adjusting the pallu, greeting people, eating, and possibly rescuing your pleats from a chair leg.
The Shoulder Keeps Slipping
If the shoulder drops, the shoulder width may be too wide or the back neckline may be too open. Narrow the shoulder seam or raise the back neckline slightly on the next version. For deep-back blouses, tie strings can add both beauty and support.
Design Ideas for a Custom Saree Blouse
Once you understand the basic blouse, you can customize almost everything. Try a sweetheart neckline, boat neck, square neck, V-neck, keyhole back, princess seams, puff sleeves, elbow-length sleeves, cap sleeves, or sleeveless design. Add piping along the neckline, contrast sleeves, tassel ties, mirror work, lace edging, or fabric-covered buttons.
For formal sarees, structured fabrics and lining give a refined finish. For casual sarees, breathable cotton blouses are comfortable and easy to wash. For party wear, experiment with metallic brocade, velvet, raw silk, or embroidered net layered over lining. The blouse is small, so it is a great place to use special fabric without buying yards and yards of it.
Experience Notes: What Sewing a Saree Blouse Teaches You
Sewing a saree blouse is one of those projects that politely exposes every shortcut you thought you could get away with. The garment is compact, but it contains many tailoring lessons: measurement, shaping, symmetry, pressing, finishing, and patience. If you have only sewn loose tops before, the first blouse may feel fussy. That is normal. A saree blouse has very little extra ease, which means small mistakes show up quickly. The good news is that small improvements also show up quickly.
One of the biggest lessons is that fit starts before sewing. Many beginners focus on the machine work, but the tape measure is really the opening act. Bust apex, shoulder slope, armhole depth, and waist shaping all affect comfort. Two people with the same bust measurement can need different dart positions. That is why a muslin test is not wasted fabric; it is a conversation with the pattern. The muslin tells you, “Move this dart,” “Give me more room here,” or “Please stop pretending this neckline is fine.” Listen to it.
Another practical experience is learning how much pressing changes the final look. A seam that looks homemade can suddenly look clean after being pressed correctly. Press darts over a curved surface, set seams before pressing them open, and avoid dragging the iron across delicate fabric. Pressing is not the glamorous part of sewing, but it is the quiet professional in the room.
Closures also deserve more respect than they usually get. Hooks and eyes may look simple, but uneven spacing can make the front edge ripple or gap. Mark hook placement carefully before sewing. If the blouse is snug, use closely spaced hooks at the bust and waist. For heavier fabrics, reinforce the placket with interfacing so the hooks do not pull through.
Fabric choice can make the same pattern behave completely differently. Cotton is forgiving and beginner-friendly. Silk is elegant but slippery. Brocade holds shape well but can be bulky at seams. Velvet looks luxurious but demands careful handling and pressing. When in doubt, sew one plain practice blouse first. Once the fit is reliable, you can confidently cut into the beautiful fabric you have been saving like treasure.
The final experience is emotional: do not expect perfection on the first attempt. A handmade saree blouse is a skill-building project. The second blouse will almost always be better than the first because your pattern has been corrected and your hands understand the process. By the third blouse, you may start looking at every saree and thinking, “I could make a blouse for that.” Congratulations. That is how fabric stashes begin.
Conclusion
Learning how to sew a blouse for a saree is a rewarding project for anyone who enjoys custom clothing. The process requires accurate measurements, careful cutting, clean dart sewing, stable neckline finishing, and patient fitting. Once you master the basic blouse, you can create endless variations for casual sarees, festive outfits, weddings, parties, and everyday wear.
The best advice is simple: start with a test blouse, press as you sew, and adjust the pattern to your body instead of forcing your body to obey the pattern. A saree blouse should feel secure, flattering, and comfortable. When it fits well, the saree drapes better, the outfit looks more expensive, and you get the satisfaction of saying, “Thanks, I made it”which is basically the sewing version of a mic drop.


