Table of Contents >> Show >> Hide
- Why Cutting Paper Straight Is Harder Than It Looks
- Before You Start: Set Yourself Up for a Straighter Cut
- 1. Cut with Long, Smooth Strokes Instead of Tiny Snips
- 2. Move the Paper, Not the Scissors
- 3. Fold or Score First, Then Cut Along the Edge
- Bonus Tips for Cleaner, Straighter Cuts
- Common Problems and Quick Fixes
- When Scissors Are Fine, and When You Might Want Another Tool
- Conclusion
- Real-Life Experiences with Cutting Paper Straight
- SEO Tags
Cutting paper should be easy. You grab the scissors, aim for the line, make a confident snip, and then somehow end up with an edge that looks like it lost a small argument with a squirrel. If that sounds familiar, good news: cutting paper straight is not a mysterious talent bestowed at birth. It is a skill, and like most skills, it gets dramatically better when you stop “just winging it” and start using a few simple techniques.
Whether you are trimming printer paper, cutting craft paper for a project, helping a child practice scissor skills, or trying to wrap a gift without producing accidental modern art, there are practical ways to improve your results fast. The trick is not brute force. It is control. Straight cuts come from the right setup, steady movement, and knowing what your other hand should be doing while your scissors do the dramatic part.
In this guide, you will learn three simple ways to cut paper straight with scissors, along with common mistakes, tool tips, and real-life experiences that make the whole process feel a lot less frustrating.
Why Cutting Paper Straight Is Harder Than It Looks
On the surface, cutting paper seems basic. But in practice, it asks your hands and eyes to cooperate like a tiny production team. One hand opens and closes the scissors. The other hand stabilizes and turns the paper. Your eyes track the line. Your grip has to stay relaxed enough for smooth movement but firm enough for control. If one part gets sloppy, the cut wanders.
That is why straight cuts often go wrong in predictable ways:
- You keep closing the blades in short, choppy bites.
- You move the scissors too much instead of moving the paper.
- You use dull or oversized scissors that drag or tear.
- You try to cut thick or slippery paper the same way you cut regular copy paper.
- You rush the last inch, where many otherwise decent cuts go to die.
The encouraging part is that none of these problems are permanent. A few small adjustments can clean up your cuts almost immediately.
Before You Start: Set Yourself Up for a Straighter Cut
Choose the Right Scissors
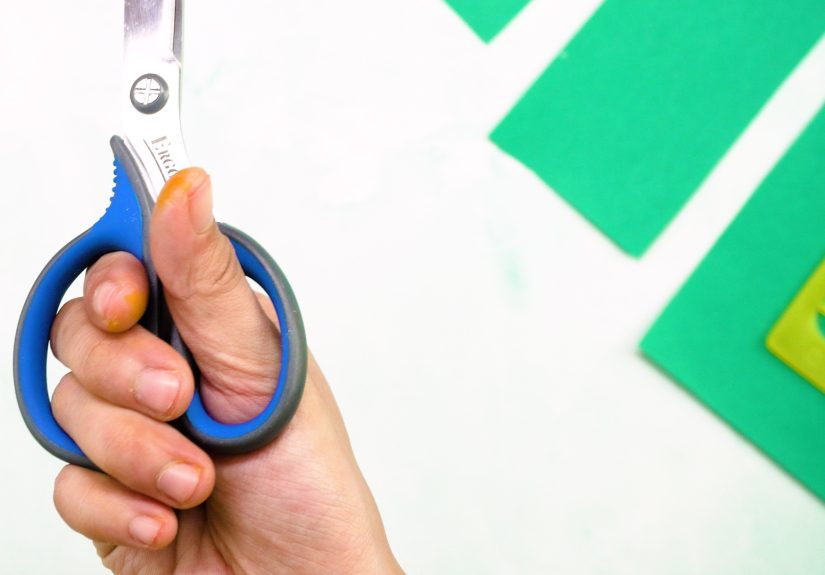
Not all scissors behave the same way. Small craft scissors can be excellent for detail work, while longer straight blades often make cleaner cuts on larger sheets because they cover more distance with each motion. For children, safety scissors sized for small hands are the better choice. For adults, a sharp, comfortable pair of paper or craft scissors usually works best.
Pick a Friendly Paper
Regular printer paper is the easiest place to practice. Construction paper is manageable, though it can feel softer. Cardstock is thicker and may need slower, more deliberate cutting. Tissue paper, glossy paper, and very thin decorative paper can slip, wrinkle, or snag if your technique is rushed.
Mark a Clear Line
If precision matters, draw a cutting line first. Use a ruler and a pencil, pen, or fine marker. A bold, visible line gives your eyes something concrete to follow. Freehand confidence is lovely, but a ruler is often the real hero of the craft table.
Sit or Stand Comfortably
Do not twist your wrist into a strange pretzel shape. Keep your shoulders relaxed, your elbows free, and the paper positioned where you can actually see the line. Half the battle is not fighting your own posture.
1. Cut with Long, Smooth Strokes Instead of Tiny Snips
The first and simplest way to cut paper straight is to use long, controlled strokes. Many people make a straight cut look jagged because they nibble at the edge with a series of nervous mini-snips. That creates little changes in direction every time the blades open and close.
How to Do It
- Open the scissors wider than you think you need to.
- Line the blades up with the cutting path.
- Start the cut and glide forward with a long closing motion.
- Do not fully stop after every snip unless the paper forces you to.
- Continue with smooth, overlapping strokes until you reach the end.
Think of it like driving a car smoothly down a lane instead of jerking the wheel every three seconds. The more continuous the motion, the straighter the result.
Why It Works
Longer strokes reduce the number of transitions in your cut. Fewer transitions mean fewer chances to drift off course. They also help the blades stay aligned with the edge of the paper instead of constantly re-entering it at slightly different angles.
Best For
- Printer paper
- Wrapping paper
- Construction paper
- Simple craft trims
Common Mistake
Forcing the scissors all the way to the tip on thick paper can cause bending or tearing. If the stock is heavier, keep the strokes smooth but slightly shorter so you stay in control.
2. Move the Paper, Not the Scissors
If there is one technique that instantly upgrades a straight cut, it is this: use your non-cutting hand to turn and guide the paper. Too many people try to steer only with the scissors, which makes the blades swing around like they are auditioning for a pirate movie.
How to Do It
- Hold the scissors in your dominant hand.
- Use your other hand to support the sheet a few inches ahead of the blades.
- Keep the scissors pointed mostly forward.
- As you cut, rotate or slide the paper gently to keep the line aligned with the blades.
- Let the paper do the turning work whenever possible.
This is especially helpful when your line is drifting or the paper feels large and floppy. Instead of twisting your wrist into a weird angle, keep your cutting hand steady and let the paper reposition itself.
Why It Works
Using both hands properly gives you better control and reduces wobble. The scissors only need to perform one job: cutting. The supporting hand handles alignment, tension, and direction. When each hand has a clear role, the cut gets cleaner.
Pro Tip
Keep a slight tension on the paper as you cut. Not enough to stretch or bend it, just enough to keep it flat and stable. Loose, floppy paper tends to wander. Slightly supported paper behaves like it finally read the instructions.
Best For
- Long straight cuts
- Larger sheets
- Cardstock
- Craft templates
3. Fold or Score First, Then Cut Along the Edge
The third simple way to cut paper straight with scissors is to give yourself a physical guide. If you need a really neat straight cut and the material allows it, fold the paper on the cut line first, crease it, then cut along the folded edge or just beside it.
How to Do It
- Measure where you want the cut to go.
- Fold the paper carefully along that line.
- Press the crease firmly with your fingers, a ruler, or the back of a spoon.
- Open the paper again if needed.
- Cut slowly along the crease line or use the folded edge as a guide.
This method is especially useful for gift wrap, craft paper, flyers, handouts, and any project where a visible straight guide helps more than a drawn line.
Why It Works
A crease gives the paper structure. It creates a visual path and a slight physical ridge that helps the blades stay on track. It also makes it easier to see where the cut should go, even when patterned paper is trying to distract you with flowers, stripes, or glittery chaos.
When to Use Caution
Very thick cardstock or specialty paper can crack if folded roughly, especially across the wrong grain or if the paper has a heavy coating. Test a scrap first if the finish matters. For regular household paper, though, a simple crease is often a game changer.
Bonus Tips for Cleaner, Straighter Cuts
Keep the Thumb Up
A classic scissor-control cue is “thumb up.” When the thumb points upward, the scissors tend to stay in a more stable cutting position. When the hand rolls sideways, the blades can angle off the line.
Watch the Blades, Not Just the Paper Edge
Many people stare at the outer edge of the paper and forget to track where the blades are headed. Keep your eyes slightly ahead of the cutting point so you can correct early instead of panicking halfway through.
Use Sharp Scissors
Dull blades tear, snag, and chew the paper. That is not a technical term, but it is emotionally accurate. If your cuts look fuzzy, ripped, or crushed, the scissors may be the problem.
Do a Practice Strip First
If you are cutting an important piece, test on scrap paper first. Two minutes of practice can save a twenty-minute project from becoming “rustic.”
Slow Down at the End
The last inch is where people get overconfident. Finish the cut with the same care you used to start it. Victory celebrations should begin after the line is complete.
Common Problems and Quick Fixes
The Cut Keeps Slanting Left or Right
Check whether you are steering with the scissors instead of the paper. Also make sure you can clearly see the line and are not blocking it with your hand.
The Paper Folds Instead of Cutting
Your scissors may be dull, the paper may be too thin or slippery, or you may be pushing rather than slicing. Reduce pressure and let the blades do the work.
The Edge Looks Jagged
Use longer strokes and avoid choppy snips. Jagged edges usually come from too many restarts.
The Scissors Feel Awkward
Try a different size or style. A pair that is too large, too small, or wrong for your handedness can make straight cutting unnecessarily difficult.
When Scissors Are Fine, and When You Might Want Another Tool
Scissors are perfect for quick trims, craft work, practice, and everyday paper cutting. But if you need repeated identical cuts, extra-long precision edges, or clean results on thick stacks, a paper trimmer or rotary cutter may be more efficient. That does not mean scissors failed you. It just means every hero deserves backup.
Still, for most day-to-day tasks, learning to cut paper straight with scissors is absolutely worth it. It is practical, inexpensive, and surprisingly satisfying once your hands figure out the rhythm.
Conclusion
If you want straighter cuts, remember these three simple methods: use long smooth strokes, move the paper instead of over-steering the scissors, and create a fold or crease when you need a built-in guide. Those strategies make a bigger difference than fancy supplies or pure luck.
The next time your cut starts wandering, do not assume you are bad at scissors. Most crooked cuts come from technique, not destiny. Slow down, set up the paper well, let both hands do their jobs, and make the blades glide instead of chatter. Your paper projects, gift wrapping, classroom prep, and random household tasks will all look noticeably cleaner. And yes, that includes the one emergency craft situation that somehow appears five minutes before you need to leave.
Real-Life Experiences with Cutting Paper Straight
In real life, people usually learn how to cut paper straight in one of three places: at a kitchen table, in a classroom, or in the middle of a project that suddenly becomes way more serious than expected. Maybe it starts with a school assignment, a homemade birthday banner, or an attempt to wrap a present so it does not look like it was packed during a minor earthquake. Whatever the setting, the experience tends to be the same: the first few cuts are humbling.
Many beginners discover that the problem is not effort. In fact, effort can make things worse. The harder they grip, the stiffer their hand becomes, and the more jagged the line looks. One of the most common experiences is realizing that a relaxed hand actually cuts better than a tense one. Once people stop attacking the paper and start guiding it, the results improve fast.
Parents helping children often notice another pattern. Kids usually want to open and close the scissors rapidly, like they are trying to win a speed contest no one announced. But once they learn to keep the thumb up and use the other hand to hold and turn the paper, the cut gets steadier. The child also gets less frustrated, which is a pretty big win for everyone in the room.
Teachers and crafters often talk about how dramatic the difference is between random cutting and cutting with a clear line. A simple pencil mark, ruler line, or crease turns a messy task into a manageable one. Even adults who feel “bad at crafts” are often surprised by how much better their work looks when they slow down and follow a visible guide.
People who wrap gifts, make scrapbook pages, prepare classroom materials, or do DIY decorations also learn that paper type matters more than they expected. Thin paper can shift. Thick paper can resist. Glossy paper can slide around like it has its own agenda. After a few frustrating attempts, most people naturally start matching their pace to the material. Light paper rewards smooth movement. Heavy paper rewards patience.
Another very relatable experience is discovering that the last inch of the cut is the danger zone. Everything looks perfect, confidence rises, and then the final snip veers off like the scissors suddenly remembered an unrelated appointment. Over time, people learn to finish slowly, keep the paper supported, and not celebrate early.
Perhaps the most encouraging real-world lesson is that cutting straight does improve quickly with repetition. A few practice strips can make someone noticeably better in one sitting. It is one of those practical little skills that feels oddly empowering. You start with a crooked edge, make a few adjustments, and suddenly your projects look cleaner, sharper, and more intentional. Not bad for a tool most of us have ignored since elementary school.


