Table of Contents >> Show >> Hide
- Why Outside Pipes Freeze in the First Place
- Way 1: Shut Off, Disconnect, and Drain Outdoor Water Lines
- Way 2: Insulate Outdoor Pipes, Faucets, and Drafty Areas
- Way 3: Add Safe Heat During Extreme Cold
- Quick Checklist: How to Keep Outside Pipes from Freezing
- Common Mistakes That Lead to Frozen Outdoor Pipes
- Personal Experience: What Actually Works When Winter Gets Rude
- Conclusion
Outside pipes are brave little soldiers. They sit in the wind, take the cold straight to the chin, and somehow still expect to deliver water when you need it. But when temperatures drop below freezing, outdoor plumbing can turn from “helpful home feature” into “expensive indoor waterfall” faster than you can say, “Why is the basement making river sounds?”
Learning how to keep outside pipes from freezing is not just a winter chore for people in Minnesota, Maine, or Colorado. Homeowners in warmer states can get caught off guard too, because many homes in mild climates have less insulation around exterior plumbing. A short cold snap can freeze outdoor faucets, sprinkler lines, pool supply pipes, exposed crawl-space pipes, and water lines running along exterior walls.
The good news: preventing frozen outdoor pipes is usually much easier than repairing burst ones. You do not need to become a master plumber overnight. You mainly need three smart habits: remove standing water, protect exposed plumbing, and keep vulnerable pipes warm during extreme cold. Let’s walk through the three best ways to keep outside pipes from freezing, with practical examples you can actually use before the next weather alert starts shouting at your phone.
Why Outside Pipes Freeze in the First Place
Water expands when it freezes. That expansion creates pressure inside the pipe, and pressure is what causes cracks, leaks, and bursts. The pipe does not always split exactly where the ice forms, either. Sometimes the ice plug blocks water flow, pressure builds downstream, and the break appears somewhere else. In other words, frozen pipes enjoy being dramatic.
Outside pipes are especially vulnerable because they are exposed to cold air, wind, and poor insulation. Common trouble spots include outdoor hose bibs, garden spigots, irrigation supply lines, swimming pool plumbing, outdoor kitchen lines, crawl-space pipes, garage pipes, and lines near foundation vents. Even a pipe that is technically “inside” can freeze if it runs through an unheated wall, cabinet, crawl space, or garage.
The safest winter strategy is to assume any pipe near outdoor air needs attention. If it serves the garden, pool, sprinkler system, outdoor sink, detached garage, or exterior wall faucet, put it on your freeze-prevention checklist.
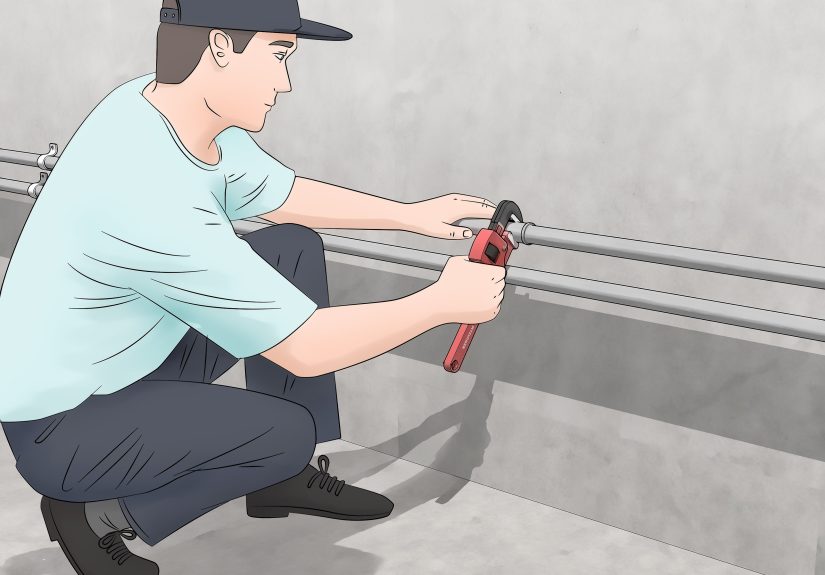
Way 1: Shut Off, Disconnect, and Drain Outdoor Water Lines
The most effective way to keep outside pipes from freezing is also the least glamorous: remove the water. A dry pipe cannot freeze and burst because there is no water sitting inside it waiting to become ice with ambition.
Disconnect garden hoses before freezing weather
Start with the easiest step. Remove every garden hose from every outdoor faucet. This includes hose splitters, spray nozzles, timer devices, drip irrigation connectors, pressure-washer hoses, and decorative “I forgot that was still attached” gadgets. A connected hose can trap water inside the faucet and the short pipe behind it. When that trapped water freezes, it may damage the spigot, the pipe, or both.
After disconnecting hoses, drain them and store them somewhere protected. A hose left full of water can crack, swell, or become a frozen garden snake. Roll it up, tuck it away, and feel slightly more responsible than you did five minutes earlier.
Use the indoor shutoff valve if your home has one
Many homes have a shutoff valve inside the house that controls water going to the outdoor faucet. It is often located in the basement, crawl space, utility room, garage, or inside a cabinet near the wall where the outdoor faucet is mounted.
Turn the indoor valve off, then open the outdoor faucet to let remaining water drain out. Leave the outside faucet open for a while so the pipe can empty. If there is a small bleeder cap or drain port near the indoor valve, place a bucket underneath and open it carefully to release trapped water. This little step can prevent a big mess later.
If you are not sure which valve controls the outdoor faucet, do a simple test. Turn the suspected valve off, then open the outdoor spigot. If water stops after a short flow, you found it. If water keeps running like it has a personal vendetta, close the faucet and keep looking.
Winterize sprinkler and irrigation systems
Sprinkler systems and irrigation lines need special attention because they often run underground or through exposed areas. Shut off the system, drain the lines according to the manufacturer’s instructions, and consider hiring a professional to blow out the system with compressed air if recommended for your setup.
Do not guess wildly with irrigation equipment. Too much air pressure or the wrong process can damage valves and heads. If your system has backflow preventers, above-ground valves, or exposed pipes, insulate those components after draining. Sprinkler repair bills have a way of arriving in spring, right when you thought winter had already taken its final bow.
When draining is better than dripping
Indoor faucets connected to vulnerable pipes may benefit from a slow drip during extreme cold, but outdoor faucets are different. If you can shut off and drain the outdoor line, that is usually the better option. Dripping an outdoor faucet may leave water moving through a pipe that is still exposed to freezing air. In deep cold, that can create ice buildup around the spigot or lead to a frozen mess outside.
Use dripping mainly for indoor faucets served by pipes in exterior walls, crawl spaces, or unheated areas. For outdoor hose bibs, think “shut off and drain” first.
Way 2: Insulate Outdoor Pipes, Faucets, and Drafty Areas
Insulation does not create heat. It slows heat loss. That matters because many outdoor pipe problems happen when cold air attacks a vulnerable line for several hours. Good insulation gives the pipe a warmer coat, and unlike your actual winter coat, it will not mysteriously disappear from the closet.
Install foam pipe sleeves on exposed lines
Foam pipe sleeves are one of the simplest ways to protect exposed outdoor pipes. They are inexpensive, easy to cut, and available at most home improvement stores. Choose sleeves that match the pipe diameter, open the slit, wrap the sleeve around the pipe, and secure it with tape or zip ties.
Pay close attention to pipes in crawl spaces, garages, under decks, around outdoor kitchens, near pool equipment, and along exterior walls. If a pipe feels cold to the touch before freezing weather arrives, it deserves insulation.
For outdoor use, cover foam insulation with weather-resistant tape or a protective outer wrap. Foam that gets soaked by rain or snow can lose effectiveness. Wet insulation is basically a tiny cold sponge hugging your plumbing, which is not the cozy winter scene anyone wants.
Cover outdoor faucets with insulated faucet covers
An insulated faucet cover is a small investment that can help protect hose bibs from freezing air. These covers are usually foam domes or soft insulated pouches that fit over the outdoor faucet and seal against the wall. They work best when you have already disconnected the hose and drained the line.
Make sure the cover fits snugly. If cold air can blow behind it, the cover becomes more decorative than useful. Also check that the wall surface around the faucet is sealed. Gaps, cracks, and loose siding can let cold air reach the pipe inside the wall.
For a temporary emergency cover, wrap the faucet with dry towels, rags, or newspaper, then cover the material with a plastic bag to keep it dry. This is not as tidy as a store-bought cover, but in a surprise freeze, “not tidy” is still much better than “burst pipe with bonus indoor fountain.”
Seal cracks and air leaks near pipes
Cold wind can freeze pipes faster than still air. Walk around your home and inspect areas where pipes, wires, vents, and faucets pass through exterior walls. Seal small gaps with exterior-grade caulk. Larger openings may need expanding foam, weatherproof sealant, or proper repair materials depending on the surface.
Inside the home, check crawl-space vents, garage doors, basement windows, rim joists, and cabinet backs near plumbing. If cold air can whistle through a gap, your pipe can feel it. Sealing drafts helps protect plumbing and can also make the house more comfortable.
Do not block vents or combustion-air openings required for furnaces, water heaters, or gas appliances. If you are unsure what a vent does, ask a qualified professional before sealing it. Pipes are important, but so is breathing.
Protect pipes in crawl spaces and garages
Outside pipes are not always outside in the obvious sense. A water line in a vented crawl space or unheated garage may experience temperatures close to the outdoors. Insulate these pipes, close garage doors during cold snaps, and block drafts where appropriate.
If your kitchen, laundry room, or bathroom plumbing runs along an exterior wall, open cabinet doors during extreme cold so warm indoor air can reach the pipes. Move cleaning products or chemicals out of reach if children or pets are present. A warm cabinet is useful; a curious dog with a bottle of cleaner is not.
Way 3: Add Safe Heat During Extreme Cold
Sometimes insulation alone is not enough. If you live where hard freezes are common, or if you have exposed water lines that cannot be fully drained, you may need to add safe heat. The key word is safe. Outdoor plumbing is not the place for creative experiments involving candles, propane torches, or anything that looks like it belongs in a dragon’s toolkit.
Use UL-listed heat tape or heat cable
Heat tape and heat cable are designed to provide controlled warmth to vulnerable pipes. Look for products that are UL-listed and rated for your pipe material and location. Some heat cables are approved for plastic pipes, while others are meant for metal pipes only. Always follow the manufacturer’s instructions exactly.
Install heat cable directly on the pipe as directed, then cover it with compatible insulation if the instructions allow. Do not overlap heat tape unless the product specifically says it is safe to do so. Overlapping the wrong type can create overheating. Also plug heat cable into a properly protected outlet, ideally with ground-fault circuit interrupter protection for outdoor or damp locations.
Thermostat-controlled or self-regulating heat cable can be especially useful because it turns on when temperatures fall near freezing and reduces output when the pipe is warm enough. It is not magic, but it is smarter than hoping the weather forecast was exaggerating.
Keep indoor heat steady near vulnerable plumbing
If outdoor pipes connect through exterior walls, basements, crawl spaces, or garages, the indoor temperature still matters. During severe cold, avoid setting the thermostat too low at night. A slightly higher heating bill is usually cheaper than repairing water damage.
If you are leaving home during freezing weather, keep the heat on. Many insurance and home maintenance sources recommend maintaining a reasonable indoor temperature to reduce freeze risk. Also consider asking a trusted neighbor or family member to check the house during extended cold spells, especially if your plumbing has frozen before.
Let selected indoor faucets drip when needed
For pipes that run along exterior walls or through unheated spaces, a slow drip from an indoor faucet can help reduce freezing risk. Moving water is less likely to freeze, and an open faucet can relieve pressure if ice starts forming inside the pipe.
You do not need to drip every faucet in the house. Focus on faucets served by vulnerable pipes: sinks on exterior walls, rooms over crawl spaces, fixtures near garages, or plumbing that has frozen in the past. A pencil-thin stream or steady drip is usually enough. Both hot and cold lines may need attention if both run through risky areas.
Know what to do if a pipe freezes anyway
If you turn on a faucet and only a trickle comes out, suspect a frozen pipe. Keep the faucet open so water can flow as the ice melts. Apply gentle heat to the frozen section using a hair dryer, heating pad, warm towels, or a safe space heater kept away from flammable materials.
Never use an open flame, blowtorch, charcoal heater, or high-heat device to thaw pipes. These can cause fire, damage pipes, or create dangerous fumes. Start warming near the faucet and work back toward the frozen area. If you cannot reach the frozen pipe, if you see a leak, or if you are unsure what to do, shut off the main water valve and call a plumber.
Quick Checklist: How to Keep Outside Pipes from Freezing
- Disconnect and drain garden hoses before freezing weather.
- Shut off indoor valves that supply outdoor faucets, then drain the lines.
- Install insulated covers over outdoor hose bibs.
- Wrap exposed pipes with foam pipe sleeves or fiberglass pipe insulation.
- Seal cracks and gaps where cold air reaches plumbing.
- Winterize sprinkler, irrigation, pool, and outdoor kitchen water lines.
- Use UL-listed heat cable on vulnerable pipes when insulation is not enough.
- Keep garage doors closed and indoor heat steady during hard freezes.
- Let selected indoor faucets drip during extreme cold if they serve exposed pipes.
- Know where your main water shutoff valve is before an emergency happens.
Common Mistakes That Lead to Frozen Outdoor Pipes
Leaving hoses attached all winter
This is the classic mistake. A connected hose can trap water at the faucet and prevent proper drainage. It takes only a few minutes to disconnect hoses, but it can save you from cracked fittings, damaged spigots, and hidden leaks inside the wall.
Covering a faucet without draining it
A faucet cover helps, but it is not a force field. If water is still trapped in the pipe and the cold is strong enough, freezing can still happen. Covering works best as the final layer after shutting off and draining.
Using wet towels as insulation
Dry towels can help in a temporary emergency. Wet towels can freeze into a pipe-shaped popsicle. If you use fabric or newspaper as a quick fix, keep it dry with plastic or weatherproof material.
Ignoring crawl spaces
Many homeowners focus on the outdoor faucet and forget the pipe behind it. If that pipe runs through a cold crawl space, the real freeze risk may be under the house. Insulate crawl-space pipes and seal drafts before cold weather arrives.
Personal Experience: What Actually Works When Winter Gets Rude
After dealing with winter plumbing problems in real homes, one lesson becomes very clear: frozen pipes rarely happen because of one huge mistake. They usually happen because of several tiny oversights stacked together like a very annoying snowman. A hose gets left attached. A crawl-space vent stays open. A faucet cover is missing. The thermostat gets turned down too far. Then a cold front rolls in, and suddenly the house is auditioning for a disaster movie.
The first experience worth sharing is about outdoor faucets. Many people assume the faucet itself is the only thing that freezes. In reality, the short pipe inside the wall is often the weak point. A homeowner may put a foam cover over the faucet and feel victorious, but if the hose is still connected or the indoor shutoff valve was never closed, water can remain trapped behind the spigot. When temperatures stay below freezing overnight, that hidden section can split. The leak may not even show up until the weather warms and the ice melts. That is when the wall, basement, or crawl space starts quietly leaking like it has a secret.
The second practical lesson is that insulation must stay dry and snug. I have seen people wrap pipes with towels, which can work briefly in an emergency, but only if the towels are dry and covered from rain or snow. Once fabric gets wet, it loses much of its protective value. Foam pipe sleeves with weatherproof tape are cleaner, more durable, and less likely to turn into frozen laundry wrapped around your plumbing. For outdoor lines, a protective outer layer matters almost as much as the insulation itself.
The third lesson is to prepare before the first freeze warning. The worst time to search for faucet covers, pipe insulation, or heat cable is the night every other homeowner in town has the same idea. Stores sell out quickly before a major cold snap. A simple winter kit can prevent panic: faucet covers, foam pipe sleeves, exterior tape, a flashlight, a bucket for draining valves, and the location of the main water shutoff written down somewhere obvious.
Another experience-based tip: check the plumbing after the freeze, not just before it. When temperatures rise, frozen sections thaw, and that is when cracks reveal themselves. Walk around outdoor faucets, crawl spaces, garages, and irrigation equipment. Turn water back on slowly if you shut off a line. Listen for running water when all fixtures are off. Check the water meter if you suspect a leak. A small inspection can catch damage before it becomes a ceiling stain, warped floor, or mystery puddle with a bad attitude.
Finally, do not underestimate wind. A pipe that survived 25 degrees on a calm night may freeze during a windy 28-degree night because moving air pulls heat away faster. If an outdoor pipe is exposed under a deck, along a wall, near a crawl-space vent, or beside a drafty garage door, protect it more aggressively. Insulation, air sealing, and safe heat cable are not overkill when the pipe is sitting in the path of winter wind.
The best approach is layered protection: drain what you can, insulate what remains, and add safe heat only where needed. That three-part method is simple, affordable, and reliable. It also gives you something priceless during a cold snap: the ability to sleep without wondering whether your outdoor faucet is plotting against you.
Conclusion
Keeping outside pipes from freezing comes down to preparation, not panic. Disconnect hoses, shut off and drain outdoor lines, insulate exposed pipes, seal cold-air leaks, and use safe heat cable when vulnerable plumbing needs extra protection. These steps may not be glamorous, but neither is discovering a burst pipe while wearing slippers and holding a cup of coffee.
Think of winter pipe protection as cheap insurance for your home. A few small tasks in the fall can prevent expensive repairs, water damage, mold problems, and emergency plumber visits. Your pipes do not need luxury treatment. They just need less water sitting in the cold, fewer drafts, better insulation, and a little warmth when temperatures become unreasonable.