Table of Contents >> Show >> Hide
- Quick Wins That Make Your Home Look Instantly Better
- Paint a “Feature” Wall (But Make It Strategic)
- Swap Out Old Switch Plates and Outlet Covers
- Upgrade Your “Main” Light Fixture
- Change to LED Bulbs with the Right Color Temperature
- Add Dimmer Switches (Where Allowed)
- Replace Cabinet Hardware (Kitchen + Bath)
- Refresh Interior Door Knobs (Or at Least the Front Hall)
- Re-caulk the “Wet Zones”
- Deep Clean Grout, Then Seal It
- Update Curtain Rods and Hang Curtains Higher
- Replace Builder-Grade Mirror Clips with a Framed Mirror
- Install Peel-and-Stick Wallpaper (Small Dose, Big Payoff)
- Kitchen and Bathroom Upgrades That Feel Like a Mini Remodel
- Swap Your Kitchen Faucet
- Replace the Showerhead with a WaterSense-Labeled Model
- Install a New Toilet Seat (Yes, Really)
- Improve Under-Sink Storage with Pull-Out Bins
- Add Under-Cabinet Lighting
- Update Bathroom Lighting (Flattering Counts as Functional)
- Change Out Towel Bars and Hooks
- Reface, Don’t Replace: Paint a Vanity or Cabinets
- Add a Backsplash Moment (Peel-and-Stick Tile Counts)
- Replace the Kitchen Sink Strainer + Disposal Flange (If It’s Ugly)
- Comfort and Efficiency: Save Money While Your House Feels Better
- Curb Appeal on a Budget: Make the Outside Match the Inside
- Function Upgrades That Make Daily Life Easier
- Create a “Drop Zone” by the Entry
- Organize One Closet with Matching Hangers + Simple Bins
- Install a Shelf or Rail System in the Laundry Area
- Add Soft-Close Bumpers to Cabinet Doors
- Replace Wobbly Hinges and Align Doors
- Update Your Bathroom Fan Grille (and Clean the Fan)
- Add Adhesive Weatherproofing to a Noisy Window
- Refinish or Touch-Up a High-Traffic Spot on Wood Floors
- Style Your Shelves with “Less Stuff, Better Stuff”
- Do a “One-Day Trim Refresh”
- How to Choose the Right Project (So You Actually Finish It)
- Budget-Reno Lessons From the Trenches ( of Real-World Experience)
- Conclusion
Want your home to feel “new” without taking out a second mortgage (or selling a kidney on Facebook Marketplace)?
You’re in the right place. The trick to budget-friendly upgrades is simple: target what people see, touch, and feel
every single daylight, color, hardware, comfort, and curb appeal. A $25 change in the right spot can look like a
$2,500 renovation… from at least six feet away (which is the distance most guests maintain from your grout lines anyway).
Below are 30 low-cost home improvement ideas that deliver outsized impactmany are weekend projects, plenty are DIY-friendly,
and all of them are designed to make your home look sharper, function better, and feel more “you” without the full-scale
chaos of a remodel.
Quick Wins That Make Your Home Look Instantly Better
-
Paint a “Feature” Wall (But Make It Strategic)
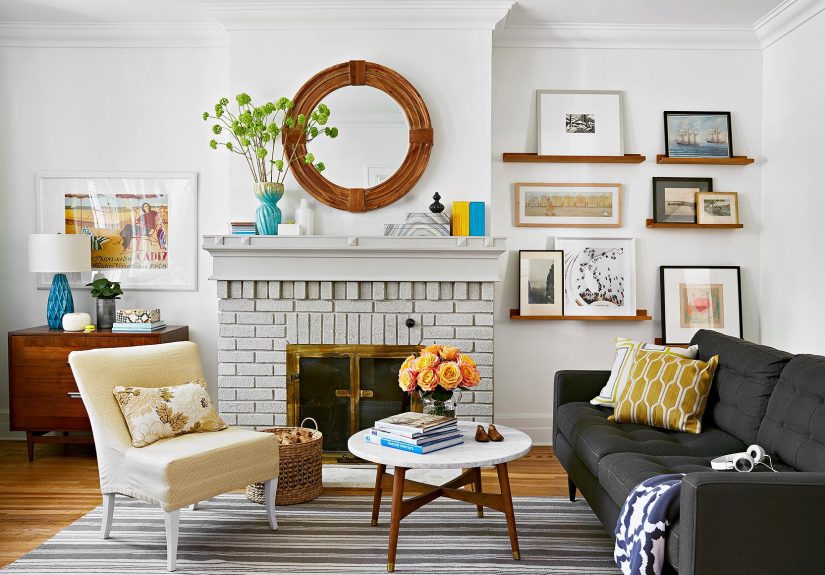
Skip the random accent wall. Instead, highlight an architectural focal point: the fireplace wall, the wall behind the bed,
or a built-in. Deep greens, inky blues, and warm clay tones read custom on camera and in real life.
Cost: $35–$70. -
Swap Out Old Switch Plates and Outlet Covers
Yellowed plastic quietly screams “1997.” Fresh white, matte black, or screwless plates look crisp and modern.
This is a five-minute upgrade that makes the whole room feel cleaner.
Cost: $10–$40. -
Upgrade Your “Main” Light Fixture
One statement fixture in the entry, dining area, or above the kitchen table changes the vibe instantly.
Pro tip: measure your space and choose a scale that doesn’t look like a lonely UFO.
Cost: $60–$200. -
Change to LED Bulbs with the Right Color Temperature
Lighting is mood. For most living spaces, try 2700K–3000K (warm white). For kitchens, 3000K–3500K can feel bright without
turning your home into a dentist’s office.
Cost: $15–$60. -
Add Dimmer Switches (Where Allowed)
Dimmers are the cheapest “luxury” upgrade. They make dinner feel expensive and laundry feel less tragic.
Always turn power off at the breaker and use compatible LED dimmers.
Cost: $20–$60 per switch. -
Replace Cabinet Hardware (Kitchen + Bath)
Handles are jewelry for your cabinetsexcept you don’t lose the matching earring.
Choose one finish family (matte black, brushed nickel, champagne bronze) and repeat it for a cohesive look.
Cost: $25–$150. -
Refresh Interior Door Knobs (Or at Least the Front Hall)
Mismatched or worn knobs are a daily annoyance. Pick a single style and finish for high-traffic areas first
(entry, hallway bath, primary bedroom).
Cost: $15–$60 per door. -
Re-caulk the “Wet Zones”
Fresh caulk around tubs, showers, and sinks makes the entire bathroom look newerand helps prevent water damage.
Remove old caulk fully, clean, dry, and apply a smooth bead (tape helps).
Cost: $8–$25. -
Deep Clean Grout, Then Seal It
If your tile looks tired, it’s often the grout doing the aging. Clean it, touch up with a grout pen if needed,
and seal for longer-lasting results.
Cost: $15–$50. -
Update Curtain Rods and Hang Curtains Higher
Mount rods closer to the ceiling and extend them wider than the window frame. This makes windows look larger,
ceilings feel taller, and the room read more “designed.”
Cost: $25–$120. -
Replace Builder-Grade Mirror Clips with a Framed Mirror
Bathrooms love a framed mirror. It adds polish fastespecially if you coordinate the frame finish with your faucet/hardware.
Cost: $60–$200. -
Install Peel-and-Stick Wallpaper (Small Dose, Big Payoff)
Use it where it feels intentional: a powder room, a laundry nook, the back of built-ins, or inside a pantry.
It’s drama without demolition.
Cost: $40–$150.
Kitchen and Bathroom Upgrades That Feel Like a Mini Remodel
-
Swap Your Kitchen Faucet
A new faucet can make the sink area feel upgraded even if everything else stays put.
Match the number of mounting holes (or use an escutcheon plate) for an easier install.
Cost: $80–$250. -
Replace the Showerhead with a WaterSense-Labeled Model
Modern efficient showerheads can still feel great, and they cut water use.
Bonus: less hot water used means less energy spent heating it.
Cost: $25–$120. -
Install a New Toilet Seat (Yes, Really)
If yours is scratched, wobbly, or has lived through too many cleaning-product eras, replace it.
Soft-close seats feel oddly luxurious for the price.
Cost: $20–$60. -
Improve Under-Sink Storage with Pull-Out Bins
The space under sinks is a black hole. Slide-out bins and a tension rod for spray bottles make it functional
and reduce “where did we put the dishwasher tabs?” stress.
Cost: $20–$80. -
Add Under-Cabinet Lighting
Stick-on LED light bars (plug-in or rechargeable) make kitchens feel higher-end and more functional for cooking.
Aim for even coverage, not spotlight interrogation.
Cost: $25–$120. -
Update Bathroom Lighting (Flattering Counts as Functional)
If your vanity light makes everyone look like they’ve been awake since 2009, swap it.
Choose diffused shades and warmer bulbs for a kinder mirror experience.
Cost: $50–$180. -
Change Out Towel Bars and Hooks
Coordinated bath accessories look intentional and reduce clutter. Hooks are especially great for kids and guests
(who may not understand the concept of folding).
Cost: $25–$120. -
Reface, Don’t Replace: Paint a Vanity or Cabinets
A quality cabinet paint and good prep (clean, sand, prime) can transform a dated vanity.
Finish with new hardware and it will feel like a full update.
Cost: $60–$150. -
Add a Backsplash Moment (Peel-and-Stick Tile Counts)
A backsplash is visual impact per square inch. Peel-and-stick options can be surprisingly convincing when installed carefully:
clean surface, level lines, and firm pressure.
Cost: $50–$200. -
Replace the Kitchen Sink Strainer + Disposal Flange (If It’s Ugly)
This tiny detail sits in the center of your sink’s “stage.”
New strainers/flanges in a matching finish make the sink area look cleaner and newer instantly.
Cost: $15–$60.
Comfort and Efficiency: Save Money While Your House Feels Better
-
Seal Drafts with Weatherstripping
If you can see daylight around a door, your HVAC can too. Add weatherstripping to doors/windows and a door sweep where needed.
The payoff is comfort: fewer drafts, fewer “why is this room angry?” zones.
Cost: $10–$50. -
Caulk Exterior Gaps (Big Holes First)
Air leaks waste energy. Start with obvious gaps around penetrations (pipes, vents) and window/door frames.
Use the right caulk for the job and keep it neatfuture you will be grateful.
Cost: $10–$40. -
Install a Smart Thermostat (or at Least Use a Schedule)
If your home is empty for chunks of the day, a programmable or smart thermostat can reduce heating/cooling waste.
Use schedules like “sleep,” “away,” and “home” to keep comfort high and bills lower.
Cost: $80–$250. -
Replace HVAC Filters and Clean Return Vents
This isn’t glamorous, but it’s one of the best “maintenance upgrades.” A clean filter helps airflow and can improve system performance.
Set a reminder so you don’t rediscover it during a heat wave.
Cost: $10–$40. -
Add a Simple Door Draft Stopper
For old houses, draft stoppers can feel like turning down the “ghost breeze” setting.
Use it on the door you dread in winter (you know the one).
Cost: $10–$30. -
Upgrade Faucet Aerators
Aerators are cheap, easy, and reduce water use without making your sink feel like a sad trickle.
Match thread size, install in minutes, and enjoy the quietly responsible glow of efficiency.
Cost: $5–$20 each. -
Insulate the “Easy Spots”
Think: attic hatch, exposed rim joists, or accessible crawl space areasplaces where DIY insulation can help.
More comfort, less temperature swing, and fewer rooms that feel like separate climates.
Cost: $30–$200. -
Use Power Strips to Cut “Phantom” Energy
Some electronics keep sipping electricity even when “off.” Put entertainment centers and office gear on a switchable power strip
so you can cut power easily when not in use.
Cost: $15–$40.
Curb Appeal on a Budget: Make the Outside Match the Inside
-
Paint the Front Door
The front door is your home’s handshake. A bold, clean color (and a fresh coat on trim if needed) makes the whole exterior look cared for.
Choose a paint designed for exterior doors and proper prep.
Cost: $35–$80. -
Replace House Numbers
New, modern numbers are small but mightyand they help deliveries find you without a scavenger hunt.
Mount them straight. (A level is cheaper than shame.)
Cost: $15–$60. -
Upgrade the Porch Light
A dated exterior fixture can drag down the whole facade. Choose one that fits the scale of your entry and add an LED bulb.
Consider a dusk-to-dawn or motion sensor for convenience and security.
Cost: $35–$180. -
Add Mulch and Crisp Edging
Fresh mulch is the cheapest “landscaper was here” signal. Keep edges clean (a spade works) and your beds look intentional.
This is curb appeal magic for the price of a couple pizzas.
Cost: $20–$120. -
Power Wash the “Grime Strip” Areas
Walkways, siding sections, fences, and front steps collect dirt that makes everything look older.
Clean surfaces brighten the entire exterior and pair perfectly with simple landscaping upgrades.
Cost: $0–$80 (rent or borrow). -
Refresh the Mailbox (or Just Make It Not Sad)
A new mailbox or a repaint plus new hardware can clean up your streetside presence fast.
If you’re in an HOA, check rules first to avoid “mailbox drama.”
Cost: $20–$100. -
Plant One “Anchor” Item Near the Entry
You don’t need a botanical garden. Add one larger planter, a small evergreen, or a pair of symmetrical pots to frame the door.
It looks designed, even if the rest of the yard is… doing its best.
Cost: $25–$150. -
Update the Doormat + Add a Layered Rug Look
A fresh doormat is a tiny upgrade that signals “welcome” instead of “we gave up.”
Layer a larger outdoor rug underneath for a modern porch look.
Cost: $20–$80.
Function Upgrades That Make Daily Life Easier
-
Create a “Drop Zone” by the Entry
A few hooks, a small tray, and a narrow bench (or shoe rack) can prevent the classic
“keys-wallet-mail-chaos” pile. This is one of the highest ROI projects for your sanity.
Cost: $20–$150. -
Organize One Closet with Matching Hangers + Simple Bins
Matching hangers are weirdly powerful: they reduce visual clutter instantly.
Add labeled bins for seasonal items and you’ve upgraded your life without buying a single new shirt.
Cost: $25–$120. -
Install a Shelf or Rail System in the Laundry Area
Even a small laundry nook gets better with vertical storage.
Add a shelf for detergent and a hanging bar for air-dry itemssuddenly you’re “organized,” not “surviving.”
Cost: $20–$100. -
Add Soft-Close Bumpers to Cabinet Doors
This is a tiny upgrade with daily impact: less slamming, less noise, less “why does everything sound dramatic?”
Stick-on bumpers take minutes and cost almost nothing.
Cost: $5–$15. -
Replace Wobbly Hinges and Align Doors
Crooked cabinet doors and squeaky hinges create a subtle “this place is tired” feeling.
Tighten screws, adjust hinges, and replace stripped hardware where needed.
Cost: $5–$40. -
Update Your Bathroom Fan Grille (and Clean the Fan)
A dusty, yellowed fan cover ages a bathroom fast. Turn off power, clean the fan housing, and swap the grille if it’s beyond saving.
Better ventilation helps reduce moisture issues too.
Cost: $10–$40. -
Add Adhesive Weatherproofing to a Noisy Window
If one window whistles in winter or rattles during storms, targeted sealing can improve comfort.
Think of it as giving your house a better “zipper.”
Cost: $10–$30. -
Refinish or Touch-Up a High-Traffic Spot on Wood Floors
Full refinishing can be pricier, but you can often improve the look by addressing scuffs, adding felt pads under furniture,
and using the right cleaner to restore shine without residue.
Cost: $15–$80. -
Style Your Shelves with “Less Stuff, Better Stuff”
You don’t need more decoryou need editing. Remove half, group the rest in threes, vary heights, and add one natural element
(a plant, wood, or woven texture). Instant designer energy.
Cost: $0–$40. -
Do a “One-Day Trim Refresh”
Baseboards, door trim, and crown molding collect scuffs. A quick wash and touch-up paint makes the entire home feel cleaner.
It’s boring work with surprisingly dramatic results.
Cost: $20–$60.
How to Choose the Right Project (So You Actually Finish It)
If you’re staring at this list thinking, “I want all of it,” start with a simple framework:
(1) what bothers you daily (comfort/function), (2) what looks dated (visual impact),
and (3) what protects the home (maintenance). The sweet spot is an easy DIY project that fixes an annoyance
and upgrades the look at the same timelike swapping lighting, re-caulking, or adding weatherstripping.
Budget-Reno Lessons From the Trenches ( of Real-World Experience)
Here’s the part nobody puts on the cute before-and-after photos: the “low-cost home improvement” projects that look easiest
are often easy… right up until the moment they aren’t. That doesn’t mean you shouldn’t do them. It just means you should go in
with the kind of optimism that’s backed by snacks, a drop cloth, and an emergency trip to the hardware store.
First lesson: prep is the hidden price tag. Painting a room isn’t expensive, but skipping prep turns it into a
long-term relationship with regret. Clean the walls, patch the holes, sand the weird spots, and tape what matters. The best “pro”
paint job isn’t about fancy techniquesit’s about not painting over dust and calling it “texture.” The same goes for peel-and-stick
wallpaper and backsplash tile: the surface needs to be clean, smooth, and dry. “It’ll probably stick” is not a plan.
Second lesson: lighting upgrades are emotional upgrades. People underestimate how much a harsh bulb can drain the joy
out of a space. Switch to the right LED color temperature and suddenly your living room looks like a home, not a convenience store.
Add dimmers and you’ve basically installed a personality. And if you change one fixture, you’ll notice the others moreso pace yourself
unless you enjoy falling into a “light fixture spiral.”
Third lesson: small hardware changes create a chain reaction. New cabinet pulls make old faucets look older. A new faucet makes
your chipped mirror edge feel rude. This isn’t badit’s just the domino effect of improvement. The key is picking a “finish story”
(like brushed nickel or matte black) and repeating it in small doses so everything feels intentional. You’re not buying a brand-new kitchen;
you’re creating the illusion of a brand-new kitchen. And illusions are powerful.
Fourth lesson: comfort projects pay you back every day. Weatherstripping and caulk are not glamorous, but they make rooms feel calmer.
Drafts create that subtle “why am I tense?” feelingespecially near doors and windows. Sealing obvious leaks, adding a door sweep, and using a smart
thermostat schedule can make your home feel more consistent without touching the big-ticket stuff. It’s like giving your house a better jacket.
Final lesson: finish lines beat perfect plans. Choose one weekend project, define “done,” and stop. A completed $40 upgrade
beats a half-finished $400 upgrade every time. Give yourself permission to do the simple thing firstpaint the door, replace the plates,
clean and seal grout, add mulch and edgingbecause these are the momentum builders. And momentum is how “I’ll get to it someday” becomes
“Wow, this place looks amazing.”
Conclusion
High-impact, low-cost home upgrades aren’t about cutting cornersthey’re about choosing the corners that matter most.
Start with what you see and touch: paint, lighting, hardware, and the entry experience. Then tackle comfort and efficiency:
seal drafts, upgrade water fixtures, and use your thermostat smarter. Stack a few small wins, and your home will feel refreshed,
more functional, and more valuablewithout the stress of a full renovation.