Table of Contents >> Show >> Hide
- What “Like a Pro” Actually Means
- Step 1: Prep Your “Flower Studio” (AKA Your Kitchen Counter)
- Step 2: Condition Your Flowers So They Don’t Give Up on Life
- Step 3: Pick the Right Vase (It’s Not CheatingIt’s Strategy)
- Step 4: Choose a Simple “Recipe” (Focal + Support + Filler + Greenery)
- Step 5: Build Your Base With Greenery First
- Step 6: Place Focal Flowers and Create a Clear Focal Point
- Step 7: Add Supporting Blooms, Then Fill Gaps (Without Overstuffing)
- Step 8: Finish Strong (Then Keep It Alive)
- Two “Pro Formulas” You Can Repeat Anytime
- Common Mistakes (So You Can Skip the “Why Does This Look Weird?” Phase)
- Bonus: of Real-World Flower-Arranging Experience (What It Actually Feels Like)
- Conclusion
Flower arranging looks like magic when a pro does itsnip, spin, smile, boom: magazine cover. But here’s the secret:
most “pro-looking” arrangements come from a few repeatable habits, not a mystical floral bloodline.
If you can rinse a vase, trim stems, and step back to judge your work like a slightly dramatic art critic,
you can arrange flowers like a pro.
This guide walks you through eight simple steps that work for grocery-store bouquets, backyard blooms, and “I forgot
I’m hosting brunch in two hours” emergencies. You’ll also get quick formulas, common mistakes to avoid, and
a bonus experience section at the end to make the whole process feel less like a test and more like a fun ritual.
What “Like a Pro” Actually Means
A professional-looking floral arrangement usually has:
clean water + clean mechanics (so it lasts),
clear structure (so it doesn’t flop),
intentional proportions (so it looks balanced),
and variety (so it looks natural instead of like a bouquet standing at attention).
In other words: healthy flowers + good support + a plan.
Step 1: Prep Your “Flower Studio” (AKA Your Kitchen Counter)
Before you touch a single stem, do a 90-second setup. It prevents chaos laterbecause nothing kills creativity like
hunting for scissors while holding a dripping bunch of hydrangeas.
What you’ll need
- A clean vase (or pitcher, jar, or any container you’re proud of)
- Sharp scissors or floral shears (dull blades crush stems)
- Fresh water + flower food if you have it
- Optional: clear tape, a small bucket/bowl for conditioning, and a trash bowl for leaves
Pro move
Rinse the vase with hot, soapy water. If you want to be extra (in a good way), give it a quick rinse with diluted
bleach and then rinse again. Flowers are basically tiny celebritiesbacteria is the paparazzi.
Step 2: Condition Your Flowers So They Don’t Give Up on Life
Conditioning is the behind-the-scenes step that makes arrangements look fresher longer. Flowers travel. They get
dehydrated. Stems seal up. The goal is to help them drink efficiently.
How to condition in 5 minutes
- Unwrap your bouquet and separate the stems gently.
- Remove leaves that would sit below the waterline. Submerged leaves rot, cloud water, and speed up wilting.
-
Recut stemsideally ¾ to 1 inchat a diagonal so there’s more surface area for water uptake.
(If you see browning on stems, trim until it’s gone.) - Give them a quick “bath”: place stems in cool water for 15–30 minutes if they feel thirsty or floppy.
If you have flower food, use it. Commercial flower food is designed to nourish blooms and reduce bacterial growth.
If you don’t have it, clean water changed regularly still does a lot of heavy lifting.
Step 3: Pick the Right Vase (It’s Not CheatingIt’s Strategy)
The vase is your arrangement’s skeleton. The wrong one can turn a beautiful bunch of blooms into a chaotic
“flower fountain” situation. The right one makes the same stems look designer.
Easy vase rules
- Narrower opening = easier arrangement. You’ll need fewer stems, and everything stays supported.
-
Use proportion: a classic guideline is flowers that are roughly 1.5× the vase height
for a tall arrangement (or a balanced relationship where the vase doesn’t visually “bully” the flowers). - Match the vibe: modern vase = bolder shape; vintage vessel = softer, looser styling.
Make a tape grid (your new best friend)
For wide-mouth vases, create a simple grid across the top using clear tape: lay strips horizontally, then vertically,
forming “tic-tac-toe” squares. This gives each stem a parking spot so heavy blooms don’t topple into a corner.
It’s the cheapest floral mechanic you’ll ever love.
Step 4: Choose a Simple “Recipe” (Focal + Support + Filler + Greenery)
Pros think in roles, not random stems. When each flower has a job, the arrangement looks intentionaleven if you
built it while wearing pajama pants and questionable confidence.
The four roles
- Focal flowers: the main stars (roses, peonies, hydrangeas, dahlias)
- Supporting flowers: medium blooms that add body (tulips, lisianthus, carnations, mums)
- Filler flowers: small clusters that soften edges and fill gaps (waxflower, baby’s breath, statice)
- Greenery/foliage: structure and contrast (eucalyptus, ruscus, fern, salal)
A foolproof grocery-store example
Try this “balanced but not boring” mix:
5 roses (focal),
7 stems of lisianthus (support),
5 stems of spray roses or mini carnations (support/filler),
3 stems of eucalyptus (greenery),
plus 2 stems of something spiky (like thistle) for texture.
Color that looks expensive
Pick one of these easy color stories:
Monochrome (all pinks), analogous (peach + coral + soft yellow),
or neutral + pop (white/green with one bold color). Limit your palette, and your arrangement
instantly looks curated.
Step 5: Build Your Base With Greenery First
Greenery is the scaffolding. It sets the shape, hides awkward stem angles, and gives your blooms a stage to shine
onlike a good haircut for your flowers (except less emotionally complicated).
How to do it
- Start with 3–5 greenery stems spaced around the vase to outline your shape.
-
Angle stems outward slightly so the arrangement feels open and dimensional, not like a bouquet trying to
squeeze into economy seating. -
Keep turning the vase as you add stems. Don’t arrange from one side only unless you want the “front-facing selfie”
version of a bouquet.
If you want a classic rounded look, build a soft dome. If you want a modern look, keep greenery tighter and use
taller lines with fewer stems.
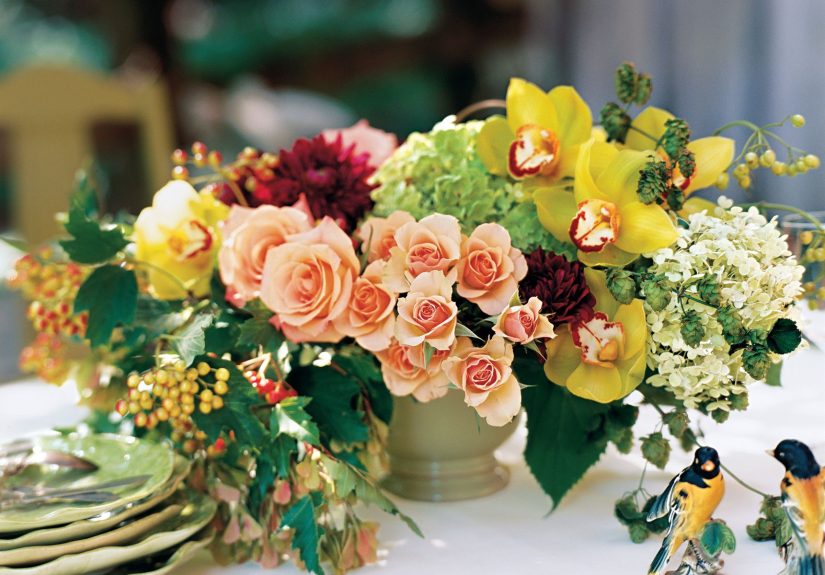
Step 6: Place Focal Flowers and Create a Clear Focal Point
This is where “random bouquet” becomes “designed arrangement.” A focal point gives the eye a place to land.
Without it, your flowers look like they’re all talking at once.
Focal placement rules that work
- Start low: place a few focal blooms lower in the arrangement to anchor it.
- Use odd numbers: groups of 3 or 5 tend to look more natural.
-
Try the “rule of thirds” feel: don’t put your best bloom dead-center like it’s a school photo.
Offset it slightly so the arrangement feels dynamic.
If you’re using big blooms like hydrangeas, they can act like “floral cushions.” Use them early to create a base,
then nestle other flowers into the spaces they create.
Step 7: Add Supporting Blooms, Then Fill Gaps (Without Overstuffing)
Now you build fullness and movement. Supporting blooms add volume; filler softens transitions. The goal is
layering, not packing flowers like you’re trying to win a suitcase-stuffing contest.
Use a simple layering order
- Supporting blooms: spread them around so weight is balanced.
- Texture stems: add something airy or spiky to break up “ball-shaped” flowers.
- Filler: tuck into gaps lightlythink “seasoning,” not “entire salt shaker.”
Quick balance check
- Step back 3 feet. Does one side feel heavier?
- Rotate the vase. Is it pretty from multiple angles?
- Do you have variety in height, or is everything the same level like a picket fence?
Optional pro technique: the “spiral” mindset
Florists often use a spiral approach in hand-tied bouquets: each new stem is added at a slight angle while the bunch
is rotated, creating a naturally full shape. You can borrow the idea in a vase by angling stems consistently and
rotating the vase as you go. The result is looser, airier, and more professional-looking.
Step 8: Finish Strong (Then Keep It Alive)
The final step is refinement and maintenancebecause a pro arrangement isn’t just pretty for 45 minutes;
it holds up.
Refinement checklist
- Clean the waterline: no leaves sitting in water.
- Trim for shape: snip one or two stems to fix an awkward “antenna” flower.
- Check proportion: if it feels too tall, shorten a few stems rather than chopping everything.
- Wipe the vase: water droplets on glass can make it look unfinished.
How to make it last longer
- Top off water daily if needed.
- Change water every 2–3 days (or whenever it looks cloudy), wash the vase, and recut stems.
- Keep flowers away from heat vents, direct sunlight, and fruit (fruit can speed up aging for some blooms).
- If your home runs warm, a cooler spot at night helps.
Two “Pro Formulas” You Can Repeat Anytime
Formula A: The easy centerpiece (low + lush)
- 1 wide vase or bowl-style container
- 2–3 big focal blooms (hydrangea/peony/large rose heads)
- 5–7 medium blooms
- 3–5 stems greenery
- 2–3 stems airy filler
Keep height modest and focus on fullness. Perfect for dining tables where you still want to see your guests’
facial expressions (highly recommended).
Formula B: The “I bought one bouquet” upgrade
- Split the bouquet into types (greenery, big blooms, small blooms).
- Add a tape grid to the vase.
- Start with greenery, then big blooms, then small blooms.
- Vary stem lengths so flowers sit at different heights.
Common Mistakes (So You Can Skip the “Why Does This Look Weird?” Phase)
- Too many flowers, not enough structure: start with greenery and/or a tape grid so stems behave.
- All blooms at the same height: vary stem lengths to create depth.
- Centering the focal bloom: offset it slightly for a more natural, designer feel.
- Dirty vase / leaves in water: bacteria shortens vase life and makes arrangements look tired faster.
- Overusing filler: filler should whisper, not shout.
Bonus: of Real-World Flower-Arranging Experience (What It Actually Feels Like)
The first time you try to arrange flowers “like a pro,” it usually goes like this: you set out a vase, dump the
bouquet in, step back, and realize you’ve accidentally created a floral mulletparty in the front, confusion in the back.
That moment is not failure; it’s the beginning of your flower-arranging superpower: noticing.
One of the most common real-life experiences is discovering that flowers have personalities. Roses are the confident
extroverts that want to face forward. Tulips are the dramatic friends who change their minds overnight and lean
toward the window. Hydrangeas are the cozy blanket that makes everything look fuller, but they also drink water like
they just ran a marathon. When you realize each stem behaves differently, you stop trying to “force” an arrangement
and start working with itadjusting angles, trimming lengths, and giving flexible stems a supportive neighbor.
Another experience: the leaf crime scene. You’ll swear you removed “all the leaves,” and thensurprisethere are
still three soggy ones lurking below the waterline like they pay rent. The payoff for staying on top of this is huge:
cleaner water, longer-lasting blooms, and a vase that doesn’t smell like a forgotten science experiment. In practice,
people find it easiest to keep a small “trash bowl” nearby while trimming. It turns the whole process into a calm
little routine instead of a messy scavenger hunt.
You’ll also learn that the best improvement comes from stepping back. Up close, you see individual stems. From a few
feet away, you see shape, balance, and where your eye naturally lands. Many beginners experience a “flat” look at
firsteverything pressed into the same planeuntil they start varying heights and creating layers: greenery framing
the outside, focal blooms anchoring the middle, and airy filler floating near the top. The arrangement suddenly looks
like it has depth, like it belongs in a room with actual grown-up furniture.
Finally, there’s the confidence curve: the first arrangement takes a while, the second is faster, and by the third
you’re casually tape-gridding a vase like it’s no big deal. The most satisfying experience is realizing you can
repeat results. You don’t need the exact same flowersjust the same roles and steps. And once you’ve made a bouquet
look polished from a simple grocery-store bunch, you start seeing flowers everywhere: backyard clippings, farmers’
market stems, even a single branch with interesting shape. That’s the pro mindset: less panic, more processand a
home that always looks like you had your life together (even if you arranged them in slippers).
Conclusion
Arranging flowers like a pro isn’t about owning rare blooms or having a secret florist handshake. It’s about
clean prep, smart structure, simple roles (focal/support/filler/greenery), and a little editing at the end.
Practice the eight steps a few times, and you’ll be able to turn almost any bunch of stems into an arrangement that
looks intentional, balanced, and delightfully “worth posting.”


