Table of Contents >> Show >> Hide
- Why Plastic Bottle Recycling Is Complicated (and Still Worth Doing)
- Step 1: Know Your Bottle (Because Plastic Is Not One Big Happy Family)
- Step 2: Prep Like a Pro (Empty, Rinse, Cap, and Maybe Crush)
- Step 3: Pick the Right Recycling Route
- What Actually Happens After You Recycle a Bottle?
- Common Plastic Bottle Recycling Mistakes (and How to Avoid Them)
- How to Make Bottle Recycling “Stick” in Real Life
- FAQ: Quick Answers (Because Nobody Has Time for a 40-Minute Recycling Debate)
- Conclusion: Recycle Right, Not Perfect
- Real-World Experiences: What People Learn When They Start Recycling Bottles for Real
Plastic bottles have one of the most dramatic career arcs in modern life. They start as a sparkling, optimistic container for water, soda, shampoo, or “mystery sports drink flavor,” and thenif you’re not carefulend up spending the next few centuries hanging out in a landfill like a bad group project that never ends.
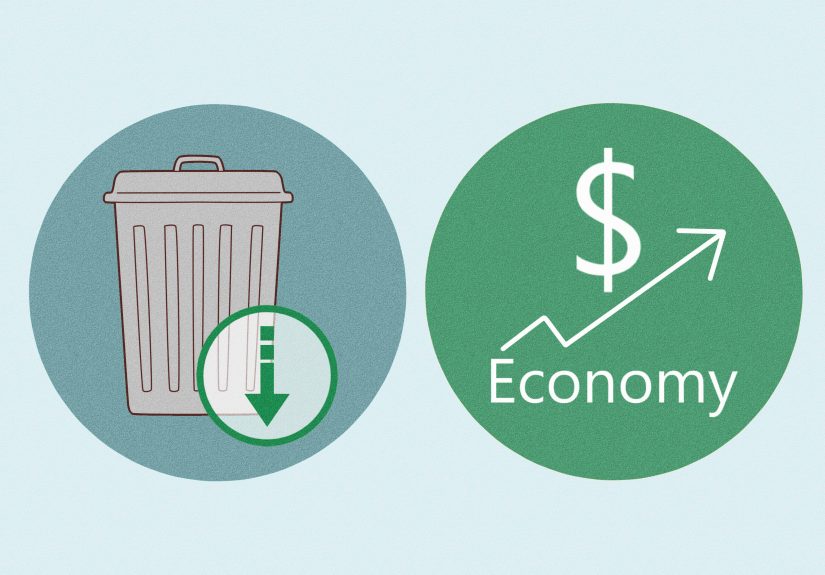
The good news: plastic bottles are one of the most recyclable plastic items in the U.S. The annoying news: recycling rules can feel like they were written by a committee of raccoons. This guide clears up what’s actually true, what’s “maybe,” and what’s definitely going to get your recycling rejectedso your bottles have a fighting chance at a second life.
Why Plastic Bottle Recycling Is Complicated (and Still Worth Doing)
Recycling in the U.S. is realbut it’s not magic. Plastics are especially tricky because there are many different plastic types, and recycling facilities can’t process all of them the same way. That’s why you’ve probably heard conflicting advice like “remove the cap!” and “leave the cap on!” and “why are you whispering to your recycling bin?”
Here’s the grounded reality: plastic bottles made from PET (#1) and HDPE (#2) are among the most commonly collected and processed plastics. Even so, the system has limits. For context, U.S. data has shown that overall recycling for plastic containers and packaging is much lower than people assume, which is why doing the simple steps correctly (and avoiding contamination) matters more than doing 27 complicated steps perfectly.
Also, your single bottle won’t “save the planet” on its own. But millions of bottles recycled correctly do help keep valuable material in circulation, reduce litter, and support markets for recycled plastic (like rPET used in new bottles and packaging). Think of it as voting, but for trash.
Step 1: Know Your Bottle (Because Plastic Is Not One Big Happy Family)
PET (#1): The Clear Drink-Bottle Celebrity
PET (polyethylene terephthalate) is the plastic used for many water, soda, iced tea, and sports drink bottles. It’s often clear and lightweight, and it’s one of the most widely recycled plastics in U.S. programs. PET can be turned into new bottles, food containers, and also non-food items like fiber for carpet and clothing.
HDPE (#2): The Sturdy One (Milk, Detergent, Shampoo)
HDPE (high-density polyethylene) is common in milk jugs, detergent bottles, and many thicker personal-care bottles. It’s tough, it’s useful, and it’s also widely accepted in many recycling programs. Recycled HDPE often becomes new bottles, piping, and durable plastic products.
What About #3–#7?
Some bottles and containers are made from other plastics (like PVC #3, PP #5, or “Other” #7). A few communities accept some of these, but many don’tor accept them only through special drop-off programs. This is why the “triangle with a number” is not a universal “yes” stamp. It’s a material ID, not a guarantee.
If you want a simple rule that works in most places: focus on recycling bottles and jugs first (especially #1 and #2), and check local guidance for everything else. When recycling is confusing, start with the items most likely to be successfully processed.
Step 2: Prep Like a Pro (Empty, Rinse, Cap, and Maybe Crush)
Your goal is to give recycling facilities clean, sortable material. The enemy is contaminationfood, liquid, and “mystery goo” that spreads onto paper and cardboard and can cause entire loads to be downgraded or trashed.
1) Empty It Completely
Pour out leftover liquid. For thick stuff (like shampoo, lotion, syrup, or detergent), use it up as much as you can. Facilities aren’t looking for spotless, but they do need containers to be mostly empty so they don’t contaminate other recyclables.
2) Give It a Quick Rinse (No, You Don’t Need a Spa Day for the Bottle)
A quick swish rinse is usually enoughespecially for sugary drinks, oily residue, or anything sticky. If you want to conserve water, rinse using leftover dishwater after you’ve washed dishes. That’s efficient and also oddly satisfying.
3) Caps: Usually On, Not Loose
This is one of the biggest “old advice vs. modern reality” issues. In many places, you should put the cap back on the bottle before recycling. Why? Loose caps are small and can fall through sorting equipment. When they stay attached, they’re more likely to make it through the system and be captured properly.
That said, local rules still matter. If your local program explicitly says “remove caps,” follow that instruction. But if you’re looking at an on-package label that says “empty & replace cap,” it’s usually giving you a solid default for typical curbside recycling.
4) Labels: Usually Fine to Leave On
Most modern recycling systems can handle labels. You generally don’t need to peel them off unless your local program says otherwise (or the label is a thick shrink sleeve that covers the whole bottlemore on that in the mistakes section).
5) To Crush or Not to Crush?
Crushing can save space in your bin, but it can also cause sorting issues in some systems (some facilities rely on containers keeping their shape for certain sorting steps). If your city encourages flattening, go for it. If they don’t mention it, a gentle “squish” is usually fine, but don’t turn it into a plastic pancake.
Step 3: Pick the Right Recycling Route
Curbside Recycling
For most households, curbside recycling is the main path. The keys are: only put accepted items in the bin, keep them empty, and avoid contamination. If your area accepts bottles and jugs, PET and HDPE bottles are usually safe bets.
Deposit Return Programs (The “Get Paid to Do the Right Thing” Option)
Some states have beverage container deposit programs. These can increase bottle return rates because the system is simple: bring eligible containers back, get your deposit back. If you live in California, for example, the California Redemption Value (CRV) refunds vary by container size. Other states have their own rules, eligible container lists, and return locations.
Even if you’re not motivated by the refund, deposit programs can be a cleaner stream of materialmeaning bottles are more likely to become new bottles rather than being downcycled.
Drop-Off Centers and Public Recycling Bins
If you don’t have curbside service, or if you’re dealing with a lot of bottles (events, sports teams, offices), drop-off locations can be a great option. Just make sure the bins are for bottles and containersnot for bagged household trash pretending to be recycling.
Special Cases: When Bottles Shouldn’t Go in Your Regular Bin
- Bottles with pumps/sprayers: Remove the pump top (often mixed materials) and recycle the bottle if accepted.
- Bottles with hazardous contents: Follow product label instructions and local hazardous waste rules.
- Plastic bags and film: Don’t put these in curbside bins unless your local program explicitly accepts them; they tangle machinery.
What Actually Happens After You Recycle a Bottle?
Recycling isn’t just “bin → new bottle.” It’s more like “bin → obstacle course.” After collection, recyclables usually go to a Materials Recovery Facility (MRF). There, items move along conveyor belts and are sorted by a mix of machines and humans.
Sorting: The High-Speed Shuffle
Many facilities use optical sorters that identify plastics (like PET) and then use air jets to push items into the right stream. Metals are often pulled out with magnets and eddy currents, while paper is separated through screens and airflow systems.
Baling and Shipping
Once sorted, plastics are compressed into bales and sent to reclaimers. Think of bales as “plastic ingredient bricks” that manufacturers can buy.
Grinding, Washing, and Separation
At the reprocessing stage, bottles are typically ground into flakes, washed to remove residue, and separated by material properties. PET and HDPE behave differently in water, which can help separate bottle plastic from cap plastic in certain processes.
From Flake to Pellet to Product
Clean plastic flakes can be melted and formed into pellets, which become raw material for making new products. Sometimes bottles become bottles (closed-loop recycling). Sometimes they become other products like packaging, fiber, or durable goods (downcycling). The cleaner and more consistent the stream, the better the outcomes.
Common Plastic Bottle Recycling Mistakes (and How to Avoid Them)
Mistake 1: “If It Has the Triangle Symbol, It’s Recyclable”
The resin ID number tells you what plastic it isnot whether your community actually accepts it. When in doubt, check your local program’s accepted list. If your city says “bottles and jugs only,” believe them.
Mistake 2: Leaving Liquid Inside
Liquids leak, soak paper, and can contribute to contamination. Empty, quick rinse, done. Your recycling doesn’t need to be museum-clean, but it shouldn’t be soup.
Mistake 3: Tossing Caps in Loose
Loose caps are tiny, and tiny items can fall through sorting lines. If your program allows it, screw caps back on. If the bottle has a cap you can reattach, that’s often the best way to keep it in the system.
Mistake 4: Putting Recyclables in Plastic Bags
Bagged recycling can be hard for facilities to sort and may be treated as trash. Unless your community specifically requests recyclables in clear bags, keep items loose in the cart.
Mistake 5: Full-Body Shrink Sleeves and Mixed-Material Parts
Some bottles have shrink sleeves that cover most of the bottle and can interfere with sorting. Some have pump tops, metal springs, or mixed materials. If you can remove a pump, sprayer, or thick sleeve easily, do it. If you can’t, follow local guidanceor consider alternate disposal routes if your community says those items aren’t accepted.
How to Make Bottle Recycling “Stick” in Real Life
The hardest part of recycling plastic bottles isn’t learning the rules. It’s turning “good intentions” into “a routine that works when you’re tired, busy, and holding three empty bottles while your dog judges you.”
Set Up a Tiny System
- Keep a small bin where bottles happen: kitchen, bathroom, laundry room, garage, car.
- Add a “quick-rinse moment”: rinse when you’re already at the sink or right after dishes.
- Make it obvious: a labeled bin beats a vague pile of guilt.
Buy Smarter When You Can
Recycling works best when products are designed for it and markets exist for recycled material. Choosing items made with recycled content (like rPET) helps create demand. When demand is strong, more material gets collected and processed, and more of it becomes new products.
FAQ: Quick Answers (Because Nobody Has Time for a 40-Minute Recycling Debate)
Do bottles need to be perfectly clean?
No. Aim for “empty and mostly clean.” A quick rinse to remove residue is typically enough.
Should I remove labels?
Usually nomost systems can handle labels. If your local program says otherwise, follow local rules.
Should I leave the cap on?
In many areas, yesreplacing the cap helps prevent it from getting lost during sorting. But if your local program says “remove caps,” follow your local instructions.
Can I recycle bottles from the bathroom?
Often yes (think shampoo, conditioner, body wash), as long as they’re empty and accepted in your program. Pump tops are frequently the problemremove them when possible.
Do deposit bottles go in curbside?
Sometimes they can, but returning them through a deposit system can keep the material cleaner and may improve the chance of high-value recycling. If you’re in a deposit state, consider returning eligible containers.
Conclusion: Recycle Right, Not Perfect
Recycling plastic bottles doesn’t require a PhD in “chasing arrows.” It requires a few consistent habits: focus on the bottles your community actually accepts, keep them empty (and lightly rinsed), handle caps the right way for your area, and avoid tossing in problem items that contaminate the stream.
The best recycling routine is the one you’ll actually do on a random Tuesday when life is chaotic. Keep it simple, keep it clean, and let your bottles retire into a second career instead of an eternal landfill internship.
Real-World Experiences: What People Learn When They Start Recycling Bottles for Real
Once people decide to “recycle plastic bottles correctly,” the first surprise is usually how many bottles show up outside the kitchen. The bathroom becomes a plastic bottle factory (shampoo, conditioner, body wash, lotion). The laundry area quietly produces detergent and stain remover containers. Cars generate water bottles like they’re being printed on demand. The practical lesson: recycling isn’t a single binit’s a small network of bins placed where bottles actually happen.
Another common experience: the biggest enemy is not laziness, it’s mess. If bottles go into the bin half-full, sticky, or dripping, recycling immediately becomes unpleasant. People notice odors, fruit flies, and the “why is my recycling bin suddenly a science experiment?” effect. The fix most households land on is a low-effort rinse habit: a quick swish right after the bottle is empty, or a rinse with leftover dishwater. When the process stops being gross, it stops being a chore.
Then there’s the cap confusionarguably the most dramatic argument topic in the history of modern households. People often grew up hearing “remove caps,” so it feels wrong to leave them on. But many updated programs and labels encourage replacing caps so they don’t get lost in sorting. In real life, what works is picking one rule that matches local guidance and sticking to it. If your program accepts caps-on, the household “cap policy” becomes: screw it back on immediately, so caps don’t roll under the fridge and disappear forever (like socks in a dryer).
A surprisingly effective trick people share is the “one-minute reset” approach: once a day (or a few times a week), someone takes 60 seconds to check the recycling bin for obvious contaminationhalf-full bottles, pump tops, plastic bags, or random trash. This tiny habit prevents a whole bin from becoming “the bin nobody wants to deal with,” and it reduces the odds that recyclables will be rejected.
People also tend to learn the difference between “recyclable in theory” and “recycled in practice.” That realization can feel discouraging at first, but it often leads to smarter habits: prioritizing bottles and jugs that are widely accepted, returning deposit bottles when possible, and reducing single-use bottles when a refill option is convenient. Many households report that once recycling is working smoothly, they naturally start asking a bigger question at the store: “Can I avoid buying the hardest-to-recycle packaging in the first place?”
Finally, the most relatable experience is this: nobody becomes perfect at recycling. People get busy. A bottle slips into the trash. Someone forgets to empty a container. It happens. The best recycling routines aren’t fragilethey’re forgiving. If your setup makes it easy to do the right thing most of the time, you’re already winning the long game.