Table of Contents >> Show >> Hide
- What Is an Aluminum Beer Bottle Wind Chime, Exactly?
- Benefits of Making an Aluminum Beer Bottle Wind Chime
- Materials and Tools You’ll Need
- Step-by-Step: How to Make an Aluminum Beer Bottle Wind Chime
- Design Ideas to Customize Your Hometalk-Style Wind Chime
- Safety and Durability Tips
- Where to Hang Your Aluminum Beer Bottle Wind Chime
- Care and Maintenance for Long-Lasting Chimes
- Hands-On Experiences and Extra Tips From the Wind Chime “Front Lines”
If your recycling bin is overflowing with aluminum beer bottles and your porch looks a little too quiet, this project is about to solve both problems in one breezy, tinkly swoop. An aluminum beer bottle wind chime is classic Hometalk energy: thrifty, a little quirky, and totally doable even if your last “craft project” was taping a grocery list to the fridge. In one afternoon, you can upcycle a handful of bottles into a colorful, musical piece of outdoor decor that looks custom-made and sounds like summer.
In this guide, we’ll walk through everything you need to know to create your own aluminum beer bottle wind chime, inspired by popular Hometalk-style projects and other DIY bottle wind chimes across the internet. We’ll talk tools and materials, sound and safety, hanging hardware, design tweaks, and how to keep your new wind chime looking and sounding great season after season. At the end, you’ll also get some real-world experience tips and stories to help you avoid the “oops” moments and go straight to “wow, I actually made that!”
What Is an Aluminum Beer Bottle Wind Chime, Exactly?
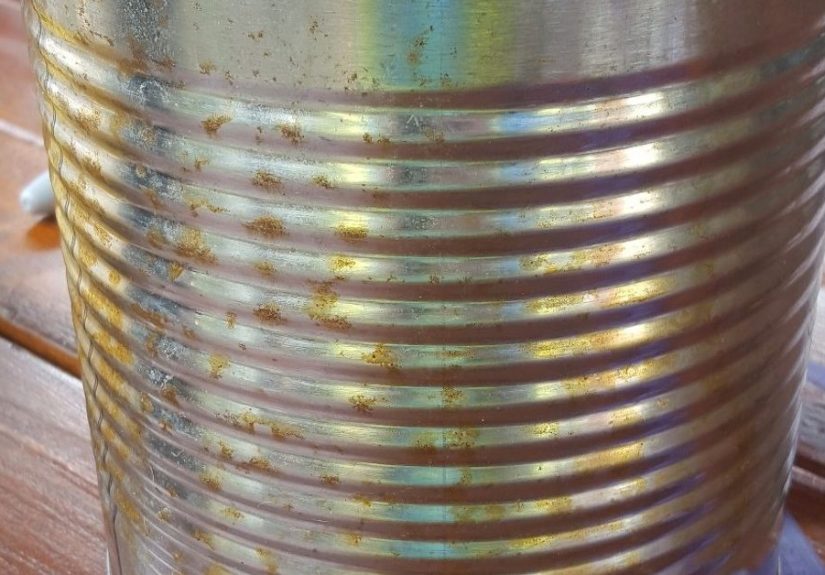
A beer bottle wind chime is a hanging outdoor decoration made from recycled bottles that chime or clink together when the wind blows. When you use aluminum beer bottles instead of glass, you get a lightweight, durable, and shatter-resistant project that holds up well in changing weather. The bottles are usually suspended from a central baseoften a metal can, wood disk, or other sturdy pieceand arranged so they catch the breeze and tap gently against a clapper or each other.
Think of it as a mash-up of two things you already love: enjoying a cold drink and relaxing outdoors. The look is playful and rustic, perfectly at home by a grilling shed, patio, balcony, or backyard bar. Depending on how you design it, your wind chime can read as “farmhouse chic,” “beachy boho,” or “my neighbors are definitely going to ask about this.”
Benefits of Making an Aluminum Beer Bottle Wind Chime
1. It’s eco-friendly and budget-friendly
Instead of tossing aluminum bottles in the recycling bin, you’re giving them a second life as outdoor art. You only need a few inexpensive itemslike wire, chain, and a baseto complete the project. If you already have basic tools (a drill, bits, and pliers), this can be a very low-cost build.
2. It’s fully customizable
You can choose matching bottles for a coordinated look, or mix brands and colors for a more eclectic, Hometalk-style vibe. Paint the bottles, add decals, or leave the aluminum logos exposed as a nod to your favorite brews. The base can be anything from a large bean can to a wooden plaque, a thrifted metal colander, or even a salvaged bicycle gear.
3. It adds sound and movement to your outdoor space
Wind chimes aren’t just prettythey’re also soothing. Aluminum bottles create a soft, clinky sound that’s more subtle than deep metal tubes and less fragile than glass. Hang them near a seating area to add a gentle soundtrack while you grill, read, or sip something icy.
Materials and Tools You’ll Need
Core materials
- 5–7 aluminum beer bottles (rinsed and label-free if you prefer a clean look)
- 1 sturdy base (a large metal can, wooden disk, or upcycled metal lid)
- Hanging hardware (chain, strong cord, or wire for the top and the bottle strands)
- Small eye screws, screw hooks, or drilled holes for attaching the bottles to the base
- Optional clapper: a wooden ball, metal washer cluster, or small can that hangs in the center
Tools
- Drill with metal-drilling bit (for the bottles and base)
- Safety gear: gloves, eye protection, and a dust mask if you’ll be sanding
- Needle-nose pliers and wire cutters
- Marker or painter’s tape for spacing and layout
- Optional: spray paint, clear sealant, and small file or sandpaper for smoothing edges
You don’t need a fancy workshop for this project. A flat outdoor surface, a sturdy table, and a little patience are much more important than having the trendiest tools.
Step-by-Step: How to Make an Aluminum Beer Bottle Wind Chime
Step 1: Prep the bottles
Wash and dry each aluminum beer bottle thoroughly. Remove any remaining labels or glue. If you like the original artwork, leave it as-is. If you’d rather customize, now’s a great time to lightly scuff the surface with fine sandpaper, then spray paint the bottles in your chosen colors. Metallics, coastal blues, or matte black with a contrasting base all look fantastic.
Step 2: Choose and prep the base
Your base needs to be strong enough to support the bottles but not so heavy that it’s a pain to hang. A large bean or soup can, a thick round of scrap wood, or a metal lid are all great options. Mark where each bottle will hang by dividing the perimeter into equal sectionsfive or seven spacing marks usually give you a nice, balanced look. Use a marker or strips of painter’s tape to lay out your drill points, then drill a small hole at each mark.
Don’t forget the top: drill one to three holes in the center of the base for your main hanging chain or cord. If your base already has a built-in handle, you can use that instead, but make sure it’s sturdy enough to handle the weight and movement.
Step 3: Drill the bottles safely
Drilling into aluminum is easier than drilling into glass, but you still want to be careful. Clamp each bottle gently or hold it firmly while wearing gloves. Use a small metal bit and go slowly. Drill a hole near the neck or in the cap (if you kept the caps on), where you’ll attach the hanging wire or chain. If you plan to add a clapper through the center of the bottle, drill a hole in the bottom as well so you can run a cord straight through.
After drilling, remove any sharp burrs around the holes with a small file or sandpaper. Your fingers will thank you later.
Step 4: Attach the bottles to the base
Cut lengths of chain or wire for each bottle. The exact length is up to youstaggered bottles create a more dynamic shape, while equal lengths give you a clean, uniform design. Thread one end of the chain or wire through the hole in the bottle and secure it with a knot, crimp, or small washer on the inside. Attach the other end to your base through the pre-drilled holes, using knots, jump rings, or small eye screws.
As you attach each bottle, hold the base up occasionally and check how everything hangs. Adjust the lengths so the bottles don’t collide too harshly but are still close enough to catch the breeze and chime.
Step 5: Add a clapper (optional but highly recommended)
If you want a more consistent chime, add a clapper that hangs in the center of the bottle ring. This could be a wooden ball, a small metal can, or a cluster of metal washers on a cord. Suspend it from the center of the base so that it lightly taps the bottles when the wind blows. Adjust the length until it hits the sweet spotliterally.
Step 6: Add the main hanger and test
Attach chain or strong cord to the top of the base. If you drilled center holes, feed the chain or cord through and secure with a large knot or washer on the underside. If your base has a handle, clip or tie the hanging hardware to that. Hang your wind chime temporarily from a sturdy hook, tree branch, or ladder and see how it behaves in a light breeze. Make any final adjustments to bottle lengths or clapper position.
Design Ideas to Customize Your Hometalk-Style Wind Chime
Play with color and finish
One of the easiest ways to personalize your aluminum beer bottle wind chime is with paint. Try:
- Monochrome chic: Spray all bottles matte white or black for a modern, minimalist look.
- Gradient effect: Use shades of the same color from light to dark around the circle.
- Beachy palette: Layer turquoise, seafoam, and sandy beige for coastal vibes.
- Team spirit: Use your favorite sports team colors for a tailgate-ready chime by the grill.
Dress up the base
The base doesn’t have to be boring. Wrap a metal can in jute rope for a rustic look, stain or paint a wooden disk, or stencil a word like “CHEERS,” “WELCOME,” or “GRILLING HQ” on the underside, so guests see it when they look up. Adding a clear outdoor sealer will help protect any painted or stained surfaces from sun and rain.
Incorporate extra upcycled elements
Bottle caps, keys, flat washers, and tab tops can all be added as accents. String bottle caps between the bottles, or hang a column of caps down the center for extra shimmer and sound. Just remember: more metal equals more noise. If you live in a quiet neighborhood, you may want to keep things on the softer side.
Safety and Durability Tips
Even though aluminum is more forgiving than glass, safety still comes first. Always wear eye protection while drilling, and keep your hands clear of the bit. Check all knots, crimps, and hardware before hanging your wind chime outdoors. If you use cord or twine, choose something rated for outdoor use that won’t fray quickly in the sun and rain.
Over time, aluminum may fade or develop small scratches. Many DIYers actually like this weathered look, but if you prefer a fresh finish, give the bottles a quick clean and recoat them with clear spray sealant once a year. Check for rust on any steel hardware and swap out parts that start to weaken.
Where to Hang Your Aluminum Beer Bottle Wind Chime
Placement is everything. You want enough breeze to make music, but not so much that your wind chime constantly smacks into the siding like it’s trying to escape.
- By the grilling shed or outdoor bar: Lean into the beer theme and hang it right where the bottles are usually opened.
- On a covered porch: This protects your chime from the harshest weather and keeps the sound closer to where people sit.
- Near a garden path: Let visitors hear the gentle clinking as they walk by your flowers and herbs.
- Under a sturdy tree branch: Just make sure falling branches aren’t a concern in storms.
Wherever you hang it, make sure the chime has room to move freely without hitting walls, windows, or your favorite hanging planter.
Care and Maintenance for Long-Lasting Chimes
Your aluminum beer bottle wind chime doesn’t need much pampering, but a little maintenance goes a long way:
- Wipe bottles down with a damp cloth a few times a season to remove dust, pollen, or spider webs.
- Check hardware connections and knots at the start and end of each season.
- If you live in a very stormy or windy area, take the chime down before big storms and rehang it afterward.
- Refresh paint with a quick touch-up or entirely new color scheme when you’re ready for a makeover.
Treat it well, and your wind chime can last for years, collecting compliments and breezy melodies along the way.
Hands-On Experiences and Extra Tips From the Wind Chime “Front Lines”
The first time many DIYers try a project like this, the biggest surprise is how much difference small adjustments make. A half-inch change in hanging length can shift your chime from “awkward clanking” to “pleasant, gentle music.” If you find the sound too chaotic, try shortening a few bottles so they don’t collide as often, or shift your clapper higher or lower until it hits only one or two bottles at a time instead of all of them at once.
Another common lesson: test your materials outside before committing. If you’re not sure how loud your aluminum bottles will be, hang one or two from a temporary hook and listen on a breezy day. Some people are surprised by how much sound a small chime can produce, especially in tight courtyard-style spaces. If you share a fence with neighbors, it’s courteous to stand near their side and listen as well. If you think you’d be annoyed hearing it at midnight, they probably would tooso consider hanging your loudest chimes farther from bedrooms or close windows.
Many makers also discover their “favorite” bottle shape or brand after a little experimenting. Tall, slim bottles tend to produce a lighter, higher-pitched clink, while wider or thicker bottles can create a slightly fuller sound. Mixing different shapes and sizes can give you a more interesting, layered tone. There’s no right or wrong herejust what makes your backyard feel the most relaxing.
Weather is another teacher. In very sunny climates, cord and twine can break down faster than you expect, especially if they’re not labeled for outdoor use. That’s why some crafters swear by thin chain or flexible wire instead of string. It takes a bit more effort to cut and attach, but it holds up far longer. If you do use cord, give it a gentle tug each month to make sure it still feels strong. If it looks faded or feels brittle, swap it out before the bottles take a surprise dive.
One of the most rewarding parts of a project like this is how it can become a conversation piece or even a tradition. Maybe you save bottles from special occasionsa birthday, a vacation, a big gameand work them into the chime over time. Each bottle tells a little story, and the finished piece becomes a hanging memory reel that also happens to sound pretty. If you host cookouts or backyard parties, guests will almost always ask, “Where did you get that?” It’s hard to beat the satisfaction of saying, “I actually made it from old aluminum bottles.”
Finally, don’t be afraid to treat this as a living, evolving project. Swap out bottles when designs change. Try different clappers in the center to experiment with sound. Repaint the base when you update your outdoor furniture. The DIY spirit behind Hometalk-style projects is all about making things your own, tweaking as you go, and having fun in the process. Your aluminum beer bottle wind chime isn’t just a finished craftit’s a small, ongoing creative playground that hangs right outside your door.
With a few aluminum bottles, simple tools, and a free afternoon, you can transform what used to be trash into a unique, musical piece of decor that reflects your style, your hobbies, and maybe even your favorite brew. Once you hang your wind chime and hear that first soft clink in the breeze, don’t be surprised if you start saving bottles for your next one.