Table of Contents >> Show >> Hide
- Quick Answer: YesHere’s the Best Make-Ahead Strategy
- Why Making Pie Crust Ahead of Time Works (And Sometimes Works Better)
- How Far Ahead Can You Make Pie Crust?
- Option 1: Refrigerate Pie Dough (Best for “This Week” Pies)
- Option 2: Freeze Pie Dough Disks (Best for Flexible Make-Ahead Baking)
- Option 3: Freeze the Crust Rolled Out in the Pie Pan (Best “Pro” Shortcut)
- Option 4: Par-Bake or Blind Bake Ahead (Best for Custards and No-Bake Fillings)
- Make-Ahead Pie Crust: What to Choose for Different Pies
- Thawing, Rolling, and Other “Why Is My Dough Doing This?” Problems
- A No-Stress Make-Ahead Schedule (Holiday Edition)
- FAQ: Making Pie Crust Ahead of Time
- Conclusion
- Extra: Real-World Make-Ahead Experiences (The Good, the Weird, and the Delicious)
- 1) “I froze dough disks and now they’re rock hard and cracking.”
- 2) “I refrigerated dough for three days and it smelled ‘different.’”
- 3) “Freezing the crust in the pan felt like genius… until I ran out of freezer space.”
- 4) “My par-baked crust lost its crispness after storage.”
- 5) “I made dough ahead and it rolled out better than my same-day attempts.”
- 6) “I baked from frozen and the top browned before the bottom was done.”
If you’ve ever tried making pie crust while someone is asking, “Is it done yet?” every 47 seconds,
you already understand why this question matters. The good news: yes, you absolutely can make pie crust ahead of time.
The better news: doing it in advance can actually make your crust more consistentless shrinkage, fewer cracks,
and dramatically fewer last-minute emotional negotiations with cold butter.
In this guide, you’ll learn the smartest make-ahead options (refrigerate, freeze, freeze-in-the-pan, and even par-bake),
how long each method lasts, and how to thaw and bake without turning your beautiful pie dreams into a crumbly crime scene.
Let’s get you to “calmly baking pie” energy.
Quick Answer: YesHere’s the Best Make-Ahead Strategy
You can make pie crust ahead of time in four main ways:
- Chill the dough (1–3 days) for fast, low-effort prep.
- Freeze dough disks (up to ~2–3 months) for flexible scheduling.
- Freeze the crust already rolled out in the pie pan for maximum “future you” gratitude.
- Par-bake or blind bake the crust ahead when you need a crisp bottom or a no-bake filling.
The “best” choice depends on your pie type (fruit, custard, cream) and how chaotic your calendar is.
If you want the most convenience, freezing the crust in the pan is the elite move.
Why Making Pie Crust Ahead of Time Works (And Sometimes Works Better)
Pie dough is basically a tiny science project: flour + fat + water + temperature + time + your kitchen’s humidity deciding to be
“quirky” today. Making it ahead helps because:
- Hydration improves: The flour has time to absorb moisture evenly, making the dough easier to roll.
- Gluten relaxes: Resting reduces spring-back, which means less shrinking in the oven.
- Fat stays cold: Cold butter (or shortening/lard) creates flakier layers when it hits the heat.
In plain English: resting the dough makes it calmer, and calm dough behaves better. Unlike most of us.
How Far Ahead Can You Make Pie Crust?
Here’s a practical timeline that works for most classic pie dough recipes (butter-based, shortening-based, or a combo):
Refrigerator timeline
- Best quality: 24 hours (easiest rolling, most relaxed dough)
- Still great: up to 3 days (wrapped well so it doesn’t dry out)
Freezer timeline
- Best quality: 1–2 months (minimal freezer flavor, best texture)
- Usually fine: up to ~3 months (especially if wrapped like it’s going on a space mission)
You might see advice that dough lasts longer in the freezer, and technically it canfrozen food doesn’t instantly turn into
poison at Day 91. But flavor and texture slowly decline, and pie crust is 50% texture, 50% bragging rights.
Option 1: Refrigerate Pie Dough (Best for “This Week” Pies)
If you’re baking in the next day or two, refrigeration is the simplest make-ahead method. Make the dough, shape it into a disk,
wrap it tightly, and stash it in the fridge.
How to refrigerate pie dough properly
- Shape dough into a flat disk (or two disks for a double crust).
- Wrap tightly in plastic wrap.
- Slide into a zip-top bag for extra protection (dry fridge air is sneaky).
- Label with the date, because “I’ll remember” is a lie we tell ourselves.
When you’re ready to roll
Pull the dough from the refrigerator and let it sit at room temperature just long enough to become workableusually 10–15 minutes.
If it cracks the moment you touch it, it’s too cold. If it feels greasy or floppy, it warmed up too much. You want “firm but
cooperative,” like a good hiking boot.
Option 2: Freeze Pie Dough Disks (Best for Flexible Make-Ahead Baking)
Freezing dough disks is the classic move: make the dough, shape into disks, wrap well, freeze, and you can bake pie on a day
that actually makes sense for your life.
How to freeze pie dough so it doesn’t taste like your freezer
- Flatten dough into a disk (1-inch thick is a good target).
- Wrap tightly in plastic wrap.
- Add a second layer: foil or a freezer-safe bag.
- Store in the back of the freezer (less temperature fluctuation from door opening).
How to thaw frozen pie dough
- Best method: thaw overnight in the refrigerator.
- Faster method: let it sit at room temp brieflywatch closely so the fat doesn’t melt.
Patience pays here. Slow thawing helps the dough stay evenly chilled, which keeps the fat in distinct pieces (aka, future flakes).
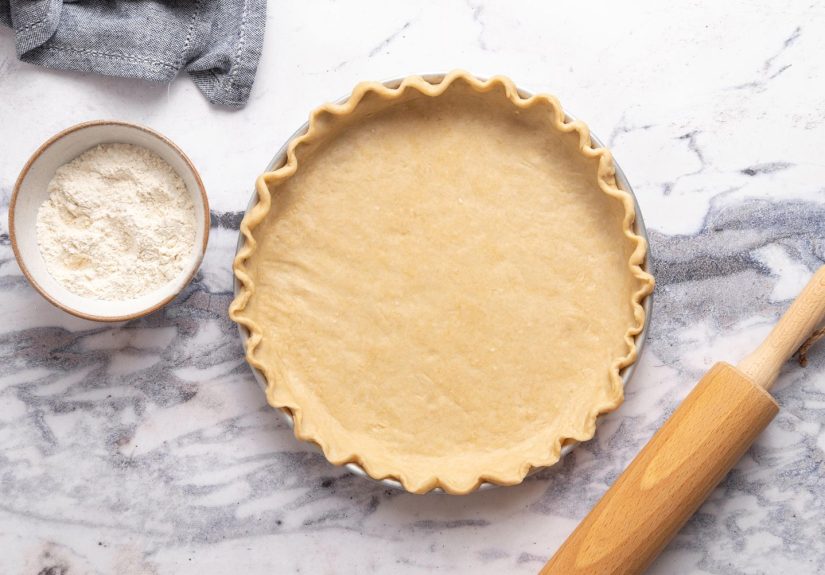
Option 3: Freeze the Crust Rolled Out in the Pie Pan (Best “Pro” Shortcut)
If freezing dough disks is good, freezing a rolled-out crust already in the pan is better. Why?
Because future you won’t have to thaw, roll, lift, patch, crimp, and pretend not to be stressed.
You’ll just fill and bake.
How to freeze an unbaked crust in the pan
- Roll out the dough and fit it into your pie plate or pie pan.
- Crimp the edges (or just tidy them up if you’re not in a crimping mood).
- Freeze the whole pan uncovered until firm.
- Wrap tightly (plastic wrap + bag is ideal) and return to the freezer.
Important pan note (aka: don’t summon the shattered-glass demon)
Metal pans are generally the safest for freezer-to-oven moves. If you use glass or ceramic, avoid extreme thermal shock:
let the frozen pan sit out briefly while the oven preheats so it isn’t going from “Arctic expedition” to “volcano” instantly.
Baking from frozen
You can often bake a frozen crust with only a small time adjustment. Expect to add a few extra minutes to the bake time.
For many pies, you can fill a frozen crust and bake right awaysuper convenient for custard pies that benefit from par-baking,
too (more on that next).
Option 4: Par-Bake or Blind Bake Ahead (Best for Custards and No-Bake Fillings)
If your pie filling is wet (pumpkin, pecan, custard) or you’re making a no-bake pie (chocolate cream, banana cream),
pre-baking the crust helps prevent the dreaded soggy bottom.
Par-bake vs. blind bake
- Par-bake: partially bake the crust so it sets but stays palethen finish baking with the filling.
- Blind bake: fully bake the crust until goldenperfect for pies that won’t go back in the oven.
Make-ahead storage for par-baked or blind-baked crusts
Let the crust cool completely first (steam trapped in wrapping is the enemy of crispness). Then store it:
- Room temperature: short-term (a couple of days) if protected from air and humidity.
- Freezer: for longer storagewrap well and freeze.
When you’re ready, you can often add the filling and continue baking without fully thawingespecially if the crust is already set.
This is a huge win during holiday baking when oven time is basically currency.
Make-Ahead Pie Crust: What to Choose for Different Pies
Here’s a simple decision guide (because decision fatigue is real, and pie is supposed to be comforting):
Fruit pies (apple, cherry, blueberry)
- Great options: chill dough 24 hours, freeze disks, or freeze crust in pan.
- Bonus tip: keeping the dough cold helps hold your crimped edges and reduces shrinkage.
Custard pies (pumpkin, pecan)
- Best options: freeze crust in pan, or par-bake ahead and freeze.
- Why: custard fillings are wet and often benefit from a pre-set crust.
No-bake pies (cream pies)
- Best option: blind bake the crust fully, then store it until filling day.
- Why: you need a crisp, fully baked shell since it won’t get oven help later.
Thawing, Rolling, and Other “Why Is My Dough Doing This?” Problems
Problem: Dough cracks when rolling
It’s too cold (or too dry). Let it rest at room temperature a bit longer, then try again. If it’s dry from storage,
a few minutes of gentle kneading can help bring it back togetherdon’t overwork it.
Problem: Dough feels sticky or greasy
It warmed up too much. Chill it again for 10–20 minutes. If butter is melting before it hits the oven, flakiness suffers.
Problem: Crust shrinks in the oven
Usually gluten tension. Solutions: rest the dough longer, chill the shaped crust before baking, and avoid stretching it into the pan.
Stretching is basically the pie equivalent of pulling a rubber band and being surprised it snaps back.
Problem: Soggy bottom
Par-bake for wet fillings, bake on a preheated sheet pan or baking steel/stone if you have one, and don’t skimp on bake time.
Pale bottom = sadness.
A No-Stress Make-Ahead Schedule (Holiday Edition)
Want a simple plan that works for Thanksgiving, Christmas, or any pie-heavy weekend? Try this:
- 2–3 days before: make dough, refrigerate (or freeze if you’re prepping far ahead).
- 1 day before: roll and freeze-in-pan, or par-bake shells for custard pies.
- Bake day: fill and bake (often straight from the freezer with a small time adjustment).
This spreads the work out and keeps “pie day” from becoming an all-day flour blizzard.
FAQ: Making Pie Crust Ahead of Time
Can I make pie dough and leave it in the fridge overnight?
Yesovernight chilling is often ideal. It helps hydration and makes the dough easier to roll with less shrinkage risk.
Does freezing ruin pie crust?
Not if you wrap it well and don’t keep it frozen forever. Freezing is a normal, reliable method for make-ahead pie crust.
Texture can decline with very long storage, and freezer odors can sneak in if packaging is weak.
Should I thaw frozen pie crust before baking?
It depends. Dough disks usually thaw best in the fridge overnight so you can roll them. But a crust already shaped in the pan,
and especially a par-baked crust, can often be filled and baked without fully thawing. Just plan for a small time adjustment.
Can I freeze pie crust with a decorative edge or lattice?
You can freeze decorative elements, but handle them gently. Many bakers freeze cut shapes on a sheet pan first, then store in a bag.
Lattice usually goes best when assembled close to bake time, but you can prep strips ahead and keep them chilled or frozen flat.
Conclusion
So, can you make pie crust ahead of time? Yesand doing it on purpose (instead of in a panic) is one of the easiest ways to upgrade
your baking. Refrigerate dough for a few days when you’re baking soon. Freeze disks for flexible scheduling. Freeze crusts already
rolled out in the pan for the ultimate time saver. And when a crisp bottom matters, par-bake or blind bake ahead so the filling
doesn’t win the soggy war.
Your future self deserves a pie day that feels like a victory lap, not an episode of “Butter vs. Countertop.”
Make the crust ahead. Then show up on bake day like you’ve got a secret. (Because you do.)
Extra: Real-World Make-Ahead Experiences (The Good, the Weird, and the Delicious)
Here are a handful of common “real kitchen” scenarios people run into when they try to make pie crust ahead of timeplus what
usually works best. Think of this as the practical, been-there-done-that guide… without the emotional damage of learning the hard way.
1) “I froze dough disks and now they’re rock hard and cracking.”
This is one of the most common first-time freezer surprises. Frozen dough can feel like a hockey puck because, well… it is.
The fix is almost always patience. Thaw the disk overnight in the refrigerator, then give it 10–15 minutes on the counter before
rolling. If you try to roll too soon, the edges crack because the outside warms faster than the center. A helpful trick is to press
the rolling pin gently into the surface a few times firstlike you’re persuading the dough that rolling is a safe activity.
Once it softens slightly, it usually rolls like a dream.
2) “I refrigerated dough for three days and it smelled ‘different.’”
Dough can pick up fridge odors, especially if it’s stored near onions, leftovers, or anything that once lived in a takeout container.
Wrapping matters. If your dough was only wrapped once and the fridge is crowded, it may absorb smells or dry out at the edges.
Double-wrap (plastic wrap + zip-top bag) is the boring step that prevents the dramatic moment later when your apple pie tastes like
last night’s garlic noodles. If the smell is sharp or sour in a truly unpleasant way, skip itfats can go rancid over time.
3) “Freezing the crust in the pan felt like genius… until I ran out of freezer space.”
Welcome to freezer Tetris. Freezing crusts in their pans is one of the best make-ahead tricks, but it demands real estate.
The practical workaround is to use stackable, freezer-to-oven metal pans and nest them (with parchment between) if you’re doing multiple.
If you’re short on pans, freeze the shaped crust until firm, then wrap it very well and carefully slide it out of the pan for storage.
Later, you can re-fit it into the pan (it’s easier than you’d think when the dough is still cold). It’s not quite as effortless
as “bake straight from the pan,” but it saves space without losing the make-ahead advantage.
4) “My par-baked crust lost its crispness after storage.”
This happens when the crust is wrapped before it fully cools, or when it’s stored in a way that traps moisture. A warm crust releases
steam; if that steam has nowhere to go, it turns into humidityaka the sworn enemy of crisp pastry. The fix is simple:
cool completely, then store airtight. If you’re filling the crust with something wet, consider brushing the par-baked crust with a thin
layer of egg white and returning it to the oven briefly to setthis can create a helpful moisture barrier. And if the crust softened
a little in storage, a short reheat in the oven (a few minutes) can bring back some crunch before filling.
5) “I made dough ahead and it rolled out better than my same-day attempts.”
This is the happy surprise that turns people into make-ahead believers. When dough rests, flour hydrates evenly and gluten relaxes,
which makes rolling smoother and reduces snap-back. Many bakers also find that chilled dough is easier to lift and transfer without
stretching. That means cleaner edges, fewer patches, and less shrinkage. In other words: making pie dough ahead isn’t just a time saver;
it can be a quality upgrade.
6) “I baked from frozen and the top browned before the bottom was done.”
Frozen crusts sometimes need a little strategy because the cold dough slows heat penetration. If the top is browning too quickly,
loosely tent the pie with foil and keep baking until the bottom is properly baked. Baking on a preheated sheet pan can also help
deliver more heat to the bottom crust. The goal is a fully baked basebecause the only thing worse than a soggy bottom is realizing
it when you cut the first slice in front of guests.
Bottom line: make-ahead pie crust is a skill that rewards tiny habitstight wrapping, smart chilling, and choosing the right method
for the type of pie you’re baking. Do those things, and pie day becomes less “kitchen chaos” and more “casually brilliant baker
who definitely has their life together.”


