Table of Contents >> Show >> Hide
- Why the Letter “L” Is the Perfect Creative Challenge
- How to Start the “Make the Letter L” Challenge
- 25 Fun Ways to Make the Letter “L”
- 1. Draw a Classic Block Letter L
- 2. Make an L With Popsicle Sticks
- 3. Build an L With Blocks
- 4. Trace L in Sand, Salt, or Rice
- 5. Paint the Letter L With Water
- 6. Create a Rainbow L
- 7. Form an L With Yarn
- 8. Make an L From Leaves
- 9. Use Buttons or Beads
- 10. Make an L With Your Body
- 11. Turn L Into a Ladder
- 12. Make an L Lion
- 13. Design a Fancy Serif L
- 14. Design a Modern Sans Serif L
- 15. Make a Bubble Letter L
- 16. Make an L With Food Shapes
- 17. Create a Collage L
- 18. Make a Shadow L
- 19. Build an L With LEGO-Style Bricks
- 20. Make an L Road Map
- 21. Create an L With Stickers
- 22. Sculpt an L From Clay or Dough
- 23. Make a Digital L
- 24. Make an L Pattern Page
- 25. Invent a Story About the Letter L
- What This Challenge Teaches Without Feeling Like School
- How Teachers and Parents Can Make the Activity Better
- Classroom Display Idea: The “Wall of L”
- Common Mistakes to Avoid
- of Personal Experience and Practical Reflections
- Conclusion: One Letter, Endless Possibilities
At first glance, the letter “L” looks like the least dramatic member of the alphabet. It is not curvy like “S,” not mysterious like “X,” and not nearly as attention-hungry as “Q,” which insists on dragging a tiny tail around like it is late for a royal parade. But give “L” a closer look, and suddenly this simple right-angle hero becomes a playground for creativity, design, handwriting practice, typography, art, and early literacy learning.
The challenge is simple: make the letter “L” in lots of different ways. That could mean drawing it, building it, painting it, arranging objects into it, forming it with your body, designing it as a logo, turning it into a monster, or sculpting it from clay. The magic of this activity is that it works for preschoolers learning letter recognition, older kids exploring visual art, teachers planning hands-on alphabet activities, designers studying letterforms, and adults who just want a creative warm-up that does not require a thousand-dollar art kit or a dramatic studio window.
In this guide, we will explore why the “make the letter L” challenge is more useful than it sounds, how it supports literacy and creativity, and how to turn one ordinary letter into dozens of playful, memorable, and surprisingly clever projects.
Why the Letter “L” Is the Perfect Creative Challenge
The capital letter “L” is built from two basic strokes: one vertical line and one horizontal line. That simplicity makes it ideal for experimenting. Children can recognize it quickly, beginners can form it without getting tangled in loops, and artists can transform it without losing the original shape.
From a learning perspective, letter-making activities help connect visual recognition, movement, sound, and memory. When a child traces a letter in sand, builds it from blocks, or paints it on cardboard, they are not just “doing a craft.” They are strengthening fine motor skills, hand-eye coordination, spatial awareness, and alphabet knowledge. In plain English: the brain is quietly taking notes while the hands are having fun.
For designers, the challenge becomes a study in letterform. The same “L” can become elegant, bold, futuristic, rustic, friendly, dramatic, or hilariously awkward depending on its weight, texture, proportion, color, and spacing. Typography has always been about more than making letters readable; it is about giving language a visual personality. The letter “L” may be simple, but it can still wear many outfits.
How to Start the “Make the Letter L” Challenge
You do not need fancy supplies. In fact, the best version of this challenge often begins with whatever is already nearby: pencils, markers, sticky notes, buttons, cereal pieces, pipe cleaners, leaves, toy bricks, yarn, paper scraps, or the contents of that mysterious craft drawer everyone has but nobody admits to organizing.
Basic Setup
Start by writing a large capital “L” on a sheet of paper. Say the letter name out loud, then talk about its shape. It has a tall line that goes down and a short line that goes across the bottom. For younger children, it helps to use simple language such as “down and across.” For older children or design students, you can introduce terms like vertical stroke, baseline, proportion, weight, and negative space.
Next, decide on a goal. Are you practicing handwriting? Exploring art materials? Creating a classroom display? Designing a logo? Building a sensory activity? The clearer the purpose, the easier it is to choose materials and avoid ending up with a glitter explosion that somehow reaches the family dog.
25 Fun Ways to Make the Letter “L”
Here are practical, creative, and classroom-friendly ways to make the letter “L.” Each idea can be adapted for different ages, skill levels, and available materials.
1. Draw a Classic Block Letter L
Begin with a thick block-style “L.” Draw one tall rectangle and one shorter rectangle across the bottom. This version teaches structure and proportion. Kids can color it, add patterns, or turn it into a building, bookshelf, ladder, or road.
2. Make an L With Popsicle Sticks
Use two craft sticks to create the shape. One stick stands vertically, and the second forms the bottom line. This is a clear, tactile way to show that the letter is made of straight strokes. Glue it onto paper and decorate it with stickers or paint.
3. Build an L With Blocks
Toy blocks are perfect for letter construction because they make children think about shape, direction, and spacing. Build a tall tower for the vertical line, then add blocks at the bottom to form the horizontal stroke.
4. Trace L in Sand, Salt, or Rice
Pour a thin layer of sand, salt, or rice into a tray and let children trace “L” with a finger. This multisensory approach is especially helpful for early handwriting practice because it uses touch, movement, and visual feedback all at once.
5. Paint the Letter L With Water
Take the challenge outdoors with a paintbrush and a cup of water. Children can paint giant letter Ls on pavement, a fence, or a chalkboard surface. The letter disappears as it dries, which feels like magic and also makes cleanup wonderfully simple.
6. Create a Rainbow L
Write a large “L” in pencil, then trace over it with different colored crayons or markers. Each new layer reinforces the letter’s shape while creating a bright rainbow effect. It is handwriting practice disguised as an art project, which is exactly the kind of trick education needs more often.
7. Form an L With Yarn
Cut a piece of yarn and glue it into the shape of an “L.” This adds texture and helps children see the letter as a line with direction. Older kids can experiment with yarn thickness, color combinations, and background paper.
8. Make an L From Leaves
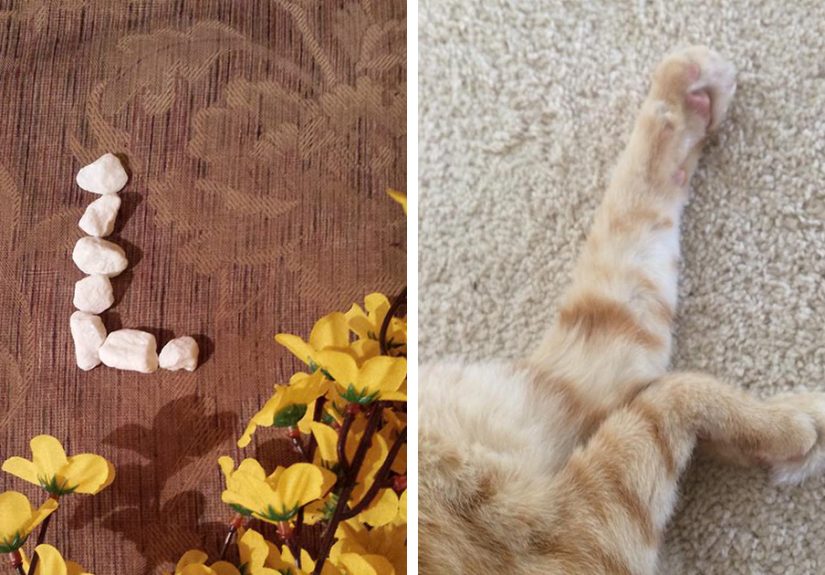
Collect leaves and arrange them into the letter “L.” This nature-based activity is great for outdoor learning and seasonal crafts. Try green leaves in spring, bright leaves in fall, or small twigs for a woodland-style letter.
9. Use Buttons or Beads
Draw an outline of the letter “L,” then fill it with buttons, beads, pom-poms, or small craft pieces. This supports fine motor development and gives the finished letter a cheerful, textured look.
10. Make an L With Your Body
Stand tall and stretch one arm straight out to the side, or lie on the floor with a partner to form a giant “L.” Movement-based letter activities are excellent for children who learn best by doing rather than sitting still and pretending a worksheet is thrilling.
11. Turn L Into a Ladder
Draw a tall capital “L,” then add small horizontal lines across the vertical stroke to turn it into a ladder. This works especially well because “ladder” begins with L, connecting letter shape with letter sound.
12. Make an L Lion
Transform the vertical part of the “L” into a lion’s body and the lower stroke into a tail, paw, or patch of ground. Add a mane, ears, and a friendly face. Suddenly the letter is not just a symbol; it is a character.
13. Design a Fancy Serif L
Add small decorative strokes, called serifs, to the ends of the letter. This introduces a basic typography concept in a simple way. Compare a plain block “L” with a serif “L” and ask: Which one feels more formal? Which one looks old-fashioned? Which one belongs on a wedding invitation?
14. Design a Modern Sans Serif L
Create a clean, simple “L” without extra decorations. Use straight edges, strong lines, and balanced spacing. This is a great way to discuss modern design, logos, and readability.
15. Make a Bubble Letter L
Draw a soft, rounded “L” with puffy edges. Bubble letters are fun because they invite color, shading, and personality. Add highlights to make it look inflated, like the letter just swallowed a balloon.
16. Make an L With Food Shapes
Use pretzel sticks, carrot sticks, crackers, or dry pasta to form the letter. This is a playful snack-time activity, but use clean surfaces and age-appropriate pieces. The goal is learning, not discovering that pasta can migrate into the carpet.
17. Create a Collage L
Cut strips from magazines, old wrapping paper, or colored construction paper. Arrange the pieces into an “L” and glue them down. This teaches composition, color choice, and layering.
18. Make a Shadow L
Use a flashlight and objects to cast a shadow shaped like an “L.” This turns the challenge into a mini science-and-art experiment. Children learn that letters can be created not only with objects but also with light and space.
19. Build an L With LEGO-Style Bricks
Interlocking bricks are excellent for making letters because they encourage planning. Try making a flat “L,” a standing 3D “L,” or a patterned “L” using alternating colors.
20. Make an L Road Map
Draw a thick “L” and turn it into a road. Add lane markers, tiny cars, traffic lights, crosswalks, and trees. This is especially engaging for children who love vehicles and storytelling.
21. Create an L With Stickers
Draw a faint letter outline, then cover it with stickers. Stars, dots, animals, and alphabet stickers all work. It is simple, low-mess, and great for building small finger control.
22. Sculpt an L From Clay or Dough
Roll clay or play dough into ropes and bend them into the letter. This strengthens hand muscles and lets children physically build the letter shape. Older students can create polished clay tiles or painted letter sculptures.
23. Make a Digital L
Use a drawing app, presentation tool, or design software to create different versions of “L.” Experiment with fonts, colors, gradients, shadows, and textures. This turns the activity into a beginner-friendly graphic design exercise.
24. Make an L Pattern Page
Draw a large letter “L” and fill it with stripes, dots, zigzags, waves, stars, checks, or tiny doodles. Patterns teach visual rhythm and help students slow down, observe, and make deliberate choices.
25. Invent a Story About the Letter L
After making several letter L designs, choose one and write a mini story. Maybe the “L” is a lost ladder, a lazy lion, a little lighthouse, or a lonely robot leg. Storytelling connects literacy, art, and imagination in one tidy package.
What This Challenge Teaches Without Feeling Like School
The best learning activities often feel like play. The letter “L” challenge teaches several skills at once, which is why it is useful for classrooms, homeschool lessons, occupational therapy-inspired practice, art clubs, and rainy-day family activities.
Letter Recognition
Children learn to identify the capital “L” by seeing it in many forms. A block “L,” yarn “L,” clay “L,” and sticker “L” all look different, but they share the same basic structure. Recognizing that structure helps children understand that letters can vary in style while still representing the same symbol.
Letter Formation
Repeatedly making “L” reinforces the motion of forming it: down, then across. For beginners, large movements are often easier than tiny pencil strokes. That is why sidewalk chalk, air writing, sand tracing, and body letters can be so effective before formal handwriting practice.
Fine Motor Skills
Picking up beads, squeezing glue, rolling clay, pressing stickers, and tracing lines all develop fine motor control. These small movements support later writing, cutting, buttoning, tying, and other practical skills that do not come with a dramatic theme song but matter every day.
Creative Problem-Solving
Ask a child to make one “L,” and they may draw it. Ask for ten different “L” designs, and they begin thinking like inventors. What else can become a line? How can two objects make a corner? Can a letter be tall, tiny, bumpy, shiny, edible, or made of shadows? That shift from copying to creating is the heart of the challenge.
Visual Design Awareness
Older children and adults can use the challenge to study typography and design. A thick black “L” feels powerful. A thin script-style “L” feels elegant. A rough cardboard “L” feels handmade. A neon digital “L” feels modern. The shape stays familiar, but the mood changes completely.
How Teachers and Parents Can Make the Activity Better
To turn this challenge into a meaningful learning experience, give just enough structure to guide creativity without flattening it. Start with a demonstration, but avoid making every finished letter look exactly like the sample. The point is variety.
For preschool and kindergarten learners, keep instructions simple. Say, “Start at the top, go down, then go across.” Use big gestures. Invite children to trace the letter in the air before using materials. Connect the letter to familiar words: lion, leaf, ladder, lamp, lake, lunch, and laugh.
For elementary students, add categories. Challenge them to make one nature “L,” one food “L,” one robot “L,” one fancy “L,” and one “L” that looks like it belongs in a comic book. Categories help students stretch their ideas while still giving them a clear target.
For older students or design groups, turn the challenge into a mini typography lab. Ask them to create a family of letter L designs: formal, playful, scary, futuristic, vintage, handmade, and luxury. Then discuss which design choices created each feeling.
Classroom Display Idea: The “Wall of L”
One of the easiest ways to celebrate this challenge is to create a “Wall of L.” Give each student a square piece of paper and ask them to make the most original letter “L” they can. When finished, arrange the letters in a grid on a bulletin board or wall.
The result is visually satisfying because every piece shares the same subject but looks different. It also sends a valuable message: creativity does not mean everyone doing the same thing perfectly. Creativity means exploring many possible answers to one clear prompt.
Common Mistakes to Avoid
The biggest mistake is turning the challenge into a rigid worksheet activity. Worksheets can be useful, but this challenge shines when students touch, build, move, test, and invent. Another mistake is focusing only on neatness. A wobbly clay “L” or leafy outdoor “L” may teach more than a perfectly traced pencil letter.
It is also helpful to avoid overwhelming younger children with too many choices at once. Instead of placing twenty materials on a table and hoping for calm educational magic, offer two or three options. You can always rotate materials later.
of Personal Experience and Practical Reflections
The funny thing about a letter-making challenge is that it looks tiny from the outside. “Make the letter L in lots of different ways” sounds like something you can finish in five minutes, right between sharpening a pencil and wondering where the blue marker cap went. But once you begin, the activity gets bigger. A simple letter becomes a test of observation, patience, imagination, and sometimes glue management.
One of the best experiences with this kind of challenge is watching how differently people approach the same shape. Some children immediately grab crayons and draw the biggest, boldest “L” possible. Others quietly collect objects and arrange them like tiny architects. Some want symmetry. Some want chaos. One student might make a neat ruler-straight “L,” while another turns the letter into a lion wearing sunglasses, because apparently even alphabet animals need confidence.
That variety is exactly the point. The challenge gives everyone the same starting line but does not demand the same finish. It is accessible for beginners because the capital “L” is easy to understand. At the same time, it is flexible enough for advanced creativity. A preschooler can make an “L” with two sticks. A graphic designer can spend an hour refining the angle, weight, texture, and mood of a custom “L.” Both are doing real creative work.
Another memorable part of this activity is how materials change behavior. When using pencil and paper, people often try to be correct. When using clay, they become more playful. When using leaves or stones outside, they start noticing shapes in the environment. When using digital tools, they experiment with scale and effects. The same letter quietly teaches that creativity is not only about ideas; it is also about materials.
For parents or teachers, the challenge is a reminder that learning does not always need to look serious to be valuable. A child arranging cereal into an “L” may look like they are simply delaying snack time, and yes, that may be partially true. But they are also practicing direction, shape recognition, spatial planning, and hand control. When they proudly say, “I made an L,” they are connecting a symbol to an action they completed themselves.
This activity also works beautifully as a confidence builder. There is no single perfect answer. If one version fails, make another. If the yarn will not stay glued, try tape. If the paper tears, turn the tear into texture. If the “L” looks more like a chair, congratulations: now you have invented furniture typography. That low-pressure environment helps learners take risks, and risk-taking is where creative growth likes to hide.
In the end, the letter “L” challenge is not really about one letter. It is about seeing possibility in something ordinary. It asks a small but powerful question: How many ways can you look at the same thing? That question belongs in art, design, writing, problem-solving, and life. Not bad for a letter made from two lines.
Conclusion: One Letter, Endless Possibilities
The challenge to make the letter “L” in lots of different ways is simple, affordable, and surprisingly rich. It supports early literacy, handwriting readiness, fine motor development, creative thinking, art exploration, and basic design awareness. It can be done indoors or outdoors, with paper or clay, quietly at a desk or loudly on a playground. Best of all, it turns a familiar alphabet letter into a launchpad for imagination.
Whether you are teaching letter recognition, planning an art lesson, designing a creative warm-up, or looking for a hands-on activity that does not require a heroic shopping trip, the letter “L” is ready. Draw it, build it, paint it, sculpt it, decorate it, animate it, and let it surprise you. The alphabet may be old, but creativity keeps giving it new shoes.


