Table of Contents >> Show >> Hide
- What Is the Craftool Dot/Rivet Anvil?
- Why This Tiny Tool Matters More Than People Expect
- How the Craftool Dot/Rivet Anvil Works with Rivets and Snaps
- How to Use the Craftool Dot/Rivet Anvil the Right Way
- Common Mistakes the Craftool Dot/Rivet Anvil Helps Prevent
- Who Should Buy a Craftool Dot/Rivet Anvil?
- Craftool Dot/Rivet Anvil vs. Improvised Shop Solutions
- Best Practices for Cleaner Results
- Real-World Maker Experience With the Craftool Dot/Rivet Anvil
- Final Thoughts
If you have ever tried to set a leather rivet on a random chunk of metal, a kitchen counter, or that suspiciously flat thing in your garage, you already know the truth: tiny hardware can become tiny chaos in seconds. One bad strike and your nice polished rivet looks like it lost a bar fight. That is exactly why the Craftool Dot/Rivet Anvil matters. It is not flashy, it is not glamorous, and it will never be the star of your Instagram feed. But in leathercraft, this little tool quietly saves projects from dents, flattened caps, crooked hardware, and vocabulary your family would rather not hear.
The Craftool Dot/Rivet Anvil is one of those deceptively simple leatherworking tools that earns its keep by doing one job well: giving snaps and rivets the proper surface they need during installation. In plain English, it helps you set hardware cleanly without turning a finished cap into a sad metal pancake. For beginners, it removes a lot of guesswork. For experienced makers, it speeds up repeatable results. For everyone else, it is the difference between “handmade” and “why does my wallet look like it got stepped on?”
What Is the Craftool Dot/Rivet Anvil?
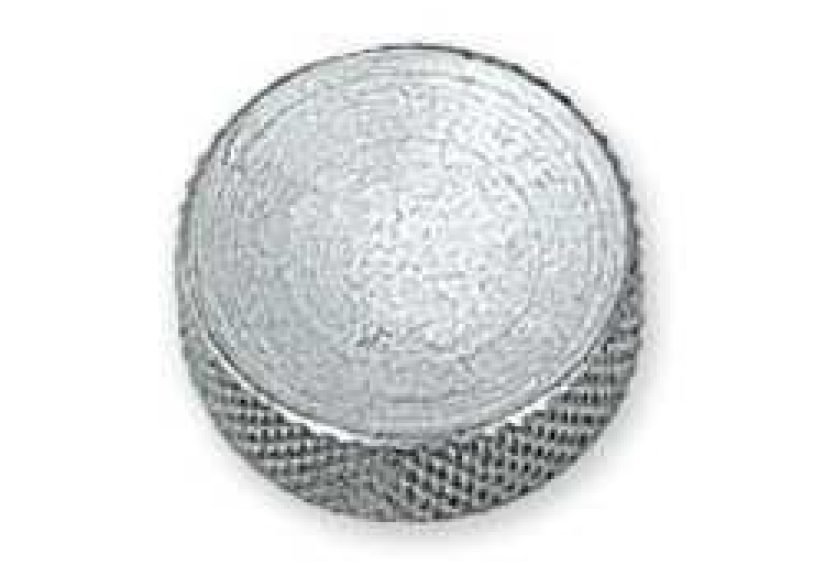
The Craftool Dot/Rivet Anvil is a compact metal base made for setting leather hardware. It has two working sides: one flat and one concave. That dual-sided design is the whole point. The flat side supports hardware that needs a stable, even backing, while the concave side cradles rounded or domed caps so they keep their shape during installation.
That means the tool is not just a lump of metal. It is a shaped support surface, and shape matters in leathercraft. When you strike a setter, force travels somewhere. If the hardware is resting on the wrong surface, the force does not magically become polite. It dents, flattens, skews, or shifts the parts you are trying to install. The Dot/Rivet Anvil gives the hardware a place to sit correctly so the force goes where it should.
In practical use, this anvil is commonly associated with Line 20 snaps, Line 24 snaps, and convex-headed rivet-back conchos. It is also handy when working with domed rivet caps that need protection while the back side gets set. In other words, it is a support tool for people who would rather finish a project with neat hardware than with a dramatic sigh.
Why This Tiny Tool Matters More Than People Expect
Leatherworkers often spend plenty of time choosing leather, cutting clean patterns, burnishing edges, and picking attractive hardware finishes. Then comes installation, and suddenly everything depends on a few taps of a mallet. That final stage can make or break the appearance of the piece. A good anvil helps preserve the shape and finish of the visible hardware, which is especially important on belts, wallets, bags, cuffs, straps, and cases where the hardware is right out front, showing off to the world.
The biggest benefit of the Craftool Dot/Rivet Anvil is control. A matched anvil and setter system keeps the cap centered, reduces slipping, and limits accidental marking. It also helps distribute force more predictably. That matters because leather hardware does not forgive sloppy alignment. If the cap slides sideways during setting, you can end up with a crooked rivet, a snap that does not close smoothly, or a decorative concho that looks just a little off forever. And “just a little off” is the handmade version of a pebble in your shoe. You will notice it every time.
The Concave Side: The Dome Protector
The concave side is the star when you are working with rounded caps. It supports the dome while you strike from the opposite side, helping the cap hold its intended shape. This is especially helpful with double-cap rivets and certain snap components where the visible side needs to stay neat and rounded. Without a concave base, the cap can flatten, scuff, or shift out of alignment.
The Flat Side: The Quiet Workhorse
The flat side is useful when you need stable, even support instead of a cup-shaped seat. Some components want a level backing, not a recess. That is why having both sides on one tool is convenient. You are not hunting around your bench like a raccoon with a hardware problem. You just flip the anvil and keep going.
How the Craftool Dot/Rivet Anvil Works with Rivets and Snaps
Using It for Rivets
When setting a rivet, the visible cap usually goes against the anvil. If the cap is domed, the concave side helps protect that shape. Then the post comes up through the leather layers, the other cap is positioned, and the setter is used from above. A few firm, controlled strikes are usually better than one wild swing from the heavens. This is craftsmanship, not medieval siege warfare.
The tool shines with rapid rivets and double-cap rivets because those fasteners look best when the caps stay smooth and centered. A proper base also helps reduce marring on finished hardware, which is a big deal when the rest of your project is clean and polished.
Using It for Snaps
The Dot/Rivet Anvil is also valuable when setting common snap sizes like Line 20 and Line 24 snaps. Snaps need both structural integrity and good alignment. If the post length is wrong or the base is unstable, the snap may look fine at first but fail to close properly, feel loose, or crack after use. A shaped anvil gives the hardware a stable place to sit during the setting process, which improves both appearance and function.
For makers producing wallets, pouches, cuffs, and small cases, that matters a lot. A snap is a moving closure, not just decoration. If it sets badly, your project will remind you every single time it opens reluctantly or pops loose like it has commitment issues.
How to Use the Craftool Dot/Rivet Anvil the Right Way
- Punch a clean hole first. Do not force hardware through an undersized hole and hope for the best. Hope is lovely, but it is not a sizing tool.
- Choose the correct side of the anvil. Use the concave side for rounded caps that need protection. Use the flat side when the hardware calls for even support.
- Check post length. Too short and the hardware will not set securely. Too long and it can bend, mushroom, or set crooked.
- Pre-fit on scrap. Testing on scrap leather saves projects, sanity, and expensive hardware finishes.
- Work on a hard, stable surface. A soft or bouncy table absorbs energy and makes clean setting harder.
- Use controlled blows. Firm, consistent strikes beat frantic hammering every time.
- Inspect before celebrating. Make sure the hardware is tight, aligned, and free of obvious marks before moving on.
Common Mistakes the Craftool Dot/Rivet Anvil Helps Prevent
Flattened Caps
This is the classic beginner problem. Domed hardware needs support that matches its shape. The concave side of the anvil helps keep the cap from getting squashed during installation.
Crooked Rivets
If the post is too long, the parts can shift while setting. If the surface is unstable, the hardware can tilt. The anvil helps create a more centered, repeatable setup, but you still need to choose the right rivet length.
Scarred Hardware
Using random metal surfaces can scratch or mar finished caps. A dedicated anvil reduces that risk because it is designed for the job rather than borrowed from whatever was lying around the shop.
Weak or Wobbly Installation
Snaps and rivets need more than brute force. They need correct positioning, matched tools, and a stable setting surface. The anvil supports all three.
Who Should Buy a Craftool Dot/Rivet Anvil?
This tool makes sense for several kinds of makers. First, beginners who want to set snaps and rivets by hand without buying a large press. Second, hobby leatherworkers building wallets, belts, small bags, cuffs, and repair projects. Third, anyone who already owns setters but keeps getting inconsistent results because the hardware is being backed by the wrong surface.
It is also a smart addition for repair kits. If you do quick fixes on belts, straps, tack, bags, or cases, a compact anvil is easier to store than bulkier bench tools. It does not replace every specialty die or press system, but it covers a lot of common hand-setting needs with very little bench space.
Craftool Dot/Rivet Anvil vs. Improvised Shop Solutions
Could you set hardware without it? Technically, yes. You can also butter toast with a screwdriver if life gets weird enough. The better question is whether you should. A random steel plate, vise, or flat bar may support hardware in a rough sense, but it will not offer the shaped recess that helps protect domed caps. That is the whole advantage here.
Improvised methods also tend to introduce inconsistency. One project turns out decent, the next gets marked hardware, and the third leaves you staring at a snap that looks fine but closes like a rusty robot handshake. A dedicated anvil increases repeatability. That consistency matters more than people think, especially if you are selling handmade goods or producing multiple items in the same style.
Best Practices for Cleaner Results
Use a mallet that gives you control. Keep the workpiece flat. Support the leather evenly so layers do not shift. Make sure the visible cap is seated correctly on the anvil before striking. Do not rush. And maybe most important of all, test unfamiliar hardware combinations on scrap first. Even experienced makers do this, because hardware sizing can vary slightly and leather thickness changes everything.
It also helps to think of the anvil as part of a system, not a stand-alone miracle worker. The best results come from matching the anvil, setter, hardware size, hole size, and leather thickness. When those factors line up, hand-setting feels straightforward. When they do not, even a good anvil cannot save every bad decision. It is a hero, not a wizard.
Real-World Maker Experience With the Craftool Dot/Rivet Anvil
A very common experience with the Craftool Dot/Rivet Anvil goes something like this: a maker buys rivets, a setter, and maybe a new strap cutter because optimism is running high. The leather gets cut beautifully. The holes are marked carefully. The project is looking sharp. Then comes the hardware stage, and suddenly the first rivet sets crooked. The second one flattens. The third one goes in, but somehow looks embarrassed. That is usually the moment the humble anvil graduates from “optional little accessory” to “where have you been all my life?”
Once people start using the tool correctly, the most noticeable change is not speed at first. It is confidence. Instead of balancing a cap on an improvised metal surface and hoping the parts stay aligned, the maker can actually feel the hardware seat into place. The concave side supports domed caps in a way that makes the process feel less slippery and less random. The flat side becomes equally useful when a more stable backing is needed. Suddenly the setup feels intentional rather than improvised, and that mental shift matters a lot in hand work.
Another frequent experience is realizing that the anvil does not just protect hardware; it also improves rhythm. Makers often describe better results when they stop swinging too hard and start using measured, consistent blows. The anvil rewards that calmer technique. You do not need to attack the rivet like it insulted your favorite baseball team. You need clean alignment, a solid surface, and controlled force. The tool helps make that method practical, especially for beginners who are still learning how much force is enough.
There is also the repair-shop angle. People fixing old belts, bag straps, tack, or utility items often love compact anvils because they are simple, portable, and easy to keep near a small bench. When a repair only needs one or two rivets or a replacement snap, hauling out larger equipment can feel like using a bulldozer to plant a tulip. The Craftool Dot/Rivet Anvil fits the real world of small fixes: quick, direct, and not dramatic.
Makers who work on visible fashion pieces tend to appreciate the cosmetic side even more. Clean caps matter on handbags, cuffs, wallets, and decorative straps because the hardware is part of the design, not just structure. A neat rivet finish communicates quality. A dented cap communicates, “Well, we had a moment.” That is why many users end up keeping this little anvil within easy reach. It may not be their most expensive tool, but it often becomes one of the most routinely used whenever hardware enters the picture.
In the end, the most honest experience is this: the Craftool Dot/Rivet Anvil does not make leatherwork effortless, but it makes good technique easier to repeat. That is exactly what a useful hand tool should do. It reduces avoidable mistakes, supports better habits, and helps the finished work look more professional. For a tiny piece of metal, that is a pretty respectable résumé.
Final Thoughts
The Craftool Dot/Rivet Anvil is proof that leathercraft success often comes down to the small, unglamorous tools that do one thing exceptionally well. Its flat side and concave side give makers the support needed to install snaps, rivets, and similar hardware with better shape retention, cleaner alignment, and fewer cosmetic disasters. It is compact, practical, beginner-friendly, and genuinely useful for everyday projects.
If your work includes double-cap rivets, rapid rivets, snaps, or convex hardware, this tool deserves a spot on your bench. It will not cut patterns, burnish edges, or make coffee. But it will help your hardware look cleaner, set straighter, and behave more like it belongs on a finished piece. In leathercraft, that is not a small win. That is the kind of quiet reliability that makes a project feel finished on purpose.