Table of Contents >> Show >> Hide
- What Is a Deluxe Wood Pizza Peel?
- Why Wood Works So Well for Pizza
- Anatomy of a Great Wooden Pizza Peel
- Best Woods for a Deluxe Pizza Peel
- How to Use a Deluxe Wood Pizza Peel Without Pizza Tragedy
- Care and Maintenance: Keep That Peel Smooth and Odor-Free
- More Than Pizza: Extra Ways to Use a Deluxe Wood Peel
- Buying Checklist: How to Spot a Truly Deluxe Wood Pizza Peel
- FAQ
- Real-World Experiences With a Deluxe Wood Pizza Peel (What Pizza Night Actually Feels Like)
- Conclusion
- SEO Tags
There are two kinds of pizza nights: the kind where your pie glides into the oven like it owns the place, and the kind where your toppings perform a dramatic floor routine… directly on the pizza stone. A Deluxe Wood Pizza Peel is one of those deceptively simple tools that quietly upgrades you from “enthusiastic chaos” to “confident home pizzaiolo.”
This guide breaks down what makes a wooden peel “deluxe,” how to choose the right one, how to launch pizzas without heartbreak, and how to keep your peel clean, smooth, and ready for years of crispy crusts.
What Is a Deluxe Wood Pizza Peel?
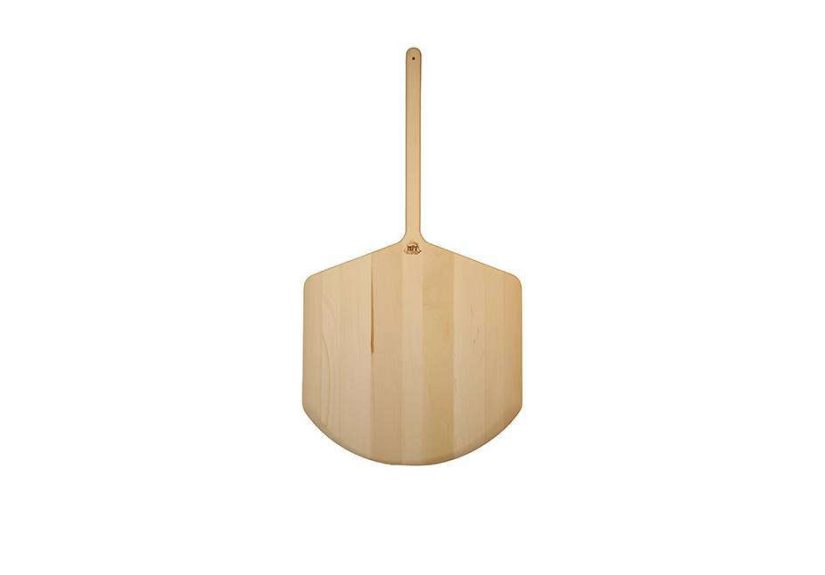
A pizza peel is the wide, flat “paddle” used to move pizza into (and sometimes out of) a blazing-hot oven. A deluxe wood peel goes beyond basic plywood vibes: it’s typically made from a sturdier hardwood or high-quality bamboo, shaped with a thinner tapered edge for smoother launches, sanded to a satin-like finish, and built to feel balanced in your hands rather than clunky and awkward.
What “Deluxe” Usually Means (In Real-World Terms)
- Better wood: maple, acacia, beech, or well-laminated bamboo (more on wood types below).
- Thinner, beveled edge: helps the peel slide under dough and encourages a clean release.
- Smoother surface: less snagging, less sticking, easier cleaning.
- Solid handle design: comfortable grip, good length, sometimes a hanging hole or loop.
- Thoughtful finishing: food-safe oil or seal that doesn’t feel sticky or plasticky.
Why Wood Works So Well for Pizza
Wood has a couple of natural advantages when you’re dealing with soft, stretchy dough. A wooden surface can hold a light dusting of flour or semolina and helps reduce the “instant glue” problem that happens when dough sits on something too smooth, too hot, or too damp. In other words: wood gives you a bigger margin for errorespecially when you’re still learning your launch technique.
Wood vs. Metal: The “Two-Peel” Strategy (and Why Pros Like It)
Many pizza makers use wood for building and launching (prep peel) and a thin metal peel for turning/removing once the crust sets. Wood is forgiving during prep, while a thin metal peel can slide under a baked pizza more easily without disturbing the crust. If you only want one peel, wood is often the friendlier starting point for home pizza nightsespecially for launching.
Anatomy of a Great Wooden Pizza Peel
1) Size: Match Your Oven, Stone/Steel, and Pizza Goals
The peel should be slightly larger than the pizza you plan to launch, but not so large it bangs into your oven walls like a paddle in a phone booth. Common home-friendly sizes are 12–14 inches wide. If you’re making big pies (or using a larger outdoor oven), 14–16 inches can be worth itjust make sure your stone/steel or oven floor can actually accommodate the size.
2) Thickness and the Tapered Edge
The single biggest “deluxe” upgrade is a thin, tapered leading edge. A thick, blunt edge can catch on dough, shove toppings forward, and cause the dreaded “half the pizza stayed behind” incident. A well-tapered edge slides more smoothly and gives you more control when you set the pizza down at an angle and pull the peel back.
3) Handle Length: Indoor Convenience vs. Outdoor Safety
For indoor ovens, a moderate handle length is comfortable and easier to store. For outdoor pizza ovens that run hotter (often much hotter), longer handles can keep your hands farther from the heat and flames. Think about where you’ll use it most oftenand where you’ll store it when pizza night is over.
Best Woods for a Deluxe Pizza Peel
In general, you want a wood that’s durable and tight-grained. Tight grain means fewer open pores that can trap moisture and food residue, and it tends to stay smoother over time with less fuzzing or splintering.
Top Picks
- Hard maple: a classic tight-grained hardwooddurable and widely used for food-contact surfaces.
- Beech: strong, fine-grained, and commonly used for kitchen tools.
- Acacia: often beautiful with bold grain; frequently used in serveware and peels.
- Bamboo: technically a grass, often laminated; lightweight and popular for peelsquality depends on construction.
- Walnut or cherry: attractive options; may show marks sooner depending on hardness and use, but many people love the look.
Woods to Avoid
Skip soft, porous woods that dent easily or trap moisture. If a peel feels rough, fuzzy, or splinter-prone out of the box, it’s not “deluxe”it’s a future sanding project you didn’t ask for.
How to Use a Deluxe Wood Pizza Peel Without Pizza Tragedy
Launching is equal parts technique and timing. You don’t need ninja reflexesyou need a repeatable routine. Here’s a simple process that works for home ovens, pizza stones, pizza steels, and outdoor pizza ovens.
Step 1: Preheat Like You Mean It
A hot baking surface is the difference between crisp and sad. Preheat your stone or steel thoroughly so the crust sets quickly when the dough hits the heat. In a home oven, that often means a solid preheat period, not just “the beep happened so it must be ready.”
Step 2: Dust the Peel (Smartly)
For many pizza makers, semolina (or a semolina-flour blend) is a go-to for dusting because it behaves like tiny ball bearings under the dough. It helps the pizza slide and can reduce sticking better than flour alone. The key is a light, even dusting, not a beach.
Step 3: Build Fastand Keep It Moving
Once the dough is on the peel, the clock starts. The longer dough sits, the more likely moisture will seep through and glue it down. A good habit: after you stretch the dough and move it onto the peel, give it a quick jiggle. If it slides, you’re good. Add sauce and toppings, then jiggle again. If it doesn’t move, fix it before you walk to the oven like everything is fine.
Step 4: The Jiggle Test (Your New Best Friend)
If the pizza won’t budge, don’t panic-launch. Lift an edge gently and toss a pinch of semolina or flour underneath the sticky spot. A bench scraper can help nudge flour under the dough without tearing it. Some pizza makers even gently blow air under a section of dough to create a little air pocket and spread the dusting floursounds goofy, works surprisingly well.
Step 5: Launch With a Confident, Quick Motion
Place the peel’s leading edge near the back of the stone/steel (or oven floor), keep a slight angle, and then use a quick pull-back motion so the pizza slides off. Think “tablecloth trick,” but with fewer shattered dishes and more melted mozzarella.
Step 6: Remove and Turn With the Right Tool
Once the crust sets, a thin metal peel or turning peel can be easier for rotating and removing the pizzaespecially at higher temperatures where the bake is fast and you want nimble control.
Bonus: The “Recovery Calzone” Move
If your dough tears or sticks beyond saving, fold it into a calzone and pretend it was your plan all along. Nobody needs to know. Your secret is safe with your peel.
Care and Maintenance: Keep That Peel Smooth and Odor-Free
A deluxe peel stays deluxe when it’s cared for like woodnot like a metal baking sheet. The enemies are long soaks, dishwashers, and storing it damp. Treat it like a nice cutting board that occasionally moonlights as pizza transport.
Cleaning Basics
- Scrape or brush off debris once the peel cools.
- Hand-wash quickly with mild soap and warm water if neededdon’t soak it.
- Dry immediately with a towel, then let it air-dry fully (ideally upright) so both sides dry evenly.
- Never dishwasher: high heat + long water exposure can warp wood and encourage cracking.
Oiling and Conditioning
If your peel looks dry, feels rough, or seems to absorb moisture quickly, condition it with a food-safe mineral oil (or a mineral oil + beeswax conditioner). Apply a thin coat, let it absorb, wipe off excess, and let it cure before using again. This helps reduce drying, cracking, and staining while keeping the surface slicker for launches.
Odors and Stains: The “Why Does My Peel Smell Like Old Pizza?” Fix
For stubborn odors, gentle methods often work: scrub with lemon and a mild abrasive like baking soda or coarse salt, then rinse quickly and dry thoroughly. For extra sanitation after messy sessions, a wipe-down with a food-safe disinfecting approach (followed by thorough drying) can help. The key is avoiding long moisture exposurewood plus water plus time equals warp.
When to Replace a Peel
If the peel develops deep cracks, severe warping, or splinters that won’t sand out, it’s time. Cracks can hold onto food residue and moisture, and a warped peel is basically a pizza catapult (not the fun kind).
More Than Pizza: Extra Ways to Use a Deluxe Wood Peel
A good-looking wooden peel can pull double duty as a serving board for pizza slices, garlic knots, flatbreads, and even charcuterie. It’s also handy for transferring hearth-style breads onto a stonebasically anything you’d rather not juggle with oven mitts and hope.
Buying Checklist: How to Spot a Truly Deluxe Wood Pizza Peel
- Edge: visibly tapered, not blocky.
- Surface: smooth and even; no rough glue lines or splinters.
- Balance: feels stable when held; not handle-heavy or awkward.
- Construction: solid hardwood or quality lamination (for bamboo); no gaps.
- Finish: food-safe, not sticky; ideally easy to recondition.
- Right size: matches your stone/steel and typical pizza size.
FAQ
Do I need parchment paper on my peel?
Parchment can make launching easier for beginners (and reduces sticking), but it can also limit direct contact and may not love ultra-high outdoor oven temperatures. A deluxe wooden peel plus semolina dusting is a classic approach once you’re comfortable.
Is semolina better than flour for dusting?
Often, yesespecially for launching. Semolina’s coarser texture can help the dough slide more easily. Some pizza makers use a blend (like semolina plus bread flour) to balance glide and handling.
Do I need both a wood peel and a metal peel?
You don’t need both, but it can be a great combo: wood for building/launching, metal for turning/removing. If you only buy one and you’re mostly making pizzas at home, a deluxe wood peel is a very friendly place to start.
Real-World Experiences With a Deluxe Wood Pizza Peel (What Pizza Night Actually Feels Like)
The first time you use a wooden peel, you usually learn one important lesson: pizza dough has opinions. It’s not trying to ruin your life; it’s just incredibly sensitive to time, moisture, and hesitation. Many home pizza makers start by over-flouring the peel “just to be safe,” then wonder why the bottom of the crust tastes slightly bitter or dusty. The fix often comes quicklyswitching to a lighter dusting and using semolina (or a semolina blend) so the dough glides without leaving a floury mess behind.
Another common experience is discovering the power of the jiggle test. People who launch confidently aren’t necessarily braver; they’re simply checking movement early and often. A quick shake after the dough hits the peel tells you if you’re on track. If there’s a sticky spot, you catch it while it’s still a small problembefore sauce and cheese turn it into a full-blown kitchen soap opera. The “aha” moment is when you realize you’re not forcing the pizza off the peel; you’re making the pizza want to slide.
There’s also a learning curve with toppings. On early attempts, it’s tempting to pile on everything in the fridge: extra sauce, fresh mozzarella, pepperoni, mushrooms, onions, olives, maybe a small salad because why not. Then the pizza sits longer, the dough absorbs moisture, and suddenly your peel is holding a very delicious, very stuck, very emotional situation. Most people naturally move toward lighter toppings, quicker assembly, and fewer wet ingredientsespecially when baking at high heat. The pizza turns out better, and the launch becomes dramatically less stressful.
Over time, the peel itself becomes part of the ritual. You learn what a well-conditioned surface feels like: smoother, slightly richer in color, and less prone to grabbing flour in weird patches. You also learn what neglect looks like: a dry, rough spot that catches dough like Velcro. Many home cooks find that a quick hand-wash (no soaking), immediate drying, and occasional oiling keeps the peel “ready” rather than “cranky.” And yes, the first time someone accidentally puts it in the dishwasher, the household typically holds a brief memorial service.
Finally, there’s the quiet confidence that comes with repetition. At some point, you stop hovering nervously at the oven door and start making small, controlled moves: a slight angle, a clean pull-back, a quick correction if the pizza shifts. When something goes wrong (because pizza nights still like to keep you humble), you recover faster. Dough tear? Patch it. Sticky spot? Lift and dust. Total chaos? Fold it into a “planned” calzone. A deluxe wood peel doesn’t magically prevent mistakesbut it makes good technique easier to learn, and it turns pizza night into a skill-building hobby instead of a recurring slapstick routine.
Conclusion
A Deluxe Wood Pizza Peel is one of the highest-impact upgrades you can make for better homemade pizza. Choose the right size, look for a thin tapered edge and smooth finish, use smart dusting (hello, semolina), and treat the peel with basic wood care. Do that, and your pizzas will launch cleaner, bake better, and arrive at the table with their toppings still on topwhere they belong.