Table of Contents >> Show >> Hide
- Why DIY No-Sew Fabric Storage Bags Are Worth Making
- Choose the Right Fabric Before the Glue Starts Flying
- Basic Supplies You Will Need
- Project 1: The Everyday Fold-Over Closet Bag
- Project 2: The Boxy No-Sew Shelf Bin
- Project 3: The No-Sew Drawstring-Style Utility Pouch
- Where DIY No-Sew Fabric Storage Bags Work Best
- Common Mistakes That Ruin the Look
- How to Make Your No-Sew Bags Look Custom, Not Crafty
- Cleaning and Care
- Real-World Experiences With DIY No-Sew Fabric Storage Bags
- Conclusion
If your home has reached that very specific stage of clutter known as “I definitely put that somewhere,” DIY no-sew fabric storage bags are here to rescue your dignity. They are practical, inexpensive, and charming in that I made this with my own two hands and only a mild amount of muttering kind of way. Best of all, you do not need a sewing machine, advanced crafting skills, or a dramatic montage soundtrack to make them work.
No-sew fabric storage bags are ideal for organizing everything from baby clothes and socks to craft supplies, pantry linens, toys, seasonal decor, and the mysterious charging cords that multiply at night. With the right fabric, a reliable adhesive or fusible product, and a little patience, you can create storage pieces that look tidy on open shelves and actually earn their keep in drawers, closets, mudrooms, and laundry spaces.
This guide breaks down how to make DIY no-sew fabric storage bags that are useful, attractive, and beginner-friendly. We will cover the best materials, smart design choices, step-by-step methods, common mistakes, and realistic ways to make these bags last longer. Because yes, you can absolutely organize your life with fabric and glue. At least parts of it.
Why DIY No-Sew Fabric Storage Bags Are Worth Making
There is a reason fabric storage has stayed popular for years: it is soft, flexible, lightweight, and easier on shelves and furniture than hard plastic bins. A good fabric bag can collapse when not in use, squeeze into awkward spaces, and add color or texture without making your room look like a warehouse aisle. That is especially handy in bedrooms, nurseries, closets, laundry rooms, and living rooms where function matters, but so does appearance.
Making your own no-sew version also gives you control. You choose the exact size, shape, pattern, and finish. Need a narrow bag for rolled washcloths? Done. Want a wider bin for pet toys, extra dish towels, or hair tools? Also done. Have a stash of old pillowcases, leftover canvas, flannel scraps, or a shirt you no longer wear but still irrationally admire? Congratulations, you may already have your raw materials.
Another major perk is cost. Store-bought fabric storage bins can be surprisingly expensive, especially when you need several that actually match. A DIY no-sew approach lets you make a coordinated set for far less, particularly if you upcycle existing textiles. It is organization with a side of budget wisdom, which is always attractive.
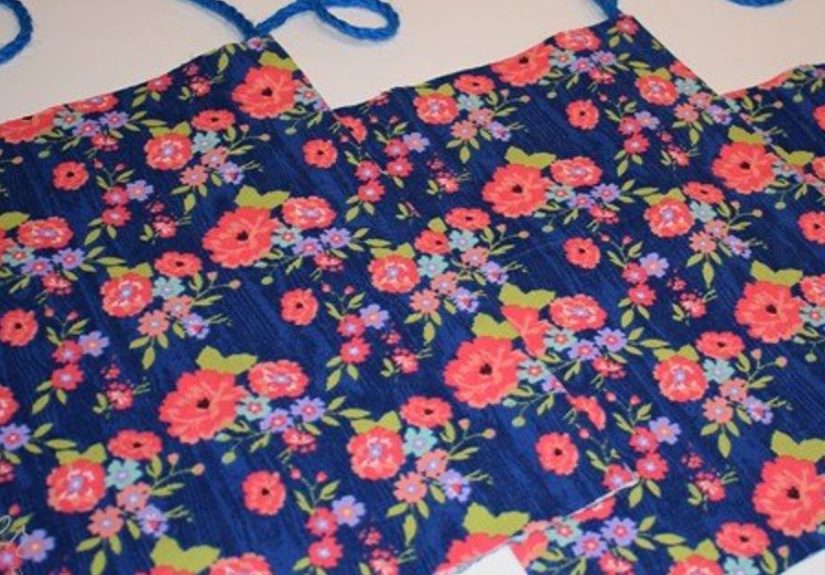
Choose the Right Fabric Before the Glue Starts Flying
The success of a no-sew storage bag starts with fabric choice. If you begin with something too limp, slippery, stretchy, or delicate, your “cute little storage bag” may collapse into a defeated cloth pancake. That is not the vibe.
Best Fabrics for No-Sew Storage Bags
- Cotton canvas: sturdy, easy to cut, and structured enough for shelf bins and closet bags.
- Home decor fabric: thicker than regular quilting cotton and great for bags you want to stand up better.
- Felt: beginner-friendly because it does not fray much, which makes it excellent for fast no-sew projects.
- Denim: durable and perfect for utility-style storage, especially if you are upcycling old jeans.
- Flannel or quilting cotton: softer and lighter, better for lining or flexible pouches rather than rigid bins.
Helpful Add-Ons
- Fusible interfacing: adds body and helps softer fabrics keep their shape.
- Fusible hem tape or fusible web: useful for clean folded seams without stitching.
- Fabric glue: great for permanent joins on many fabrics if used correctly.
- Ribbon, twill tape, or cotton cording: handy for tie closures or decorative handles.
If you want a bag that stands on its own, choose a heavier fabric or combine a lighter outer fabric with interfacing. If you want something soft and flexible for drawers or closet shelves, a medium cotton can work just fine. Either way, prewash washable fabric before you cut it, especially cotton, so shrinkage does not surprise you later like an unpleasant tax document.
Basic Supplies You Will Need
- Fabric scissors or a rotary cutter
- Measuring tape or ruler
- Fabric chalk or washable marker
- Iron and ironing board
- Fabric glue, fusible hem tape, or fusible web
- Press cloth
- Binder clips or clothespins to hold edges while adhesive sets
- Optional: interfacing, cardboard inserts, grommets, ribbon, labels, and embellishments
One important note: hot glue is fine for decorative storage that will not be washed much, but for bags that need flexibility or occasional laundering, fabric glue or fusible products are usually smarter choices. Hot glue can turn stiff, bulky, or moody over time. And by “moody,” I mean it may peel when you least appreciate the drama.
Project 1: The Everyday Fold-Over Closet Bag
This is the easiest no-sew storage bag to start with. It works well for socks, scarves, baby clothes, rolled T-shirts, wrapping supplies, or clean rags in a laundry room.
What You Need
One rectangle of medium or heavy fabric, fabric glue or fusible tape, an iron, and optional ribbon for a tie closure.
Suggested Size
Cut one piece 18 inches wide by 28 inches tall. That gives you a versatile medium bag.
How to Make It
- Press the fabric flat and trim any uneven edges.
- Fold all four raw edges over by about half an inch and secure them with fusible hem tape or fabric glue for a neat finish.
- Place the fabric right side down. Fold the bottom up about 11 inches and the top down to overlap slightly, like an envelope.
- Glue or fuse the side seams, leaving the top flap open.
- If you want a closure, glue a length of ribbon to the front and back before finishing the overlap, then tie it shut after the adhesive cures.
- Turn the bag right side out and press gently.
The result is a soft storage bag with a fold-over top that looks tidy in a closet or on open shelving. Make a few in coordinating fabrics and suddenly your linen closet starts acting like it has its life together.
Project 2: The Boxy No-Sew Shelf Bin
If you want structure, this is the star of the show. This no-sew fabric bin is ideal for cube shelves, entryway storage, diapers, toiletries, office supplies, or craft materials that enjoy escaping from lesser containers.
What You Need
Heavy canvas, felt, or home decor fabric; fusible interfacing if the fabric is soft; fabric glue or fusible web; and optional cardboard or plastic canvas inserts for the base.
Suggested Size
For a medium cube-style bin, cut one rectangle 24 by 14 inches for the outer body and one matching piece for the lining if you want a neater interior.
How to Make It
- If using interfacing, fuse it to the wrong side of your outer fabric according to product directions.
- Hem the top long edge of the outer fabric and lining fabric separately.
- Fold each rectangle in half short-side to short-side and glue the side seam to create a tube.
- Flatten the tube so the side seam is centered at the back.
- At each bottom corner, pinch the fabric into a triangle and measure about 3 inches across the point. Glue or fuse that line shut. Repeat on both sides. This creates a boxed bottom.
- Repeat for the lining if using one.
- Insert the lining into the outer bin with wrong sides together, then glue the top edges together neatly.
- Add a cut piece of cardboard covered in fabric or contact paper to the bottom for extra support if needed.
This style looks especially polished with solid canvas on the outside and a fun print inside. It is like opening a sensible blazer and discovering leopard lining. Responsible, but with flair.
Project 3: The No-Sew Drawstring-Style Utility Pouch
A true sewn drawstring bag is simple, but we are keeping this no-sew. This version uses ribbon ties and works beautifully for shoe storage, travel accessories, small toys, hair tools, or giftable organization sets.
What You Need
Light to medium cotton, felt, or canvas; fabric glue; hole punch or small grommets if desired; and ribbon or cording.
How to Make It
- Cut a rectangle 16 by 20 inches.
- Hem all edges using fusible tape or glue.
- Fold the rectangle in half to form the pouch shape and secure the side seams.
- Near the top opening, punch two holes on the front and two on the back, or attach small grommets if you have them.
- Thread ribbon through the front and back pairs separately so you can pull both sides to cinch the opening.
- Tie the ribbon ends securely.
This pouch is less “camp laundry sack” and more “pretty little organizer for socks, chargers, makeup brushes, or random travel essentials.” It is also an excellent project if you want a fast win without wrestling a structured base.
Where DIY No-Sew Fabric Storage Bags Work Best
These bags are surprisingly flexible once you start using them. In bedrooms, they are great for belts, scarves, sleepwear, and accessories. In kids’ rooms, they can hold toy cars, art supplies, blocks, or stuffed-animal overflow. In bathrooms, they work for washcloths, hair accessories, unopened toiletries, and backup soap. In craft rooms, they are perfect for yarn, ribbon, stamps, felt scraps, and all the little tools that otherwise migrate across the room.
You can also make flatter pouches for drawers, larger bins for cube shelving, and gift-bag versions for holidays or party favors. In a mudroom, use tougher fabrics for hats, gloves, dog leashes, and reusable shopping bags. In a laundry room, label separate bags for delicates, unmatched socks, dryer sheets, and stain-removal supplies. It is not glamorous, but unmatched sock management is a noble calling.
Common Mistakes That Ruin the Look
Using fabric that is too flimsy
If the bag needs to stand up, choose canvas, felt, denim, or interfaced cotton. Thin fabric without support usually sags.
Skipping the iron
Wrinkled fabric leads to crooked folds and messy seams. Press first. Your project will look instantly more polished.
Using too much glue
More glue does not mean more strength. It usually means seepage, stiffness, and regret. Thin, even application wins.
Not testing adhesives
Always test on a scrap. Some adhesives darken fabric slightly, leave stiffness, or behave differently on felt versus canvas.
Ignoring curing time
If the product says let it set or cure fully, believe it. Premature handling is how corners peel and seams sulk open.
How to Make Your No-Sew Bags Look Custom, Not Crafty
The difference between “adorable handmade storage” and “school project energy” often comes down to finishing details. Start with a cohesive color palette. Neutrals with one accent print always look intentional. So do stripes, gingham, ticking, chambray, and simple florals.
Use contrast lining for a neat interior. Add labels with iron-on letters, tags, or hand-lettered fabric labels. Fold the top edge outward on boxy bins to create a cuff. Add matching ribbon pulls or handles. Repeat one fabric across several bag sizes to create a coordinated set. Suddenly your shelf says “boutique organizer,” not “I panic-crafted this on Saturday.”
If you want extra structure without sewing, slide a removable insert into the bottom. Covered cardboard, plastic canvas, or even a trimmed placemat can help a soft bag hold shape better. Just keep removable inserts out if you plan to wash the bag.
Cleaning and Care
Care depends on the fabric and adhesive. Some fabric glues remain flexible and washable after curing, while fusible products vary by brand and intended use. Follow product instructions carefully. For many no-sew storage bags, spot cleaning is the safest option, especially if the bag includes cardboard support or decorative trim.
To keep them looking good longer, avoid overloading them with sharp or heavy items. Store scissors, metal tools, or bulky hardware in more durable containers. Fabric bags are wonderful for soft goods, lightweight supplies, and household categories that benefit from visibility and flexibility. They are less thrilled about being treated like a construction bucket.
Real-World Experiences With DIY No-Sew Fabric Storage Bags
The first time I made a no-sew fabric storage bag, I approached the project with the confidence of someone who had watched exactly two tutorials and owned one bottle of fabric glue. I figured it would be simple: cut fabric, stick edges together, become organized person overnight. Naturally, the first bag came out a little lopsided, one side seam wandered off course, and I used enough glue to qualify as a structural engineer. But the funny part was that it still worked. It held rolled washcloths in the bathroom for months, and every time I saw it, I thought, “Well, you are not perfect, but neither am I, and here we are.”
That is the real charm of DIY no-sew fabric storage bags. They are forgiving. You do not need expert sewing skills or expensive equipment to make something useful. Over time, I learned that the best projects were not always the fanciest ones. The bags that lasted were the ones made for an actual job. A denim bin for pet toys. A felt pouch for chargers. A canvas shelf bag for extra pillowcases. A simple fabric envelope for holiday napkins. When the purpose is clear, the design gets better fast.
One of the most helpful lessons came from using the wrong fabric on purpose, or rather, by accident. I once made a large storage bag from lightweight quilting cotton because the print was cute and I was feeling optimistic. The result looked lovely for about ten minutes. Then I put hair accessories and a few lotion bottles inside, and it collapsed like it had just received bad news. That was when I finally understood why heavier canvas, interfacing, or felt matters. Pretty fabric is great, but structure is what keeps the whole thing from becoming a decorative puddle.
I also learned that no-sew does not mean no patience. The projects that looked best were the ones where I pressed the fabric carefully, clipped the edges in place, and actually let the adhesive cure. The rushed versions were always the ones that puckered, peeled, or looked slightly offended by my choices. Once I slowed down, the results changed. Even basic storage pouches started to look cleaner and more intentional.
Another pleasant surprise was how satisfying it felt to customize bags for specific spaces. In a nursery, soft bins made from washable cotton prints looked sweet and practical. In a laundry room, neutral canvas bags with simple labels made everything feel calmer. In a craft corner, mismatched scraps turned into coordinated organizers that made me feel wildly competent for at least an afternoon. There is something deeply rewarding about turning leftover fabric into something that reduces visual chaos.
Perhaps the best experience, though, is that these bags tend to invite more organizing. Once you make one that works, your brain starts scanning the house for new missions. Could the closet use scarf bags? Probably. Would the guest room benefit from a little pouch for spare toiletries? Absolutely. Do the random batteries, cords, and instruction manuals deserve a better system? They have been waiting for one. DIY no-sew fabric storage bags are not magic, but they do create momentum. And sometimes momentum is exactly what a messy room needs.
Conclusion
DIY no-sew fabric storage bags are proof that organization does not need to be expensive, complicated, or machine-stitched into existence. With smart fabric choices, clean folds, the right adhesive, and a little planning, you can make storage that is both practical and genuinely attractive. Whether you prefer a soft closet bag, a boxy shelf bin, or a travel-ready utility pouch, these projects let you create custom storage that suits your space and style. Start simple, learn what shapes and fabrics work best in your home, and before long you will have a collection of handmade organizers that look polished, save money, and quietly make everyday life easier.