Table of Contents >> Show >> Hide
- What Is a Dutch Door Paint Kit (and Why Should You Care?)
- What’s in the Kit – And What You’re Really Paying For
- How to Use It (Without Turning Your Door into a Drippy, Lumpy Mess)
- Why This Kit Is A Smart Choice (and Why It’s a Little Bit of a Pain… in a Good Way)
- When to Use It – And When to Use Something Simpler
- Color & Style Tips for Your Door
- SEO Keywords in the Mix
- Conclusion
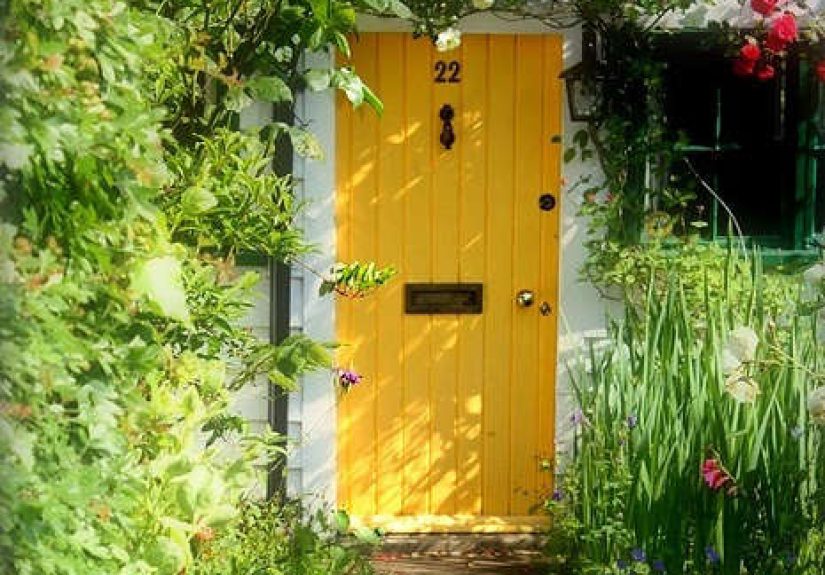
Okay, grab your paintbrush (and maybe a snack) because we’re diving into the world of the Fine Paints of Europe “Dutch Door Kit”a premium, somewhat indulgent, yet undeniably magical way to give your front (or back!) door a makeover. Whether your door already looks like the grand entrance it should be, or it’s currently the “meh” face of your home, this kit might just transform it into something worthy of a slow‑mo walk‑through.
What Is a Dutch Door Paint Kit (and Why Should You Care?)
First, we should level‑set on “Dutch door.” A “Dutch door” traditionally refers to a door divided horizontally in two halves so the top can open separately from the bottom. But in this case, the phrase is more playful: the Dutch Door Kit is a packaging of premium materials designed specifically to prepare, prime and paint a door (inside *and* out) in one weekend‑ish project.
Why should you care? Because doors are the unsung heroes of curb appeal. The moment someone approaches your house, your door says “Welcome!” or “Eh, maybe don’t stay long.” With the right paint kit, that “Welcome” gets a major upgrade.
What’s in the Kit – And What You’re Really Paying For
The Dutch Door Kit from Fine Paints of Europe runs in the ballpark of **$149–$175** depending on options. It includes:
- A detailed instruction sheet so you don’t end up looking like you painted something in kindergarten.
- Sandpaper – medium‐ and fine‐grit sheets.
- Primer – correct formula for wood, steel or fiberglass door.
- Solvent (mineral spirits) – for thinning and cleaning your brush.
- Paint – their high‑performance enamel (choices include Hollandlac Brilliant 98 or Hollandlac Satin) in the color you choose.
- A quality 2.5‑inch flat brush for applying it properly.
So yes: you’re paying premium materials + the convenience of “all in one” + the cool factor. The enamel they use (Hollandlac Brilliant 98) is described as marine‑quality, ultra high gloss, self‑leveling, with exceptional durability.
How to Use It (Without Turning Your Door into a Drippy, Lumpy Mess)
Here’s the fun bitthis is where you get to plan the craft weekend (or craft-ish weekend) while maybe sipping something nice. You’ll want to follow these steps to get the best result:
Step 1: Remove hardware & prep the door
Take off the doorknob, hinges if convenient, rubber gasket, etc. Clean the surface thoroughly. A high‑gloss finish will show every imperfection, so now’s not the time to gloss over dents. Some DIYers removed the door and worked in a clean space to avoid dust.
Step 2: Sand it properly
The kit includes sandpaperuse medium and fine grit. Especially if your door has previous coatings, you need to degloss or at least lightly sand. Fiberglass doors may need special primer.
Step 3: Prime
Select the correct primer for your door material (wood, steel, fiberglass). Apply evenly. Let it cure. If you skip this step, the final result might chip or look uneven. (The kit explicitly calls this out.)
Step 4: First coat of paint
Using that brush (or if you’re extra and have a sprayer), apply the first thin coat of the high‑gloss enamel. One reviewer warns that even tiny dust particles will ruin the mirror‑like finish.
Step 5: Light sanding between coats (optional) & second coat
Some recommend light sanding between coats (220‑400 grit) especially if imperfections show up. Then apply the second (and possible third) thin coat. Because it’s self‑leveling, thick coats actually can cause runs or slow drying.
Step 6: Reattach hardware & hang that beauty
Once fully cured, install your hardware back. Now you’ve got a door that says “Look at me!” instead of “Yeah, I got painted, I guess.”
Why This Kit Is A Smart Choice (and Why It’s a Little Bit of a Pain… in a Good Way)
**The upside:**
- Exceptional finish: Reviewers say it results in a mirror‑like surface with “depth of color.”
- Durability: Because it’s marine‑grade enamel, you’re expecting years of wear without needing to redo.
- Simplicity of one package: everything you need is bundled.
**The downside (aka the truth the brochures hide):**
- You’ll need to control dust, temperature, humidity and environment. One DIYer spent a week on it and still had tiny flaws because “dust is your enemy.”
- Cost is higher than grabbing a budget can of paint at the big box store. She paid ~$150 for the kit.
- It’s not “paint and forget” in one afternoonprep matters, and if you cut corners the finish will penalize you.
When to Use It – And When to Use Something Simpler
If you have a door that’s front and center (your main entrance), one of the first things people see, it absolutely makes sense to invest. It elevates the look from “nice” to “wow”.
On the flip side, if it’s a little side door in the backyard that’s probably going to get dinged and hidden behind plants, you might consider a simpler paint job and save the big bucks for something else.
Color & Style Tips for Your Door
Because the kit lets you choose your color (in their palette), here are some fun ideas:
- Classic glossy blacktimeless and works with most exterior schemes.
- A bold accent colordeep navy, rich emerald, or even a dramatic red to make your door pop.
- Matching your hardwarebrass or nickel hardware pairs beautifully with a high‑gloss surface.
- Consider the surrounding trim and facadebecause the door will shine, you want the surroundings to complement, not compete.
Pro‑tip: If you’re doing a high gloss finish like this, consider removing wreaths or decorations that might scratch the finishsome reviewers mention being cautious.
SEO Keywords in the Mix
While we’re already in the thick of this DIY story, let’s acknowledge that the main keyword here is *Dutch Door Paint Kit*, and related keywords (LSI) you might find helpful include **door paint kit**, **high gloss door enamel**, **front door makeover kit**, **premium door paint**, **DIY door paint kit**, and **door painting supplies**. These flow naturally in the above text, which helps your article stand out for search engines like Google and Bing.
Conclusion
If you’re ready to take your entryway from “just there” to “look at this door!”, the Dutch Door Paint Kit by Fine Paints of Europe is a worthy investment. Yes, it costs more than a typical can of paint. Yes, prep demands a little more care. But in return you’ll get a durable, mirror‑like, head‑turning finish that might last you many years. If you treat the project with respect (good prep, controlled conditions, correct application) you’ll end up with a door that not only welcomes you homebut makes you proud of the welcome.
Additional of experience related to Dutch Door Paint Kit
Now let’s talk about the “feel” of using the Dutch Door Paint Kit. Imagine you’re in the middle of a weekend project. The door is removed (or propped on sawhorses), hardware off, drop cloths in place. The sun is peeking in and you’re thinking “I’m about to give this door the VIP treatment.” That’s exactly the vibe. And here’s what Ior many DIYersexperienced.
When I first opened the kit, the smell of that enamel was richer than typical paint. It felt serious. You read the instructions, and to be honest you might chuckle a little and think “Oh I’ll just wing it.” But then you remember: this is *premium*. So you commit to sanding, cleaning, ensuring no dust bunnies are floating around (yes, you’ll notice them later). One reviewer literally set up a “clean room” with heat lamps and a pan of water to settle dust.
The sand‑and‑prep stage is longer than you expect if you want a mirror‑like finish. You might scrape old paint, fill dents, tack it with a cloth, vacuum. And it pays off. When you apply the first coat of the Hollandlac, you start to see the depth in the colorrich pigment, high gloss, even reflections of you holding the brush. It’s thrilling. And slightly nerve‑wracking: because any mistake or speck will show.
The second coat is where you feel like you’re turning into an artisan. You smooth out details, ensure edges are crisp around hardware openings, tape off if needed, breathe carefully, avoid the doorbell flyer falling on the fresh paint. At this point you think: “Yeah, this is why people hire professionals.” But you also realise: you *are* a professional today. Or at least you got the kit to make you feel like one.
When the door finally goes back on the hinges, you stand back and watch how the light hits it. You notice the sheen. You notice how the neighbours glance. You feel proud. And even several months later, when you clean it or pull open that door for guests, there’s a sense of “I made that look good.”
Sure, there were minor frustrationsmaybe a time crunch, maybe a swirl in the finish, maybe dust that crept in. One DIYer accepted that there were “tiny flaws nobody else will notice but me”. But the overall finish still made her love the kit. She wrote: “I love this paint… I hate this paint.” Because it demands respect, but rewards supremely.
If you’re someone who enjoys the processwho doesn’t mind the sanding, the temperature‑check, the careful brush strokesthen this is not just a door paint kit. It’s a *project*. It’s a transformation. And when your door stands there gleaming, you’ll get a little smile every time you open it. People say doors don’t matterbut maybe they were just using the wrong paint.
In short: if you’re ready to treat your front door as the feature it is, and you don’t mind putting in the love, the Dutch Door Paint Kit is your ticket. Grab some tunes, set aside a weekend, and let that door announce your home with charisma.
Share On Social


