Table of Contents >> Show >> Hide
Paper is humble. It sits in printer trays, school folders, junk-mail piles, and craft drawers pretending to be ordinary. Then one afternoon, with a few cuts, folds, and a little “over-under-over-under” magic, it becomes a basket. Not a titanium storage system, obviously. Please do not use it to carry soup. But for treats, paper flowers, party favors, desk trinkets, Easter eggs, classroom projects, or a cheerful handmade gift, a paper basket is surprisingly useful.
This guide explains how to form paper into a basket using two beginner-friendly methods: a woven paper strip basket and a folded paper basket. The woven version gives you that classic basket texture, while the folded version is faster and cleaner if you want a small paper basket with fewer supplies. Both methods are easy to follow, inexpensive, and ideal for kids, parents, teachers, and adults who secretly enjoy craft time more than they admit.
You will also find video-style steps, material tips, troubleshooting advice, and a longer experience section at the end with real-world lessons from making paper baskets that looked adorable, slightly lopsided, and eventually much better.
Before You Start: Choose the Right Paper
The best paper for a basket depends on how sturdy you want the finished piece to be. Regular printer paper works for practice, but it can wrinkle and collapse if you ask too much of it. Construction paper is colorful and easy to cut, making it great for kids. Cardstock is stronger and holds its shape better, especially for the folded basket method. Scrapbook paper is the fancy cousin: patterned, pretty, and ready for gift baskets or party favors.
If you are weaving, choose paper that bends without cracking. If you are folding, choose paper that holds a crease. If you are crafting with children, use safety scissors and supervise cutting, especially when making slits or narrow strips. A craft project should end with a basket, not a dramatic retelling called “The Great Scissor Incident.”
Helpful Supplies
- Construction paper, cardstock, or scrapbook paper
- Scissors or a paper trimmer
- Ruler
- Pencil
- Glue stick, craft glue, or double-sided tape
- Clothespins or paper clips for holding glued areas
- Optional: stickers, markers, ribbon, paper flowers, washi tape
Method 1: Woven Paper Strip Basket
This method creates a basket with a real woven look. It is the best choice if you want texture, color contrast, and a project that teaches the basics of weaving. The technique is simple: paper strips pass over and under each other, then fold upward to create sides. The process feels a little like making a tiny fence that decided to become useful.
Best For
- Classroom crafts
- Easter baskets
- Small gift holders
- Paper flower baskets
- Fine-motor practice for kids
- Using leftover colored paper
Materials for the Woven Basket
- 2 to 4 sheets of construction paper or lightweight cardstock
- Scissors or paper trimmer
- Ruler and pencil
- Glue or tape
- One extra strip for the handle
Step-by-Step Instructions
Step 1: Cut the Paper Strips
Cut 12 to 16 paper strips, each about 1 inch wide. For a small basket, strips around 8 to 10 inches long work well. For a larger basket, use longer strips. Try using two colors: one for the vertical strips and one for the horizontal strips. This makes the woven pattern easier to see and gives the basket a cheerful checkerboard effect.
Step 2: Build the Basket Base
Lay 6 strips vertically on the table, side by side. Now take one horizontal strip and weave it across the vertical strips: over the first strip, under the second, over the third, and so on. Slide it toward the center. Take the next horizontal strip and do the opposite pattern: under, over, under, over. Continue until you have a square woven base.
Keep the strips snug but not strangled. If you pull too hard, the base may buckle. If the strips are too loose, the basket will wobble like it just heard bad news.
Step 3: Secure the Corners
Once the base looks even, add a small dot of glue or a tiny piece of tape at the outer corners. This keeps the woven base from shifting while you form the sides. Let the glue set for a minute before moving on.
Step 4: Fold the Strips Upward
Fold every strip that extends from the base upward along the edge of the square. These upright strips become the “stakes” of your basket. Crease firmly so the sides stand up. If you are using thick cardstock, score the fold lightly with the back of a butter knife or a bone folder before bending.
Step 5: Weave the Basket Walls
Take a new strip and weave it around the upright strips, going over one, under the next, and repeating all the way around. Glue the ends together where they overlap. Add another strip above it, reversing the pattern. Continue for 3 to 5 rows, depending on how tall you want the basket.
Step 6: Trim and Finish the Rim
Fold the top ends of the upright strips inward or outward and glue them down. This creates a neat rim and prevents the basket from looking like it just woke up from a nap. You can also glue a long strip around the top edge to strengthen the rim.
Step 7: Add the Handle
Cut one strip about 1 inch wide and 10 to 12 inches long. Glue or tape one end to the inside of the basket, then arch it over and attach the other end to the opposite side. For a stronger handle, use two strips glued together or fold one strip lengthwise before attaching it.
Video Steps for Method 1
- 0:00–0:20: Show all supplies: colored paper, scissors, ruler, pencil, and glue.
- 0:20–0:50: Measure and cut equal paper strips.
- 0:50–1:40: Weave the flat square base using the over-under pattern.
- 1:40–2:10: Glue the corners and fold the loose strips upward.
- 2:10–3:20: Weave strips around the sides of the basket.
- 3:20–3:50: Fold, trim, and glue the rim.
- 3:50–4:20: Attach the handle and decorate the basket.
Method 2: Folded Paper Basket
The folded paper basket is faster than the woven version and uses fewer strips. It is inspired by simple paper-folding and origami-style box techniques. You begin with a square or rectangle, make strong creases, shape the corners, and add a handle. This method is perfect when you want a clean little basket without weaving several rows.
Best For
- Quick party favors
- Mini candy baskets
- Spring crafts
- Paper desk organizers
- Beginners who want fewer cuts
- Last-minute gifts
Materials for the Folded Basket
- 1 square sheet of cardstock or scrapbook paper, about 8 x 8 inches
- 1 narrow paper strip for the handle
- Scissors
- Glue, tape, or a stapler
- Optional decorations
Step-by-Step Instructions
Step 1: Start With a Square
Place your square paper patterned-side down if you are using scrapbook paper. Fold it in half from top to bottom, then unfold. Fold it in half from side to side, then unfold again. You should now have a cross-shaped crease in the center.
Step 2: Fold the Corners Toward the Center
Bring each corner into the center point and crease well. This creates a smaller square made of four triangular flaps. Strong creases are important because they help the basket hold its shape.
Step 3: Create Side Panels
Fold the left and right edges toward the center, crease, and unfold. Then fold the top and bottom edges toward the center, crease, and unfold. These folds create a grid that will guide the basket walls.
Step 4: Open Two Opposite Corners
Open the top and bottom corner flaps while keeping the left and right flaps folded toward the center. The shape may look confusing for a moment. Do not panic. Paper crafts often include one stage where the project appears to be auditioning as modern art.
Step 5: Lift the Sides
Pinch the left and right sides upward along the crease lines. As the sides rise, fold the opened top flap over the side edges and into the basket. Repeat on the bottom side. This locks the walls into place and forms a small open box.
Step 6: Secure the Shape
Add glue or tape to the inside flaps so the basket stays together. If you want a crisp finish, press the glued areas with a clothespin for a few minutes. If you are making several baskets for a party, use double-sided tape to speed things up.
Step 7: Add a Handle
Cut a strip of paper about 1 inch wide. Glue, tape, or staple it to opposite sides of the basket. For a polished look, attach the handle inside the basket so the ends are hidden. Decorate with stickers, bows, paper flowers, or a name tag.
Video Steps for Method 2
- 0:00–0:15: Show one square sheet of paper and one strip for the handle.
- 0:15–0:45: Fold the square in half both ways to make center creases.
- 0:45–1:20: Fold all four corners into the center.
- 1:20–2:00: Make side-panel creases by folding edges inward.
- 2:00–2:45: Open two opposite flaps and lift the sides.
- 2:45–3:20: Fold the flaps into place to form the basket.
- 3:20–3:50: Glue the inside flaps, attach the handle, and decorate.
Which Method Is Better?
Choose the woven paper basket if you want a craft that looks more like traditional basketry. It takes longer, but it is more satisfying and visually interesting. The over-under pattern also helps children practice focus, hand control, and sequencing.
Choose the folded paper basket if you want speed, simplicity, and a cleaner shape. It is a better option for party prep, small favors, or times when you need ten baskets and only one cup of coffee left in your emotional support system.
| Feature | Woven Paper Basket | Folded Paper Basket |
|---|---|---|
| Difficulty | Easy to medium | Easy |
| Time Needed | 20 to 35 minutes | 10 to 20 minutes |
| Best Paper | Construction paper or light cardstock | Cardstock or scrapbook paper |
| Look | Textured and woven | Clean and folded |
| Best Use | Decorative baskets and learning projects | Quick favors and small containers |
Creative Ways to Use a Paper Basket
A paper basket can be more than a cute craft. Use it as a mini gift basket filled with wrapped candy, paper flowers, seed packets, tea bags, stickers, or handwritten notes. For classrooms, paper baskets can hold spelling words, kindness prompts, or tiny paper fruits during a nutrition lesson. For holidays, change the colors: pastels for Easter, orange and black for Halloween, red and green for Christmas, or warm earth tones for Thanksgiving.
You can also turn the basket into a desk organizer for paper clips, rubber bands, washi tape, or other lightweight supplies. Just remember that paper baskets are decorative containers, not heavy-duty storage bins. They are wonderful for charm, less wonderful for carrying a collection of rocks named after your favorite relatives.
Troubleshooting: Fix Common Paper Basket Problems
The Basket Looks Crooked
Check the base. If the woven strips are uneven, the sides will rise unevenly too. Straighten the base before gluing the corners. A ruler helps keep the strips aligned.
The Paper Tears While Folding
Your paper may be too thin, too dry, or folded too sharply. Try cardstock for structure, but score it lightly before folding. For kids, construction paper is usually easier to bend.
The Handle Keeps Falling Off
Use a wider handle strip and attach it inside the basket with glue plus tape. For extra strength, glue two handle strips together before attaching.
The Woven Rows Slip Around
Add small dots of glue at the corners as you work. Paper clips can also hold rows in place until the glue dries.
Helpful Experience Notes From Making Paper Baskets
The first time you make a paper basket, expect the project to teach you patience in a very paper-based way. The woven basket especially rewards slow hands. When the strips are cut evenly, the whole basket behaves better. When they are uneven, the basket still works, but it may lean with the confidence of a tired shopping cart. A paper trimmer makes the cleanest strips, but scissors are fine if you measure first and cut with care.
One practical lesson is to avoid using paper that is too flimsy. Printer paper is okay for learning the pattern, but it does not always create strong sides. Construction paper is better for children because it is flexible and colorful. Cardstock is better for a basket you actually want to use. Scrapbook paper looks beautiful, but some types crack at the folds, especially if they have a glossy coating. Test one fold before committing your prettiest sheet. This small act can save you from a crafting tragedy involving floral paper and regret.
Another experience-based tip is to glue less than you think you need. Too much glue makes paper buckle, wrinkle, or slide around. A thin line or small dot is usually enough. If you are working with kids, glue sticks are less messy than liquid glue. If you are making baskets for a party or classroom, double-sided tape is fast and clean. It also avoids the suspenseful waiting period where everyone stares at wet glue as if it might suddenly become more interesting.
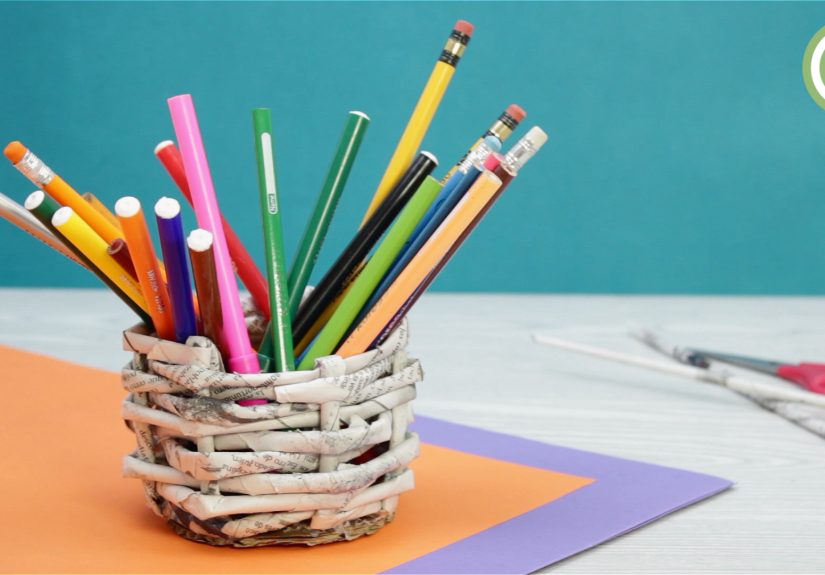
For the woven method, color choice matters. Two contrasting colors make the pattern easier for beginners to follow. For example, blue vertical strips and yellow horizontal strips clearly show the over-under sequence. Once you understand the structure, try three colors, patterned paper, or a gradient effect. A basket made from recycled magazine pages can look surprisingly stylish, especially if you choose pages with similar tones. Just use stronger paper for the handle if the magazine pages are thin.
The folded basket method is great when you want quick results, but crisp creases make all the difference. Run your fingernail, a ruler edge, or a bone folder along every fold. The cleaner the crease, the cleaner the basket. If the sides pop open, do not blame yourself or the entire art of paper folding. Add a hidden piece of tape inside the flap and move on with dignity.
Decorating is where the basket becomes personal. A simple woven basket can turn into a spring flower basket with paper tulips, a Valentine basket with heart cutouts, a Halloween treat holder with a jack-o’-lantern face, or a tiny thank-you gift filled with notes. The best decorations are lightweight. Heavy buttons, thick beads, or large foam pieces may pull the paper out of shape unless you reinforce the sides.
Finally, paper basket making is an excellent reminder that useful crafts do not need expensive materials. A few sheets of paper, a pair of scissors, and a little time can become something charming. It is budget-friendly, easy to personalize, and forgiving enough for beginners. Even the imperfect baskets have personality. Sometimes the slightly crooked one is the favorite, because it looks handmade in the best possible way: warm, playful, and completely unlike something that came from a factory shelf.
Conclusion
Learning how to form paper into a basket is simple, creative, and surprisingly satisfying. The woven method gives you a classic basket look with colorful paper strips, while the folded method creates a quick container from a single sheet. Both are beginner-friendly, affordable, and easy to adapt for holidays, classrooms, gifts, and home décor.
If you want the strongest result, use cardstock, measure your strips, crease carefully, and secure the rim and handle well. If you want the most fun result, add color, pattern, and a little personality. Paper may be ordinary at the start, but by the end, it can hold candy, flowers, notes, and possibly your renewed faith in simple crafts.