Table of Contents >> Show >> Hide
- Why a Bookcase Headboard Makes a Great Keepsake Hutch
- Planning the Transformation Before Picking Up a Paintbrush
- Step 1: Cleaning and Inspecting the Old Headboard
- Step 2: Repairing Dents, Holes, and Wobbly Spots
- Step 3: Sanding for Better Paint Adhesion
- Step 4: Priming the Bookcase Headboard
- Step 5: Choosing the Right Paint Color
- Step 6: Adding Details That Make It Look Like a Hutch
- Step 7: Sealing and Letting the Finish Cure
- Styling the Keepsake Hutch Without Creating Clutter
- What This Project Cost
- Common Mistakes to Avoid
- Extra Experience: What I Learned While Re-purposing My Bookcase Headboard
- Conclusion: A Forgotten Headboard Can Become the Heart of a Room
Some people walk past old furniture and see clutter. I walk past it and hear tiny violins playing a dramatic soundtrack. That is exactly what happened when I found an old bookcase headboard sitting in the corner of the garage, looking like it had been rejected by every bedroom in America. It was bulky, scratched, and deeply committed to its 1990s identity. But behind the dents, dust, and questionable finish, I saw something better: a keepsake hutch.
This project began as a simple attempt to reuse an old headboard and turned into one of my favorite DIY furniture makeovers. Instead of sending the piece to the curb, I transformed it into a practical display cabinet for family photos, small heirlooms, vintage dishes, travel souvenirs, handwritten recipes, and the little objects that somehow mean everything. The result was not a perfect showroom piece, and thank goodness for that. It became warm, personal, useful, and just polished enough to look intentional.
If you have an old bookcase headboard, a tired shelving unit, or a thrift-store furniture find with “please rescue me” energy, this guide will walk you through the process. We will cover planning, cleaning, repairing, painting, styling, and the lessons I learned while turning forgotten bedroom furniture into a keepsake hutch with personality.
Why a Bookcase Headboard Makes a Great Keepsake Hutch
A bookcase headboard already has the bones of a hutch. It usually includes shelves, cubbies, a sturdy frame, and enough depth to hold small decorative items. Unlike a flat headboard, a bookcase-style headboard offers built-in storage, which makes it perfect for repurposing into a display piece.
The shape also works surprisingly well outside the bedroom. Once removed from the bed frame and placed against a wall, the headboard starts to look less like a sleepy furniture relic and more like a compact cabinet. With a little sanding, paint, trim, backing, and styling, it can become a dining room hutch, hallway memory cabinet, craft room shelf, entryway organizer, or family keepsake display.
The Best Part: It Saves Money and Adds Character
Buying a new hutch can be expensive, especially if you want solid construction and unique detail. Repurposing furniture lets you keep costs lower while creating something no big-box store can duplicate. A few suppliesprimer, paint, wood filler, sandpaper, knobs, trim, and maybe a small piece of plywoodcan completely change the look of the piece.
Even better, old furniture often has charm that new furniture tries very hard to imitate. A scratch here, a worn edge there, and suddenly the project has a backstory. In my case, the headboard had survived several moves, one leaky garage corner, and what appeared to be a close encounter with a rogue screwdriver. Naturally, it was perfect.
Planning the Transformation Before Picking Up a Paintbrush
Before I started sanding like a person in a home improvement montage, I took a step back and asked three questions: Where will this hutch go? What will it hold? What style should it have? These questions saved me from creating a very pretty piece that served absolutely no purpose, which is a common DIY trap right after “I’ll just eyeball it.”
I wanted the hutch to hold meaningful items without looking cluttered. That meant the shelves needed enough breathing room for framed photos, a small vase, old books, keepsake boxes, and a few seasonal decorations. I also wanted the finish to feel soft and timeless, not too glossy or too rustic. The goal was cozy, not “abandoned farmhouse in a thunderstorm.”
Measure First, Celebrate Later
Measure the width, height, and depth of the headboard before you begin. Check the room where it will live and make sure it does not block outlets, vents, doors, or traffic flow. If the piece is tall or top-heavy, plan to secure it to the wall with anti-tip hardware. A hutch should display memories, not perform gymnastics.
I also measured the shelves and made a quick list of what I wanted to display. This helped me decide whether to add extra dividers, remove a shelf, or leave the original layout alone. In the end, I kept most of the structure intact because the existing cubbies were already useful. Sometimes the best DIY decision is knowing when to stop adding more “brilliant” ideas.
Step 1: Cleaning and Inspecting the Old Headboard
The first real step was cleaning. Old furniture collects dust, grime, and mysterious garage confetti. I wiped the entire headboard with a damp cloth and mild soap, paying special attention to corners and shelf seams. After it dried, I inspected every surface for loose veneer, cracked trim, wobbly joints, and nail holes.
This part is not glamorous, but it matters. Paint does not magically fix dirt or damage. It only makes dirty damage a different color. Cleaning also helps reveal the true condition of the piece so you can repair problems before they become more annoying later.
Safety Check for Older Painted Furniture
If your headboard is older or has an unknown painted finish, be cautious before sanding. Older paint may contain lead, especially on very old furniture or items stored in older homes. Use a lead test kit or consult a professional if you are unsure. Work in a ventilated area, wear proper protection, and avoid creating unnecessary dust.
For my project, the headboard had a factory finish rather than old flaking paint, so a light sanding was enough. Still, I wore a mask and safety glasses because sawdust has a special talent for finding eyeballs.
Step 2: Repairing Dents, Holes, and Wobbly Spots
Once the piece was clean, I filled small dents and screw holes with wood filler. After the filler dried, I sanded the patches smooth. A few corners had chipped veneer, so I used a thin layer of filler to even them out. I also tightened loose screws and reinforced one shelf with wood glue and clamps.
Do not skip these small repairs. A hutch is meant to display special objects, so the structure should feel solid. If a shelf flexes too much, add support underneath. If the back is flimsy, consider attaching a new backing panel. If the whole piece rocks, check whether the floor is uneven or whether the base needs leveling feet.
Adding a Back Panel for a More Finished Look
Many bookcase headboards have an unfinished or unattractive back because they were designed to sit against a bed and wall. Since my keepsake hutch would be visible from the side, I added a thin plywood back panel. This made the piece feel more like a real cabinet and less like a headboard wearing a fake mustache.
You can keep the backing simple, paint it the same color as the frame, or use beadboard, wallpaper, peel-and-stick paper, or fabric for texture. A patterned back panel can make plain shelves look custom, especially if the outside finish is neutral.
Step 3: Sanding for Better Paint Adhesion
Sanding is the part of the project where enthusiasm goes to be tested. The goal is not to remove every bit of finish. It is to scuff the surface so primer and paint can grip properly. I used medium-grit sandpaper on glossy areas and a finer sanding sponge on edges, corners, and repaired spots.
After sanding, I vacuumed the dust and wiped the piece with a tack cloth. Dust left behind under paint creates bumps, streaks, and a finish that says, “I was in a hurry and emotionally unsupervised.” A clean surface makes a noticeable difference.
Step 4: Priming the Bookcase Headboard
Primer helps create an even base, especially when painting over dark wood, laminate, or a shiny factory finish. I used a bonding primer because the original finish was slick. A small roller worked well on flat surfaces, while an angled brush helped reach corners and shelf edges.
One thin coat looked decent, but I added a second coat after lightly sanding the first. This gave the paint a smoother foundation and helped block the old color from peeking through. If your headboard is made from laminate or MDF, primer becomes even more important because those surfaces can be stubborn.
Step 5: Choosing the Right Paint Color
For a keepsake hutch, I recommend a color that supports the objects inside rather than competing with them. Soft white, warm cream, muted sage, dusty blue, greige, charcoal, and deep green all work beautifully depending on your home’s style. I chose a warm off-white because I wanted the hutch to feel light, nostalgic, and flexible enough for seasonal decorating.
A satin or semi-gloss finish is practical for furniture because it is easier to wipe clean than flat paint. Chalk-style paint can also work if you want a matte, vintage look, but it usually needs a protective topcoat in high-touch areas.
Painting Thin Coats Instead of One Thick Coat
Two or three thin coats are better than one thick, gloopy coat. Thick paint can drip, cure slowly, and collect in corners. I painted with the grain where possible and checked the shelf undersides because paint drips love hiding there like tiny criminals.
Between coats, I let the paint dry fully and lightly sanded any rough spots. The final coat looked smooth but still had enough hand-painted character to feel warm. That balance was exactly what I wanted: refined, but not so perfect that everyone would be afraid to touch it.
Step 6: Adding Details That Make It Look Like a Hutch
The biggest challenge was helping the piece stop looking like a headboard. To do that, I added simple trim along the top and base. This created a more furniture-like silhouette. I also installed small decorative feet to lift the piece slightly off the floor and make it feel less boxy.
Hardware can also change the personality of a repurposed piece. If your headboard has little cabinets or sliding doors, replace outdated pulls with antique brass, matte black, ceramic, or wood knobs. If it has open shelves only, consider adding cup hooks underneath one shelf for keys, ornaments, mugs, or small hanging keepsakes.
Optional Ideas for Customizing the Hutch
You can add battery-powered puck lights to highlight special objects, install small rails to keep plates upright, use baskets on lower shelves, or add glass doors if you are comfortable with more advanced woodworking. For a cottage look, beadboard backing is charming. For a modern look, paint the interior a darker accent color. For a family-memory display, add label holders to small boxes or drawers.
Step 7: Sealing and Letting the Finish Cure
After painting, I protected the surface with a clear water-based topcoat. This step is especially helpful for shelves that will hold objects, because moving frames and boxes can scratch fresh paint. I used a light hand and followed the dry-time directions carefully.
One important lesson: dry paint and cured paint are not the same thing. Paint may feel dry within hours, but it can take days or longer to fully harden. I waited before loading the shelves with heavier objects. This required patience, which I do not naturally possess, but the finish thanked me by not peeling off under a picture frame.
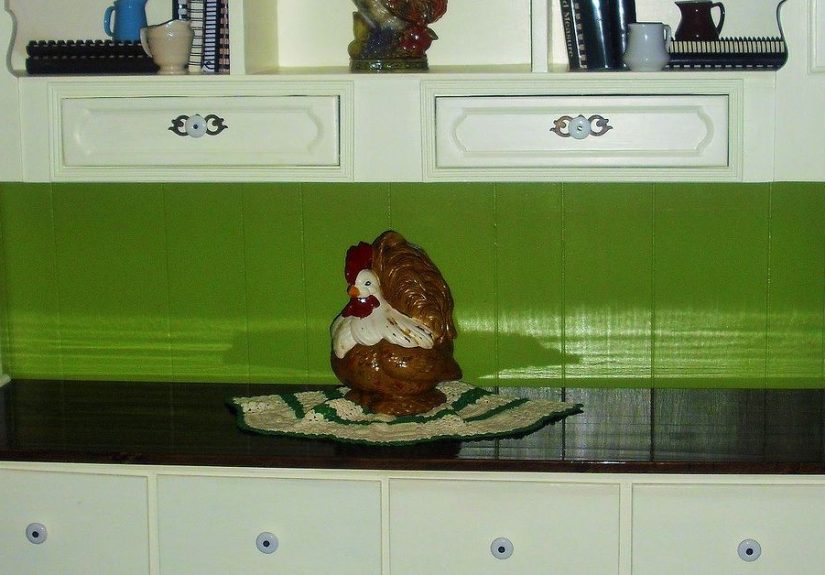
Styling the Keepsake Hutch Without Creating Clutter
Once the hutch was ready, the fun part began. I gathered family photos, old letters, a tiny ceramic dish from a trip, a few vintage books, a small plant, and a recipe card written in familiar handwriting. The key was editing. A keepsake hutch should feel meaningful, not like a yard sale had a confetti cannon.
I used the “mix and breathe” method: mix heights, textures, and shapes, then leave breathing room around each group. A framed photo looks better next to a small vase and a stack of books than it does squeezed between twelve unrelated trinkets. Negative space gives special items more importance.
My Favorite Display Formula
For each shelf, I used one anchor piece, one medium item, and one small accent. For example, a framed photo became the anchor, a small keepsake box added weight, and a tiny brass bird added charm. On another shelf, vintage books served as the anchor, a candle added height, and a handwritten recipe card brought in the personal story.
Lower shelves are best for heavier items. Delicate objects should sit higher but still within safe reach. If children are in the home, avoid placing tempting breakables where they might encourage climbing. Secure the hutch to the wall, especially if it is tall or narrow.
What This Project Cost
The final cost depends on what you already own. My headboard was free because it was already sitting in storage, quietly judging me. I spent money on primer, paint, wood filler, sandpaper, trim, a back panel, and a clear topcoat. Compared with buying a new hutch, the savings were significant.
Thrift stores, estate sales, garage sales, and online marketplaces are great places to find bookcase headboards. Look for sturdy construction, useful shelf depth, and a shape that can stand alone. Avoid pieces with severe water damage, mold, major structural cracks, or strong odors that refuse to leave even after cleaning.
Common Mistakes to Avoid
The first mistake is skipping prep. Cleaning, sanding, and priming may not be exciting, but they determine whether the finish lasts. The second mistake is choosing a paint color before deciding where the hutch will live. Always test the color in the actual room if possible because lighting changes everything.
The third mistake is overloading the shelves. A keepsake hutch should tell a story, not shout every chapter at once. Rotate items seasonally if you have too many treasures. The fourth mistake is ignoring safety. Tall furniture should be anchored, and heavy items should sit low.
Extra Experience: What I Learned While Re-purposing My Bookcase Headboard
The most surprising part of this project was how emotional it became. I thought I was just painting old furniture. Instead, I found myself building a small stage for memories that had been hiding in boxes. There was the photo from a family picnic, the little dish that used to sit on my grandmother’s table, the ticket stub from a trip, and a few books with notes tucked inside. Suddenly, the hutch was not just storage. It was a quiet little museum of everyday life.
I also learned that repurposing furniture requires flexibility. My original plan involved adding doors to the lower shelves, but after testing the layout, I realized open storage looked lighter and more welcoming. Then I planned to paint the back panel a bold color, but the keepsakes looked better against a softer background. DIY projects have a way of humbling a person. You begin with a grand vision, and the furniture calmly says, “Cute idea, but no.”
Another lesson was that imperfections can become part of the charm. One side of the headboard had a shallow dent that did not disappear completely after filling and sanding. At first, it annoyed me. After the final coat of paint, though, it looked like a gentle sign of age. That dent reminded me that the piece had lived a life before becoming a hutch. New furniture rarely gives you that kind of built-in character.
Working slowly made the biggest difference. I gave primer time to dry, let paint coats cure, and resisted the urge to decorate immediately. That patience created a better finish and fewer touch-ups. It also helped me make smarter design decisions. When I stepped away from the project for a day, I came back with fresh eyes and noticed details I would have missed while rushing.
The project also changed how I look at unwanted furniture. A bookcase headboard is not just a headboard. It can become a hutch, a hallway shelf, a craft station, a display cabinet, or even a child’s reading nook with the right adjustments. Once you start seeing furniture by its structure instead of its original label, the creative possibilities multiply quickly. Warning: this may cause you to stare at curbside furniture like a detective at a crime scene.
My final piece now sits against the wall with family photos, small heirlooms, and a few decorative items that make me smile. It is useful, meaningful, and slightly smug about its glow-up. Best of all, it reminds me that home design does not always require buying something new. Sometimes the best piece in the room is the one you rescued, repaired, and gave a better job title.
Conclusion: A Forgotten Headboard Can Become the Heart of a Room
Re-purposing a bookcase headboard into a keepsake hutch is a practical, creative, and deeply personal DIY furniture project. It saves money, reduces waste, and gives sentimental items a place to shine. With careful cleaning, smart repairs, proper sanding, primer, paint, and thoughtful styling, an outdated bedroom piece can become a beautiful storage and display feature for almost any room.
The best part is that the finished hutch does not need to be perfect. In fact, it is better when it is not. A handmade furniture makeover should show a little personality. It should hold stories, not just stuff. And if it makes guests say, “Wait, that used to be a headboard?” you have officially won the DIY Olympics.
Note: This article is written as an original, publish-ready DIY guide based on widely used furniture upcycling, painting, refinishing, and home safety practices in the United States.


