Table of Contents >> Show >> Hide
- Why Cookie Recipes Behave Differently at High Altitude
- Quick Altitude Bands You Can Use
- How to Adjust a Cookie Recipe for High Altitude: 7 Steps
- Step 1: Start with your exact elevation and classify the recipe type
- Step 2: Raise oven temperature slightly and shorten baking time
- Step 3: Reduce chemical leaveners so cookies don’t over-expand
- Step 4: Reduce sugar (and sometimes fat) to control spread
- Step 5: Add a little liquid and, if needed, a bit more flour
- Step 6: Chill dough and control your pans like a pro
- Step 7: Run a micro test batch and adjust one variable at a time
- Cheat Sheet: Starting Adjustments for High-Altitude Cookies
- Troubleshooting by Symptom
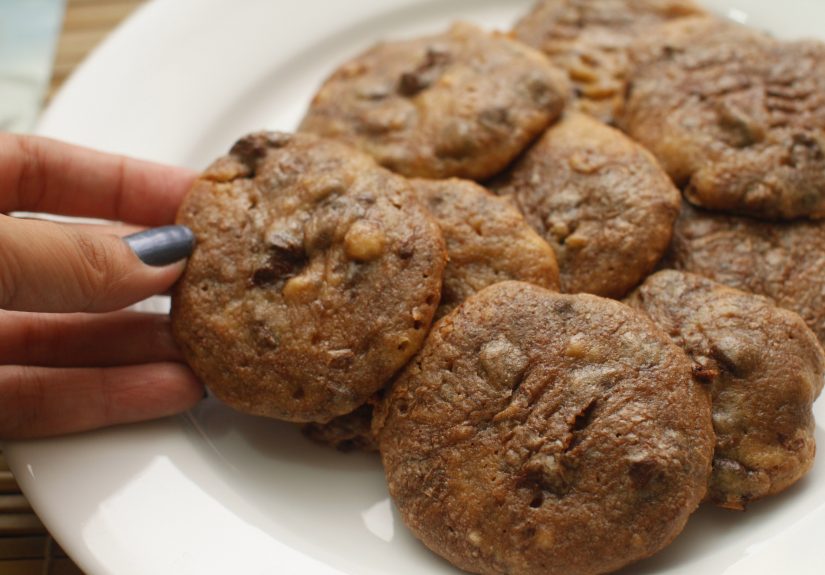
- Example Conversion: Classic Chocolate Chip at Around 5,200 Feet
- Conclusion
- Experience Section (About ): What Actually Happened in Real High-Altitude Kitchens
You followed the recipe. You used real butter. You resisted the urge to free-pour vanilla “with your heart.”
And stillyour cookies spread into one giant sugary map of North America.
If you bake above roughly 3,000 feet, this is not a character flaw. It’s physics.
At higher elevations, air pressure is lower, water evaporates faster, and gases from leaveners expand more aggressively.
Translation: cookie dough can dry out, over-expand, spread too fast, or finish with a weirdly crisp edge and underwhelming center.
The good news is that you don’t need to abandon your favorite sea-level recipe. You just need to teach it mountain manners.
In this guide, you’ll get a clear 7-step method to adjust almost any cookie formula for altitudewhether you’re baking in Denver,
Santa Fe, Flagstaff, or a cabin where your oven light flickers every time the wind blows.
We’ll keep it practical, nerdy where it helps, and fun enough that your next batch won’t feel like a science fair project.
Why Cookie Recipes Behave Differently at High Altitude
Most mainstream cookie recipes are developed close to sea level. Once you go higher, a few things change:
- Lower air pressure: Leavening gases expand more quickly, which can push structure too far, too fast.
- Faster evaporation: Moisture leaves dough sooner, often causing dryness and uneven texture.
- Sugar concentration: As water evaporates, sugar becomes more concentrated and can weaken structure.
- Rapid spread: Fat melts and dough sets at a different pace, so cookies can flatten before structure firms.
The fix is not one magical ingredient. It’s a coordinated set of small moves: temperature, time, leaveners, sugar, liquid, flour, and dough handling.
Think of it like tuning a guitar: one peg alone won’t get you to perfect pitch.
Quick Altitude Bands You Can Use
Use these as practical adjustment zones (not strict legal boundaries):
- 3,000–5,000 ft: Light adjustments often work.
- 5,000–7,000 ft: Moderate adjustments are usually needed.
- 7,000+ ft: Stronger adjustments and tighter process control matter.
How to Adjust a Cookie Recipe for High Altitude: 7 Steps
Step 1: Start with your exact elevation and classify the recipe type
First, know your baking altitude. Then classify your cookie:
drop cookie (like chocolate chip), scoop-and-bake thick cookie, bar cookie, or thin crisp style.
Different styles react differently to moisture loss and spread.
If your recipe already has high fat + high sugar + low flour (many classic drop cookies do),
it’s more likely to spread too much at altitude. If it’s already flour-forward and chilled, you may need fewer edits.
Pro tip: write your baseline formula in grams and keep notes by batch number. Your future self will send you flowers.
Step 2: Raise oven temperature slightly and shorten baking time
A hotter oven helps cookies set structure before they spread into pancake territory.
A common starting point is raising the oven by 15–25°F.
Then reduce bake time proportionallyoften 1–2 minutes less per 10 minutes of typical bake time.
Example: if your sea-level cookie bakes at 350°F for 11 minutes, test 365°F for 9–10 minutes.
You’re looking for edges set + center still slightly soft; carryover heat will finish the middle.
Don’t change temperature wildly all at once. Overshooting can brown bottoms before the centers set.
Step 3: Reduce chemical leaveners so cookies don’t over-expand
At altitude, baking soda and baking powder can push faster lift than your dough can support.
Start by trimming leaveners a little.
- Gentle start: reduce by 1/8 teaspoon per 1 teaspoon called for.
- Higher elevations: reductions may need to be larger depending on altitude band and recipe.
If your cookies taste slightly soapy/alkaline, or puff then collapse, excess leavener is a likely culprit.
One small reduction can dramatically improve flavor and shape.
Step 4: Reduce sugar (and sometimes fat) to control spread
Sugar attracts moisture and liquefies during baking. At altitude, faster evaporation can concentrate sugar and weaken cookie structure.
A common first move: reduce sugar by about 1 tablespoon per cup in the formula.
For very rich formulas that still spread, trim fat slightly too (especially if dough feels overly soft at room temp).
Make this a second-round adjustment after sugar and temperature changes.
You’re not turning cookies into diet crackers. You’re restoring balance so texture lands chewy and structured instead of “crispy coaster.”
Step 5: Add a little liquid and, if needed, a bit more flour
Moisture loss is one of the biggest altitude issues. Increase liquid modestly to keep dough from drying:
- Starting point: +1 to 2 tablespoons liquid around 3,000 feet.
- As altitude rises: add incrementally more as needed.
- Optional: an extra yolk or larger egg can boost moisture and structure.
If cookies still spread too much after that, increase flour gradually (for example, 1 tablespoon at a time per batch).
Higher-protein flour can also help structure in some formulas.
Real-world example from classic chocolate chip guidance at around 5,200 ft:
increase flour, reduce sugars, and add a little watersmall edits, big improvement.
Step 6: Chill dough and control your pans like a pro
Temperature control isn’t optional at altitude.
Chill dough for 30 minutes to 2 hours to firm fat before baking.
This slows early spread and improves thickness.
- Use cool sheet pans (not still-hot pans from prior batches).
- Use parchment for consistency and cleaner release.
- Portion evenly so bake timing is predictable.
- Rotate pans as needed for even browning.
Bonus: chilled dough often tastes better because hydration and flavor integration improve.
Science and deliciousness shaking hands.
Step 7: Run a micro test batch and adjust one variable at a time
This is the step most people skip, then blame the moon.
Don’t change five things at once.
Bake 3–4 test cookies first, observe, then adjust one variable per round.
Keep a mini log like this:
- Batch A: +20°F, -1 tbsp sugar/cup
- Batch B: A + -1/8 tsp leavener
- Batch C: B + +1 tbsp liquid
In two or three rounds, you’ll usually dial in your “house version” for your kitchen and altitude.
That recipe then becomes your reliable base for flavor variations.
Cheat Sheet: Starting Adjustments for High-Altitude Cookies
| Variable | Starting Adjustment | Why It Helps |
|---|---|---|
| Oven temperature | +15°F to +25°F | Sets structure sooner, reduces excessive spread |
| Bake time | Shorten proportionally (often 1–2 min less per 10 min) | Prevents over-drying at hotter temp |
| Leavening | Reduce slightly (start at -1/8 tsp per tsp) | Prevents over-expansion/collapse and soapy taste |
| Sugar | Reduce ~1 tbsp per cup | Improves structure and controls spread |
| Liquid | Add 1–2 tbsp (then tune by altitude) | Counteracts fast evaporation |
| Flour | Add in small increments (e.g., 1 tbsp at a time) | Strengthens dough structure |
| Dough handling | Chill 30 min to 2 hrs | Firmer fat = less spread, better shape |
Troubleshooting by Symptom
Cookies spread too much
- Increase oven temp 15–25°F
- Reduce sugar slightly
- Reduce leavener slightly
- Chill dough and use cool pans
- Add a little more flour
Cookies are dry or tough
- Add 1–2 tablespoons liquid
- Consider an extra yolk or larger egg
- Shorten bake time
- Do not overbake while waiting for deep color
Cookies taste soapy or metallic
- Reduce baking soda/baking powder
- Check measurement accuracy
- Evaluate whether recipe has too much leavener for your altitude
Cookies don’t spread enough
- Decrease flour slightly
- Warm dough a little before baking
- Verify you didn’t reduce sugar/fat too aggressively
Example Conversion: Classic Chocolate Chip at Around 5,200 Feet
Let’s say your sea-level formula is the classic style:
2 1/4 cups flour, 3/4 cup white sugar, 3/4 cup brown sugar, 1 tsp baking soda, 1 cup butter, 2 eggs.
A practical high-altitude adaptation can look like this:
- Flour: increase to about 2 1/2 cups
- Sugars: reduce to about 2/3 cup each
- Add a small amount of water (e.g., 2 tsp)
- Watch time carefully (often 8–10 min for drop cookies, depending on oven)
That’s not the only correct answerjust a proven pattern. Your flour brand, pan type, room humidity, and dough temperature still matter.
But this style of adjustment is exactly how many bakers recover from “flat cookie syndrome” at altitude.
Conclusion
High-altitude cookie baking isn’t about luck. It’s about controlled tweaks:
set structure sooner, soften leavener pressure, protect moisture, and calibrate spread.
Once you learn the pattern, you can adapt almost any cookie recipe with confidence.
If you remember only one rule, make it this:
change one variable at a time and keep notes.
Your best high-altitude cookie recipe is usually your favorite sea-level recipe, translated into your own kitchen language.
Experience Section (About ): What Actually Happened in Real High-Altitude Kitchens
The first time I tried to bake chocolate chip cookies at altitude, I did what everyone does: I blamed the butter.
Then I blamed the oven. Then, for good measure, I blamed “cheap flour.”
The truth was simpler. I had moved from low elevation to a mountain town and used my old sea-level recipe unchanged.
The cookies spread so far they merged into a giant cookie continent. I cut them into squares and called them “rustic bars,”
which is baker code for “this did not go according to plan.”
Batch two, I got aggressive. I reduced sugar, reduced leavener, added flour, changed the pan, changed the rack position,
and changed the bake temperatureall at once. The result? Thick pucks with the emotional texture of hockey equipment.
Technically edible, spiritually confusing.
That’s when the real lesson clicked: high-altitude baking rewards patience, not panic.
I restarted with a notebook and tiny test bakes. Four cookies per round. In round one, I only increased oven temperature by 20°F.
Better edge structure, but still too much spread. Round two, I kept temperature change and reduced sugar by one tablespoon per cup.
Better shape, better chew. Round three, I reduced baking soda by a small amount and added one tablespoon of water.
Suddenly the cookies looked like actual cookies againdefined edges, chewy centers, no weird alkaline aftertaste.
The most surprising discovery was how much dough temperature mattered.
Room-temperature dough at altitude behaved like it had somewhere urgent to bemelt, spread, flatten, done.
Chilled dough, on the other hand, baked with confidence.
Same ingredients, same oven, radically different outcome.
I now chill every drop-cookie dough by default, even if the recipe says it’s optional.
Optional is a sea-level word.
Another useful habit was tasting and evaluating at three points: warm, fully cooled, and day two.
At altitude, some cookies feel great warm but become dry the next day.
Slightly increasing liquid and pulling cookies from the oven a touch earlier fixed that.
Also, I stopped chasing dark color for doneness. At higher temperatures, “golden edge + soft center” is the sweet spot.
Overbaking by even a minute can turn a good batch into crunchy regret.
Over time, I built a personalized conversion card for my kitchen:
+20°F oven, slight sugar reduction, slight leavener reduction, modest liquid increase, and mandatory dough chilling.
That card now works across peanut butter cookies, oatmeal cookies, and chocolate chunk styleswith tiny tweaks.
The process feels less like troubleshooting and more like calibration.
Once dialed in, high-altitude cookies can be phenomenal: thick, chewy, deeply flavored, and consistent.
So if your first mountain batch looks tragic, don’t give up.
You’re not bad at bakingyou’re just speaking sea-level to a high-altitude oven.
Translate in small steps, keep notes, and give yourself three rounds before judging.
The mountain will eventually hand back your cookie confidence.
And when it does, you’ll wonder why you ever accepted flat, brittle, sad little disks as normal.


