Table of Contents >> Show >> Hide
- What a Forge Actually Does
- Choose Your Forge Type Before You Buy Anything
- What You Need to Build a Safe Beginner Forge
- Where to Put the Forge
- How to Build a Forge: Step by Step
- Common Mistakes First-Time Forge Builders Make
- Should You Build or Buy?
- Final Thoughts
- Real-World Experiences and Lessons From Building a Forge
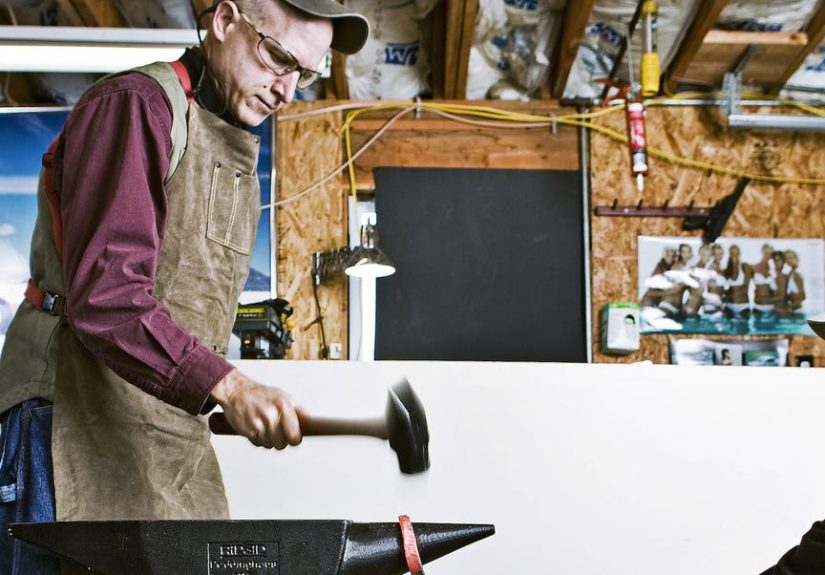
If you have ever watched a blacksmith pull glowing steel from a fire and thought, “I want that kind of dragon energy in my life,” welcome. Building a forge is one of the most satisfying shop projects you can tackle. It is practical, a little intimidating, and deeply cool in the old-school, hit-hot-metal-with-a-hammer sense.
That said, a forge is not just a fun backyard gadget. It is a high-heat tool that produces flame, fumes, scale, and sometimes a surprising amount of chaos. A good forge is not just hot. It is stable, well ventilated, durable, and designed with enough common sense to keep you forging steel instead of making friends with the fire department.
This guide explains how to build a forge in a smart, beginner-friendly way. Instead of chasing sketchy internet shortcuts, we are going to focus on a practical design, safe materials, a sensible workspace, and realistic expectations. Think of it as forge building with both ambition and eyebrows intact.
What a Forge Actually Does
A forge is a heating system built to bring metal to a workable temperature so you can bend, taper, punch, twist, or shape it. Unlike a general campfire or a random torch setup, a forge concentrates heat in a controlled area. That matters because blacksmithing is less about “make metal very hot” and more about “make the right part of the metal hot enough, for long enough, to move it with control.”
For beginner blacksmithing, most home shops use one of two forge types:
- Propane forge: Cleaner, more compact, faster to start, and usually easier for beginners to manage.
- Coal or coke forge: Traditional, excellent for localized heating, and great for long bars or shaping specific sections of steel.
Both can work well. The best choice depends on your space, your budget, your tolerance for smoke, and whether you want “flip a valve and get to work” convenience or “become one with the fire” traditionalism.
Choose Your Forge Type Before You Buy Anything
Propane Forge
A propane forge is usually the easiest path for a beginner. It heats quickly, runs clean compared with solid fuel, and does not require you to constantly manage a fire mound. It is especially appealing if you want to forge knives, hooks, tongs, bottle openers, or small decorative work.
The basic design includes a steel shell, a heat-resistant lining, a burner system, a stand, and openings for your workpiece. The main caution is that gas systems must be treated with respect. This is not the place for random plumbing parts, mystery fittings, or “close enough” leak checks. If you are not comfortable with fuel-gas setup, use a commercial burner assembly or have a qualified installer help with the gas side.
Coal or Coke Forge
A coal or coke forge is more traditional and incredibly flexible. It lets you focus heat in a smaller zone, which is handy for bending scrolls, upsetting ends, or heating only one section of a long bar. The basic setup usually includes a steel pan or table, a firepot, an ash dump, an air source, and a sturdy base.
The tradeoff is that a solid-fuel forge demands more attention. You will manage fuel, clinker, ash, and airflow while also learning how metal behaves. It is a bit like learning to cook while also building your stove. Rewarding? Absolutely. Relaxing? Debatable.
What You Need to Build a Safe Beginner Forge
No matter which type you choose, a good forge starts with the same core ideas: stable structure, heat-resistant materials, controlled airflow, safe clearances, and proper ventilation.
- Steel shell or forge body: Heavy steel works well for the outer shell because it holds structure and supports the lining.
- Stand or base: Use welded steel legs or a heavy steel table. Wobble is not character. Wobble is a problem.
- Heat-resistant lining: Common choices include refractory brick or castable refractory. Some builders also use ceramic fiber insulation under a protective refractory coating.
- Work openings: Front and back openings allow you to feed stock through the forge.
- Air or burner system: A blower for solid fuel, or a properly matched burner system for propane.
- Ventilation and exhaust plan: Fresh air in, fumes out.
- Safety gear: Eye protection, face protection as needed, gloves used selectively, natural-fiber clothing, leather apron, fire extinguisher, and carbon monoxide alarm.
If you use ceramic fiber products, handle them with care. During installation, cutting, or removal, fibers can become airborne. Wear appropriate respiratory protection when handling loose insulation, avoid creating dust, and keep the hot face sealed with a refractory product designed for forge use. In plain English: do not let fluffy insulation become your shop’s surprise seasoning.
Where to Put the Forge
Location matters almost as much as the forge itself. A bad forge in a great setup is still a bad forge. But a decent forge in a smart setup is already halfway to success.
A beginner forge should sit on a stable, nonflammable surface such as concrete. You want generous working room around it, clear walkways, and no piles of cardboard, solvent cans, oily rags, or scrap wood nearby. Forging makes scale pop, sparks jump, and hot steel travel in ways that can feel personally insulting.
Ventilation is non-negotiable. A forge creates combustion by-products, and open doors alone are not a magic spell. Your setup should have both fresh-air intake and a way to move fumes away from your breathing zone. A hood and chimney can help, and local exhaust is even better. If you plan to forge in a garage or shed, think carefully about airflow, roof clearance, heat buildup, and carbon monoxide monitoring before the first test fire.
Good forge spots usually have these qualities:
- Concrete or other heat-resistant flooring
- Good cross ventilation or direct exhaust
- Enough room to move long stock safely
- Safe distance from walls, shelving, and combustibles
- Noise tolerance, because hammering is not exactly a whisper hobby
How to Build a Forge: Step by Step
1. Build the Stand First
Start with the stand or base. This gives your forge the height, stability, and footprint it needs. A comfortable forging height depends on your body and workflow, but in general, the forge opening should feel easy to reach without bending awkwardly or stretching over flame.
Use steel tubing, angle iron, or a heavy steel table. Add a lower shelf if you want storage for tools, but do not treat it like a wood-burning decorative basket. Keep the area around the heat zone clear and practical.
2. Build the Forge Body
For a propane forge, the body is commonly a short steel box or cylindrical shell mounted on the stand. For a coal forge, it is often a steel table with a central firepot. In both cases, the outer shell is not the part that should see direct heat all day long. That is the job of the refractory lining.
A beginner-friendly approach is to build a modest forge chamber sized for the work you actually plan to do. New builders often dream of forging swords on day one and end up creating a huge chamber that wastes fuel and heats unevenly. Smaller is usually smarter at the beginning.
3. Add the Heat-Resistant Interior
This is where the forge becomes a forge instead of a hot metal box. Line the interior with refractory brick, castable refractory, or another heat-rated material designed for repeated high-temperature use. The goal is to protect the shell, retain heat, and create an efficient hot zone.
If you use ceramic fiber blanket as part of the insulation package, do not leave it exposed to the workspace. Builders often apply a refractory coating over it to improve durability and help keep fibers from becoming airborne. Follow product directions for installation and curing. This part rewards patience. Rush it, and the lining will let you know by cracking, flaking, or otherwise expressing disappointment.
4. Create the Front and Rear Openings
Your forge needs a mouth, not a giant cavern. The front opening should be large enough for your typical workpiece and tongs, while the rear opening should allow longer stock to pass through if needed. Keep these openings only as large as necessary. Bigger holes mean more heat loss and less control.
Some builders add movable doors, soft firebrick blocks, or adjustable baffles to manage chamber size. That is a smart upgrade because the forge can then adapt to both short and long projects.
5. Add the Air or Burner System
For a solid-fuel forge, install an air source under the firepot. This may be a hand-crank blower, electric blower, or other controllable airflow system. The key word is controllable. Too little air and the fire is lazy. Too much air and you burn fuel fast, oxidize steel aggressively, and turn the session into a loud argument with physics.
For a propane forge, install a properly matched burner system according to the manufacturer’s guidance. Do not improvise gas delivery components unless you genuinely know what you are doing. Leak testing, regulator compatibility, hose condition, shutoff placement, and safe startup procedure all matter. This is why many first-time builders choose a commercial burner kit even when they fabricate the forge body themselves.
6. Plan the Exhaust and Airflow
Now build the system around the forge, not just the forge itself. If you are using a hood, place it so it actually captures heat and combustion products rather than politely observing them drift around your shop. Make sure fresh air can enter the space as exhaust leaves. A shop that is too tight can work against safe combustion and ventilation.
This step is where beginners often cut corners, because exhaust systems are less exciting than flames. Unfortunately, ventilation is the part most likely to decide whether your forge is merely useful or quietly dangerous.
7. Cure, Inspect, and Test Fire
Before regular use, cure refractory materials according to the product directions. This usually means low, gradual heating rather than going straight to maximum heat like an excited amateur wizard. Slow curing helps drive out moisture and reduces the chance of damage.
Then inspect everything:
- Is the forge stable?
- Are the openings sized appropriately?
- Are fuel connections secure?
- Does exhaust move away from the breathing zone?
- Are your extinguisher and alarm in place?
- Can you shut the system down quickly if something goes sideways?
Only after that should you do a small test fire. Observe flame behavior, heat retention, smoke or fume movement, and the comfort of the working position. Your first test is not a production run. It is a reality check.
Common Mistakes First-Time Forge Builders Make
- Building too large: A giant forge looks impressive and wastes fuel like it is being sponsored by bad decisions.
- Ignoring ventilation: A forge in a closed garage is not rugged. It is reckless.
- Using the wrong materials: Thin sheet metal, coated scrap, mystery insulation, or wood too close to the heat zone all create problems.
- Overcomplicating the design: Your first forge should be reliable, not theatrical.
- Skipping maintenance: Burners, hoses, ash dumps, bricks, and stands all need regular checks.
- Leaving insulation exposed: Heat, abrasion, and airflow can turn that into a durability and dust issue.
Should You Build or Buy?
This is the honest answer: many smiths do both. They build the stand, shell, and layout themselves, then buy the burner system or use commercial refractory products. That hybrid approach makes a lot of sense. It lowers risk, shortens troubleshooting, and still gives you the satisfaction of a shop-built forge.
If you are brand new, building a forge from scratch is a good project only if you are willing to spend as much attention on safety and setup as on the fire itself. If you mostly want to start forging now, a commercial forge may get you there faster. If you love fabrication and want to understand your tools deeply, building your own forge can be a fantastic first lesson in how blacksmithing really works.
Final Thoughts
Learning how to build a forge is really about learning how to build a safe heat source for controlled metalwork. The best forge is not the biggest, hottest, or most dramatic one on social media. It is the one that fits your projects, uses appropriate materials, manages heat efficiently, and keeps your shop breathable and organized.
Start simple. Build sturdy. Vent the space well. Respect fuel, flame, and insulation. Inspect everything before every session. If something feels sketchy, it probably is. Blacksmithing already gives you enough opportunities to be humbled by hot steel. Your forge should not be one of them.
Done right, a beginner forge becomes more than a tool. It becomes the center of the shop, the place where flat bar turns into hooks, leaves, tools, and projects you will be weirdly proud of for years. And yes, once it is up and running, you are allowed to stand back, admire it, and think, “I have built fire into furniture.” That is part of the experience too.
Real-World Experiences and Lessons From Building a Forge
One of the most common experiences people have when building a forge is realizing that the forge itself is only half the project. On paper, the job seems simple: make a box, line it with heat-resistant material, add fire, and start forging. In reality, the build teaches you very quickly that workshop layout, airflow, working height, and tool placement matter just as much as the fire chamber. Many first-time builders spend a weekend proudly assembling the forge body, then another weekend fixing the things they did not think about the first time, like where the hot stock will go, how to set down tongs without playing a dangerous game of metal pickup sticks, or why smoke insists on drifting exactly where your face happens to be.
Another common lesson is that smaller, simpler builds usually perform better for beginners. New smiths often imagine a forge that can do everything: long bars, big stock, welding heat, artistic scrollwork, and maybe, while it is at it, solve personal character flaws. What they often discover is that a compact forge heats faster, wastes less fuel, and is easier to control. A modest chamber with adjustable openings feels less glamorous at first, but during actual use it becomes obvious why experienced smiths recommend restraint. Heat where you need it beats extra empty volume every single time.
There is also the unforgettable moment when a builder learns the difference between “hot” and “forge hot.” The stand gets warm. The bricks get hotter than expected. The tools laid nearby become hotter than expected. The piece of steel you thought had cooled enough to touch absolutely has not. That is why experienced blacksmiths repeat the same advice over and over: assume anything on, in, or near the forge is hot. It sounds dramatic until the day you absentmindedly reach toward a dark piece of metal that still carries enough heat to teach the lesson permanently.
Then there is ventilation, the least glamorous part of the build and often the most educational. Builders frequently assume that an open garage door or a fan in the corner will handle everything. Once the forge is lit, reality arrives. Heat stratifies. Smoke or exhaust rolls in weird directions. The room that felt airy five minutes ago suddenly feels stale. Many people end up redesigning their hood, repositioning the forge, or improving fresh-air intake after the first few test fires. It is not failure. It is part of learning how combustion behaves in an actual workspace instead of in your imagination.
Finally, one of the best experiences related to building a forge is the shift in confidence that comes after the tuning phase. The first fires are cautious. The first projects are humble. The first adjustments feel endless. Then one day the forge lights cleanly, the chamber heats evenly, the steel moves the way it should, and the whole setup starts to feel less like an experiment and more like a working tool. That moment is deeply satisfying. You stop feeling like someone who built a questionable machine in the garage and start feeling like a craftsperson with a real shop. That confidence is earned, and it is one of the best reasons to build a forge the right way in the first place.


