Table of Contents >> Show >> Hide
If your radiator is doing a great job heating the room but looks like it was designed by a grumpy blacksmith in 1912, a radiator cover can be a smart upgrade. A well-built radiator cover hides the clunky metal, protects curious hands, adds a shelf or display surface, and can make the whole room feel more finished. The catch is simple: you cannot build it like a sealed wooden box and hope for the best. A good radiator cover needs airflow, clearance, and easy access to valves and vents.
This guide walks you through how to build a radiator cover that looks custom, works safely, and does not sabotage your heat. Whether you want a simple painted cabinet, a classic grille-front surround, or a radiator cover that doubles as a skinny console table, the process is surprisingly approachable for a weekend DIY project.
Why Build a Radiator Cover in the First Place?
A DIY radiator cover does more than hide an eyesore. It can make an awkward corner more useful, especially in older homes where radiators tend to sit right where you wish a bench, shelf, or entry table could go. Done right, a cover can also soften the look of cast iron, help protect kids and pets from direct contact with a hot surface, and give a room a cleaner, more intentional design.
That said, this is not a project for every heating unit. Traditional hot-water and steam radiators can often be covered successfully if the design leaves enough breathing room. Electric baseboard heaters are a different animal and usually need a purpose-made replacement cover rather than a homemade wood cabinet. In other words, do not freestyle your way into a fire hazard just because you own a saw and optimism.
Before You Start: Safety and Planning
1. Confirm what kind of heater you have
If you have a cast-iron radiator with fins or columns, this guide is for you. If you have a baseboard heater, look for a replacement baseboard cover instead of building a wood surround over it.
2. Let the radiator cool completely
Turn the heat off and wait until the unit is cool to the touch before measuring, sanding nearby trim, or working around valves. This is basic self-preservation and excellent practice in not burning your knuckles for no reason.
3. Check for old paint
If your home was built before 1978, be cautious about disturbing old paint around the radiator, trim, or existing cover. Sanding or scraping can create lead dust. If there is any doubt, use lead-safe practices and consider professional testing before you start cutting and refinishing nearby surfaces.
4. Plan for airflow
The cover should never hug the radiator tightly. Leave clearance on all sides, include a vented front panel, and ideally add openings at the top so warm air can rise into the room instead of getting trapped inside your new little wooden prison.
5. Keep access points open
Do not block the control valve, bleeder, or steam vent. If you cannot reach those parts easily after installation, your gorgeous upgrade will become a maintenance headache with excellent posture and terrible manners.
Tools and Materials
Tools
- Tape measure
- Circular saw, table saw, or miter saw
- Jigsaw
- Drill/driver
- Clamps
- Staple gun or hammer stapler
- Sander or sanding block
- Level
- Safety glasses and dust mask
Materials
- 3/4-inch MDF or plywood
- 1×2 or 1×4 boards for bracing and cleats
- Decorative metal grille, aluminum sheet, or perforated MDF insert
- Wood glue
- Screws or finish nails
- Wood filler
- Primer
- Paint or clear finish
- Optional trim or molding for a furniture-style look
MDF is popular because it paints beautifully and gives you a crisp, cabinet-like finish. Plywood is lighter and can be easier to work with if you want a stained wood look. For the front insert, many DIYers use decorative aluminum sheet metal or perforated panels because they allow heat to move through while giving the cover some style.
How to Build a Radiator Cover Step by Step
Step 1: Measure the radiator carefully
Measure the radiator’s height, width, and depth. Then add clearance. A safe rule of thumb is to add a few inches around the unit rather than building the cover tight to the metal. For depth, adding about 2 to 3 inches beyond the radiator is a common starting point. For height and width, enough extra room should be built in so the cover does not touch the radiator and air can circulate freely.
Also measure the location of the valve, pipe entries, and any vent. Write everything down. Then measure again, because many old houses have floors that slope, walls that lean, and radiators that seem to have been installed by a committee of poets rather than carpenters.
Step 2: Sketch your design
A simple radiator cover has five main parts: front panel, two side panels, top, and an internal brace. The top can sit permanently in place, but a removable top is often better because it allows easier cleaning and future access.
For the front, most people cut a large opening and attach a metal grille or perforated insert on the back side. That gives you airflow and style in one move. You can make the shape plain and square, or add curves and trim for a more traditional furniture look.
Step 3: Cut the side panels and front panel
Cut the two sides first. Then cut the front to span between them. Dry-fit the pieces around the radiator before moving on. If the floor is uneven, trim the bottoms of the side panels so the cover sits level. This tiny adjustment makes a huge difference in the final look.
Many covers look awkward because the proportions are off. A slightly deeper top and a front opening that feels centered usually make the whole piece look intentional rather than improvised.
Step 4: Create the front opening
Mark the decorative opening on the front panel. Leave enough border around the outside edges to keep the panel strong. Then cut the opening with a jigsaw or circular saw, depending on the design. Sand the cut edges smooth.
If you want more of a built-in look, you can repeat smaller openings on the side panels as well. Side ventilation can help, especially with steam radiators that run hot and need plenty of airflow.
Step 5: Attach the grille or insert
Cut the metal grille or perforated insert so it overlaps the opening from behind. Then staple or screw it to the back of the front panel. Decorative aluminum sheet is a favorite because it is lightweight, corrosion resistant, and easy to trim with tin snips. If you use metal, wear gloves and file down sharp edges.
If you want a softer or more custom look, you can frame the insert with cove molding or thin trim. That little detail makes the project look less like “weekend repair” and more like “bespoke millwork with excellent manners.”
Step 6: Build the frame
Attach the side panels to the front using glue and screws or finish nails. Add a rear brace near the top to keep the structure square. You can use a 1×4 for this. If the cover is long, add another internal support so the top does not sag over time.
Before installing the top, place the assembled body over the radiator and check all the clearances one more time. Make sure the unit is not rubbing the valve and that the cover can sit in place without rocking.
Step 7: Add the top
The top can be flush, slightly overhanging, or styled like a narrow shelf. A small overhang usually looks best and adds a little furniture character. If you want the top removable, attach cleats underneath so it nests neatly into place without sliding around.
Top vents are a smart idea. Warm air rises, so slots, grille cutouts, or a vented back edge can help heat escape into the room. Without some opening near the top, your cover may look fantastic while quietly hoarding warmth like a dragon with central heating.
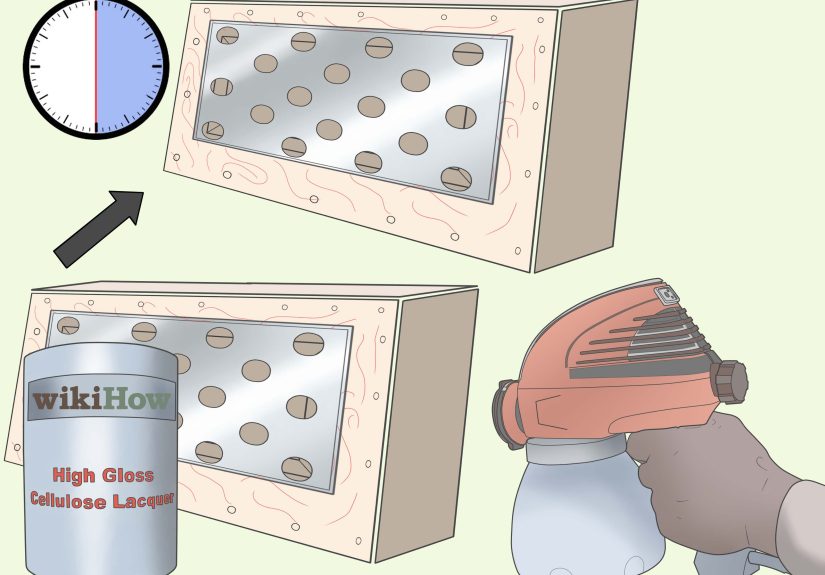
Step 8: Sand, fill, prime, and paint
Fill nail holes and seams with wood filler, then sand everything smooth. Prime all surfaces well, especially if you used MDF, which loves to drink paint like it is at an open bar. Follow with two finish coats in your chosen color.
White is the classic choice because it makes the cover look built-in and clean. But deeper colors can look rich and intentional, especially if you want the radiator cover to behave like a piece of furniture instead of pretending it does not exist.
Step 9: Install and test
Place the finished cover over the radiator and confirm that the top is stable, the airflow is unobstructed, and the valves are accessible. Once the heat comes on, monitor the first few heating cycles. The cover should warm up, but it should not trap excessive heat or interfere with normal radiator performance.
Best Design Ideas for a DIY Radiator Cover
- Classic cabinet style: Painted MDF with a decorative metal front and simple molding.
- Modern minimal: Flat panels, square openings, and a clean matte finish.
- Entryway console look: Extend the top slightly and style it with a tray, lamp, or bowl for keys.
- Bench-style cover: In the right spot, a radiator cover can double as a window seat or landing zone.
- Built-in look: Match nearby trim, baseboards, or shelving so the cover feels original to the home.
Common Mistakes to Avoid
Making it too tight
If the cover sits too close to the radiator, heat gets trapped and efficiency can drop. Clearance matters.
Using a solid front with no ventilation
A radiator cover without venting is basically a decorative heat hostage situation.
Blocking the valve or vent
You need access for maintenance, bleeding, and temperature control.
Skipping lead-safe precautions
Older homes can hide lead paint in surprising places. Do not sand first and ask questions later.
Using the wrong finish
Prime properly and use a durable paint. Cheap paint jobs around heat sources tend to show wear fast.
Real-World Experiences: What People Learn After Building One
The most common experience people report after building a radiator cover is this: the measuring part looks easy until the house reminds you it is older than your favorite playlist. Radiators are often not centered on the wall, floors are rarely perfectly level, and pipes never seem to come up exactly where you hoped. Many DIYers discover that the difference between a homemade-looking cover and a polished one is not fancy trim or expensive paint. It is patience during layout.
Another frequent lesson is that airflow is not optional. Some first-time builders get excited about the “furniture” part and create a beautiful box with a tiny front grille and no venting at the top. Then winter arrives, the room feels cooler than expected, and the cover gets blamed like a guilty side character in a detective show. In practice, covers work best when they leave generous room around the radiator and let warm air move up and out. Once people enlarge the front opening or add top vents, the project usually performs much better.
There is also a finishing lesson that seems to surprise almost everybody: radiator covers live in a high-visibility zone. They sit in entryways, living rooms, bedrooms, and dining spaces, which means sloppy edges show up fast. A rushed paint job, fuzzy MDF edges, or crooked trim becomes painfully obvious once the cover is in place. Experienced DIYers tend to spend more time sanding and priming than they expected, and they almost always say it was worth it. A smooth, clean finish is what makes the piece read like custom built-in furniture instead of “I had half a sheet of MDF and a free Saturday.”
Families with kids and pets often say the project becomes more useful than they planned. The cover is not just camouflage for the radiator; it turns into a practical surface. In an entryway, it becomes a drop zone for keys and mail. In a bedroom, it holds books and a lamp. Under a window, it can act like a narrow bench or display ledge. That added function is one of the biggest reasons people feel the project pays off, especially in small homes where every horizontal surface works overtime.
Some homeowners also discover that removable tops are a lifesaver. At first, a permanently attached top seems simpler. Later, when the radiator needs to be cleaned, bled, painted around, or inspected, that permanent top suddenly feels like a personal betrayal. A lift-off design or a top secured with hidden cleats keeps the look clean while making future maintenance much easier.
Finally, there is the emotional side of the project, which sounds dramatic but is true. Old radiators can make a room feel dated, awkward, or unfinished no matter how well you decorate around them. Once covered properly, the room often feels calmer and more intentional. The radiator stops shouting for attention. The architecture feels tidier. The whole space becomes easier to style. For a project built from a few panels, some screws, and a stubborn refusal to let ugly hardware win, that is a pretty satisfying result.
Conclusion
Building a radiator cover is one of those home projects that blends practical problem-solving with a nice little design upgrade. The key is to think like both a carpenter and a radiator: measure carefully, leave clearance, preserve airflow, and make maintenance easy. If you do that, you can transform a chunky old heater into something that looks neat, useful, and completely at home in the room.
In other words, your radiator can still heat like a champion without looking like it wandered in from a basement boiler room. That is what we call progress.