Table of Contents >> Show >> Hide
- Why Pine-Sol Works Well on Kitchen Floors
- Before You Start: Check the Floor Type
- What You Need
- How to Clean a Kitchen Floor With Pine-Sol Step by Step
- How to Handle Common Kitchen Floor Problems
- Best Practices by Floor Type
- Mistakes to Avoid When Cleaning a Kitchen Floor With Pine-Sol
- Do You Need to Disinfect the Kitchen Floor?
- How Often Should You Clean a Kitchen Floor?
- Real-Life Experiences and Lessons From Cleaning Kitchen Floors With Pine-Sol
- Final Takeaway
A kitchen floor has a special talent: it can look fine from across the room and absolutely horrifying the second sunlight hits it. One minute it is “cozy family kitchen,” and the next it is “crime scene of pancake syrup, pasta sauce, and mysterious sticky dots.” The good news is that learning how to clean a kitchen floor with Pine-Sol is not complicated. You do not need a janitorial degree, a playlist of dramatic music, or the upper-body strength of a professional rower. You need the right dilution, the right mop, a little patience, and the self-control not to dump half the bottle into the bucket like you are seasoning soup.
Pine-Sol has been a go-to household cleaner for generations because it cuts through everyday grime, handles greasy messes well, and works on many common floor types when used correctly. In a busy kitchen, that matters. Crumbs get ground in, cooking oils float through the air and settle down, and foot traffic turns little spills into full-blown floor archaeology. A smart cleaning routine keeps the room looking better, helps floors last longer, and makes walking barefoot a much less adventurous experience.
This guide breaks down exactly how to mop a kitchen floor with Pine-Sol, how to tackle sticky spots and greasy buildup, what to avoid on delicate flooring, and how to get a cleaner, fresher kitchen without leaving behind residue or regret.
Why Pine-Sol Works Well on Kitchen Floors
Kitchen floors collect a weird mix of messes. There is dry debris like crumbs, flour, and coffee grounds. There is wet grime like juice drips, pet bowl splashes, and the occasional “I dropped the whole spoonful of chili oil” incident. Then there is greasy film, which is the kitchen’s way of saying, “I have been very busy, thank you.” Pine-Sol floor cleaning works well because it is designed to break through dirt, grease, and general kitchen funk on many hard surfaces.
Used properly, Pine-Sol can help clean ceramic tile, porcelain tile, vinyl, laminate, and many sealed hardwood floors. The key phrase is used properly. More cleaner does not automatically mean more clean. Too much solution can leave streaks, create residue, or overwhelm the room with scent so aggressively that your floor smells like it has its own personality. A properly diluted solution and a damp mop usually do a better job than a soaking-wet floor treatment.
Before You Start: Check the Floor Type
Before you mix anything, identify what is actually under your feet. Most kitchen floors fall into one of these categories: tile, vinyl, laminate, or sealed hardwood. Pine-Sol is generally a practical option for those surfaces when the product label and the flooring manufacturer allow it. If you have unfinished, unsealed, waxed, oiled, or badly worn wood, slow down. Those floors do not like extra moisture, and they definitely do not enjoy enthusiastic mopping.
If your kitchen has marble, soft natural stone, or specialty finishes, skip the experiment and check both the flooring instructions and the cleaner label first. A kitchen floor is expensive enough without turning it into a chemistry project.
What You Need
- Pine-Sol Multi-Surface Cleaner
- Warm water
- A bucket
- A microfiber mop or soft flat mop
- A broom, dust mop, or vacuum with a hard-floor attachment
- A soft cloth or sponge for spot cleaning
- Gloves if your skin is sensitive
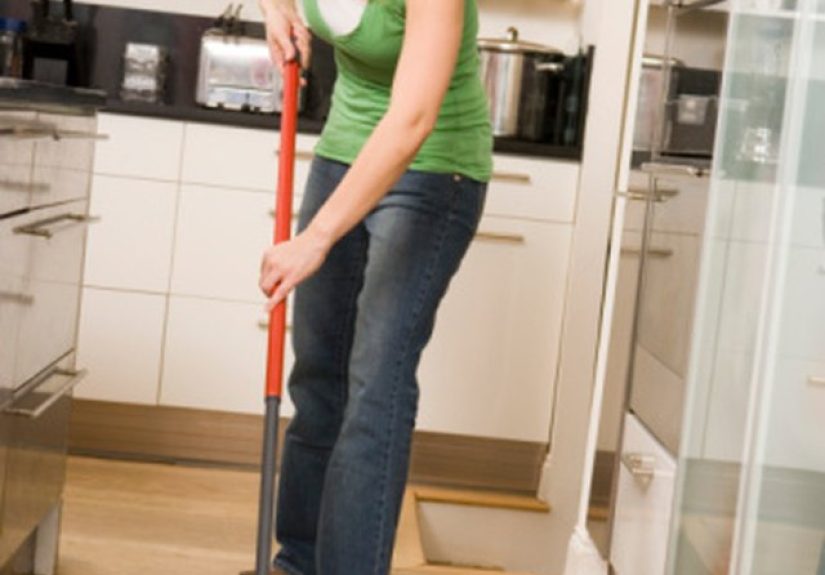
A microfiber mop is especially helpful because it picks up fine debris well and is easier to wring until damp. That matters more than people think. The phrase “damp mop” sounds boring, but it is secretly the hero of clean, streak-free kitchen floors.
How to Clean a Kitchen Floor With Pine-Sol Step by Step
1. Clear the Floor and Remove Loose Debris
Move lightweight chairs, pet bowls, and anything else that likes to lurk in the corners. Then sweep, dust mop, or vacuum the floor thoroughly. Do not skip this part. Mopping over crumbs and grit is basically turning your mop into a wet breading station. On wood and laminate especially, dry debris can scratch the finish once moisture gets involved.
Pay extra attention to the zones around the stove, sink, refrigerator, and trash can. Those are the kitchen’s official grime headquarters.
2. Mix Pine-Sol the Smart Way
For many current concentrated Pine-Sol floor-cleaning directions, a common mix is 1/8 cup per gallon of warm water. That is enough to clean effectively without turning your mop bucket into a pine-scented swamp. Still, always check your specific bottle because formulas can vary, and label directions win every time.
Warm water helps loosen grime, but you do not need steaming-hot water. You are cleaning a kitchen floor, not trying to audition it for a sauna.
3. Dip, Wring, and Mop in Sections
Dip the mop into the solution, then wring it out really well. The mop should be damp, not dripping. This is especially important for laminate and hardwood, where excess moisture can seep into seams, cause swelling, or dull the finish over time.
Mop in small sections, working from the farthest corner toward the exit. That way, you do not clean yourself into a corner like a cartoon character with a bucket and bad decisions. Use smooth, overlapping strokes. In kitchens with wood-look planks or hardwood, follow the direction of the grain or boards for a nicer finish.
4. Tackle Sticky or Greasy Areas Separately
If you hit a sticky patch near the stove or a mystery splatter under the table, do not just keep gliding over it and hope for a miracle. Pause and give that spot a little focused attention. Use a soft cloth, sponge, or mop pad with a bit of diluted Pine-Sol to loosen the grime. Let it sit briefly if needed, then wipe gently.
For scuffs on laminate or sealed hard floors, a small amount of cleaner on a soft cloth often works better than aggressive scrubbing. Avoid steel wool, stiff scrub brushes, or anything that looks like it belongs in a medieval dungeon.
5. Do a Damp Rinse Pass if Needed
One of the simplest ways to avoid streaks or film is to follow with a second pass using fresh water and a clean, well-wrung mop. This is especially helpful on laminate, vinyl, and sealed wood if you used a little extra cleaner on greasy areas. That quick rinse step can leave the floor looking clearer, less hazy, and more “I have my life together.”
6. Let the Floor Dry Fully
Give the floor time to air dry before sending traffic back through the kitchen. If you want to speed things up, open a window, turn on the exhaust fan, or go over damp spots with a dry microfiber pad. Better airflow also makes the whole cleaning process more pleasant.
How to Handle Common Kitchen Floor Problems
Greasy Film Near the Stove
Grease tends to settle near cooking areas, especially if you cook often and enthusiastically. Instead of soaking the whole floor with extra cleaner, focus on the greasy zone first. Use diluted Pine-Sol on a microfiber pad or soft cloth, wipe the area, then mop normally. This targeted approach is more effective and gentler on the floor.
Sticky Spots Under the Table
Sticky spots usually need a little dwell time. Place your damp mop or cloth over the spot for a short moment, then wipe. If the mess is stubborn, repeat rather than scrubbing aggressively. The goal is to lift the residue, not sand down your flooring.
Crumbs in Textured Tile or Grout Lines
Textured kitchen tile can hold onto crumbs and grit like it is emotionally attached. Vacuuming before mopping helps a lot. For grout lines or textured spots, use a soft brush or cloth with a little cleaner rather than flooding the area. Tile is durable, but grout likes to absorb drama.
Cloudy or Streaky Finish
If your floor looks dull after cleaning, the usual suspects are too much cleaner, too much water, or a dirty mop pad. Use less solution next time, rinse the mop more often, and finish with a clean damp pass. Floors are surprisingly judgmental about technique.
Best Practices by Floor Type
Tile Kitchen Floors
Tile is usually the easiest customer in the room. Ceramic and porcelain kitchen floors can handle routine mopping well, which makes Pine-Sol a practical choice for everyday cleaning. Just make sure you remove debris first and avoid letting dirty water settle into grout. For grout-heavy floors, regular light cleaning beats waiting for the floor to become a science exhibit.
Vinyl Kitchen Floors
Vinyl is tough, but it still benefits from a nonabrasive approach. A damp microfiber mop is ideal. Wipe spills promptly and avoid rough scrubbers that can scratch the wear layer. If you have luxury vinyl plank, use the same basic rule: clean gently, do not soak it, and always test spot treatments in an inconspicuous area first.
Laminate Kitchen Floors
Laminate looks great in a kitchen, but it hates standing water. Keep the mop nearly dry, work quickly, and never let liquid pool along seams. Pine-Sol can be part of a laminate floor cleaning routine when diluted correctly and used with a careful hand. Think “light refresh,” not “indoor monsoon.”
Sealed Hardwood Kitchen Floors
Hardwood is the floor type most likely to punish overconfidence. Sweep first, mop lightly, and dry promptly. Stick to sealed, finished wood only. If the finish is worn, patchy, waxed, or questionable, do not assume any all-purpose cleaner is automatically safe. With wood, restraint is a cleaning superpower.
Mistakes to Avoid When Cleaning a Kitchen Floor With Pine-Sol
- Using too much cleaner: More product can leave residue and make floors look worse, not better.
- Skipping the sweep: Wet crumbs are not a premium floor treatment.
- Using a dripping mop: Too much water is a common cause of streaks, swelling, and wood damage.
- Mixing cleaners: Never combine Pine-Sol with bleach, ammonia, or other cleaning products.
- Ignoring ventilation: Open windows or run a fan when possible, especially in a smaller kitchen.
- Using abrasive tools: Rough pads and harsh scrubbers can scratch floors and dull finishes.
- Cleaning the whole floor the same way: Greasy stove areas, laminate seams, and tile grout all need slightly different levels of care.
Do You Need to Disinfect the Kitchen Floor?
Usually, routine kitchen floor cleaning is enough. In most homes, regular cleaning removes dirt and a large share of germs without the need for constant disinfection. If someone in the home has been sick, or if you are dealing with a high-risk mess, follow the disinfecting directions on your specific product label exactly. For some Pine-Sol disinfecting directions on hard, nonporous surfaces, the surface needs to stay visibly wet for the full contact time, and pre-cleaning may be required for heavy soil.
In other words, everyday mopping and true disinfecting are not the same job. One is maintenance. The other is a label-following mission.
How Often Should You Clean a Kitchen Floor?
For most homes, sweep or vacuum the kitchen floor several times a week, especially around cooking and eating zones. Mop about once a week for regular upkeep, or more often if you have kids, pets, heavy traffic, or an ongoing relationship with frying oil. Spot-clean spills as soon as they happen. Waiting until the spill “dries on its own” is not a cleaning plan. That is just letting tomorrow’s problem marinate.
Real-Life Experiences and Lessons From Cleaning Kitchen Floors With Pine-Sol
One of the most common experiences people have with kitchen floor cleaning is discovering that the floor was much dirtier than it looked. A quick mop can seem like enough, but once you start cleaning in sections, you notice color differences, sticky zones, and traffic lanes you somehow stopped seeing weeks ago. The area by the stove often turns out darker, the spot in front of the sink has a dull film, and the space under the table has the sort of stickiness that makes you question everyone in the house. That is why many people find that the best Pine-Sol cleaning results happen when they stop treating the entire kitchen as one flat surface and start cleaning it by behavior. Cooking zones, eating zones, pet zones, and entry zones all collect different messes.
Another real-world lesson is that a microfiber mop changes everything. Plenty of people grow up thinking a traditional string mop is the default answer for every floor. Then they switch to a flat microfiber mop and realize the old method was basically dragging around a wet octopus. A microfiber mop is easier to wring out, easier to control, and much better for laminate or sealed wood that needs only light moisture. It also makes spot cleaning less annoying, which means you are more likely to handle messes before they become sticky fossils.
Many people also learn, usually the hard way, that extra cleaner does not mean extra shine. It often means streaks, haze, and the strange feeling that your floor is somehow both clean and not clean at the same time. The fix is usually simple: use the correct dilution, switch to fresh water when the bucket gets dirty, and finish with a light rinse pass. Once people make that change, the floor tends to look clearer and feel less tacky underfoot.
There is also the experience of realizing that timing matters. Cleaning a kitchen floor right after dinner, when crumbs are obvious and spills are fresh, is usually much easier than doing it two days later when oil has settled and sauce has become a permanent opinion. A five-minute sweep after cooking and a quick wipe of obvious splashes can make the weekly mop feel almost easy. That is not glamorous advice, but it is the kind that saves effort.
And then there is the emotional side of it, which sounds dramatic until you experience it. A freshly cleaned kitchen floor changes how the whole room feels. The counters may still have mail on them and the fridge may still contain one suspicious leftover container, but a clean floor makes the kitchen feel reset. It is one of those chores that gives an outsized reward. You walk in the next morning, coffee in hand, and instead of spotting greasy footprints and cereal crumbs, you see a room that looks calmer, brighter, and more cared for. That is a pretty good return on a bucket of warm water and twenty minutes of honest effort.
Final Takeaway
If you want to know how to clean a kitchen floor with Pine-Sol the right way, the formula is simple: identify your floor type, sweep first, dilute the cleaner properly, use a damp microfiber mop, focus on greasy areas without soaking the whole floor, and let everything dry well. That combination handles everyday kitchen grime without turning the job into an all-day event.
The biggest secret is not brute force. It is technique. A lightly damp mop, the right amount of cleaner, and a little consistency will usually beat a dramatic deep-clean frenzy every single time. Your kitchen floor does not need a heroic rescue. It just needs regular attention, a smart method, and fewer syrup footprints.