Table of Contents >> Show >> Hide
- Why Cleaning a Razor Blade Matters (More Than Your Future Self Wants to Admit)
- Before You Start: Pick the Right “Razor Type” Path
- What You’ll Need (No Fancy Lab Coat Required)
- How to Clean a Razor Blade: 10 Steps
- Rinse Immediately (Yes, Even If You’re Busy)
- Shake Off Water Like You Mean It
- Flush the Back of the Cartridge (The Hidden Mess Zone)
- Disassemble If You Can (Safety Razors Love This Step)
- Soap Up: Warm Water + Mild Soap
- Brush Gently (Tiny Strokes, Big Results)
- Soak Briefly (Only If Needed)
- Rinse Thoroughly (No Soap Left Behind)
- Disinfect With Isopropyl Alcohol (Fast, Effective, Evaporates)
- Dry Completely and Store Smart
- A Simple Cleaning Schedule That Actually Works
- Common Mistakes That Make Razors Dirtier (and Shaves Worse)
- When to Replace a Razor Blade (Cleaning Has Limits)
- Quick FAQ: Razor Blade Cleaning, Answered Like a Real Human
- Real-Life Experiences: What People Learn After They’ve Ruined (At Least) One Razor
- Conclusion: Clean Blade, Better Shave, Less Drama
Razor blades are tiny, shiny troublemakers. One minute they’re giving you a smooth shave; the next minute they’re
hoarding hair, soap scum, and whatever mystery gunk lives in the warm, humid ecosystem known as “your shower.”
If you’ve ever wondered why your blade suddenly tugs, leaves irritation behind, or develops a charming orange
“rust freckle,” the answer is usually the same: it’s time to clean that razor blade.
This guide walks you through a simple, dermatologist-approved hygiene mindset (clean, dry, replace when needed),
plus a practical 10-step cleaning routine you can do in just a few minutes. The payoff: a blade that
shaves better, lasts longer, and is less likely to contribute to razor burn and bumps.
Why Cleaning a Razor Blade Matters (More Than Your Future Self Wants to Admit)
A razor blade doesn’t just cut hairit scrapes across skin, picks up oil and dead skin cells, and gets clogged with
shaving cream residue. That buildup creates two big problems:
-
Performance problems: Gunk between blades increases drag, makes tugging more likely, and can lead to
extra pressure (aka more irritation). -
Hygiene problems: Wet razors stored in humid places can become a cozy hangout for microbes. Plus,
shaving can cause microscopic nicks, which is exactly why experts warn against sharing razors.
Cleaning doesn’t magically turn an old blade into a brand-new one, but it does reduce buildup, helps the blade
dry faster, and keeps your shave more comfortable.
Before You Start: Pick the Right “Razor Type” Path
“Razor blade” can mean a few things, and cleaning technique depends on what you’re using:
- Cartridge razors (multi-blade heads that click onto a handle): clean thoroughly, don’t soak forever, dry well.
- Disposable razors (all-in-one): same cleaning steps, but replace soonerespecially if they dull or rust.
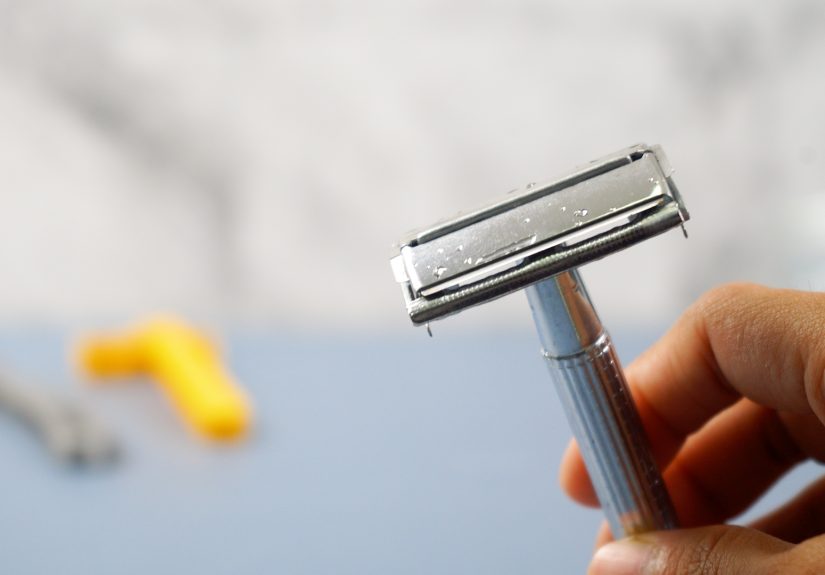
- Safety razors (metal head with a replaceable single blade): disassemble, clean parts, dry everything.
- Straight razors (barber-style fold-out blade): keep water exposure minimal; dry immediately; focus on careful wiping and disinfection.
What You’ll Need (No Fancy Lab Coat Required)
- Warm running water
- Mild liquid soap (hand soap or dish soap)
- A soft toothbrush or small cleaning brush (dedicated to this job)
- A small cup or bowl
- 70% isopropyl alcohol (common “rubbing alcohol”) for disinfection
- A clean towel or paper towels
- Optional: a razor stand or a dry cup to store the razor upright
- Optional (for mineral deposits): white vinegar (short soak only)
Safety note: Blades are sharp even when they feel dull. Avoid sliding your fingers along the edge,
and don’t wipe “down the blade” like you’re polishing a sword in a movie. This is a bathroom, not a medieval quest.
How to Clean a Razor Blade: 10 Steps
-
Rinse Immediately (Yes, Even If You’re Busy)
Right after shaving, rinse the blade under warm running water. Aim the water so it flows
through the blades and flushes out hair and shaving cream. This is the easiest time to remove debris
because it hasn’t dried into “cement.” -
Shake Off Water Like You Mean It
Hold the razor firmly and shake it over the sink to remove excess water. Less water left behind means less chance
for rust and less time for buildup to turn into crust. -
Flush the Back of the Cartridge (The Hidden Mess Zone)
With cartridge razors, the back of the head can trap hair. Rinse from the back side so the stream pushes debris out.
If your razor has a little “trimmer edge” on the back, give it attention too. -
Disassemble If You Can (Safety Razors Love This Step)
If you use a safety razor, carefully unscrew the handle and separate the parts. If you’re cleaning a straight razor,
skip disassembly and move to gentle brushing and wiping. For disposable and cartridge razors, you’ll keep the head intact.Pro tip: If your safety razor blade is old, rusty, or visibly damaged, don’t try to “restore” itreplace it.
Cleaning is maintenance, not time travel. -
Soap Up: Warm Water + Mild Soap
Put a drop of mild liquid soap on the blade head (or on the safety razor parts). Let warm water run over it and
work the soap into a light lather. Soap helps break up oils and residue that plain water doesn’t fully remove. -
Brush Gently (Tiny Strokes, Big Results)
Using a soft toothbrush, gently scrub the blade area and crevices. Brush across the blades, not along the sharp edge.
You’re trying to lift debris outnot audition for “Most Likely to Get a Nick.”For cartridge razors, focus on the spaces between blades. For safety razors, brush the head plates and handle threads.
-
Soak Briefly (Only If Needed)
If the razor is extra grimy, soak the head (or safety razor parts) in a cup of warm, soapy water for
5–10 minutes. This loosens stubborn buildup.Avoid long soaks for cartridge razorsextended soaking can weaken lubricating strips or trap water in places that
take forever to dry.Optional for mineral deposits: a very short soak (a few minutes) in diluted white vinegar can help with hard-water scale.
Rinse thoroughly afterward and dry well. -
Rinse Thoroughly (No Soap Left Behind)
Rinse until the water runs clear and you don’t feel slippery soap residue. Leftover soap can dry into film and
attract more gunk laterbasically, it’s the “come back soon” sign for buildup. -
Disinfect With Isopropyl Alcohol (Fast, Effective, Evaporates)
Pour a small amount of 70% isopropyl alcohol into a cup. Dip just the blade head (or safety razor blade/head parts)
for about 10–30 seconds. Alcohol helps reduce microbes and also encourages faster drying because it evaporates quickly.Then remove it and let it air dry. (Do not rinse the alcohol offlet it evaporate.)
Skip harsh stuff: Bleach and other strong disinfectants can corrode metal and irritate skin. Keep it simple.
-
Dry Completely and Store Smart
Pat the razor dry with a clean towel or paper towel, then store it upright in a dry place with airflow.
The goal is “dry quickly,” not “sit wet in a steamy shower corner plotting your next breakout.”If you can, store the razor outside the shower area or at least away from constant humidity.
A Simple Cleaning Schedule That Actually Works
- After every shave: Rinse well, shake off water, quick alcohol dip (optional but helpful), store dry.
- Weekly: Soap + brush cleaning to prevent buildup you don’t notice until it becomes a problem.
- Monthly (or when it looks gross): Brief soak + brush + disinfect, especially for safety razor parts.
Common Mistakes That Make Razors Dirtier (and Shaves Worse)
- Leaving it in the shower 24/7: Humidity slows drying and encourages rust and buildup.
- Smacking the razor on the sink: That can misalign delicate blades or damage the edge.
- Scraping debris out with sharp tools: You can nick the blade or cut yourself. Use a brush instead.
- Using harsh chemicals: Strong cleaners can corrode metal and leave irritating residue.
- Trying to “save” a rusty blade: Rust is your sign to replace, not negotiate.
When to Replace a Razor Blade (Cleaning Has Limits)
Even a perfectly cleaned razor blade eventually becomes dull. A dull blade can cause tugging, irritation, razor burn,
and bumps because you end up using more pressure and more passes.
Many dermatology sources recommend replacing blades around every 5–7 shaves, but the real answer depends on
hair thickness, how big an area you shave, and the blade type. Some manufacturers suggest longer intervals for certain
multi-blade cartridges, but if your blade is dragging, nicking, or causing irritation, it’s doneno inspirational speech required.
Replace sooner if you notice:
- Rust spots or discoloration
- Persistent clogging that won’t rinse clean
- Tugging, skipping, or a “sandpapery” feel
- More razor burn or bumps than usual
Quick FAQ: Razor Blade Cleaning, Answered Like a Real Human
Can I boil my razor blade?
For many modern cartridge razors, boiling isn’t idealheat can damage plastic parts, adhesives, and lubricating strips.
If you use a metal safety razor (with the blade removed), warm soapy water and alcohol disinfection are usually more
practical and gentler on the razor.
Is rubbing alcohol enough to sanitize a razor?
Alcohol is a widely used disinfectant and evaporates quickly, which helps keep the blade dry. It’s not a magic spell,
but it’s a simple, effective step for everyday razor hygiene when paired with thorough cleaning and drying.
Should I share razors if I clean them?
No. Even clean-looking razors can carry microscopic blood and skin debris. It’s not worth the riskkeep razors personal.
What about hydrogen peroxide?
Peroxide can be oxidizing and may contribute to corrosion over time. If you want a straightforward routine, soap + water
+ alcohol + drying is a solid combo.
Real-Life Experiences: What People Learn After They’ve Ruined (At Least) One Razor
Let’s talk about the kind of “experience” that doesn’t show up on a resume, but absolutely shows up on your skin:
the moment you realize your razor has become a tiny garbage truck on a stick.
A super common scenario goes like this: you finish shaving, give your razor a polite little rinse (two seconds, tops),
then toss it back in the shower caddy like it’s taking a spa vacation. The next day you pick it up andsurpriseit’s
wearing a sweater made of hair, soap, and hardened shaving cream. Now the blade doesn’t glide; it kind of
scratches and skips like a shopping cart with one broken wheel. That’s when people discover the first truth
of razor maintenance: the rinse after shaving matters more than the rinse before shaving.
Another experience many people relate to: the “I swear I just changed this blade” mystery. You did change it… but you
also stored it in a humid shower where it never fully dried. Over time, water clings to the metal, minerals settle,
and tiny rust spots show up. The blade looks fine from three feet away, but up close it’s giving “antique relic.”
That’s when the dry-storage trick feels like a life hack: put the razor somewhere it can actually dry, and suddenly
it stays sharper longer. Not because you performed sorcerybecause you stopped marinating it in moisture.
Then there’s the “I tried to clean it by banging it on the sink” phase. It’s understandable! When a razor is clogged,
the instinct is to tap it like a ketchup bottle. The problem is that razor blades are delicate. Repeated tapping can
bend or misalign blades, making the shave worse and increasing the odds of nicks. People who switch from “tap attack”
to “soft toothbrush scrub” usually have the same reaction: “Wait… that’s all it needed?” Yes. Gentle wins.
Some folks learn the hard way that harsh chemicals are not your razor’s best friend. Bleach sounds like a tough,
responsible choice until it starts corroding metal parts or leaving residues you don’t want near your skin. The more
practical “experience-based” upgrade is boringbut effective: warm water, mild soap, a brush, and a quick dip in
rubbing alcohol. It’s the grown-up version of cleaning. (It’s also the version that doesn’t end with you Googling
“why does my razor smell like a public pool?”)
And finally, the big lesson: cleaning extends a blade’s usefulness, but it doesn’t make it immortal. Plenty of people
keep cleaning a blade that’s already dull, then blame their shaving cream, the lighting, the angle of the Earth, and
possibly Mercury in retrograde. If your razor tugs or leaves irritation even after a proper cleaning, that’s the blade
telling you it’s ready to retire. Replace it and move on. Your skin will thank you, and your bathroom will stop
feeling like a tiny friction-based science experiment.
Conclusion: Clean Blade, Better Shave, Less Drama
If you take nothing else from this guide, take this: cleaning a razor blade is mostly about removing buildup and getting it dry.
Rinse well, use soap and a brush when needed, disinfect with isopropyl alcohol, and store it somewhere dry. That routine
helps you avoid the clogged-blade tug, the rusty surprise, and the irritation spiral that starts with “maybe one more shave”
and ends with “why is my skin angry at me?”
Keep your razor clean, keep it dry, replace it when it’s dull, and enjoy the rare luxury of a shave that doesn’t come with a side of regret.


