Table of Contents >> Show >> Hide
- First, the “expert rule” that makes everything easier
- Before you start: 5 minutes of prep that saves your bathtub (and your sanity)
- Pick your method: a quick decision guide
- Method 1: The safest all-purpose clean (hot water + dish soap)
- Method 2: The “green-ish” workhorse (baking soda + hot water + a little dish soap)
- Method 3: Vinegar + baking soda (best for spot jobs, not miracles)
- Method 4: The “serious but still reasonable” soak (washing soda + oxygen bleach)
- Method 5: The least-scrubbing heavy hitter (ammonia “bag” method)
- Method 6: Oven cleaner in a bag (fast, powerful, follow the label)
- Method 7: Bar Keepers Friend paste (quick, targeted, surprisingly satisfying)
- Method 8: Dishwasher tablets (works, but read the fine print)
- Can you leave racks in during a self-clean cycle?
- How to keep oven racks cleaner longer (so you don’t do this again next weekend)
- FAQ: quick answers to common rack-cleaning questions
- Bonus: of real-life oven rack cleaning experiences (so you feel less alone)
- Conclusion
Oven racks are the unsung heroes of dinner. They hold your sheet pans steady, survive bubbling lasagnas, and quietly collect a
crunchy “seasoning” of grease that nobody asked for. And then one day you preheat to 425°F and your kitchen smells like
Regrets: The Musical. That’s your cue: it’s time to clean the oven racks.
The good news? You don’t need a hazmat suit or a three-day sabbatical. The best approachaccording to cleaning pros and
appliance guidanceis to pick the least aggressive method that will actually work, lean hard on
soaking time (because scrubbing is overrated), and keep your rack finishand lungshappy.
First, the “expert rule” that makes everything easier
Here’s the rule pros use: Soak first, scrub second, and only escalate if the grime laughs at you.
Oven racks are usually chrome-plated or coated, and aggressive abrasives can make them rougher over time. Rough racks
don’t just look sadthey can grab grease faster and slide less smoothly.
Translation: start with hot water + grease-cutting soap. If that’s not enough, upgrade to a longer soak with baking soda,
washing soda, or a targeted cleaner. Save heavy hitters (like ammonia fumes or strong oven cleaners) for the racks that have
basically joined a biker gang.
Before you start: 5 minutes of prep that saves your bathtub (and your sanity)
- Check your manual if you can. Some racks are “self-clean” / “no-scrub” and can stay in during a self-clean cycle. Many should be removed.
- Let the oven cool completely. Hot racks + water = steam burns and bad decisions.
- Protect your tub or sink. Lay down an old towel or a shower curtain liner so racks don’t scratch the surface.
- Ventilate. Open windows, turn on the hood fanespecially if you’re using any strong product.
- Wear gloves. Even “gentle” cleaners plus hot water can irritate skin, and grease is basically liquid betrayal.
Pick your method: a quick decision guide
- Light grime, normal weeknight life: Hot water + dish soap soak (fast, safe, solid).
- Medium grime, you want “mostly natural”: Baking soda + hot water + dish soap soak.
- Sticky brown mystery film: Washing soda + oxygen bleach soak (stronger, still manageable).
- Heavy burnt-on gunk: Ammonia bag method or oven-cleaner-in-a-bag method (use outdoors/ventilation).
- “I need this done today”: Bar Keepers Friend paste (quick, targeted) or a controlled cleanser + scrub.
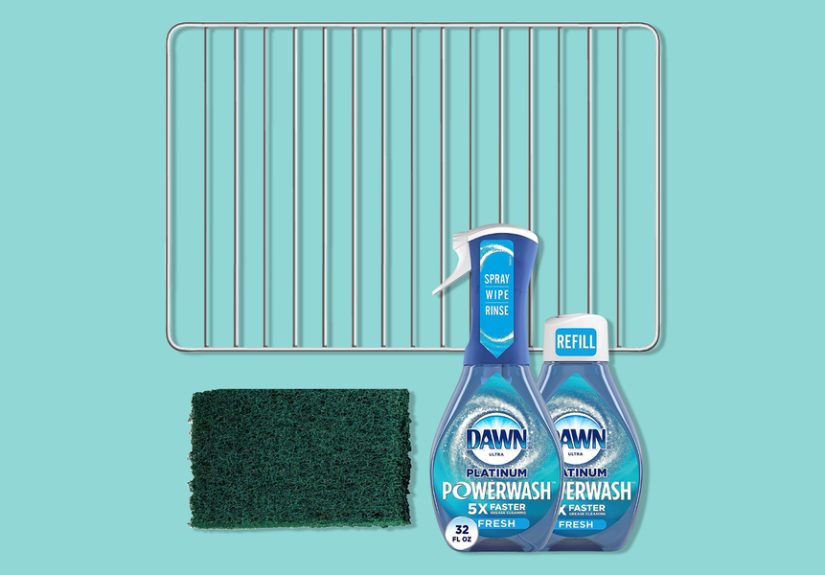
Method 1: The safest all-purpose clean (hot water + dish soap)
This is the method you should try first if your racks are just greasy, not apocalyptic. It’s gentle, reliable, and doesn’t
involve turning your backyard into a chemistry lab.
What you’ll need
- Bathtub, deep sink, or large plastic bin
- Old towel
- Grease-cutting dish soap
- Non-abrasive scrub brush or sponge
- Microfiber cloth or clean towel for drying
Steps
- Line your tub/sink with a towel. Place racks flat.
- Fill with very hot water until racks are submerged.
- Add a generous squirt of dish soap. Swish the water a little.
- Soak for 2–4 hours (overnight if you can).
- Scrub lightly. Most grime should release without a wrestling match.
- Rinse well and dry completely to prevent rust spots.
Pro tip: If the racks still feel tacky after rinsing, rinse again with hotter water. Grease can cling like it’s
paying rent.
Method 2: The “green-ish” workhorse (baking soda + hot water + a little dish soap)
Baking soda is a mild abrasive and deodorizer. The trick is not to rely on frantic scrubbingrely on soak time.
This method shines for medium messes: drips, splatters, and that caramelized sugar spill you promised you’d “deal with later.”
What you’ll need
- 1/2 to 1 cup baking soda (more if using a bathtub)
- Dish soap (a few drops to a squirt)
- Hot water
- Sponge or scrub brush
Steps
- Place racks in a lined tub or large bin.
- Sprinkle baking soda generously over the racks (or add it directly to the water).
- Fill with hot water and add a small squirt of dish soap.
- Soak for at least 4 hours (overnight is even better).
- Scrub lightly, rinse thoroughly, then dry.
When to upgrade: If you’re scrubbing so hard you’re considering naming your biceps, stop. Move to Method 4 or 5.
The goal is clean racksnot a new personality trait called “upper body strength.”
Method 3: Vinegar + baking soda (best for spot jobs, not miracles)
Vinegar and baking soda fizz, which is satisfying (and briefly helpful). It can lift surface grime and fresh grease, especially
if you use it as a spot treatment or follow it with a soak. Don’t expect the bubbles to remove a decade of carbon.
Bubbles are enthusiastic, not magical.
Steps
- Lay racks in a lined tub.
- Spritz with vinegar, then sprinkle baking soda. Let it fizz for 5–10 minutes.
- Scrub the trouble spots.
- If grime remains, fill the tub with hot water + dish soap and soak for a few hours.
- Rinse and dry.
Method 4: The “serious but still reasonable” soak (washing soda + oxygen bleach)
If you want something stronger than baking soda, this is a great middle ground. Washing soda (sodium carbonate) is more powerful
for grease, and oxygen bleach helps with baked-on stainswithout the intense fumes of many oven sprays.
What you’ll need
- 1/2 to 1 cup washing soda (use more for a bathtub)
- About 1/4 cup oxygen bleach powder
- A squirt of dish soap
- Hot water
Steps
- Fill tub/bin with hot water.
- Stir in washing soda, oxygen bleach, and dish soap.
- Soak racks for 4–12 hours (overnight is ideal).
- Scrub with a sponge or brush, rinse thoroughly, and dry.
Safety note: Oxygen bleach is not the same as chlorine bleach, but it still deserves respect. Wear gloves, avoid
splashing, and store powders away from kids and pets.
Method 5: The least-scrubbing heavy hitter (ammonia “bag” method)
This method is famous because it’s lazy in the best way: ammonia fumes do the work. It’s ideal for racks with thick,
burned-on carbon. But it requires careful handling and excellent ventilation.
Do this safely
- Work outdoors (patio/garage with door open), or in a very well-ventilated area.
- Never mix ammonia with bleach or bleach-containing products. Ever.
- Wear gloves and avoid inhaling fumes when opening the bag.
Steps
- Place racks in a heavy-duty trash bag.
- Add a small amount of ammonia (you’re creating fumes, not a swimming pool).
- Seal the bag tightly and leave it overnight.
- Open the bag carefully in fresh air, remove racks, and rinse thoroughly.
- Lightly scrub any remaining spots, rinse again, and dry completely.
Reality check: This method is incredibly effective, but it’s not the one to do next to your open kitchen window
while you’re also sautéing onions. Keep it separate, ventilated, and calm.
Method 6: Oven cleaner in a bag (fast, powerful, follow the label)
When racks are truly scorched, commercial oven cleaners can be the quickest solutionespecially when used inside a sealed
garbage bag to reduce mess. The bag keeps the product working and helps prevent overspray everywhere.
Steps
- Take racks outside or to a protected area.
- Place racks in a large trash bag.
- Spray thoroughly with oven cleaner (follow the product’s directions).
- Seal the bag and let it sit for at least 1 hour (overnight for extreme grime).
- Remove racks, rinse very well, and dry.
Important: Some oven cleaners can damage certain surfaces. Protect what’s underneath, and don’t “freehand”
this method on your nice stone countertop unless you enjoy living dangerously.
Method 7: Bar Keepers Friend paste (quick, targeted, surprisingly satisfying)
If you want a faster method without a long soak, a mildly abrasive cleanser like Bar Keepers Friend can cut through grease and
stains efficientlyespecially when you turn it into a paste and give it a short dwell time.
Steps
- Make a paste with the powder and a small amount of water (think “peanut butter consistency”).
- Brush it onto racks and let sit for 45–60 minutes.
- Scrub gently, rinse thoroughly, and dry.
Best use: Targeted rescue for stubborn spots, or when you need clean racks today and can’t sacrifice your tub overnight.
Method 8: Dishwasher tablets (works, but read the fine print)
Dishwasher tablets are built to attack baked-on food and grease. People use them for racks by soaking in hot watersometimes
wrapping racks in foil first to keep the tablet concentrated against the grime. This can work well, but remember: many tablets
contain strong agents (sometimes bleach). Gloves and ventilation are still your friends.
Steps
- Submerge racks in hot water in a tub/bin.
- Add a dishwasher tablet and let it dissolve.
- Soak for 2–3 hours (longer if needed).
- Scrub, rinse thoroughly, and dry.
Expert-style caution: If you have sensitive skin or a small, poorly ventilated space, consider a dish-soap soak or
washing-soda soak instead. You want “clean racks,” not “why are my hands angry?”
Can you leave racks in during a self-clean cycle?
Sometimesbut only if your racks are specifically designed for it. Many manufacturers advise removing standard racks before
running self-clean to prevent discoloration, warping, or glide issues. If your oven has racks labeled “self-clean” or “no scrub,”
those may be allowed to stay in, but always confirm in your owner’s manual.
Also, self-clean runs at extremely high temperatures. It’s effective for burning off residue inside the oven, but it’s not a
magical solution for every situation, and it can create smoke/odors if there’s a lot of grease. If you’re mainly trying to fix
dirty racks, a soak-and-scrub method is usually safer and more predictable.
How to keep oven racks cleaner longer (so you don’t do this again next weekend)
- Use a sheet pan under messy bakes. Catch drips from pies, casseroles, and anything cheesy.
- Wipe racks after “splatter meals.” Once cool, a damp cloth removes fresh grease before it bakes on.
- Don’t store things in the oven. Extra pans block airflow and can create more splatter and smoke.
- Deep clean on a schedule. If you cook often, aim for every 3–6 months; lighter users can stretch it longer.
- If racks stop sliding well: Clean the side rails and follow manufacturer guidancesome people lightly wipe rack edges with a tiny bit of oil, but not all ovens recommend it.
FAQ: quick answers to common rack-cleaning questions
Can I put oven racks in the dishwasher?
Sometimes they fit, but it’s not always recommended. Dishwasher detergents can be harsh, and some rack finishes can discolor or
corrode over time. If you try it, check your manual firstand don’t be surprised if the results are “meh” for heavy baked-on grime.
Should I use steel wool?
Only as a last resort, and gently. Steel wool can scratch finishes and create a rougher surface that traps grease faster. If you
must, use it on stubborn spots after a long soak, and stop once the grime releases.
Why do my “clean” racks still feel sticky?
That’s usually leftover degreaser or softened grease residue. Rinse longer with hot water, and wipe down with a clean, damp cloth.
Dry fully before returning racks to the oven.
Bonus: of real-life oven rack cleaning experiences (so you feel less alone)
If oven racks had a group chat, the messages would be 90% “help,” 9% “why me,” and 1% someone posting a photo of a burnt cheese
fossil with the caption “new pet.” Over and over, people run into the same rack-cleaning momentsso here are a few you’ll probably
recognize, plus what actually works.
Experience #1: The Lasagna Overflow Incident. You pull out the rack and it’s basically lacquered with a sticky,
caramelized red-brown stripe. You try a sponge. The sponge laughs. The move here is not angerit’s soaking. Hot water plus dish
soap will soften the top layer, but if the spill has baked on for months, washing soda + oxygen bleach is the sweet spot: strong
enough to break down the stain without instantly turning your bathroom into a fume chamber. Give it overnight, then scrub in the
morning when you’re emotionally fresh.
Experience #2: The “Why Does My Oven Smoke Every Time?” Mystery. This is usually rack grease, not a haunted appliance.
The easy fix isn’t necessarily a deep cleansometimes it’s a maintenance wipe. After roasting something fatty (hello,
chicken thighs), let the oven cool and wipe the rack bars with a damp cloth. It feels too simple to matter, but it prevents grease
from polymerizing into that stubborn, smoky film that demands a full tub soak later.
Experience #3: The “I Tried Baking Soda and Vinegar and Nothing Happened” Letdown. Totally normal. The fizz is brief.
It’s great for fresh messes and spot treatment, but it’s not a demolition crew. If you love the idea of using pantry staples, pair
the fizz with a long soak (baking soda + hot water + dish soap) and you’ll get dramatically better results. Think of vinegar as the
opening act, not the headliner.
Experience #4: The “I Need These Clean Today” Panic. Maybe you’re hosting. Maybe you’re stress-baking. Maybe your
mother-in-law has the observational skills of a hawk. This is when a paste cleanser shines. A targeted Bar Keepers Friend paste
(or a controlled cleaner used exactly as directed) can rescue the visible gunk quickly. You’re not trying to restore a museum piece;
you’re trying to stop thinking about it long enough to make cookies.
Experience #5: The “This Rack Is Beyond Human Effort” Moment. When a rack is coated in thick, black carbonlike it
spent a summer interning at a barbecue jointthe ammonia bag method can feel like cheating (in a good way). It’s also the moment
to be extra careful: do it outdoors, don’t inhale when opening the bag, and rinse like you mean it. The best cleaning method is the
one that doesn’t accidentally become a science fair.
The common theme in all these stories is simple: time beats force. Let chemistry and soaking do the heavy lifting,
and save your elbows for literally anything more fun.
Conclusion
Cleaning oven racks doesn’t have to be dramatic. Start with hot water and dish soap, upgrade to baking soda or washing soda for
heavier grease, and only pull out the big guns (ammonia or oven cleaner) when the mess is truly baked into history. Protect your
tub, ventilate your space, rinse thoroughly, and dry completely. Your future selfbreathing normal, non-smoky airwill be grateful.