Table of Contents >> Show >> Hide
- Why Clean Oven Racks in the Bathtub?
- What You Will Need
- Before You Start: A Few Smart Precautions
- How To Clean Oven Racks in Bathtub, Step by Step
- Step 1: Remove the Oven Racks
- Step 2: Line the Bathtub With Towels
- Step 3: Place the Racks in the Tub
- Step 4: Fill the Tub With Very Hot Water
- Step 5: Add Your Cleaning Agent
- Step 6: Let the Racks Soak
- Step 7: Scrub Away the Loosened Grime
- Step 8: Rinse Thoroughly
- Step 9: Dry Completely
- Step 10: Clean the Bathtub
- The Best DIY Add-Ons for Extra Dirty Oven Racks
- What Not To Do
- How Often Should You Clean Oven Racks?
- Why This Method Works So Well
- Frequently Asked Questions
- Real-World Experiences With Cleaning Oven Racks in a Bathtub
- Final Thoughts
Oven racks have a special talent: they look innocent right up until you pull them out and realize they are wearing a thick sweater made of grease, burnt cheese, and the ghost of last month’s casserole. The good news? You do not need a chemistry degree, a hazmat suit, or a miracle. If you have a bathtub, hot water, and a little patience, you already have the setup for one of the easiest DIY deep-cleaning jobs in the kitchen.
This guide walks you through exactly how to clean oven racks in a bathtub using simple household supplies. You will learn what to use, what to avoid, how long to soak, and how to deal with the really stubborn mess that acts like it signed a lease. Whether your oven racks are lightly grimy or look like they survived a barbecue apocalypse, this bathtub method is practical, affordable, and surprisingly satisfying.
Why Clean Oven Racks in the Bathtub?
Oven racks are large, awkward, and not exactly sink-friendly. The bathtub gives you plenty of space to lay them flat, fully submerge them, and scrub without wrestling metal bars in a tiny kitchen sink. It is one of the simplest ways to loosen baked-on grease and food residue with less mess and less frustration.
Even better, soaking does a lot of the hard work for you. Instead of scrubbing like you are trying to erase your kitchen mistakes from history, you let hot water and cleaner soften the grime first. That means less elbow grease, fewer dramatic sighs, and a better chance of keeping the finish on the racks in good shape.
What You Will Need
- Old towels to protect the bathtub
- Dish soap or a mild laundry detergent
- Very hot water
- Baking soda for stubborn spots
- A non-scratch scrub brush, sponge, or nylon scrubber
- Microfiber cloths or clean towels for drying
- Rubber gloves, if you prefer to keep your hands out of grease soup
- An optional dishwasher tablet or gentle scouring pad for extra-tough buildup
Before You Start: A Few Smart Precautions
1. Make Sure the Racks Are Cool
Never remove or soak hot oven racks. Let the oven cool completely first. This is safer for you and better for the racks.
2. Check Your Owner’s Manual
Most metal oven racks can be cleaned by soaking and scrubbing, but some ovens have special rack finishes or porcelain-coated racks with different care instructions. A quick check can save you from accidental damage.
3. Protect the Tub
Lay old towels in the bottom of the bathtub before the racks go in. This helps prevent scratches, chips, and that deeply annoying moment when one chore creates another chore.
4. Keep It Simple With Cleaners
Do not mix random cleaning products together. Stick with one method at a time. Hot water, dish soap, detergent, and baking soda are usually enough for this job. If you use a stronger cleaner, follow the product directions exactly and keep the room ventilated.
How To Clean Oven Racks in Bathtub, Step by Step
Step 1: Remove the Oven Racks
Slide the racks out carefully and set them aside on a towel or protected floor. Give them a quick once-over. If there are loose crumbs or burnt bits hanging on for dear life, brush those off first so your soaking water does not turn into chunky broth.
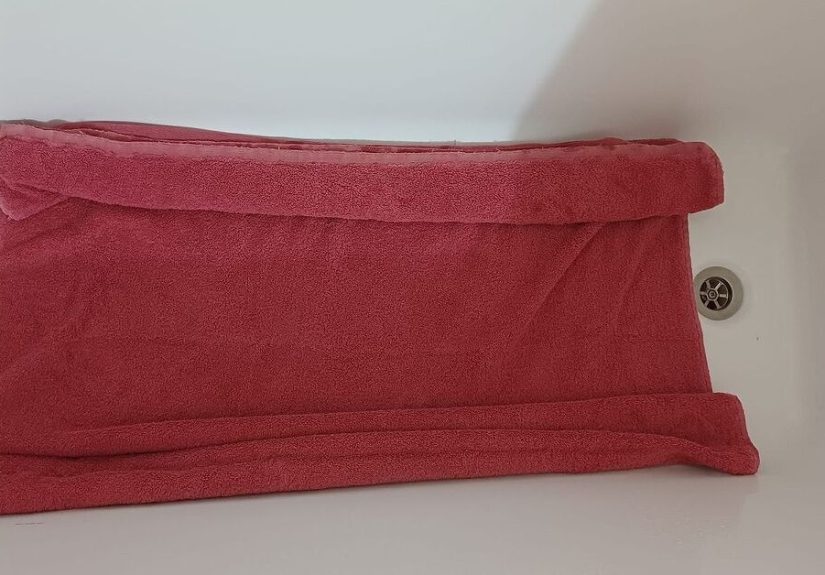
Step 2: Line the Bathtub With Towels
Spread old towels across the bottom of the tub. Use enough to cushion the racks and cover the surface underneath them. This simple step protects the bathtub finish and keeps the racks from clanging around like a kitchen percussion section.
Step 3: Place the Racks in the Tub
Lay the oven racks flat on top of the towels. If you have more than one rack, try to keep them from overlapping too much so the soaking water can reach every greasy nook and cranny.
Step 4: Fill the Tub With Very Hot Water
Run enough hot water to cover the racks completely. The hotter the water, the better it can help loosen grease and baked-on residue. You do not need boiling water. You just want it very hot and deep enough to submerge the racks.
Step 5: Add Your Cleaning Agent
Add dish soap or a mild laundry detergent to the tub. Swish the water gently to distribute it. For a basic DIY method, dish soap works well because it is made to cut grease. If the racks are especially filthy, sprinkle in some baking soda, too. It acts as a mild abrasive and gives the soak a little extra cleaning muscle.
A good rule of thumb is to keep the solution simple rather than turning the tub into a science fair. One grease-cutting cleaner plus hot water is usually plenty. Baking soda can join the party for extra help without making the process complicated.
Step 6: Let the Racks Soak
This is where patience earns its paycheck. Let the racks soak for at least two hours. If they are heavily coated with grease or old food residue, leave them overnight. The soaking time softens grime so you can scrub smarter, not harder.
If your racks only have light buildup, a shorter soak may do the trick. If they look like they have not been cleaned since the invention of frozen pizza, go for the overnight treatment and let the water do its thing.
Step 7: Scrub Away the Loosened Grime
Drain some water if needed, then use a nylon brush, sponge, or non-scratch scrubber to clean the racks. Focus on corners, bars, and spots where grease likes to cling. Most of the softened gunk should come off without a fight.
For stubborn patches, make a baking soda paste with a little water and apply it directly to the problem areas. Let it sit for 10 to 20 minutes, then scrub again. For truly cranky residue, a gentle scouring pad can help, but use it carefully and only if it is appropriate for your rack finish.
Step 8: Rinse Thoroughly
Once the racks look clean, rinse them well with fresh water. You do not want any soap, detergent, or paste left behind. Residue can smoke or smell the next time the oven heats up, and nobody wants dinner with a side of mystery fumes.
Step 9: Dry Completely
Use microfiber cloths or clean towels to dry the racks thoroughly. Do not rush this part. Water left on the racks can cause spotting or make sliding them back into the oven feel less smooth. Let them air-dry a bit longer if needed before reinstalling.
Step 10: Clean the Bathtub
Congratulations, the racks are clean. Now the tub may look like it hosted a greasy convention. Drain the water, remove the towels, and rinse the bathtub well. A quick wipe with bathroom cleaner or dish soap usually finishes the job.
The Best DIY Add-Ons for Extra Dirty Oven Racks
Baking Soda Paste
If the soak does not remove everything, baking soda paste is your best backup singer. Mix baking soda with a little water until it forms a spreadable paste, apply it to dark, crusty spots, and let it sit before scrubbing. This works especially well on cooked-on splatters and sticky grease film.
Dishwasher Tablet Soak
Some homeowners swear by dropping a dishwasher tablet into the hot soak water for extra grease-cutting power. It can help break down oily buildup faster. Just be sure to rinse the racks very thoroughly afterward so no cleaner remains on the metal.
Non-Scratch Scrubbers
A nylon scrubber or non-scratch pad is usually enough for routine cleaning. Save the more aggressive scrubbing tools for last-resort situations, and use them carefully. You want clean racks, not racks that look like they lost a fight with sandpaper.
What Not To Do
- Do not place bare metal racks directly on the bathtub surface without towels.
- Do not mix bleach, ammonia, or other strong cleaners together.
- Do not assume every rack can handle the same treatment; check the manual first.
- Do not put wet racks back in the oven.
- Do not use harsh abrasives on delicate finishes unless the manufacturer says it is safe.
- Do not wait years between cleanings unless you enjoy scrubbing like it is an Olympic event.
How Often Should You Clean Oven Racks?
For most households, cleaning oven racks every few months is a smart routine. If you cook often, roast meats, bake cheesy dishes, or have a habit of letting pies bubble over with reckless optimism, you may need to do it more often. A seasonal deep clean works well for many people. Wiping small spills quickly can also keep the racks from turning into a long-term grease museum.
Why This Method Works So Well
The bathtub method is effective because it combines three things grime hates: heat, time, and a grease-cutting cleaner. Hot water softens the residue, soap or detergent helps loosen oily buildup, and soaking reduces the amount of force needed during scrubbing. Add baking soda when needed, and you have a simple DIY system that feels low-tech but delivers real results.
It is also more practical than trying to clean bulky racks over a tiny sink or balancing them awkwardly on a countertop. The bathtub gives you room to soak, scrub, rinse, and rotate the racks without turning your kitchen into a wet obstacle course.
Frequently Asked Questions
Can I use dish soap only?
Yes. For light to moderate grime, hot water and dish soap may be all you need. If the racks are very dirty, add baking soda or extend the soak time.
Can I leave the racks soaking overnight?
Absolutely. Overnight soaking is often the easiest way to deal with heavy buildup. It gives grease and food residue more time to loosen.
Is baking soda safe for oven racks?
It is commonly used as a mild abrasive for many metal racks, but it is still smart to check your manual first, especially if your racks have a specialty finish.
Do I need a commercial oven cleaner?
No, not necessarily. Many homeowners get great results with hot water, dish soap, detergent, and baking soda. A commercial cleaner is more of an optional backup than a requirement.
Real-World Experiences With Cleaning Oven Racks in a Bathtub
One reason this method has stuck around for so long is simple: it works in real homes, not just in glossy before-and-after photos. People usually try it after ignoring their oven racks for months, then having a moment of truth while preheating the oven and smelling that familiar “something is definitely burning, and not in a gourmet way” odor. The bathtub method appeals to regular people because it feels doable. You are not buying specialty tools, disassembling the oven, or sacrificing your entire Saturday to a deep-cleaning marathon.
A common experience is that the job looks worse than it is. The racks come out of the oven looking hopeless, with greasy bars and blackened spots that seem fused to the metal. Then they soak for a few hours, and suddenly the mess starts sliding off with a brush and a little determination. It is one of those rare cleaning tasks where patience genuinely beats brute force. That can be oddly reassuring, especially for people who have attacked the same grime before with frantic scrubbing and increasingly creative bad language.
Another relatable lesson is that preparation matters more than most people think. The folks who skip the towels usually regret it when the tub gets scratched or the racks clang around like shopping carts on a downhill slope. The people who take two extra minutes to line the bathtub first tend to have a smoother experience from start to finish. The same goes for drying. Many homeowners discover that putting damp racks back into the oven is a shortcut to water spots, sticking, or a weird smell on the next heat-up. Drying them thoroughly feels boring in the moment, but it is one of those tiny habits that makes the whole project feel complete.
There is also the emotional arc of the project, which is honestly kind of funny. At the start, you are mildly annoyed that oven racks can get this filthy in the first place. Midway through, while staring at a tub full of gray-brown water, you may briefly question your life choices. Then the final rinse happens, the metal starts to look bright again, and suddenly you feel like a domestic genius. Not a humble one, either. A full “I should teach a master class on household redemption” type of genius.
Families who cook a lot often say the biggest difference is not just how the racks look, but how the kitchen feels afterward. A clean oven tends to smell better, heat more pleasantly, and make the whole room feel less grimy. People who bake weekly or roast food often notice that keeping the racks relatively clean makes future cleanup much easier. Once the first big deep clean is done, the next one is usually faster because you are dealing with fresh messes instead of ancient archaeology.
Renters, home sellers, and holiday hosts also love this method because it delivers visible results without a huge investment. If you are moving out, staging a home, or getting ready for relatives who inspect kitchens like they are judging a cooking show, shiny oven racks make a bigger difference than you might expect. They signal that the oven has been cared for. It is a small detail, but small details are what make a kitchen feel fresh instead of vaguely suspicious.
In the end, the bathtub method is popular because it fits real life. It does not ask for perfection. It asks for hot water, a few household basics, and enough time to let the grime surrender on its own. That is a pretty fair deal. And once you have seen what comes off those racks after one long soak, you may never look at your bathtub quite the same way again. It will always be a place for relaxation, sure, but also a quiet warrior in the battle against baked-on kitchen chaos.
Final Thoughts
If you have been putting off cleaning your oven racks because the task sounds messy, annoying, or suspiciously like a workout, the bathtub method is your friend. It is simple, effective, and built for real-life kitchens where grease happens and nobody wants to spend a fortune fixing it. With hot water, dish soap, a protected tub, and a little soak time, you can get grimy racks looking dramatically better without resorting to extreme measures.
The secret is not fancy products. It is using the right setup, giving the cleaner time to work, and scrubbing only after the mess has softened. Do that, and even scary-looking oven racks can make a respectable comeback. Your oven will look better, smell better, and maybe stop reminding you of every lasagna you have ever loved too aggressively.