Table of Contents >> Show >> Hide
- Before You Start: What Counts as “Temp Files” (and What Doesn’t)
- Method 1: Use Windows Settings to Remove Temporary Files (Easiest + Safest)
- Method 2: Turn On Storage Sense (Let Windows Clean Up Automatically)
- Method 3: Run Disk Cleanup (Classic Tool, Still Powerful)
- Method 4: Manually Delete Temp Folder Files (Fast, Effective, Slightly Spicier)
- Common Questions (Because Windows Loves Plot Twists)
- Quick “Best Method” Cheat Sheet
- Real-World Experiences: What Usually Happens When You Clear Temp Files (Extra)
- Experience 1: The Windows Update That Refused to Install
- Experience 2: The Mystery Storage Leak (a.k.a. “Where Did My 30 GB Go?”)
- Experience 3: “My PC Is Slow” (and the Real Culprit Is a Full Drive)
- Experience 4: The Downloads Folder Trap
- Experience 5: The Browser Cache vs. Windows Temp Confusion
- Experience 6: “I Deleted Everything and Nothing Broke” (Because Windows Is Smarter Than It Looks)
- Conclusion
Temporary files are like the junk drawer in your kitchen: you don’t notice it growing until you can’t close it.
Windows 10 creates temp files to install updates, cache app data, speed up loading, and keep things humminguntil
your C: drive starts flashing “Low Disk Space” like a neon sign in a desert.
The good news: clearing temporary files in Windows 10 is safe when you use the built-in tools (and you
resist the urge to delete random folders like you’re defusing a bomb in an action movie). This guide walks you
through four easy, reliable methodsplus real-world “yep, that happened” scenarios at the end so you know what
to expect.
Before You Start: What Counts as “Temp Files” (and What Doesn’t)
In Windows 10, “temporary files” usually includes things like:
- App and system cache files
- Temporary installation files
- Windows Update leftovers (often huge)
- Error reports, logs, and dump files
- Delivery Optimization files (peer-to-peer update chunks)
- Files sitting in temp folders (
%temp%,C:WindowsTemp)
It usually does not mean your personal files (photos, documents, videos)unless you explicitly
select categories like Downloads or remove items you actually want. Windows gives you checkboxes for a
reason. Treat them like a buffet plate: just because it’s available doesn’t mean you should pile it on.
Quick safety checklist:
- Close apps you’re actively using (temp files may be “in use” and won’t delete).
- If Windows warns a file is in use, choose Skip (don’t fight it; Windows will win).
- Read the category names before deletingespecially anything that sounds like it contains your stuff.
Method 1: Use Windows Settings to Remove Temporary Files (Easiest + Safest)
If you want the “I don’t want to think, I just want space” approach, Windows Settings is your best friend.
This method uses Windows’ own scan to identify temporary files that are safe to remove.
Step-by-step
- Press
Win + Ito open Settings. - Go to System → Storage.
- Under your main drive (usually Local Disk (C:)), click Temporary files.
- Wait for Windows to calculate what’s taking space.
- Select the categories you want to remove.
- Click Remove files.
What to select (with real-world guidance)
- Temporary files: Usually safe. This is the core cleanup.
- Windows Update Cleanup: Often a big win for space. Safe for most users.
- Delivery Optimization Files: Safe; you might re-download some update data later.
- Device driver packages: Be cautious. It can be safe, but if you’re troubleshooting drivers, you may want to keep them temporarily.
- Previous Windows installation(s) / Windows.old: Huge space recoverybut only delete if you’re sure you won’t roll back to the previous version.
- Downloads: Not a temp folder. Only select this if you truly want to delete items in your Downloads folder.
- Recycle Bin: Safe if you don’t need to restore anything.
Pro tip: If your PC is nearly full, clearing temp files can help Windows updates succeed,
reduce random app crashes, and make room for browsers and programs that need “working space” to function.
It’s not magic performance dustbut it can stop your system from dragging when storage is critically low.
Method 2: Turn On Storage Sense (Let Windows Clean Up Automatically)
Storage Sense is the “set it and forget it” option. You choose what it can delete and how often it runs, and
Windows quietly takes out the trash while you live your life.
Step-by-step
- Press
Win + Ito open Settings. - Go to System → Storage.
- Turn Storage Sense On.
- Click Configure Storage Sense or run it now (wording may vary slightly).
- Choose how often it runs: Every day, Every week, Every month, or During low free disk space.
- Decide what it can delete (temp files, Recycle Bin, Downloads, etc.).
- Optional: Click Clean now to run it immediately.
Recommended Storage Sense settings for most people
- Run Storage Sense: During low disk space (or weekly if you’re a heavy user).
- Temporary files: On (this targets safe-to-remove temp items).
- Recycle Bin: Delete files older than 14–30 days (gives you a safety window).
- Downloads: Only enable if you’re disciplined (or if your Downloads folder is basically a landfill).
Why this works: Temp files constantly regenerate. Automation prevents the slow creep where
you suddenly lose 20 GB and have no idea why. Storage Sense keeps your disk from turning into a hoarder’s attic.
Method 3: Run Disk Cleanup (Classic Tool, Still Powerful)
Disk Cleanup is the old-school utility that’s still excellent at deleting system junk, including Windows Update
leftovers. It’s especially useful when you want a targeted cleanup without digging through folders.
Step-by-step
- Click Start and search for Disk Cleanup.
- Open it (if prompted, select drive C:).
- Let it scan.
- Check categories you want to remove (e.g., Temporary files, Temporary Internet Files, Thumbnails, etc.).
- For deeper cleaning, click Clean up system files (this rescans with admin-level options).
- Click OK → Delete Files.
What Disk Cleanup is great at
- Windows Update Cleanup: Often one of the biggest space savers.
- System error memory dump files: Helpful to remove if you’re not debugging crashes.
- Temporary internet files / caches: Useful if you’re trying to reduce clutter (browser-specific clearing can still be better).
- Thumbnails: Safe; Windows will rebuild them over time.
Heads-up: If you delete some system caches, Windows may rebuild them later. That’s normal.
The goal is to reclaim space now and prevent your drive from hitting “critical storage” levels.
Method 4: Manually Delete Temp Folder Files (Fast, Effective, Slightly Spicier)
Sometimes you just want to open the temp folder and toss everything you can. This method is excellent when:
(1) Windows tools don’t clear enough, (2) an app left behind a mountain of junk, or (3) you want immediate
satisfaction.
Option A: Clear your user temp folder (%temp%)
- Press
Win + Rto open Run. - Type
%temp%and press Enter. - When the folder opens, press
Ctrl + Ato select all. - Press
Delete(orShift + Deleteto permanently delete). - If Windows says some files are in use, check Do this for all current items and click Skip.
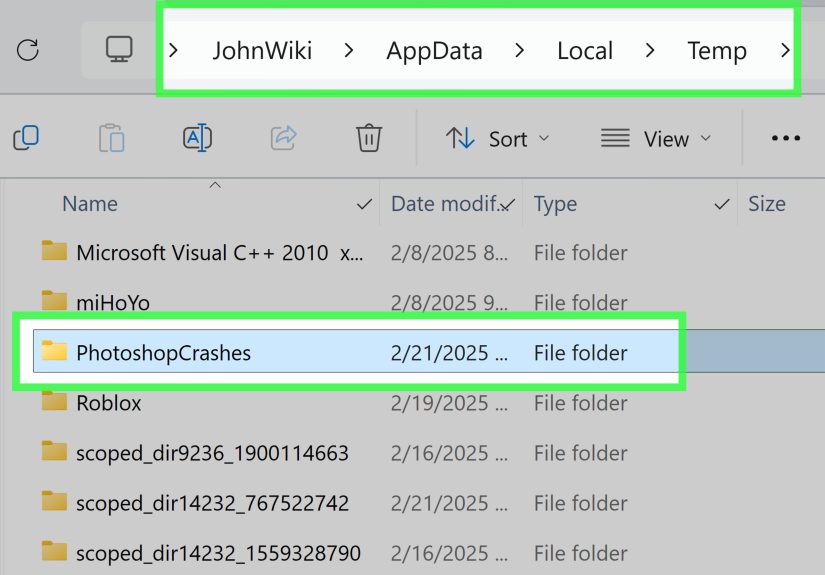
Option B: Clear the Windows temp folder (C:WindowsTemp)
- Open File Explorer.
- Navigate to
C:WindowsTemp. - You may be prompted for administrator permissionapprove it.
- Select all files you can and delete them. Skip anything in use.
Optional: The “temp” and “prefetch” folders (use judgment)
You’ll sometimes see advice to also clear:
Win + R→ typetempWin + R→ typeprefetch
Clearing temp is generally fine (same rules: delete what you can, skip what you can’t).
The prefetch folder is used to speed up app launches; deleting it won’t usually break anything,
but it may temporarily slow the first launch of some apps while Windows rebuilds data. If your goal is
maximum safety with minimal side effects, stick with %temp%, C:WindowsTemp, and
the built-in Windows tools.
Common Questions (Because Windows Loves Plot Twists)
Will deleting temp files speed up Windows 10?
Sometimes. If your drive is nearly full, freeing space can make Windows and apps behave betterupdates install
more reliably, browsers crash less, and programs have room to create working files. But if you have plenty of
free space already, deleting temp files won’t suddenly turn your laptop into a gaming spaceship.
How often should you clear temporary files?
If you enable Storage Sense, you don’t have to think about it much. Otherwise:
- Light use: Once a month is fine.
- Heavy use (gaming, video editing, lots of downloads): Weekly or when you notice storage shrinking.
- Before a big Windows update: Great time to clear space.
Why won’t some temp files delete?
The most common reason: they’re currently in use. Close apps, restart your PC, and try again. If you’re deleting
from temp folders, always choose Skip for in-use files rather than forcing deletion.
Is it safe to delete everything in temp folders?
It’s safe to delete what Windows allows you to delete. Some files will be locked for a reason, and that’s okay.
Don’t stress about leaving a few behind; you’re not failing at cleaningyou’re just respecting boundaries.
Quick “Best Method” Cheat Sheet
- Want safest + easiest? Use Settings → Storage → Temporary files (Method 1).
- Want it automatic? Turn on Storage Sense (Method 2).
- Need deeper system cleanup? Run Disk Cleanup and click Clean up system files (Method 3).
- Need to nuke app junk fast? Clear
%temp%manually (Method 4).
Real-World Experiences: What Usually Happens When You Clear Temp Files (Extra)
People often expect temp-file cleanup to feel like upgrading their CPU. In reality, it’s more like cleaning your
fridge: it won’t make dinner cook faster, but it will stop the weird smells and make room for groceries.
Here are common “in the wild” situations that show what temp-file cleanup actually doesand why it matters.
Experience 1: The Windows Update That Refused to Install
A classic scenario: your PC tries to install a feature update or cumulative update, fails halfway through, and
then repeats the cycle like a sitcom rerun. Often, the real problem isn’t the updateit’s free space. Windows
updates can require several gigabytes of breathing room for downloads, extraction, and rollback safety. Running
Method 1 (Settings → Temporary files) or Method 3 (Disk Cleanup → Clean up system files) frequently
frees up enough space to let the update finish. The “Windows Update Cleanup” category is a frequent hero here,
especially on older machines that have been updated for years.
Experience 2: The Mystery Storage Leak (a.k.a. “Where Did My 30 GB Go?”)
Another common moment: you swear you didn’t download anything big, but your C: drive drops from 20 GB free to
2 GB free overnight. This is often temp growth from browsers, game launchers, creative apps, or Windows update
caches. Clearing %temp% (Method 4) can be surprisingly satisfyingespecially when you see folders
full of ancient installer leftovers. Usually, some items won’t delete because they’re in use, and that’s fine.
Skip them, reboot, and repeat if needed.
Experience 3: “My PC Is Slow” (and the Real Culprit Is a Full Drive)
When storage is nearly full, Windows can struggle. Apps may take longer to open, browsers may stutter, and the
system can feel “sticky.” It’s not because temp files are evilit’s because Windows needs space for paging,
caching, and general housekeeping. After clearing temp files, users often report the PC feels less sluggish,
not because the CPU got stronger, but because the OS can finally breathe. The improvement is most noticeable on
systems with small SSDs (like 128 GB or 256 GB) where a few gigabytes makes a real difference.
Experience 4: The Downloads Folder Trap
One of the funniest (and most painful) patterns: people confuse “temporary files” with “stuff I downloaded once
and forgot about.” Windows cleanup tools sometimes offer to clear Downloads depending on how you configure
Storage Sense. That sounds helpful… until it deletes the only copy of a tax form or installer you meant to keep.
A safer approach is to keep Downloads out of automation unless you review it regularly. If you want automation,
set a longer window (like 30+ days) and still scan the folder occasionally for important files.
Experience 5: The Browser Cache vs. Windows Temp Confusion
Someone clears Windows temp files and expects their browser issues to vanishthen wonders why a website is still
loading oddly or auto-logging them out. That’s because browser cache and cookies are their own ecosystem. While
Disk Cleanup and Settings can remove certain internet-related temporary files, browsers often manage most cache
internally. If your goal is fixing browser glitches, clear cache in the browser settings. If your goal is
reclaiming storage and reducing Windows clutter, stick to the four methods above.
Experience 6: “I Deleted Everything and Nothing Broke” (Because Windows Is Smarter Than It Looks)
The biggest surprise for many users is how anti-climactic it is. You delete temp files, the PC doesn’t explode,
and life goes on. That’s the point. Temporary files are designed to be disposable. The only “side effect” you
may notice is that some apps take a little longer to launch once as caches rebuildor you may need to sign back
into a site if you cleared certain internet files. If you used the built-in tools and avoided deleting personal
folders, you did it right.
Bottom line: clearing temp files is not a one-time miracle. It’s routine maintenance that keeps your storage
healthy, reduces update headaches, and prevents your PC from turning into a digital junk closet. And if you turn
on Storage Sense, you can let Windows quietly handle itlike a tiny robot janitor that never asks for a raise.