Table of Contents >> Show >> Hide
- What Is a Moth Orchid?
- Why Moth Orchids Make Great Houseplants
- Best Conditions for Growing a Healthy Moth Orchid
- The Right Pot and Potting Mix for Moth Orchids
- How to Water a Moth Orchid Without Drowning It
- How and When to Fertilize a Moth Orchid
- How to Get a Moth Orchid to Rebloom
- Repotting a Moth Orchid the Smart Way
- Common Moth Orchid Problems and How to Fix Them
- Simple Care Routine for Busy Growers
- Experience-Based Tips: What Growing Moth Orchids Really Teaches You
- Conclusion
- SEO Metadata
If houseplants had a popularity contest, the moth orchid would already have a sash, a trophy, and an overly confident acceptance speech. Known botanically as Phalaenopsis, the moth orchid is one of the easiest orchids to grow indoors, which is exactly why so many people buy one, love it for three months, and then panic the moment the flowers fall off. The good news? A flowerless moth orchid is not a dead moth orchid. It is simply between performances.
This guide covers how to grow and care for a moth orchid the right way, from light and watering to humidity, feeding, repotting, and getting it to bloom again. Whether you picked one up at a grocery store, inherited one from a friend who “gave up,” or decided your windowsill needed a little more drama, you can absolutely keep this plant healthy for years. Moth orchid care is less about magical tricks and more about understanding what the plant actually wants: bright filtered light, breathable roots, steady warmth, careful watering, and a grower who knows the difference between “dry enough” and “bone dry and emotionally unavailable.”
What Is a Moth Orchid?
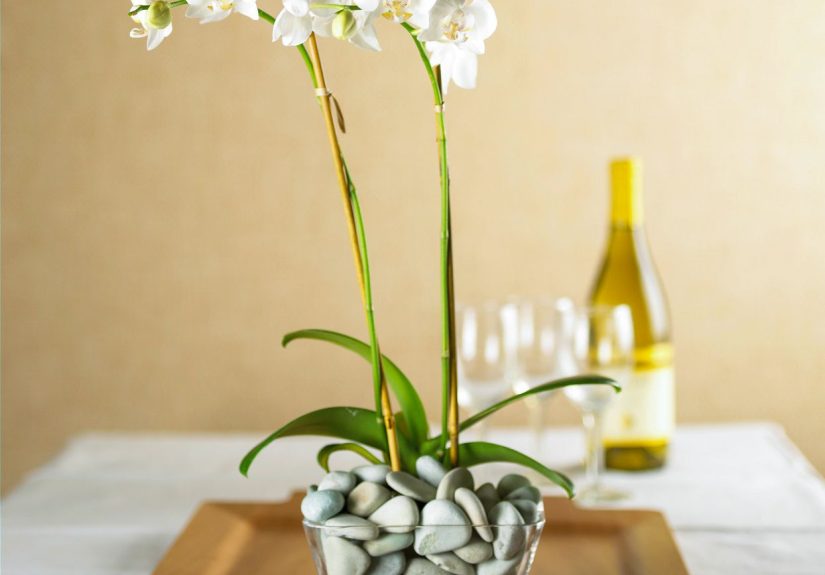
Moth orchids are tropical orchids prized for their broad leaves, elegant arching flower spikes, and blooms that can last for weeks or even months. In nature, they usually grow attached to trees rather than rooted in ordinary ground soil. That single fact explains almost everything about their care. Their roots want air. Their potting mix needs to drain quickly. Their leaves like warmth. And their watering routine should feel more like a tropical rain shower followed by good airflow, not a swamp vacation.
That tree-dwelling habit also explains why moth orchids often grow aerial roots that snake outside the pot like tiny green tentacles looking for a better zip code. Do not cut those off just because they look weird. Weird is normal in orchid world.
Why Moth Orchids Make Great Houseplants
There is a reason Phalaenopsis orchids are recommended for beginners again and again. They tolerate indoor temperatures well, they do not demand blazing sun, and their flowers last far longer than most blooming houseplants. With proper care, many plants bloom once a year, and some bloom even more often. That means your investment can keep paying floral dividends long after the first bouquet from the grocery store would have called it quits.
They also fit neatly into real life. You do not need a greenhouse. You do not need a mist-filled Victorian conservatory. You do not need to whisper affirmations to the leaves at sunrise. A bright room, a decent potting medium, and a consistent routine will do a lot of the heavy lifting.
Best Conditions for Growing a Healthy Moth Orchid
Light: Bright but Indirect Wins the Game
The best light for a moth orchid is bright, indirect light. An east-facing window is often ideal because it gives gentle morning sun without the leaf-scorching drama of harsh afternoon rays. A north-facing window can work if it is bright enough, and a south or west window may also work if you use a sheer curtain to soften direct sun.
If the leaves are deep, dark green, your orchid may need more light. If they look yellowish or develop red or pink stress tones along the edges, it may be getting too much. Healthy leaves are usually a light to medium green. Think “fresh avocado,” not “mystery lime chip” and not “forest at midnight.”
Low light is one of the most common reasons a moth orchid refuses to rebloom. The plant may stay alive, but it will have all the enthusiasm of a teenager asked to clean the garage. Alive, yes. Cooperative, no.
Temperature: Cozy, Not Chilly
Moth orchids like warm household temperatures. In general, daytime temperatures around 70 to 85 degrees Fahrenheit and nighttime temperatures in the 60s suit them well. They dislike cold drafts, freezing windows, and sudden temperature swings. If a leaf is pressed against a cold window in winter, it can suffer damage surprisingly fast.
To encourage blooming, mature moth orchids often benefit from cooler nights in fall for several weeks. That drop does not need to be dramatic. A mild difference between day and night temperatures is usually enough to tell the plant it is time to start planning its next flower spike.
Humidity and Airflow: Tropical, But With Manners
Moth orchids appreciate moderate to high humidity, especially in dry indoor environments. If your home air turns desert-like in winter, you can raise humidity with a pebble tray, a room humidifier, or by grouping plants together. The key detail is that the pot should sit above the water level, not directly in standing water. Orchid roots enjoy moisture in the air, not a permanent foot bath.
Just as important as humidity is airflow. Good air circulation helps reduce fungal and bacterial problems. This does not mean your orchid wants to be blasted by an air conditioner vent or a fan set to “tornado.” It simply means stale, damp air is not ideal.
The Right Pot and Potting Mix for Moth Orchids
If you plant a moth orchid in regular potting soil, you are basically asking an epiphyte to wear concrete shoes. It will not end well. Moth orchids need a loose, airy potting mix designed for orchids, usually bark-based, sometimes blended with sphagnum moss, charcoal, perlite, or other chunky ingredients that improve drainage and root aeration.
Clear plastic orchid pots are popular for good reason. They let you monitor root health, moisture levels, and root color. Healthy roots are usually green when moist and silvery when dry. Clear pots also allow some light to reach the roots, which many growers appreciate. Decorative cachepots are fine too, as long as the inner pot can drain completely.
Choose a pot that fits the root system snugly rather than one that leaves a lot of empty space. Oversized pots stay wet too long, and that is how root rot starts writing its villain monologue.
How to Water a Moth Orchid Without Drowning It
Watering is where most moth orchid care problems begin. The goal is simple: water thoroughly, then wait until the potting medium approaches dryness before watering again. Not crispy dry. Not swampy. Just nearly dry.
A practical method is to carry the orchid to the sink, run lukewarm water through the potting mix, let it soak the bark thoroughly, and then allow excess water to drain completely. Morning is the best time to water because it gives the leaves and crown time to dry. If water collects in the crown, blot it out gently. Sitting water in the crown can lead to crown rot, which is one of the fastest ways to ruin an otherwise healthy plant.
How often should you water? It depends on your home, season, pot size, and potting medium. A bark mix may need water about once a week in many homes. Moss often stays wet longer. Warm, bright rooms dry plants faster than cool, dim ones. Instead of following a rigid calendar, check the roots and potting mix. When the roots look silvery and the pot feels noticeably lighter, it is probably time.
One more thing: do not confuse misting with watering. A quick spritz may make you feel productive, but it usually does very little for the plant’s actual hydration needs.
How and When to Fertilize a Moth Orchid
Moth orchids are not heavy feeders, but they do appreciate regular light nutrition. A balanced orchid fertilizer works well for many home growers. The safest approach is to fertilize weakly and consistently rather than dumping in a strong dose and hoping for a floral miracle.
During active growth, many growers feed at quarter strength weekly or every few waterings. Others fertilize lightly every two weeks. In lower light or cooler conditions, reduce feeding. Overfertilizing can cause salt buildup, root damage, and lush leafy growth with fewer flowers. In other words, you may end up with a plant that looks like it is training for a leaf bodybuilding contest instead of preparing to bloom.
Flushing the pot with plain water once in a while can help wash away fertilizer salts, especially if you use bark-based media and feed regularly.
How to Get a Moth Orchid to Rebloom
Once the blooms fade, many people assume the show is over forever. It is not. In fact, reblooming is one of the most satisfying parts of growing a moth orchid. The plant just needs the right cues.
Step 1: Keep Giving Good Care
Continue bright indirect light, appropriate watering, and light fertilizer after flowering. A moth orchid cannot produce new blooms if it is barely hanging on.
Step 2: Decide What to Do With the Flower Spike
If the spike turns brown and dry, cut it off near the base. If it stays green, you have two main options. You can cut it down low to let the plant rest and focus on roots and leaves, or you can cut just above a node and see whether it produces a side branch. The second method may give you flowers sooner, but sometimes smaller ones. The first method often helps the plant build strength for a future full bloom cycle.
Step 3: Give It Better Light
The most common reason a moth orchid does not rebloom is insufficient light. If your plant has healthy leaves but never spikes again, move it a little closer to a bright window or supplement with a grow light.
Step 4: Let Fall Nights Cool Down Slightly
A few weeks of cooler nighttime temperatures in fall can help trigger spike formation. You are not trying to freeze the plant. You are simply giving it a seasonal signal that says, “Time to put on the fancy outfit again.”
Repotting a Moth Orchid the Smart Way
Repotting should usually happen every one to three years, or sooner if the bark breaks down, the roots look unhealthy, or the medium stays soggy too long. For many mature plants in bark, around every two years is a sensible rhythm. The best time to repot is typically after flowering, especially when new root growth begins.
Gently remove the plant from its pot, shake or rinse away old decomposed media, and trim dead, mushy, or hollow roots with a sterile cutting tool. Healthy roots are firm. Nestle the plant into fresh orchid mix and position it so the base sits just above the medium, not buried deep like a tomato transplant. After repotting, water it in and let it settle into its new home.
Do not panic if your orchid sulks for a short time after repotting. Plants dislike moving day just as much as people do.
Common Moth Orchid Problems and How to Fix Them
Wrinkled Leaves
This usually points to watering issues or root trouble. Sometimes the plant is too dry. Sometimes the roots are damaged and cannot absorb water properly. Check the potting mix and root condition before assuming the answer is simply “more water.”
Yellow Leaves
One older leaf yellowing naturally is not usually a crisis. Multiple yellowing leaves may suggest overwatering, cold damage, root stress, or excessive light. Look at the whole plant before reaching a verdict.
No Flowers
Most often this comes down to low light, not enough seasonal temperature difference, or inconsistent care after the previous bloom cycle. A healthy moth orchid that gets enough light usually wants to bloom again. It just may take patience.
Mushy Crown or Rotting Roots
These are classic overwatering or poor-drainage problems. Remove damaged tissue, improve airflow, repot if needed, and avoid letting water sit in the crown or pot.
Pests
Watch for mealybugs, scale, mites, and thrips. Catching pests early matters. Isolate affected plants, clean the foliage, and use orchid-safe treatment methods if necessary.
Simple Care Routine for Busy Growers
If you like your plant care instructions simple, here is the boiled-down version. Put your moth orchid in bright indirect light. Water it thoroughly when the bark is nearly dry. Let it drain fully. Feed lightly during active growth. Keep it warm. Repot every couple of years. Give it a little cooler nighttime air in fall to encourage reblooming. Congratulations, you are now more competent than half the people who say, “I can never keep orchids alive.”
Experience-Based Tips: What Growing Moth Orchids Really Teaches You
After living with moth orchids for a while, you start to realize they are not difficult so much as they are specific. That sounds fancier than it is. They simply punish guesswork with more style than most houseplants. A pothos will forgive neglect and keep trucking. A moth orchid will respond to poor care by becoming a silent botanical performance review.
One of the first lessons many growers learn is that watering schedules printed on the internet are not laws of physics. “Water once a week” is useful only until your potting mix, room temperature, humidity, and container type decide otherwise. In one bright, warm apartment, a moth orchid in bark may be ready every five or six days. In a cooler room with less light, that same plant may still be damp after eight or nine days. The real skill is not memorizing a number. It is learning to read the plant. You look at the roots, feel the pot, check the medium, and respond to what is actually happening.
Another big lesson is that roots matter more than flowers, even if flowers get all the applause. New growers naturally stare at the blooms because that is the glamorous part. Experienced growers stare at the roots because that is where the truth lives. Firm green or silvery roots usually mean the plant is functioning well. Black mushy roots mean the plant has entered the kind of drama no one asked for. Once you start caring about root health, your orchid care improves fast.
There is also the patience factor. Moth orchids teach delayed gratification better than almost any houseplant. You can do everything right for weeks and still see no visible reward. Then one day, a little spike appears near the base of the leaves, and suddenly you feel like a gardening genius. That spike is not random luck. It is the plant quietly responding to months of steady care. Moth orchids reward consistency, not panic interventions.
Many people also discover that less fussing often works better than constant meddling. Rotating the pot every other day, changing windows weekly, repotting too often, trimming random roots, or watering because the leaves “look thirsty” usually causes more problems than it solves. The healthiest moth orchids often belong to growers who pay attention without hovering. Think attentive host, not overcaffeinated stage manager.
Perhaps the most useful real-world insight is this: the flowers are only one chapter. A moth orchid with no blooms is still a living plant building energy, growing roots, and preparing for the next cycle. When people stop treating the plant like a disposable centerpiece and start treating it like a long-term houseplant, success rates go way up. That mindset shift changes everything. Instead of asking, “How do I keep the flowers going forever?” you start asking, “How do I keep the plant healthy enough to bloom again?” That is the question that actually leads to success.
And once you rebloom one moth orchid, something dangerous happens. You get confident. Then you buy another one. Then another. Before long, you are discussing bark grades and humidity trays with a suspicious amount of enthusiasm. This is how orchid people are made.
Conclusion
Learning how to grow and care for a moth orchid is mostly about respecting the plant’s natural habits. Give it bright indirect light, warm temperatures, airy roots, a fast-draining potting mix, careful watering, light feeding, and occasional repotting. Add a little patience and better light for reblooming, and your Phalaenopsis can become one of the most rewarding indoor plants you own. It may look elegant and expensive, but under all that beauty is a plant that mainly wants consistency, not chaos. Which, honestly, is relatable.