Table of Contents >> Show >> Hide
- What Hardwiring a Rope Light Really Means
- Step 1: Identify the Rope Light Type Before You Touch a Screwdriver
- Step 2: Decide on the Correct Hardwire Method
- Tools and Materials You May Need
- Step 3: Shut Off Power and Plan the Layout
- Step 4: Size the Driver or Power Supply Correctly
- Step 5: Mount the Junction Box, Driver, and Cable Path
- Step 6: Make the Electrical Connections the Right Way
- Step 7: Install and Secure the Rope Light
- Step 8: Test Before You Finish the Trim Work
- Outdoor and Wet-Location Rope Light Installations
- Common Mistakes to Avoid
- When to Call an Electrician
- Final Thoughts
- Real-World Experience: What People Learn After Actually Hardwiring a Rope Light
- SEO Tags
If you want the clean, built-in look of accent lighting without a dangling plug photobombing your room, hardwiring a rope light is the move. Done right, it looks polished, intentional, and quietly impressive. Done wrong, it looks like a weekend project that lost a fight with a hardware aisle. This guide walks you through the smart way to hard wire a rope light, whether you are adding glow under cabinets, along a tray ceiling, inside shelving, or around a patio feature.
The first thing to know is that “hardwire a rope light” does not usually mean cutting off a factory plug and twisting random wires together like you are auditioning for a cautionary tale. In most cases, the proper method is one of two approaches: either you hardwire a compatible 120-volt rope light system through a listed junction box or conversion accessory, or you hardwire a power supply/driver and then connect a low-voltage rope light to that driver using the manufacturer’s approved leads and connectors.
That distinction matters. It affects safety, brightness, dimming, outdoor performance, and whether your project ends with a beautiful glow or a very expensive lesson. Let’s do this the smart way.
What Hardwiring a Rope Light Really Means
Hardwiring means the lighting is connected to your home’s electrical system without a standard plug-in cord being the final power connection. In a finished installation, the rope light is controlled by a wall switch, a compatible dimmer, or a hardwired controller, and the visible cord clutter disappears.
For most homeowners, there are two common setups:
- 120V rope light: The rope light or its compatible junction/converter box is connected directly to house power.
- 12V or 24V rope light: House power feeds a hardwired driver or transformer, and the rope light connects to the low-voltage output side.
If your rope light is low voltage, the driver is the traffic cop in the system. It converts your home’s line voltage to the lower voltage the light actually needs. If your rope light is line voltage, it may connect through a compatible hardwire accessory, but the connection method must still match the product instructions. That part is not optional. That part is the whole game.
Step 1: Identify the Rope Light Type Before You Touch a Screwdriver
Before you think about wiring, confirm exactly what you bought. Check the packaging, manual, product label, or the printing on the power supply. You are looking for these details:
- Voltage: 120V, 24V, or 12V
- Indoor, damp, wet, or outdoor rating
- Maximum run length
- Whether it is dimmable
- Whether it must use brand-specific connectors, end caps, or conversion boxes
- Where the cut marks are, if cutting is allowed
This is where many DIY projects go sideways. People assume all rope lights wire the same way. They do not. One product may be a line-voltage kit with a molded power cord. Another may be a 24V decorative system that absolutely requires a driver. Another may allow direct-wire conversion only through a manufacturer-specific junction box. If you skip this step, you are basically building a puzzle after throwing away the picture on the box.
Step 2: Decide on the Correct Hardwire Method
Method A: Hardwiring a Low-Voltage Rope Light
This is often the cleaner and more flexible option for interior accent lighting. The wiring path looks like this:
house power → switch/dimmer (if compatible) → hardwired driver/transformer → low-voltage rope light
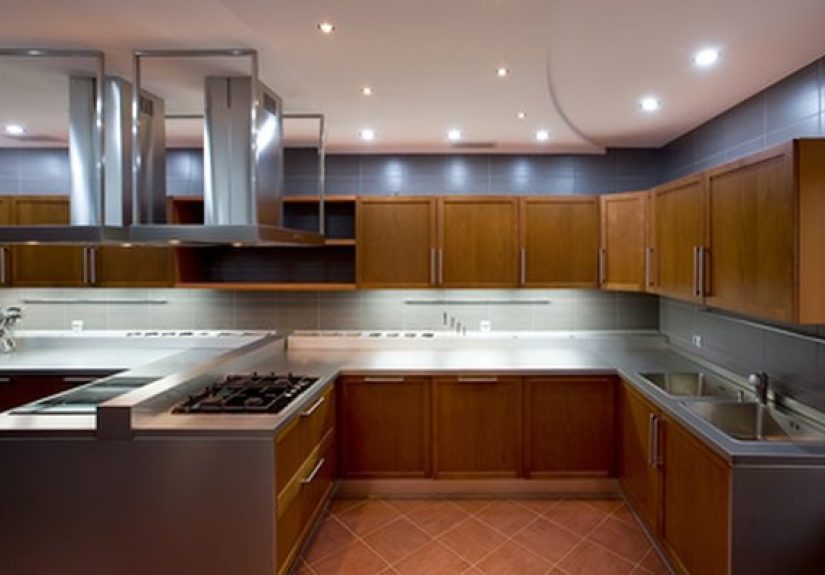
This method works well for under-cabinet lighting, display shelves, toe kicks, and architectural accents where you want a neat, concealed installation. The rope light itself stays on the low-voltage side, which is usually easier to route in finished spaces once the driver location is planned properly.
Method B: Hardwiring a 120-Volt Rope Light
This is common in certain rope light kits and some longer decorative runs. The correct approach is to use the manufacturer’s approved connection method, which may include a direct-wire junction box, hardwire conversion box, or other listed accessory. Do not assume you can remove a plug and improvise. If the product was designed to plug in, you need to verify that the manufacturer also offers a direct-wire path for that exact model.
If no listed hardwire accessory exists, that is your answer. The product is not a hardwire candidate for a clean code-friendly install. Pick a compatible hardwire system instead.
Tools and Materials You May Need
- Non-contact voltage tester
- Screwdrivers
- Wire stripper/cutter
- Drill and bits
- Cable clamps or strain relief fittings
- Approved wire connectors
- Electrical box or compatible junction box
- Hardwire driver/transformer if using low-voltage rope light
- Manufacturer-approved connector, end cap, and mounting clips or channel
- Compatible dimmer or controller if needed
- Silicone or weatherproof accessories for outdoor-rated systems, where specified
Step 3: Shut Off Power and Plan the Layout
Turn off the breaker to the circuit you are working on and verify the power is off with a tester. Not “probably off.” Not “the light switch stopped working, so we’re good.” Actually verify it.
Then map the entire route before installation:
- Where the power will come from
- Where the switch or dimmer will be
- Where the driver or junction box will sit
- How the rope light will enter the run
- Where you may need to drill or fish cable
- Where the end of the rope light will terminate
Keep the driver or junction box in an accessible location. Do not bury it behind drywall, seal it inside a wall, or hide it in some unreachable “future me will deal with it” cavity. Future you already has enough going on.
Step 4: Size the Driver or Power Supply Correctly
If you are using 12V or 24V rope light, add up the total wattage of the run and make sure the driver is rated to handle it. A quick example makes this easier:
If a 24V rope light uses 3.7 watts per foot and your run is 12 feet, the total connected load is:
3.7 × 12 = 44.4 watts
That means your driver must be rated above 44.4 watts, following the product manufacturer’s instructions. If you plan to dim the system, confirm the driver and dimmer are compatible with each other and with the rope light. Dimming is where many “almost right” installs go to become flickery little headaches.
Step 5: Mount the Junction Box, Driver, and Cable Path
Install the electrical box or the product’s direct-wire conversion box in the approved location. If you are feeding a low-voltage driver, bring the branch-circuit cable into the box using the proper clamp or connector. If the driver includes a dedicated wiring compartment or onboard terminal, follow the manufacturer’s instructions for cable entry and strain relief.
For under-cabinet or cove installations, plan the route so the feed enters at the least visible point. Many hardwired fixtures and converter boxes are designed with knockouts or entry points that let you bring power in from the rear, top, or side. That flexibility makes a big difference when you are trying to keep the install looking intentional instead of improvised.
Step 6: Make the Electrical Connections the Right Way
This is the moment where patience beats confidence. Make line-voltage connections only inside an approved box or wiring compartment. Use approved connectors, secure the cable, and follow the product’s wiring diagram.
In a typical U.S. residential setup, you may see:
- Black = hot
- White = neutral
- Green or bare copper = ground
But do not rely on color alone if anything looks questionable. Verify the circuit, read the instructions, and stop if the installation does not match the expected wiring method.
For low-voltage systems, connect the driver’s low-voltage output to the rope light using the manufacturer’s approved leads, terminals, or connectors. Observe polarity when required. For 120V systems, connect only through the listed hardwire accessory or junction method intended for that product family.
Important: Never hide splices in a wall, ceiling, or cabinet void without an approved box. Never twist-and-tape a line-voltage connection and call it a day. That is not a shortcut. That is a fire hazard wearing a fake mustache.
Step 7: Install and Secure the Rope Light
Once the power side is complete, install the rope light itself. Use mounting clips, track, or channel recommended for the product. Rope lights are durable, but they are not immortal pool noodles full of magic. Respect their bend limits, do not kink them, and do not force sharp corners unless the product specifically allows it or offers a corner connector.
Good installation habits include:
- Dry-fit the full run before final fastening
- Cut only at designated cut marks
- Use the correct end cap on the far end
- Seal exposed outdoor ends exactly as specified
- Use clips or channels for straight, clean runs
- Support the light evenly instead of letting it sag
If you want a straight architectural line, a channel or raceway usually looks better than clips alone. Clips are excellent for curves, outlines, and utility installs. Channels are the secret weapon when you want the result to look custom.
Step 8: Test Before You Finish the Trim Work
Restore power and test the system before you permanently close access panels, reinstall trim, or tidy the last details. Check for:
- Full illumination across the run
- Correct switch or dimmer operation
- No flicker, buzzing, or inconsistent brightness
- Proper controller behavior, if applicable
- No loose connectors or warm, stressed-looking terminations
If part of the run does not light, start with the obvious: polarity on low-voltage systems, connector seating, cut quality, end cap placement, and whether the run exceeds the product’s maximum length. Many rope light problems are not mysterious. They are simply “one connector isn’t fully seated” wearing a dramatic costume.
Outdoor and Wet-Location Rope Light Installations
If the rope light is going outdoors, your standards need to go up, not down. Use a product specifically rated for the environment. A rope light may be wet-location rated while its power supply, cord, or driver requires a protected dry location. Read all parts of the system, not just the marketing headline on the front of the box.
For outdoor hardwired installations, pay close attention to:
- Wet-location or outdoor rating
- Sunlight resistance where exposed to UV
- GFCI protection where required
- Proper sealing of cut ends and splices
- Keeping power supplies and electrical connections protected from direct water intrusion
- Avoiding submersion unless the system is specifically rated for it
Also remember that “water-resistant,” “weather-resistant,” and “waterproof” are not interchangeable. Marketing likes to blur those words. Electricity does not.
Common Mistakes to Avoid
- Cutting off a factory plug without confirming the product supports direct wire installation
- Using a low-voltage rope light without the correct driver
- Mixing brands of connectors, cords, or accessories
- Ignoring polarity on DC rope light systems
- Exceeding the maximum run length
- Burying the driver or junction box where it cannot be accessed
- Using indoor-rated parts outdoors
- Skipping end caps, strain relief, or weather sealing
- Trying to use rope light as the main light source in a room
When to Call an Electrician
You should bring in a licensed electrician if:
- You need to open a wall and extend a new branch circuit
- You are unsure whether the existing circuit can handle the added load
- You are installing a new wall switch or dimmer and are not confident about the wiring
- You are hardwiring line-voltage rope light and the product instructions are unclear
- You are working outdoors, around masonry, or in a location with special code requirements
- You open the box and immediately think, “Interesting, none of this looks like the internet promised”
There is no shame in calling a pro. The goal is a clean lighting upgrade, not a sudden hobby in electrical troubleshooting.
Final Thoughts
If you are wondering how to hard wire a rope light, the best answer is this: hardwire the system the way the product was designed to be hardwired. For low-voltage rope lights, that usually means hardwiring the driver and keeping the light on the low-voltage side. For 120V rope lights, it means using a listed junction method, conversion box, or direct-wire accessory approved for that exact product.
Take the extra time to verify voltage, load, rating, and connector compatibility. Use approved boxes. Keep drivers accessible. Cut only where allowed. Seal the ends correctly. Test before the finish work goes back on. Do all that, and your rope light will look less like an afterthought and more like the quiet architectural flex it was meant to be.
Real-World Experience: What People Learn After Actually Hardwiring a Rope Light
Across real installation guides, retailer product support pages, and manufacturer instructions, the same practical lessons show up again and again. The first is that rope light projects usually look simpler from ten feet away than they do at the workbench. A homeowner sees a glowing shelf edge and thinks, “That can’t be too hard.” Then the box opens, and suddenly there are connectors, end caps, clips, optional controllers, dimmer notes, and the slightly humbling realization that lighting has more opinions than expected.
One common experience is discovering that the hardest part is not the light itself. It is the planning. People who get the best results usually spend more time measuring, mapping the feed location, and deciding where the driver or junction box will live than they spend on the final mounting. That sounds boring, but it is the boring part that makes the install look elegant. When the feed enters from an invisible corner and the switch works exactly as intended, the whole project feels polished. When the power entry is in the wrong spot, even a good light can look improvised.
Another recurring lesson is that low-voltage systems often feel friendlier once you understand them. At first, the need for a driver sounds like one more complication. In practice, many installers end up liking low-voltage rope light because it gives them better flexibility for accent lighting, especially in kitchens, bookcases, and toe-kick areas. The driver can be placed in a serviceable spot, the light output is consistent, and the visible installation stays clean. The trick is respecting polarity, wattage, and connector compatibility instead of assuming all LED gear speaks the same language.
People also learn very quickly that connectors matter more than they expected. A run that fails to light evenly is often blamed on the light strip or rope itself, when the real culprit is a connector that was not fully seated, an end cap that was skipped, or a cut made slightly off the mark. In other words, the glamorous part of the project is the glow, but the success usually lives in the tiny plastic and metal pieces everyone wants to ignore.
Outdoor installations teach their own lessons. Homeowners often remember to buy an outdoor-rated rope light but forget that the rest of the system has to match the conditions too. The power supply location, splice protection, sunlight exposure, and GFCI protection suddenly become very important after the first heavy rain. The projects that last are usually the ones where someone paused long enough to ask, “Is every part of this setup meant to live here?” That one question saves a lot of frustration later.
And then there is the universal truth of lighting upgrades: once one rope light looks good, it starts a chain reaction. The cabinet project becomes a shelf project. The shelf project becomes a cove-light project. The patio starts looking suspiciously underdramatic. Good lighting has a way of making the rest of the house ask for equal attention. The happy ending, though, is that a properly hardwired rope light does not just add brightness. It adds intention. It makes a space feel designed. And that is why people keep doing these projects even after learning that no, the instructions were not kidding about reading the instructions.


