Table of Contents >> Show >> Hide
If you’ve ever scrolled through Hometalk, Pinterest, or your favorite DIY blogs and wondered,
“Where is everyone getting these cute wooden bead tassels, and why does my coffee table look
naked without one?” this tutorial is for you. A DIY wood bead tassel is one of those
wonderfully simple projects that looks boutique, costs just a few dollars, and can be finished
in less than an episode of your favorite show.
In this guide, we’ll walk through how to make a classic DIY wood bead tassel from start to
finish, plus give you plenty of styling ideas, troubleshooting tips, and real-life experience
notes so you can avoid common beginner mistakes. Whether you’re going for farmhouse,
minimalist, or boho decor, wood bead tassels are a small detail that makes your home feel
styled, intentional, and cozy.
Why DIY Wood Bead Tassels Are So Popular
Wood bead garlands and tassels have become a decor staple in farmhouse and boho-inspired
interiors. They’re endlessly versatile: drape them over stacked books on a coffee table, wrap
them around a vase, hang them from a doorknob, or layer them on a holiday mantel. Many
tutorials point out that you only need a few basic supplies wood beads, jute or yarn, and
scissors and you can usually make an entire garland or set of tassels for under $10.
Wood beads also bring a natural, warm texture into your space. You can keep them raw for a
Scandinavian look, stain them for a rustic vibe, or paint them in soft pastels or bold seasonal
colors. Some crafters even dye their beads or tassels in ombré shades for a modern twist.
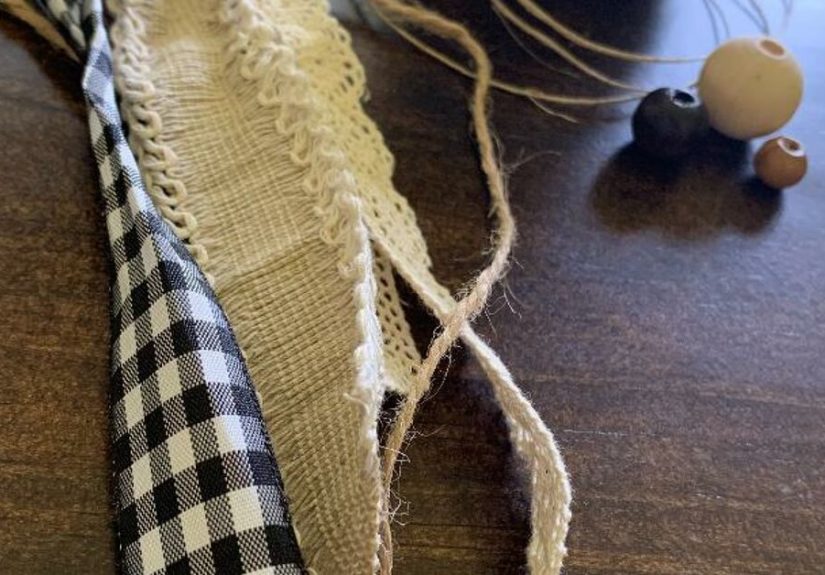
Supplies You’ll Need
The exact materials can vary a little depending on the look you’re going for, but most DIY wood
bead tassel projects use a simple supply list that’s easy to find at craft stores or online.
Basic Materials
- Wood beads – Round wooden beads in various sizes. Common sizes range from 10 mm to 20 mm.
- Stringing material – Jute twine, cotton cord, leather lace, or strong yarn.
- Tassel material – Jute twine, cotton yarn, embroidery floss, or fabric strips.
- Scissors – Sharp enough to cut clean ends on twine and yarn.
- Large-eye needle (optional) – A darning needle or similar to help string beads.
- Small piece of cardboard – Useful for wrapping yarn or twine to create even tassels.
Optional Extras
- Wood stain or acrylic craft paint and a foam brush for coloring beads.
- Painter’s tape for creating color-blocked beads.
- Key rings or lobster clasps if you’re turning your tassel into a keychain or bag charm.
- Small wood tags or charms to add quotes or seasonal messages.
Good news: if you’re the kind of person who has a drawer full of random craft supplies “just in
case,” there’s a solid chance you already own half of these items.
Step-by-Step: How to Make a DIY Wood Bead Tassel
Step 1: Decide on Your Design
Before you cut a single piece of twine, decide what you’re making:
- A single tassel with a short strand of beads (great for drawer pulls and doorknobs).
- A full garland with tassels at both ends for mantels, coffee tables, or centerpieces.
- A keychain or bag charm with beads and a small tassel.
Sketch a quick idea or lay out a few beads on the table to get a sense of the pattern for
example, three small beads, one large bead, repeat.
Step 2: Cut Your Main String
Cut a length of twine or cord for your main strand. For a simple tassel with a bead accent,
12–18 inches is usually enough. For a garland you can drape across a coffee table or tray,
many DIYers use 4–6 feet or longer, depending on the size of your space.
Add a few extra inches to whatever length you think you need. Extra string is cheap. The regret
of coming up three beads short? Priceless.
Step 3: Make the Tassel
There are a few ways to make tassels, but this easy method works with jute, yarn, or embroidery
floss:
-
Cut a piece of cardboard roughly the length you want your tassel. A 4–5 inch piece makes a
nice standard tassel. -
Wrap your yarn or twine around the cardboard 20–40 times, depending on how thick and full you
like your tassels. -
Cut a short piece of twine and slide it under the wrapped loops at the top. Tie a tight knot
to create the tassel’s hanging loop. -
Slide the entire bundle off the cardboard, then cut through the loops at the bottom to create
the fringe. -
About ½ inch below the top knot, wrap another piece of twine around the bundle several times
to create the “neck” of the tassel, then tie securely and trim the ends.
Give the tassel a little haircut by trimming the ends so they’re even. Don’t worry about making
it perfect the slightly imperfect, handmade look is part of the charm.
Step 4: Attach the Tassel to Your Main String
Thread the end of your main string (the garland or tassel hanger) through the top loop of the
tassel. Tie a tight double knot, then add a drop of clear-drying glue if you want extra
security. You can hide this knot later by sliding a bead over it.
Step 5: String the Wood Beads
Now for the satisfying part: adding the beads.
- Thread beads onto your main string in whatever pattern you designed.
- Use a large-eye needle if the twine is bulky or the bead holes are small.
- Alternate bead sizes or colors for a more playful, boho look.
- Keep beads all one size and color for a minimalist, Scandinavian feel.
If you’re making a garland with tassels on both ends, stop stringing beads a few inches from the
end so you have enough room to attach the second tassel.
Step 6: Finish the Ends
When you reach the desired length, tie a secure knot at the end of the beads. If you’re adding
a tassel on both sides, attach the second tassel using the same method as before. For a single
tassel item (like a keychain), you may tie the free end onto a key ring or decorative hook.
Trim any excess string, and that’s it you’ve made your own DIY wood bead tassel!
Customizing Your DIY Wood Bead Tassel
Play with Color and Finish
One of the best parts of this project is how customizable it is. Here are a few ideas:
- Painted beads: Use acrylic craft paint to create solid or color-blocked beads.
- Stained beads: Wipe on wood stain for a richer, rustic farmhouse look.
- Dyed tassels: Dip-dye the tassel ends in fabric dye or watered-down paint for an ombré effect.
If you want a seasonal look, choose colors that match your decor: muted greens and reds for
Christmas, soft pastels for spring, or deep jewel tones for fall.
Experiment with Tassel Materials
Wood bead tassels don’t have to be just jute and yarn. Many DIYers use:
- Soft cotton rope for a chunkier, coastal look.
- Embroidery floss for small, silky tassels on keychains or ornaments.
- Fabric strips for a shabby-chic or seasonal garland.
If you’re going for a high-end boho vibe, a mix of natural wood beads and suede or faux leather
tassels looks especially stylish.
Where to Use Your Wood Bead Tassels
Once you start making these, you’ll realize they can go almost anywhere. Popular styling ideas
include:
- Draped across a stack of coffee table books.
- Looped around a vase or plant pot.
- Hung from a doorknob, bedpost, or cabinet pull.
- Layered on a holiday mantel with greenery and candles.
- Wrapped around a centerpiece tray on your dining table.
- Used as a photo prop in flat-lay styling for social media.
You can also scale the idea up or down. Make tiny tassels and use them as napkin ring accents,
or go big with oversized beads for a bold mantel statement.
Common Mistakes (and How to Fix Them)
1. Beads Keep Slipping Off the End
If your beads slide off every time you set your project down, tie a temporary knot in the end
or clip on a small binder clip. This simple hack saves your sanity when kids, pets, or gravity
get involved.
2. Tassel Looks Thin or Stringy
If your tassel looks sad instead of stylish, you probably didn’t wrap your yarn or twine enough
times. The fix is easy: make another tassel and wrap more. You can also combine two thinner
tassels into one by tying their tops together under the neck.
3. Beads Don’t Fit Over the Twine
Thick jute and small bead holes don’t always get along. Try:
- Switching to a thinner cord.
- Using a needle to compress and guide the twine.
- Trimming the twine end at an angle and adding a tiny bit of clear glue, then rolling it to form a stiff “needle” tip.
4. Tassel Top Looks Messy
If the top of your tassel looks bulky or uneven, double-check that the top knot is tight and
centered. You can also wrap the neck area a few extra times to hide imperfections and give it a
more polished finish.
Safety and Durability Tips
While DIY wood bead tassels are generally very safe, a few precautions are smart:
- Keep loose beads and unfinished tassels away from small children and pets (they’re choking hazards).
- Use non-toxic paint or stain if your tassels will be in a child’s room.
- Double-knot and occasionally glue high-stress points, like keychains or frequently handled garlands.
If you’re hanging a long garland where people might tug or pull on it (for example, along a
stair rail), use stronger cord and consider tying it off more securely at the ends.
Real-Life DIY Wood Bead Tassel Experiences & Tips
After you’ve made a few DIY wood bead tassels, you start to pick up little tricks that don’t
always show up in step-by-step photos. Think of this section as your “friend on Hometalk” who
tells you what actually happens once you’re knee-deep in beads and twine.
Start Simple, Then Level Up
It’s tempting to jump straight into an elaborate multi-color, macramé-inspired creation. In
reality, your first tassel is a great chance to keep things simple: natural wood beads, plain
jute, one tassel, done. Once you’re comfortable with the process, you can start adding painted
beads, extra tassels, or decorative tags with seasonal phrases like “home,” “gather,” or
“blessed.”
Many crafters report that the first project takes the longest because they’re figuring out how
tight to tie knots, how many times to wrap the tassel, and which bead sizes they like best.
After that, you can easily make a new tassel in 10–15 minutes it’s the kind of craft you can
do while chatting on the phone or watching TV.
Batch Your Beads and Tassels
One of the most efficient approaches is to batch your work. Instead of making one full tassel
from start to finish, try:
- Painting or staining all your beads at once and letting them dry.
- Wrapping several tassels while you already have the cardboard and yarn out.
- Stringing multiple garlands during one “assembly” session.
This batching method is especially handy if you’re making wood bead tassels for gifts, markets,
or holiday decorating. You can create a whole coordinating collection in one afternoon: neutral
everyday garlands, a pastel set for spring, and a deeper color palette for fall and winter.
Use Tassels to Test Decor Trends (Without Committing)
Not sure if you’re ready to go full farmhouse or boho with your entire living room? Wood bead
tassels are a low-risk way to experiment. Try a neutral garland draped on your coffee table or
bookshelf, and see how it changes the feel of the room. If you love it, you can add more wood
accents, woven baskets, and natural textures to build on that look.
Similarly, seasonal tassels are a fun way to decorate for holidays without filling your home
with bulky items. A simple strand of natural beads with red, green, or metallic tassels can
carry a Christmas vignette. Neutral wood plus soft blues and whites can support a winter look
long after the ornaments are packed away.
Turn Mistakes Into “Design Choices”
Maybe you miscounted and ended up with one extra bead. Maybe the tassel you made for the end of
your garland is slightly shorter than the first one. Instead of tossing the whole project, lean
into it. Make the mismatch intentional by adding an accent bead near the shorter tassel or
trimming both tassels a bit shorter to match.
The truth is, most people will never notice where you “messed up.” They’ll just see a charming,
handmade piece that adds warmth and personality to your space.
Get the Most Out of Your Supplies
A big bonus of DIY wood bead tassels is how economical they are. A single bag of wood beads can
often stretch across multiple projects: a garland for your mantle, a smaller strand for a
tiered tray, and a few keychains or bag charms on the side. Leftover yarn or twine from other
crafts can easily become tassels instead of clutter in your supply bin.
If you’re buying beads and twine online, check the length and quantity before you add to cart.
Many farmhouse-style garlands in stores are 58–76 inches long; using similar dimensions can
help ensure your DIY version drapes just as nicely on mantels, shelves, or trees.
Share and Inspire
One of the best parts of making DIY decor is sharing it. Snap a before-and-after photo of your
coffee table, mantel, or entryway styled with your new wood bead tassel and post it to
Hometalk, Instagram, or your favorite DIY community. Not only do you get ideas for your next
project, but you’ll also pick up clever tips from other makers like using fabric scraps for
tassels or layering two garlands together for extra impact.
Once you’ve made one DIY wood bead tassel, you’ll understand why so many crafters keep coming
back to this project. It’s simple, relaxing, and gives you a stylish, high-impact decor piece
that looks like it came from a boutique home store not from your kitchen table and a $5 bag
of beads.


