Table of Contents >> Show >> Hide
- What Is a Fake Nose Piercing?
- Materials You Can Use for a Fake Nose Piercing
- How to Make a Fake Nose Piercing: 12 Steps
- Step 1: Decide Which Style You Want
- Step 2: Choose Skin-Friendly Materials
- Step 3: Clean Your Hands and Nose
- Step 4: Measure the Nose Area
- Step 5: Cut a Small Piece of Jewelry Wire
- Step 6: Shape the Wire Around a Round Object
- Step 7: Round and Smooth the Ends
- Step 8: Try the Hoop Gently
- Step 9: Make a Fake Nose Stud With a Gem
- Step 10: Check the Look From Different Angles
- Step 11: Wear It for a Short Test Run
- Step 12: Remove and Store It Properly
- Safety Tips for Wearing a Fake Nose Piercing
- How to Make a Fake Nose Piercing Look Real
- Common Mistakes to Avoid
- Best Occasions to Wear a Fake Nose Piercing
- Fake Nose Piercing vs. Real Nose Piercing
- Extra Experience Notes: What It Is Really Like to Make and Wear a Fake Nose Piercing
- Conclusion
Note: This guide is for creating a temporary, non-piercing nose accessory only. It should never be used to puncture skin, imitate a real piercing procedure, or replace advice from a professional piercer or healthcare provider.
A nose piercing can change your whole look in about two seconds. It can make a simple outfit feel more stylish, add a tiny bit of rebellion to a school-photo-level face day, or help you test whether you are truly a “nose hoop person” before committing to the real thing. The good news? You do not need a needle, a healing timeline, or a dramatic speech to your mirror. A fake nose piercing gives you the look without the permanent decision.
Learning how to make a fake nose piercing is surprisingly easy, affordable, and beginner-friendly. With a small piece of craft wire, a skin-safe adhesive gem, or a ready-made clip-on ring, you can create a realistic faux nose stud or hoop at home. The key is choosing smooth, skin-friendly materials, shaping the piece carefully, and wearing it safely for short periods. Think of it as fashion’s version of trying on bangsless risky, less emotional, and much easier to remove before dinner.
Below is a complete 12-step guide to making a fake nose piercing, plus styling tips, safety advice, common mistakes, and real-life experience notes to help your temporary nose jewelry look cute instead of “craft project gone rogue.”
What Is a Fake Nose Piercing?
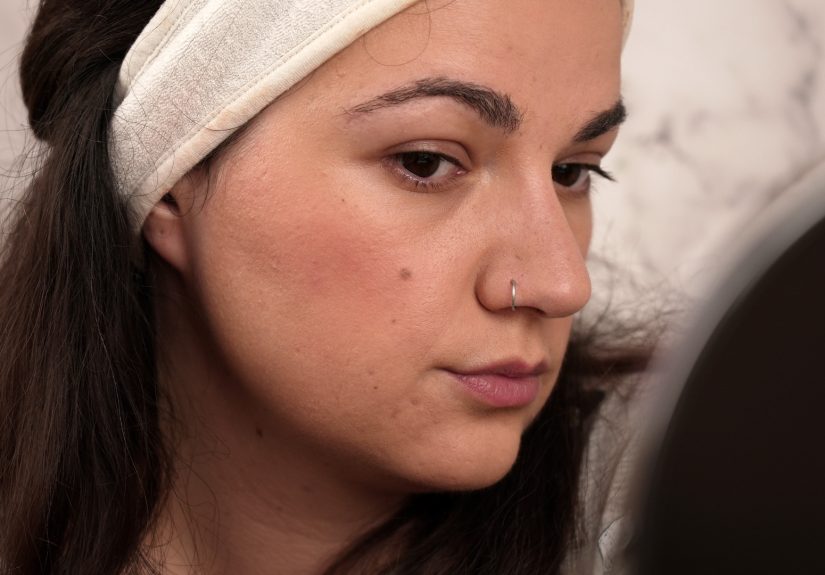
A fake nose piercing is temporary jewelry designed to sit on the nose without creating a hole in the skin. It can look like a nostril hoop, a tiny stud, a gem, or even a faux septum ring. Unlike a real piercing, it does not require healing time, aftercare for an open wound, or professional piercing tools. It is purely decorative.
Fake nose piercings are popular because they let you test different styles before committing to the real thing. They are also useful for costumes, photo shoots, dances, festivals, themed parties, or everyday self-expression. One day you can wear a delicate silver hoop; the next day you can go full sparkle goblin with a tiny rhinestone. Fashion loves options, and fake jewelry delivers.
Materials You Can Use for a Fake Nose Piercing
Before jumping into the steps, gather safe, simple materials. The best choice depends on whether you want a fake hoop, a fake stud, or a faux septum ring.
For a Fake Nose Hoop
You can use thin craft wire, jewelry wire, or a small pre-made open hoop. Look for smooth wire that bends easily but keeps its shape. A thin gauge is usually more comfortable because it does not press too hard on the nostril. Avoid rusty, rough, jagged, or mystery-metal wire from random drawers. Your nose deserves better than the hardware junk drawer.
For a Fake Nose Stud
A tiny flat-back rhinestone, adhesive body gem, or skin-safe cosmetic gem works well. You may also use a small bead attached with a cosmetic adhesive made for skin. Do not use super glue, nail glue, craft glue, or anything designed for paper, plastic, or construction. Your skin is not a scrapbook page.
For a Faux Septum Ring
A small U-shaped clip-on septum ring is the easiest option. You can also shape smooth wire into a small horseshoe design, but the ends must be rounded, smooth, and gentle. Septum-style fake jewelry should sit lightly and should never pinch hard or go too deep into the nose.
How to Make a Fake Nose Piercing: 12 Steps
Step 1: Decide Which Style You Want
Start by choosing your look. Do you want a subtle nose stud, a delicate nostril hoop, or a bold faux septum ring? A fake stud is the easiest style for beginners because it usually requires only a small adhesive gem. A hoop takes a little more shaping, while a faux septum ring needs careful sizing so it feels secure without pinching.
If you are testing whether a real piercing would suit your face, try a few styles before deciding. A tiny stud can look soft and minimal, while a hoop feels more noticeable. Septum rings create a stronger style statement. None is “better”it depends on your face shape, outfit, comfort level, and how much attention you want your nose to receive today.
Step 2: Choose Skin-Friendly Materials
Use smooth, clean materials that are less likely to irritate your skin. Hypoallergenic jewelry, nickel-free metals, surgical-grade stainless steel, titanium, sterling silver, and cosmetic-grade adhesive gems are commonly preferred for sensitive skin. Many inexpensive jewelry pieces may contain nickel, which can trigger itching, redness, dryness, or a rash in people with nickel sensitivity.
For a fake piercing, the jewelry only touches the outside of the skin, but irritation can still happen. If you already know your skin reacts to costume jewelry, choose nickel-free or hypoallergenic options. When in doubt, wear the piece for a short time first and check how your skin responds.
Step 3: Clean Your Hands and Nose
Wash your hands with soap and water before handling any jewelry. Then gently clean the area of your nose where the fake piercing will sit. A mild facial cleanser works well. Pat the skin dry with a clean towel.
This step matters because oil, sunscreen, makeup, sweat, and moisturizer can prevent adhesive gems from sticking properly. For hoops and clips, clean skin also helps reduce the chance of irritation. You do not need to scrub like you are preparing for surgery; just make sure the skin is fresh and dry.
Step 4: Measure the Nose Area
For a fake hoop, look at the curve of your nostril and estimate how wide the ring should be. You can use a small measuring tape, a strip of paper, or simply compare the wire to your nose in the mirror. The hoop should sit comfortably around the edge of the nostril without digging into the skin.
If the hoop is too large, it may look cartoonish or slide around. If it is too small, it may pinch. Aim for a shape that follows the natural curve of your nostril. The best fake nose piercing looks like it belongs therenot like it is trying to escape.
Step 5: Cut a Small Piece of Jewelry Wire
For a DIY fake hoop, cut a small piece of smooth jewelry wire. A length of about one to two inches is usually enough, depending on your nose size and the hoop style. Use jewelry cutters if available. Avoid leaving sharp points.
After cutting, inspect both ends. If they feel sharp, rough, or scratchy, do not put the wire near your face yet. Smooth the ends with a jewelry file, fine sandpaper, or a small rounded bead cap if you are experienced with jewelry making. Comfort and safety come first.
Step 6: Shape the Wire Around a Round Object
Wrap the wire around a small round object, such as a pen, makeup brush handle, or lip balm tube. This helps create a clean curve instead of a lumpy, uneven circle. Gently bend the wire into a C-shape or partial hoop.
Do not close the ring completely. A fake nose hoop usually needs a small opening so it can slide onto the nostril edge and stay in place through gentle tension. Keep the shape soft and rounded. If the hoop looks like a bent paperclip, keep adjusting. Tiny jewelry deserves tiny patience.
Step 7: Round and Smooth the Ends
This is one of the most important steps. The ends of the fake hoop should be smooth enough that they do not scratch or poke your skin. If you have small jewelry pliers, curl each end slightly inward to make it less sharp. You can also add tiny beads to the ends if they are secure and lightweight.
Never use a fake piercing with jagged, pointed, rusty, or splintered edges. Even though you are not piercing the skin, rough jewelry can still cause discomfort, redness, or tiny scratches. The goal is cute, not “why does my nostril feel attacked?”
Step 8: Try the Hoop Gently
Place the fake hoop on the outer edge of your nostril. Slide it on gently and adjust the opening until it feels secure but not tight. It should rest in place without squeezing hard. If you feel pain, pressure, throbbing, or sharpness, remove it and reshape it.
Fake hoops rely on light tension. They should not clamp aggressively. If you have to force it, it is too small. If it falls off every time you smile, laugh, or make a normal human face, it is too loose. Adjust slowly until it feels balanced.
Step 9: Make a Fake Nose Stud With a Gem
If you prefer a stud, use a small adhesive rhinestone or body-safe cosmetic gem. Clean and dry the side of your nose, then place the gem where a nostril piercing would usually sit. Press lightly for a few seconds so it sticks.
For extra hold, use a small amount of skin-safe cosmetic adhesive made for body gems or false lashes. Apply only a tiny dot. More glue does not mean better hold; it usually means messier removal. Avoid placing adhesive too close to the inside of your nostril. Keep everything on the outer skin surface.
Step 10: Check the Look From Different Angles
Look straight ahead, then turn your face to each side. Check the placement in natural light if possible. A fake nose piercing can look different depending on angle, lighting, makeup, and hairstyle.
For a realistic look, position a stud slightly above the nostril crease, not too high and not too close to the tip of the nose. For a hoop, line it up so the lower curve appears to wrap around the nostril naturally. Small placement changes can make a big difference. This is the part where your mirror becomes your creative director.
Step 11: Wear It for a Short Test Run
The first time you wear your fake nose piercing, keep it on for a short period. Try 30 minutes to an hour at home. Talk, smile, drink water, and move around normally. Check whether the jewelry stays put and whether your skin feels comfortable.
If you notice itching, burning, redness, swelling, or discomfort, remove the jewelry. Wash the area gently and give your skin a break. Temporary jewelry should feel easy and fun. If it feels irritating, the material, adhesive, size, or pressure may not be right for you.
Step 12: Remove and Store It Properly
Remove your fake nose piercing gently. For a hoop, slide it off without pulling. For an adhesive gem, loosen it slowly instead of ripping it away. If needed, use a little warm water or a skin-safe makeup remover to help dissolve adhesive.
Clean reusable pieces with mild soap and water, dry them fully, and store them in a small clean container. Do not toss them into a backpack, makeup bag, or pocket where lint, dust, and mystery crumbs live rent-free. Clean storage helps keep your fake jewelry ready for the next time you want a quick style upgrade.
Safety Tips for Wearing a Fake Nose Piercing
A fake nose piercing is safer than an actual DIY piercing, but you still need common sense. Do not sleep with fake nose jewelry on, especially small studs or magnetic pieces. Tiny accessories can fall off, get lost, or become a choking hazard. Remove them before showering, swimming, sports, or intense dancing that could launch your hoop into another dimension.
Be cautious with magnetic nose studs. They can look realistic, but small magnets should be kept away from young children and should not be placed where they might be inhaled or swallowed. If a magnet feels too strong, pinches, or slides toward the inside of the nose, choose a different style.
Also avoid wearing a fake nose piercing over irritated, broken, sunburned, or acne-inflamed skin. Give your skin time to calm down first. Temporary style should not make a skin issue worse.
How to Make a Fake Nose Piercing Look Real
The secret to a realistic fake nose piercing is restraint. Choose small, lightweight pieces. Oversized wire, huge gems, and bulky hoops can look costume-like unless that is the exact vibe you want. A delicate silver, gold, black, or rose-gold finish usually looks more believable.
Match the jewelry to your usual style. If you wear simple outfits and minimal makeup, a tiny stud may blend beautifully. If you like bold eyeliner, layered necklaces, or streetwear, a hoop or faux septum ring may feel more natural. The best fake piercing is the one that looks like you chose it on purpose.
Placement also matters. Real nostril piercings are typically positioned along the nostril curve, not randomly in the middle of the nose. Use photos of professional piercings as general placement inspiration, but remember that every nose shape is different. Your goal is not to copy someone else’s face; it is to find the spot where the jewelry flatters yours.
Common Mistakes to Avoid
Using Unsafe Glue
Never use super glue, nail glue, craft glue, hot glue, or industrial adhesive on your skin. These products are not made for facial use and may cause irritation or damage. Use cosmetic adhesive only.
Making the Hoop Too Tight
A fake hoop should not hurt. If it pinches, leaves a deep mark, or makes your nose sore, reshape it or remove it. Pain is not part of the aesthetic.
Ignoring Metal Sensitivity
If cheap jewelry makes your ears, neck, or fingers itch, your nose may react too. Choose hypoallergenic or nickel-free materials whenever possible.
Wearing It Too Long
Fake nose jewelry is best for temporary wear. Remove it at the end of the day and clean your skin. Even lightweight pieces can irritate skin if worn for too long.
Trying to Create a Real Piercing at Home
A fake piercing should remain fake. Do not attempt to pierce your nose at home. Real piercings should be done by trained professionals using sterile equipment, proper jewelry, and safe placement techniques.
Best Occasions to Wear a Fake Nose Piercing
A fake nose piercing is perfect when you want style flexibility. Wear one for a concert, school event, birthday party, Halloween costume, fashion photo shoot, weekend hangout, or just a regular Tuesday that needs more sparkle. It is also great for testing whether you want a permanent nose piercing someday.
If you are considering a real piercing, wear different fake styles for a week or two. Try a stud one day, a hoop the next, and a faux septum ring after that. Notice which one feels most like you. Sometimes the style you thought you wanted is not the one you end up loving.
Fake Nose Piercing vs. Real Nose Piercing
A fake nose piercing gives you instant style without healing time. You can remove it whenever you want, change styles easily, and avoid the commitment of a real piercing. However, it may not stay in place as securely as real jewelry, and some designs can feel less comfortable if poorly fitted.
A real nose piercing is more permanent and can look seamless once healed, but it requires professional placement, aftercare, healing time, and careful jewelry choices. Nostril piercings can take months to heal, and irritation, bumps, infection, or allergic reactions can happen if aftercare is poor or jewelry materials are not suitable.
If you are unsure, start fake. It is the easiest way to test the look without making a long-term decision. Fashion experiments are supposed to be fun, not stressful.
Extra Experience Notes: What It Is Really Like to Make and Wear a Fake Nose Piercing
The first thing most people notice when making a fake nose piercing is that size matters more than expected. A hoop that looks tiny in your hand may look huge on your nose. A gem that looks subtle in the package may suddenly announce itself like a disco ball under bathroom lighting. That is why testing is essential. Make one version, try it on, adjust it, and do not be surprised if your first attempt is more “practice round” than masterpiece.
Comfort is another big lesson. A fake hoop can look amazing for photos but feel annoying if the curve is uneven. The smallest rough edge can become noticeable because the nose is sensitive. When making a wire hoop, take extra time smoothing the ends and shaping the curve. A well-shaped fake hoop should feel almost forgettable. If you keep touching it, adjusting it, or thinking about it every five seconds, it probably needs reshaping.
Adhesive studs are usually easier, but they come with their own personality. Some stick beautifully all day; others give up after one dramatic facial expression. Skin prep makes a huge difference. Clean, dry skin helps the gem stay put. Heavy moisturizer, sunscreen, or oily foundation can make adhesive slide around. If you want to wear makeup with a fake stud, apply makeup first, let it set, then place the gem on top with a tiny amount of cosmetic adhesive.
Another real-world tip: take pictures before leaving the house. Fake nose piercings can look slightly different in selfies than they do in the mirror. A photo helps you check symmetry, placement, and whether the piece looks realistic from normal angles. It also helps you decide whether the jewelry matches your outfit. A tiny silver stud may look elegant with soft makeup, while a black hoop can add edge to a graphic tee, denim jacket, or bold eyeliner look.
People may ask whether it is real. That is normal. You can simply say, “No, I’m testing the look,” or “It’s temporary.” Most people are curious, not judgmental. In fact, fake piercings often start conversations because they let others imagine trying the style too. It is a low-pressure way to explore personal style without making a permanent change.
Storage is the underrated part. Tiny nose gems and hoops disappear with legendary speed. One minute they are on your desk; the next minute they have entered the same universe as lost hair ties and single socks. Use a small jewelry box, pill case, or zip pouch. Keep adhesive gems flat and clean. If a reusable hoop bends out of shape, reshape it gently before wearing it again.
The biggest experience-based lesson is simple: fake nose piercings work best when they feel like play. You are allowed to experiment. Try gold, silver, rhinestone, pearl, black, hoop, stud, and septum-inspired styles. Some will suit you; some will look like you borrowed jewelry from a pirate fairy. That is part of the fun. Because the piercing is temporary, you can remove it, redesign it, and try again whenever you want.
Conclusion
Making a fake nose piercing is an easy, creative way to explore a new look without committing to a real piercing. With smooth materials, careful shaping, clean skin, and a little patience, you can create a realistic fake nose hoop, stud, or faux septum ring at home. The most important rules are simple: keep it temporary, keep it comfortable, use skin-friendly materials, and never use unsafe adhesives or sharp edges.
Whether you are testing a future piercing, building a costume, styling a photo shoot, or just giving your face a tiny accessory upgrade, a fake nose piercing lets you experiment freely. It is affordable, removable, and surprisingly fun. Best of all, if you change your mind, you can take it off in two secondsno healing schedule, no regret, no awkward “why did I do this?” moment required.