Table of Contents >> Show >> Hide
- Why the “Sunrise” Floating Mirror Is So Popular
- Project Overview
- Materials and Tools
- Step-by-Step: Build the Sunrise Backer and Shelf
- Attaching the Mirror to the Shelf and Backer
- Safe Ways to Hang a Modern “Sunrise” Floating Mirror + Shelf
- Styling Ideas for Your Sunrise Floating Mirror
- Troubleshooting and Pro Tips
- Real-Life Experiences and Lessons Learned
- Conclusion
Imagine rolling out of bed, shuffling into the bathroom, and being greeted by a mirror that looks like a sunrise instead of a sad rental-grade rectangle. That’s the magic of a modern “sunrise” floating mirror with a built-in shelf: it’s part art, part storage, and 100% glow-up for your walls.
This DIY project takes a simple round mirror and transforms it into a sculptural focal point with a curved wood backer that mimics the sun rising over a horizon shelf. It looks designer, but it’s totally doable with basic tools, a free weekend, and maybe a podcast in the background. In this guide, you’ll learn how to build the sunrise backer, add a floating shelf, and hang the whole thing safely so it actually stays on the wall instead of becoming “that one time I broke a mirror and possibly my floor.”
Why the “Sunrise” Floating Mirror Is So Popular
Round mirrors and floating shelves have been trending for years, and for good reason: soft curves instantly modernize a space and break up all the straight lines from tile, cabinets, and doors. When you combine a round mirror with a half-circle wood backer and a slim shelf, you get:
- Visual drama – The sunrise shape frames the mirror and makes it look custom, not builder-basic.
- Extra storage – The ledge is perfect for tiny plants, perfume bottles, or your “I swear I’ll put this away later” items.
- Small-space friendly design – It works above a bathroom vanity, in an entryway, or over a console table without feeling bulky.
- Budget-friendly impact – You can start with an inexpensive basic round mirror and scrap lumber instead of buying an expensive designer piece.
Project Overview
At its core, this modern sunrise floating mirror + shelf is made of four main parts:
- A round mirror (usually 18–30 inches wide).
- A sunrise-shaped wood backer – essentially a half-circle cut from a plywood or solid-wood circle.
- A floating shelf “horizon” that intersects the bottom of the mirror.
- A secure hanging system, like a French cleat, keyhole hangers, or z-bar, to keep everything safely on the wall.
If you’re comfortable making simple straight cuts and sanding, you can absolutely tackle this. The only slightly advanced move is cutting the circle (or half-circle), but there are easy ways to cheat that too, which we’ll cover.
Materials and Tools
Materials
- 1 round mirror (18–30″ diameter, frameless or thin-framed)
- 1 wood round (same size or slightly larger than your mirror) or a panel you can cut into a circle
- 1 board for the shelf (1×4 or 1×6 is common; hardwood or quality plywood)
- Wood glue
- Wood screws (for attaching shelf to backer)
- Construction adhesive or mirror-rated adhesive for attaching mirror to wood
- Heavy-duty hanging hardware (French cleat, z-bar, or keyhole brackets rated for the total weight)
- Sandpaper (120–220 grit) or sanding sponges
- Wood filler (optional, for screw holes or seams)
- Primer and paint or stain and clear topcoat
- Painters tape, pencil, and a level
- Wall anchors or screws into studs for hanging
Tools
- Circular saw, jigsaw, or router with circle-cutting jig (for the sunrise backer)
- Miter saw or circular saw (for the shelf)
- Drill/driver and bits
- Clamps (helpful but not mandatory)
- Measuring tape and straightedge
- Stud finder (for safe hanging)
Step-by-Step: Build the Sunrise Backer and Shelf
1. Decide on your size and layout
First, decide where your modern sunrise floating mirror will live. Above a bathroom vanity? In an entryway? Over a dresser? Measure the wall width and height so your mirror doesn’t overpower the space or look like a tiny porthole.
A common combo is a 24″ round mirror with a 24″ wood circle backer cut in half. The shelf usually runs the full width of the backer or slightly widerthink 24–28″and sticks out from the wall about 4–6″, enough to hold essentials without becoming a forehead hazard.
2. Cut the sunrise-shaped backer
If you’ve bought a pre-cut wood circle, you’re ahead of the game. Mark a line straight through the center of the circle using a straightedge. Cut along this line with a circular saw or jigsaw to create two perfect half circles. You’ll use one for this project, and you can stash the other for a future DIY (or pretend you totally planned that).
If you’re starting from a rectangular panel, use a homemade circle jig, router, or jigsaw to cut a circle the same diameter as your mirror, then slice it in half. Sand the curved edge and straight cut until smooth.
3. Cut and prep the floating shelf
Cut your shelf board to the same width as the flat edge of the half-circle (or a bit wider if you want a slight overhang). For example, if your sunrise backer is 24″ wide, cut the shelf 24–26″ long.
You can leave the front edge square for a clean, modern look or soften it with a round-over bit or sanded bevel. Sand all edges and faces until they’re smooth to the touchno one wants to get a splinter while grabbing their mouthwash.
4. Attach the shelf to the sunrise backer
Lay the half-circle face down on a flat surface with the flat edge toward you. Place the shelf along that straight edge so it overlaps the backer by about half the shelf’s width. Mark the position with pencil lines.
- Apply wood glue along the back edge of the shelf where it will contact the backer.
- Clamp the shelf to the backer, keeping everything aligned.
- From the back side of the sunrise panel, pre-drill and drive wood screws into the shelf. Space them every 4–6″ for strength.
Wipe away any glue squeeze-out with a damp rag. Once dry, fill any visible holes with wood filler if you want a seamless look.
5. Sand, prime, and finish
Sand the entire sunrise backer and shelf assembly, paying extra attention to seams and edges. Then it’s time for the fun decision: paint or stain?
- Painted look: Prime first, then apply 2–3 coats of your chosen color. Warm whites, soft taupes, and muted terracotta tones work beautifully with the “sunrise” vibe.
- Stained wood: Apply stain in thin coats, wiping back excess. Seal with a clear topcoat for durability, especially in steamy bathrooms.
Let everything cure fully according to the product instructions. Rushing this step is how fingerprints, dust, and mysterious pet hair end up permanently embedded in your finish.
Attaching the Mirror to the Shelf and Backer
6. Plan your mirror placement
Flip the sunrise backer face up and lay the round mirror on top. Typically, the bottom of the mirror overlaps the shelf slightly, so it looks like the sun rising from behind the horizon. Adjust until it looks visually balancedusually the mirror sits centered left-to-right with 2–4″ of wood “sky” showing above it.
Once you’re happy, trace lightly around the mirror with pencil so you can remove it and still know where it goes.
7. Use mirror-safe adhesive
You’ll want to use either mirror mastic or a construction adhesive specifically labeled as safe for mirrors. Some adhesives can damage the reflective backing over time, so this is not the time to grab a random tube from the bottom of your tool bin.
- Clean the back of the mirror and the front of the painted or sealed wood where the mirror will sit.
- Apply adhesive in vertical “sausages” or generous dots within the traced outline, leaving some space near the edges so it doesn’t squeeze out.
- Carefully set the mirror onto the adhesive, aligning it with your pencil marks.
- Press gently but firmly, and use painter’s tape to hold it in place while the adhesive cures.
Follow the manufacturer’s cure timeoften 24 hours or morebefore lifting or hanging the mirror. Yes, waiting is annoying. Yes, it’s worth it.
Safe Ways to Hang a Modern “Sunrise” Floating Mirror + Shelf
A sunrise floating mirror isn’t just a mirror; it’s a mirror plus a wood backer plus a shelf plus whatever you pile on that shelf. Translation: it’s heavy. You want a secure hanging system that’s rated for more than the total weight of the piece and firmly anchored into the wall.
Best hanging options
- French cleat or z-bar: Two interlocking metal stripsone on the back of the sunrise panel, one screwed into the wall studs. The mirror then “hangs” on the cleat, distributing weight across a wide area.
- Keyhole brackets: Metal brackets recessed into the back of the panel that hook over screws in the wall. Good for medium weight, but still best anchored into studs.
- Heavy-duty D-rings and wire: Works in some cases, but is less ideal with a built-in shelf because the weight wants to pull outward.
Skip lightweight adhesive hooks for this projectthose are better for holiday décor and tiny frames, not heavy glass-and-wood pieces. Your sunrise mirror deserves better than a suspenseful “will it fall?” subplot.
Mounting tips
- Locate studs with a stud finder and mark them lightly.
- Measure from the top of the sunrise backer down to the hanging hardware on the back.
- Transfer those measurements to the wall, using a level so your mirror doesn’t look like the sun is melting.
- Pre-drill and install wall screws or the wall-side cleat, then carefully hang the piece.
Step back, adjust if needed, and celebrate by placing one (1) tiny plant or candle on the shelf like a ceremonial ribbon cutting.
Styling Ideas for Your Sunrise Floating Mirror
Once your modern mirror with shelf is up, you get to play stylist. A few easy ideas:
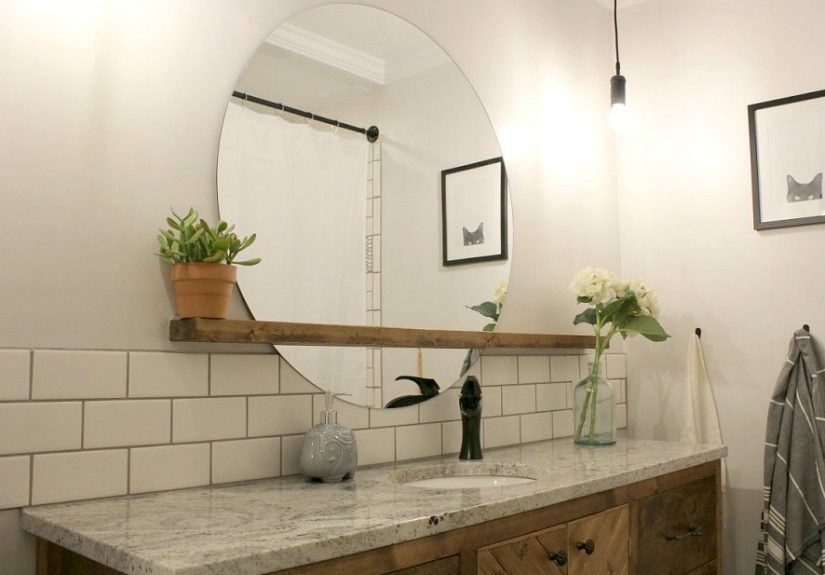
- Bathroom vanity: Add a small bud vase, a pretty soap dispenser, and a lidded jar for cotton rounds. Keep it simple so you still have space to actually live your life.
- Entryway: Use the shelf for a tiny catch-all dish, keys, and a favorite candle. Hang hooks or a small rail below for bags and hats.
- Bedroom: Treat it like a mini vanity. Store perfume bottles, jewelry dishes, or a small hand cream on the shelf.
- Color story: Lean into the sunrise theme with warm metals (brass, gold), soft peach or blush tones, and natural textures like rattan or linen nearby.
Troubleshooting and Pro Tips
- Mirror looks too small? Use a larger wood circle so there’s more “sunrise” showing around it, or widen the shelf to visually anchor the piece.
- Shelf feels bulky? Switch to a thinner board (like a 1×3), round over the front edge, or paint it the same color as the wall for a more subtle effect.
- Backer warped a little? Thicker plywood (3/4″) or a solid wood panel helps. If there’s mild warping, the French cleat and wall screws may pull it straighter.
- Worried about bathroom humidity? Use a good primer and a moisture-resistant topcoat, and avoid leaving raw wood exposed.
Real-Life Experiences and Lessons Learned
On paper, “How to Make a Modern ‘Sunrise’ Floating Mirror + Shelf” sounds like a straightforward weekend project. In real life, it’s more like a mini design adventurewith sawdust. Here’s what people typically learn along the way (and what you can cheat off of before you even pick up a saw).
The first surprise is usually the scale. When you lay a 24″ mirror and a matching sunrise backer on the floor, it looks enormous. But once it’s on the wall above a vanity or console, it suddenly feels just right. If anything, many DIYers wish they’d gone a size bigger. The lesson: mock it up first. Tape a paper circle and a paper half-circle on the wall and live with it for a day. That five minutes of taping can save you from days of “hmm, should we have gone bigger?” every time you brush your teeth.
The second big moment is discovering that wood circles are not all created equal. Pre-cut rounds can be slightly out of true, and budget plywood sometimes has voids inside that show up when you cut it. People often start out frustrated, then realize they can sand the curve, fill imperfections, and still end up with a piece that looks expensive once it’s finished. If your sunrise backer doesn’t look flawless right off the saw, you’re in very normal, very human company.
Hanging is where the adrenaline kicks in. Most folks underestimate how heavy a floating mirror + shelf combo becomes once it’s fully assembled. The experience of trying to hold the piece, line up the hardware, and not yell “THIS IS FINE” is pretty universal. The fix is simple: install the wall hardware first, then recruit a second person for the actual hanging. A stud finder and a French cleat turn a nerve-wracking moment into a satisfying “click” as the sunrise mirror locks into place. You feel like a magician. A slightly sweaty magician, but still.
Another recurring theme: finishes matter more than perfection. Tiny gaps, a slightly uneven line on the backer, or a minor dent in the wood all but disappear once the piece is painted or stained. Warm tones like honey oak, light walnut, or creamy white bring out the “sunrise” mood; dramatic black or charcoal turns it into modern wall sculpture. People who experiment with colorlike painting the backer a soft terracotta and leaving the shelf naturaloften end up the happiest, because the mirror feels custom to their space, not just “Pinterest-inspired.”
Then there’s the everyday experience after install. The shelf becomes a tiny stage for your personality: a trailing plant one month, a seasonal candle the next, maybe a framed mini print propped against the mirror when you get restless with your décor. A lot of DIYers report that this little ledge quietly nudges them to keep the counter below cleaner, because clutter suddenly has a prettier place to live. It’s like a very gentle, very stylish accountability coach.
Finally, there’s the long-term lesson: this project changes how you see your home. Once you’ve built a modern sunrise floating mirror from a simple round mirror and some lumber, you start eyeing every flat surface as a potential upgrade. Boring wall? Maybe it needs a curved shelf. Builder-grade hallway? Perhaps another mirror moment. You gain confidence with tools, you learn how to plan for weight and hardware, and you realize that a designer look is often just a clever shape plus good proportions.
So when you stand in front of your finished sunrise mirrorhair a mess, coffee in hand, shelf styled just soyou’re not just seeing your reflection. You’re seeing a reminder that with a bit of creativity and effort, you can literally reshape the things you live with every single day. That’s a pretty great way to start the morning.
Conclusion
A modern “Sunrise” floating mirror + shelf brings softness, function, and a custom feel to any bathroom, entryway, or bedroom. By layering a round mirror over a half-circle wood backer and adding a slim floating shelf, you get a piece that looks boutique but is absolutely DIY-friendly. The key ingredients are careful planning, mirror-safe adhesive, sturdy hanging hardware, and a finish that works with your existing décor.
Whether you follow the classic Remodelaholic-style sunrise look or tweak the proportions and colors to fit your home, this project is a smart way to elevate a basic mirror into a statement moment. And every time you catch the “sun” rising on your wall, you’ll know you built it yourselfno designer price tag required.


