Table of Contents >> Show >> Hide
- What You’ll Need
- Step 1: Decide What Kind of Tinkerbell You Want to Be
- Step 2: Start With a Comfortable Green Base
- Step 3: Measure for Fit Before You Add the Magic
- Step 4: Create the Signature Tinkerbell Dress Shape
- Step 5: Add Texture With Tulle or a Soft Tutu Layer
- Step 6: Make the Leaf Details Look Intentional
- Step 7: Build or Buy the Fairy Wings
- Step 8: Attach the Wings So They Stay Put
- Step 9: Make the Famous Pom-Pom Shoes
- Step 10: Style the Hair in a Tinkerbell Bun
- Step 11: Keep the Makeup Light, Fresh, and Fairy-Like
- Step 12: Add the Accessories That Finish the Look
- Step 13: Do a Final Wear Test and Safety Check
- Common Mistakes to Avoid
- Conclusion
- Experience and Lessons Learned From Making a Tinkerbell Costume
If you have ever looked at a Tinkerbell costume and thought, “Cute… but why does it cost as much as a small electric bill?” welcome to the fairy workshop. The good news is that making your own version is absolutely doable, even if your sewing machine is currently acting as a decorative shelf. A classic Tinkerbell look is really built on a few signature details: a green dress, light fairy wings, playful shoes, a neat bun, and just enough sparkle to say “pixie” without saying “craft store explosion.”
This DIY guide walks you through a practical, wearable, and fun Tinkerbell costume in 13 clear steps. It works for adults, teens, and kids with a few easy size adjustments. Better yet, you can make it super polished, slightly whimsical, or gloriously last-minute depending on your budget, skill level, and tolerance for glitter in your car the next morning.
What You’ll Need
- A green dress, green tank and skirt, or a long green tee
- Green felt or fabric scraps
- Tulle for volume or a tutu effect
- Hot glue gun or fabric glue
- Scissors
- Elastic or ribbon
- Fairy wings or DIY wing materials
- Flats, ballet shoes, or comfortable sandals
- White pom-poms for the shoes
- Headband, bobby pins, and hair ties
- Optional makeup, body shimmer, and a wand
Step 1: Decide What Kind of Tinkerbell You Want to Be
Before you cut, glue, or dramatically hold fabric against yourself in the mirror, decide on the vibe. Do you want a classic storybook Tinkerbell, a softer woodland fairy version, or a quick Halloween-friendly costume? That choice affects everything else. A classic look leans toward a bright green mini dress with a pointed leaf hem, translucent wings, and tidy ballet-inspired styling. A woodland version may use mossy green, floral details, and a more natural texture. A quick costume can start with a green dress from your closet and a few clever accessories.
This step matters because it keeps you from buying twelve “maybe” supplies and ending up with a costume that looks like Tinkerbell moonlighted as a Christmas elf. No judgment. It happens.
Step 2: Start With a Comfortable Green Base
The base outfit is the backbone of your costume. You can use a simple green slip dress, a stretchy green tank dress, a tunic, or even a green top paired with a skirt. If you are making this for a child, a sweatshirt dress or soft cotton set can be a smart choice for comfort, warmth, and easier movement. If you are making it for an adult, choose something that fits well and lets you sit, walk, and raise your arms without feeling like a trapped houseplant.
Look for a shade of green that feels bright and magical rather than muddy. Lime, leaf, grass, and soft emerald tones work especially well. The exact shade is flexible. What matters most is that the color reads instantly as fairy-like and gives you a cheerful backdrop for the wings and accessories.
Step 3: Measure for Fit Before You Add the Magic
One of the biggest DIY costume mistakes is decorating first and discovering later that the outfit rides up, drags, twists, or refuses to zip. Try on the base outfit with the shoes you plan to wear. Check the hem length. Make sure it is short enough to avoid tripping but long enough to stay comfortable when walking or sitting. If the costume is for a child, do a full movement test: walk, spin, bend, crouch, and perform a dramatic fairy escape across the room.
This is also the time to think about weather. If it will be chilly, build in leggings, bike shorts, or a fitted long-sleeve layer underneath. Nobody looks enchanted while shivering aggressively in a driveway.
Step 4: Create the Signature Tinkerbell Dress Shape
Now it is time to transform a regular green outfit into something unmistakably Tinkerbell-inspired. The easiest method is to cut a jagged leaf hem along the bottom of the skirt or dress. Do this slowly. Start by marking triangles or soft points with chalk or a washable fabric marker. Then trim little by little instead of going full scissors tornado.
If you do not want to cut the original garment, make a removable leaf overlay from green felt. Cut several leaf shapes and glue or stitch them around the hemline. You can also add a few leaf points at the neckline or shoulder straps for extra character. This gives the costume that classic fairy silhouette without requiring advanced sewing skills or emotional resilience after one bad cut.
Step 5: Add Texture With Tulle or a Soft Tutu Layer
A little volume makes the costume look more finished. Add green or pale green tulle underneath the skirt for a flouncy effect, or create a quick no-sew tutu using strips of tulle tied around elastic. This is especially useful if the dress is simple and you want more movement. The tulle should add bounce, not turn you into a decorative lampshade, so keep the layers light.
For kids, a soft tutu layer also adds that playful fairy-princess energy people love for Halloween parties and dress-up events. For adults, a subtle underskirt can make the costume look polished in photos without feeling bulky. If you prefer a cleaner shape, skip the full tutu and add tulle only at the back or sides for a slight magical swish.
Step 6: Make the Leaf Details Look Intentional
This is where the costume goes from “green outfit with ambitions” to “yes, that is definitely Tinkerbell.” Cut leaf shapes from felt or satin and attach them around the neckline, waist, or hem. You can overlap them slightly for a layered effect. Mix two shades of green if you want more depth. A few tiny faux flowers or subtle gold trim can also help, but do not overdo it. Tinkerbell is airy and playful, not a mobile craft aisle.
If you want a belt, use a ribbon sash or a thin strip of elastic wrapped in green fabric. Tie it at the waist and let the ends fall softly. It adds shape and makes the dress feel more custom-made.
Step 7: Build or Buy the Fairy Wings
Wings are the star accessory, and you have two good options. The first is to buy a simple pair of translucent fairy wings and customize them with glitter paint, ribbon, or felt swirls. The second is to make your own by shaping wire hangers into rounded wing forms, stretching tights or sheer fabric over them, and joining the pieces together in the center.
If you make your own, keep them lightweight. Fancy is nice, but being able to sit in a car or get through a doorway without turning sideways like a refrigerator is even nicer. Add a few decorative lines with metallic marker, glue on tiny appliqués, or leave them simple and elegant. Pale green, clear shimmer, or iridescent finishes all work beautifully for a Tinkerbell costume.
Step 8: Attach the Wings So They Stay Put
There is nothing magical about wings that slap you in the back of the head every time you move. Use elastic loops like backpack straps so the wings sit comfortably and securely. If the costume is for a child, make sure the straps are soft and not scratchy. Test how the wings feel while walking and sitting. If they lean backward too much, reinforce the center with felt or add a ribbon tie around the chest or shoulders.
Also think about scale. Oversized wings look cute in pictures, but medium wings are often easier to wear. The best wings are the ones you forget you are wearing until someone compliments them.
Step 9: Make the Famous Pom-Pom Shoes
Tinkerbell shoes are a tiny detail with huge costume payoff. Start with flats, ballet slippers, or low-profile sandals in green, gold, nude, or metallic tones. Then glue or clip fluffy white pom-poms to the tops. That simple upgrade gives the costume an instantly recognizable finish.
If you are walking a lot, choose comfort over strict costume accuracy. Cushioned flats beat blisters every single time. For kids, secure the pom-poms well and make sure the shoes fit properly. This is not the place for borrowed heels, mystery sandals, or anything that turns trick-or-treating into an ankle-based plot twist.
Step 10: Style the Hair in a Tinkerbell Bun
The hairstyle pulls everything together. A high bun is the easiest and most recognizable option. Smooth the hair back, twist it into a bun, and secure it with pins and a hair tie. If you want more volume, use a bun form or tease the ponytail slightly before wrapping. Loose bangs or soft face-framing pieces can make the look gentler and more modern.
If the hair is short, no problem. Use a headband, clip-in bun, or even a blonde wig if that suits the overall look. The goal is not perfection. The goal is to make the costume read instantly and feel fun to wear.
Step 11: Keep the Makeup Light, Fresh, and Fairy-Like
Tinkerbell makeup works best when it stays light and playful. Think soft green or gold shimmer on the eyes, rosy cheeks, mascara, and a fresh lip color. A little highlight on the cheekbones adds a magical glow. If you want extra flair, draw a tiny winged shape at the outer corner of the eyes or add a touch of face-safe glitter away from the lash line.
Be smart here: test products before wearing them, avoid anything that irritates the skin, and keep craft glitter off the eye area. For children, simple makeup or no makeup at all is perfectly fine. A bright smile and fairy wings are already doing most of the heavy lifting.
Step 12: Add the Accessories That Finish the Look
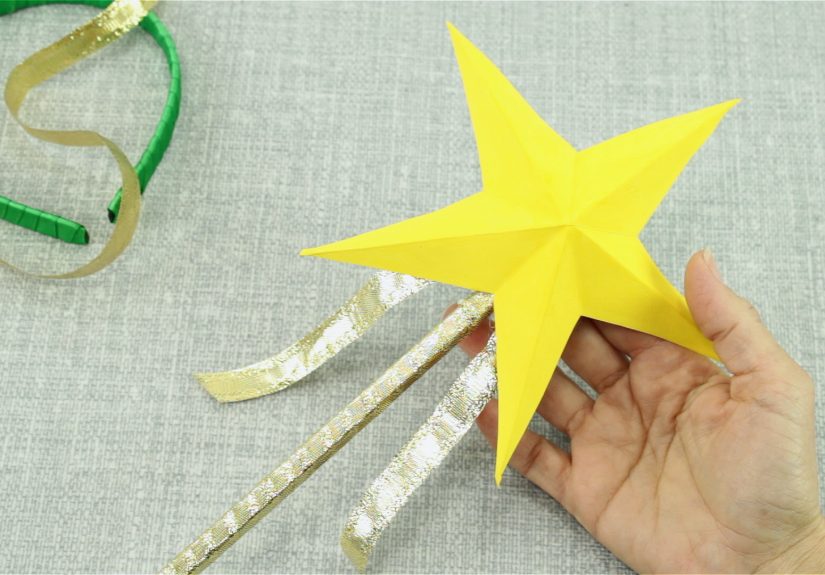
At this point, your costume already works. Accessories just make it sing. A wand wrapped in ribbon, a floral headband, tiny butterflies clipped near the bun, or a little sparkle on the wings can elevate the final effect. You can also add a mini drawstring bag or basket for practicality. Let us be honest: every fairy needs somewhere to keep lip balm, keys, and emergency snacks.
If you are dressing as Tinkerbell for a group costume, coordinate with Peter Pan, Wendy, or Lost Boys colors. If you are wearing the costume solo, keep the accessories cohesive. Pick two or three strong details instead of piling on everything in the craft bin.
Step 13: Do a Final Wear Test and Safety Check
The final step is not glamorous, but it is the one that keeps your costume from betraying you in public. Put the full outfit on and walk around. Sit down. Reach overhead. Go through a doorway. Make sure the hem does not drag, the wings do not wobble wildly, and the shoes stay secure. If you are out after dark, add reflective details subtly to the bag or wings. If open flames are around, skip anything too billowy and keep delicate fabrics away from candles or heaters.
For kids, hats should not slide over the eyes, masks should not block vision, and accessories should be soft and easy to carry. For adults, make sure the costume still feels comfortable after twenty minutes, not just in the mirror for twenty seconds. The best DIY Tinkerbell costume is pretty, practical, and built to survive real life.
Common Mistakes to Avoid
- Choosing itchy fabric and regretting every life decision by hour one
- Making the wings too heavy or too wide
- Cutting the hem too short too quickly
- Using shoes that are cute but impossible to walk in
- Adding too much glitter and creating a permanent sparkle trail through your house
- Skipping the fit test before the event
Conclusion
Making a Tinkerbell costume is one of those DIY projects that looks impressive without requiring costume-designer superpowers. With a green base, leaf-inspired details, light wings, comfortable shoes, and a little playful styling, you can create a look that feels instantly recognizable and wonderfully personal. Whether you sew, glue, pin, or simply improvise like a fairy under pressure, the charm comes from balancing whimsy with wearability.
The real secret is not perfection. It is smart choices: comfortable materials, secure wings, practical shoes, and enough sparkle to catch the light without becoming the light. Build the costume around movement, comfort, and a few signature details, and you will end up with a DIY outfit that feels magical, photographs beautifully, and does not fall apart before the candy bowl is empty.
Experience and Lessons Learned From Making a Tinkerbell Costume
Anyone who has made a Tinkerbell costume more than once will tell you that the first draft and the final version are rarely the same creature. On paper, it sounds easy: green dress, wings, bun, done. In reality, the process tends to include at least one moment where someone hot-glues a leaf on backward, realizes the wings do not fit in the car, or discovers that “comfortable enough” shoes were part of an elaborate lie. That is exactly why this costume is such a great DIY project. It teaches you quickly which details matter most.
One common experience is learning that materials change everything. A costume made from stiff fabric can look sharp on a hanger but feel miserable after an hour. Softer knits, cotton blends, and light tulle often win because they move better and photograph well without making the wearer feel shrink-wrapped in green optimism. People also tend to discover that a simple dress with thoughtful details almost always looks better than an overworked one. A neat leaf hem, a flattering waistline, and wings that sit properly beat a mountain of extra trim every time.
Another lesson comes from the wings. Nearly everybody starts out wanting giant, dramatic, enchanted wings that could probably pick up local radio signals. Then reality enters wearing a sensible cardigan. Large wings bump into chairs, knock into walls, and make crowded spaces awkward. Medium-size wings usually give the best result. They still look magical, but they allow the wearer to move like a person instead of a parade float.
Shoe choices also become strangely emotional during the process. The fluffy pom-poms are adorable, but the base shoe matters more than people expect. A costume can look fantastic until the wearer has to stand in line, walk around a school event, or trick-or-treat for an hour. At that point, supportive flats become the unsung heroes of the fairy kingdom. Plenty of DIY costume makers say the same thing after the event: nobody complimented the pain level of the shoes, but everyone noticed the costume looked polished and effortless.
Hair and makeup usually end up being the easiest win. A tidy bun instantly sharpens the whole costume, and simple shimmer makeup often looks better than anything too theatrical. In fact, many of the best homemade Tinkerbell costumes are the ones that stop just short of overdoing it. They feel breezy, bright, and wearable. The person looks like a fairy, not like they lost an argument with a glitter cannon.
Perhaps the best part of the experience is how customizable the costume is. Some people make it elegant for adults, some make it cozy for kids, and some create a quick closet version in under an hour. Yet the final reaction is usually the same: the costume feels charming, recognizable, and a little bit triumphant because it was made by hand. That is the magic people remember. Not perfection. Not expense. Just the moment the wings go on, the pom-poms are attached, and suddenly an ordinary outfit becomes something delightfully fairy-tale-ish.