Table of Contents >> Show >> Hide
- Why Wooden Garden Markers Are the MVP of Veggie Gardens
- Pick the Right Wood (So Your Markers Don’t Become Compost in July)
- Tools & Materials
- Step-by-Step: Classic Wooden Stake Garden Markers
- Three Labeling Methods That Actually Hold Up Outdoors
- Design Ideas for an Organized Vegetable Garden
- Weatherproofing Tips (Because the Sun Is a Bully)
- Troubleshooting: When DIY Garden Markers Misbehave
- Two Fun Variations: Wood Disc Markers and Wooden Spoon Markers
- Maintenance: Make Them Last for Next Season
- Extra: Real-World Experiences & Lessons from DIY Wooden Vegetable Garden Markers (500+ Words)
- Conclusion
Every vegetable garden starts with big dreams… and ends (at least once) with someone whispering,
“Is this basil… or is it the weed that has emotionally adopted me?”
Wooden vegetable garden markers solve the mystery, level up your garden’s look, and keep you from
harvesting “surprise jalapeños” when you were absolutely sure you planted bell peppers.
In this guide, you’ll learn how to make durable, good-looking DIY wooden garden markersusing simple
materials, weatherproof labeling methods, and a few pro tricks to help them survive sun, rain, and the
occasional overenthusiastic watering can.
Why Wooden Garden Markers Are the MVP of Veggie Gardens
Plastic tags work… until they snap, fade, or vanish into the soil like they’re auditioning for a magic show.
Wooden plant markers are different: they’re sturdy, customizable, easy to read, and they look like you
actually have your life together (even if your tomatoes disagree).
What makes wooden markers worth it?
- They’re easy to make in batchesone cutting session, then you label as you plant.
- They’re prettier than random nursery tagsand you can match them to your garden style.
- They’re flexiblepainted, wood-burned, stenciled, or decorated with icons.
- They’re reusableespecially if you seal them well and store them dry.
Pick the Right Wood (So Your Markers Don’t Become Compost in July)
The biggest factor in how long your DIY wooden garden labels last is the wood itself. Garden markers live
outdoors and often touch damp soilbasically a spa resort for rot. Choosing the right material is the
difference between “lasts all season” and “mysteriously dissolves after a thunderstorm.”
Best woods for vegetable garden markers
- Cedar: Naturally rot-resistant, lightweight, and a classic for outdoor garden projects.
- Redwood: Similar benefits to cedar (often pricier, depending on your area).
- Hemlock: Also used for outdoor garden builds; can hold up well when sealed.
- Birch (craft markers): Great for short markers in pots or seed traysseal it for outdoor beds.
What about pressure-treated wood?
For edible gardens, many gardeners prefer naturally rot-resistant wood options instead of treated lumber,
especially when parts will be in contact with soil. If you’re growing vegetables and want to keep things simple,
stick with cedar or other naturally durable woods for your stakes and labels.
Quick cheat sheet
| Material | Best For | How Long It Tends to Last | Notes |
|---|---|---|---|
| Cedar stakes | Raised beds, in-ground rows | Season(s), with sealing | Great rot resistance; seal the label area for best results. |
| Pine paint sticks | Budget batch markers | Season, with good sealing | Works well if you seal thoroughly and keep the writing above soil. |
| Birch craft markers | Seed trays, pots | Short-term outdoors | Best for lighter-duty labeling; seal if exposed to weather. |
| Wood discs + bamboo stake | Decorative “tag” markers | Season(s), if sealed | Looks boutique; keep discs above splash zone. |
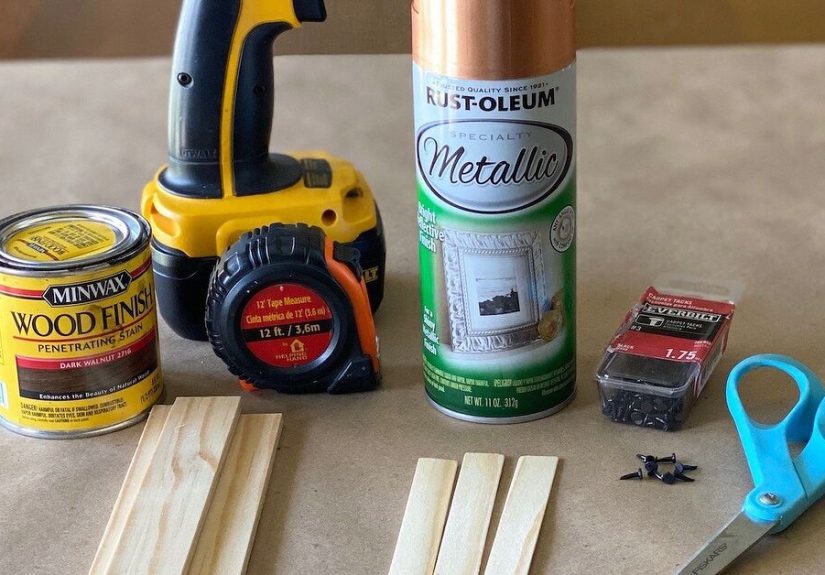
Tools & Materials
You can make wooden vegetable garden markers with basic supplies. If you’ve got a saw and sandpaper, you’re
already halfway to being the “organized gardener” your friends think you are.
Wood options
- Cedar fence pickets (cut into stakes)
- Paint stir sticks or paint sticks (budget-friendly)
- 1×2 cedar boards (for thicker, longer-lasting markers)
- Wood discs (for tag-style markers)
- Wooden spoons (for a fun upcycled look)
Labeling supplies
- Paint pens or outdoor permanent markers
- Acrylic paint (optional for color blocks)
- Stencils (optional, for neat lettering)
- Wood-burning tool (optional, for rustic labels)
Finishing supplies (the “make it last” part)
- Outdoor sealant / exterior clear coat (brush-on or spray)
- Exterior-grade polyurethane or spar urethane (great for weather resistance)
- Fine sandpaper (120–220 grit)
Tools
- Handsaw, miter saw, or utility knife (depending on wood thickness)
- Ruler / tape measure + pencil
- Clamps (helpful, not required)
- Drill (optional, if you’re attaching discs or making holes)
Safety note
If you’re using power tools, a wood-burning tool, or strong finishes, work in a well-ventilated space,
wear eye protection, and get an adult to help if you’re not experienced. Your garden doesn’t need a
“dramatic origin story.”
Step-by-Step: Classic Wooden Stake Garden Markers
This is the go-to method: simple stake markers that slide into your veggie beds and stay readable.
Make a batch now, and you’ll thank yourself laterespecially when seedlings all look like “tiny green
confusion” for a few weeks.
Step 1: Cut your stakes
A practical size for vegetable garden markers is 10–12 inches long and about
3/4–1 inch wide. If you want taller markers for big beds or dense plantings, go
14–16 inches.
- Short beds / raised beds: 10–12 inches
- In-ground rows: 12–16 inches
- Seed trays / pots: 4–6 inches
Step 2: Shape the bottom for easier planting
Cut a simple point on one end (like a stake) or taper the corners slightly. This helps the marker go into
soil without splitting. If you’re using thin paint sticks, even a small taper helps.
Step 3: Sand for smooth writing
Sand the label area (top 3–4 inches) so paint and ink stick better. A quick pass with 180–220 grit is usually
enough. Wipe off dust with a dry cloth.
Step 4: Add color (optional, but satisfying)
Want a clean “garden aesthetic” vibe? Paint the top portion a solid color, or dip-dye the top third.
Let it dry fully before writing. If you want wood grain to show through, thin acrylic paint with a little
water and apply a light coat.
Step 5: Label your markers
For outdoor readability, your best friends are paint pens and weather-resistant markers.
Pencil is cute, but rain will treat it like an eraser.
- Neat lettering: Use stencils, then fill with a paint pen.
- Fast labeling: Write directly with a paint pen in bold letters.
- Extra clarity: Add the plant variety or sow date on the back.
Step 6: Seal (the step everyone skips… then regrets)
If you want your wooden vegetable garden markers to last, seal them. Apply 2–3 thin coats
of an exterior clear coat or outdoor sealant, letting each coat dry. Focus on:
- The label area (where ink and paint need protection)
- The end grain (wood drinks water fastest through the cut ends)
- The bottom portion if it will be in damp soil (but keep finishes fully cured before use)
Step 7: Place markers the smart way
Insert the marker deep enough that it won’t tip, but keep the writing well above the soil line.
Soil splash is the enemy of legibility. Aim for 2–4 inches in soil and the label
above the “splash zone.”
Three Labeling Methods That Actually Hold Up Outdoors
1) Paint pen + clear coat (bright and bold)
This is the sweet spot for most gardeners: quick, readable, and customizable. Use a paint pen or a
weather-resistant permanent marker, then seal. If you want the marker to be readable from three feet away
while you’re holding a hose like a garden wizard, go bold.
2) Wood-burned labels (rustic and satisfying)
Wood burning (pyrography) creates a carved-in look that feels extra “handmade.” The trick is to burn a bit
deeper and seal afterward. Keep your design simple and legibleyour carrot row doesn’t need an elaborate
portrait, unless that’s your brand.
3) Painted nameplate area (high contrast)
Paint a rectangle at the top (white, black, or a color), then write on it. This boosts readability and helps
your labels look consistent. Seal it and you’ve got “farmstand chic” for pennies.
Design Ideas for an Organized Vegetable Garden
Your markers can do more than just name the plant. A good system helps you rotate crops, track varieties,
and remember which tomato was “life-changing” and which one was “watery disappointment in a red suit.”
Simple marker upgrades
- Color-code by plant family: green for leafy crops, red for tomatoes/peppers, orange for roots, etc.
- Add sow or transplant dates: especially helpful for succession planting.
- Include variety names: “Cucumber” is fine; “Marketmore 76” is better if you’re comparing results.
- Use icons for quick scanning: a little pepper doodle goes a long way.
Weatherproofing Tips (Because the Sun Is a Bully)
Outdoor durability comes down to two big enemies: moisture and UV light.
Here’s how to fight both without turning your garden into a chemistry lab.
Make your wood less thirsty
- Seal cut ends first: End grain absorbs water fastest, so coat it carefully.
- Use thin coats: They dry better, cure stronger, and are less likely to peel.
- Let finishes cure fully: “Dry to the touch” isn’t the same as “ready for damp soil.”
Keep writing readable
- Write big (your future self will thank you).
- Seal over the lettering once the ink/paint is fully dry.
- Put writing on both sides so one sun-faded side still leaves you a backup.
Place markers to reduce damage
- Keep labels above soil to avoid splash and abrasion.
- Avoid sprinkler blast zones if possible (constant spray can wear finishes down).
- Remove and store in the off-seasonwinter moisture is ruthless.
Troubleshooting: When DIY Garden Markers Misbehave
Problem: The writing faded
- Cause: UV exposure and no protective topcoat.
- Fix: Re-label with a paint pen and apply 2–3 coats of outdoor clear coat.
- Prevention: Use bold paint pens or weather-resistant markers and seal after labeling.
Problem: Paint peeled or chipped
- Cause: Painting over dusty wood, thick coats, or not enough drying time.
- Fix: Sand lightly, wipe dust, repaint in thin coats, seal after it dries.
- Prevention: Sand smooth and use thin coats with dry time between layers.
Problem: The stake rotted at the bottom
- Cause: Constant moisture contact with soil, thin wood, no sealing on ends.
- Fix: Replace with thicker cedar stakes; seal ends and keep label higher.
- Prevention: Choose rot-resistant wood and seal end grain thoroughly.
Two Fun Variations: Wood Disc Markers and Wooden Spoon Markers
Rustic wood disc markers (the “farmhouse tag” look)
This style uses a round wood disc as the label, attached to a stake. It looks like something you’d buy at a
garden boutique, but you made it on your porch while wearing yesterday’s hoodie. Art.
- Lightly sand the wood disc and wipe off dust.
- Write the veggie name with a paint pen or wood-burn the text for a rustic effect.
- Seal the disc with 2–3 coats of outdoor sealant, letting it dry between coats.
- Glue the disc to a bamboo stake or wooden dowel and let it set fully.
- Add twine detail if you want extra charm (optional, but adorable).
Wooden spoon markers (upcycled and quirky)
If you have old wooden spoons (or thrift store finds), they make great markers. The spoon bowl becomes the
label area, and the handle becomes the stake. It’s practical, cute, and slightly chaoticin a good way.
- Clean and dry the spoon; sand lightly where you’ll write.
- Paint the spoon bowl (optional), then write the plant name with a paint pen.
- Seal with an exterior clear coat once the label is fully dry.
- Place the handle into soil near the plant.
Maintenance: Make Them Last for Next Season
If you want reusable wooden garden markers, treat them like seasonal tools:
- Pull them at the end of the season (before frost turns them into soggy relics).
- Brush off soil and let them dry completely.
- Store indoors in a dry bin or box (garage shelves work great).
- Touch up and re-seal at the start of next season if needed.
Extra: Real-World Experiences & Lessons from DIY Wooden Vegetable Garden Markers (500+ Words)
If you ask gardeners what they’d do differently next time, you’ll hear the same theme:
“I should’ve sealed them.” It’s the classic DIY momenteverything looks perfect on day one, and then nature
shows up like a harsh project manager with a clipboard.
One of the most common experiences is discovering that thin wood markers are basically seasonal.
Paint sticks and skinny craft markers are fantastic for quick labeling, especially when you’re starting seeds
or trying a new bed layout. But once those thin pieces sit in damp soil, they can warp, soften, or crack.
The practical lesson: if you want markers that survive longer, go thickercedar stakes, small boards cut into
strips, or wood discs attached to sturdier stakes. Think “tiny fence post,” not “wooden spaghetti.”
Another real-world moment happens about three weeks into the season: everything looks the same.
Seedlings are adorable, but they’re also indistinguishable little green comedians. This is where good marker
design matters. Gardeners often find that tiny, delicate handwriting becomes useless fastespecially when you’re
standing in bright sun squinting and thinking, “Was this kale or arugula or… a volunteer squash with ambition?”
Big block letters, high contrast, and short names work best. If you need details (variety, date), write them on
the back or add a code like “TOM-1” that matches a garden notebook.
Many DIYers also learn that where you place the marker matters as much as how you make it.
Markers shoved too close to the plant can get buried under mulch or swallowed by foliage. Markers placed too low
get splashed by soil and mud (which turns your neat lettering into abstract art). The common fix is to position
markers slightly off to the side of the plant, with the writing higher than you think you need. If the label is
above the “splash zone,” it stays readable longer.
Weather also teaches its own lessons. Sun can fade ink, and rain can creep into wood grain. Gardeners who use
paint pens or weather-resistant markers often report better results than basic markersespecially when the label
is sealed. Wood-burning can look amazing, but shallow burns may lighten over time outdoors, so deeper lines and a
protective finish help. A practical habit is to make a quick “maintenance day” mid-season: wipe markers clean,
touch up any fading text, and add another light coat of exterior sealer if needed. It’s a small task that can
stretch your markers from “one summer only” to “see you next spring.”
The best experience-based tip is surprisingly simple: make extra blanks.
When you’re planting, you will inevitably add “just one more herb” or toss in a late-season crop. If you already
have a handful of blank, sealed stakes ready to label, you’ll actually label theminstead of promising yourself
you’ll remember which row is which (you won’t, and that’s okay; none of us will).
Conclusion
Making DIY wooden vegetable garden markers is one of those small projects that pays you back all season:
less confusion, easier care, cleaner garden organization, and a nice little burst of “I made this” pride
every time you walk past your beds. Choose a good wood, label boldly, seal like you mean it, and your garden
will be easier to manageno detective work required.