Table of Contents >> Show >> Hide
- Why an Origami Fish Is a Great Beginner Project
- What You Need Before You Start
- How to Make an Origami Fish Step by Step
- Step 1: Start with a Square Sheet
- Step 2: Make the First Creases
- Step 3: Fold the Lower Side Corners Toward the Center
- Step 4: Fold the Upper Side Corners Inward
- Step 5: Collapse the Paper into a Fish Base or Windmill-Like Form
- Step 6: Form the Tail
- Step 7: Shape the Body
- Step 8: Add the Finishing Details
- Easy Tips for Better Origami Results
- Common Mistakes to Avoid
- Creative Ways to Use Your Origami Fish
- How to Make Your Origami Fish Look More Realistic
- Is Origami Fish Good for Kids?
- Experience and Creative Reflections on Making an Origami Fish
- Conclusion
- SEO Tags
There are two kinds of people in this world: people who think origami is magical, and people who have not yet folded a fish out of paper on a random Tuesday. Today, we are fixing that. If you have one square sheet of paper, a flat surface, and the courage to survive a few creases, you can make an origami fish that looks charming, playful, and surprisingly impressive for something made without glue, tape, or wizardry.
This guide walks you through how to make an origami fish in a beginner-friendly way, while also giving you practical tips on paper choice, folding technique, decorating ideas, and common mistakes to avoid. Whether you are crafting with kids, making classroom decorations, creating handmade cards, or simply trying to keep your hands busy without scrolling your life away, this easy paper fish is a fun project with a low barrier to entry and a high “Hey, look what I made” reward.
Best of all, you do not need expensive supplies. A square sheet of lightweight paper is enough to get started. Once you understand the folding logic, you can make a whole school of fish in different sizes and colors. Your desk, bulletin board, or gift wrap will never be the same again.
Why an Origami Fish Is a Great Beginner Project
An origami fish is one of the friendliest paper-folding projects for beginners because it combines simple folds with a satisfying final shape. It usually starts with basic creases and a few diagonal folds, then quickly transforms into something that clearly looks like a fish instead of a mysterious folded potato chip.
It is also a smart project for anyone learning foundational origami techniques. As you work through the model, you practice accuracy, symmetry, sequencing, and patience. In plain English, you learn how to line things up, follow steps, and resist the urge to crumple the paper into a dramatic little ball when one corner acts rebellious.
Because the finished fish is flat, lightweight, and decorative, it works beautifully for:
- Kids’ craft sessions
- Ocean-themed classroom displays
- Handmade greeting cards
- Party decorations
- Bookmarks and gift tags
- Wall art and mobiles
What You Need Before You Start
Basic Supplies
- 1 square sheet of paper
- A clean, flat work surface
- Your fingers or a ruler for sharpening creases
- Optional: markers, pens, or googly eyes for decoration
Best Paper for Origami Fish
If you want the easiest folding experience, choose thin, crisp paper. Standard origami paper works best because it folds cleanly and holds a crease without fighting back. If you do not have origami paper, you can cut a square from printer paper, notebook paper, wrapping paper, or lightweight craft paper.
Try to avoid thick cardstock for your first attempt. Heavy paper may look fancy, but it can make sharp folds harder to achieve and cause bulky layers around the tail and body. If you are making origami fish with children, larger squares are usually easier than tiny ones because small folds can get fiddly in a hurry.
What Size Paper Should You Use?
A 6-inch by 6-inch square is a comfortable size for beginners. It is large enough to handle without feeling clumsy and small enough to finish quickly. If you want a bolder decorative piece, use 8-inch or 10-inch squares. If you want mini fish for cards or confetti-style decor, try smaller squares after you have practiced the model once or twice.
How to Make an Origami Fish Step by Step
The version below is a traditional-style easy origami fish that is ideal for beginners. Read through the steps once before you start. Origami gets much easier when you know where the paper is headed.
Step 1: Start with a Square Sheet
Place your square paper on the table with one corner pointing up, like a diamond. If your paper has a colored side and a white side, begin with the colored side facing down if you want the color to show on the outside of the fish.
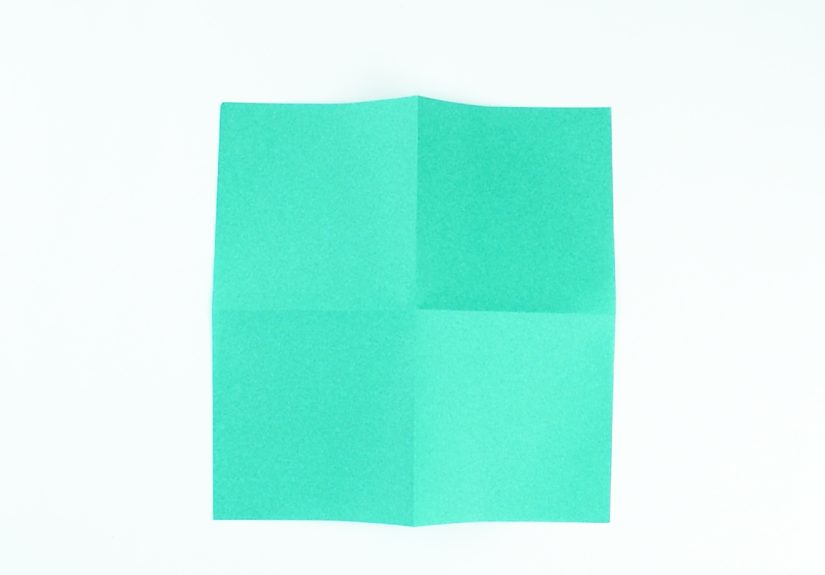
Step 2: Make the First Creases
Fold the paper in half from left to right and press the crease firmly. Open it back up. Then fold it in half from top to bottom and open it again. You should now see a vertical crease and a horizontal crease crossing at the center.
These starter folds are your guide lines. They help you line up the next folds more accurately, and accuracy matters in origami more than most of us want to admit.
Step 3: Fold the Lower Side Corners Toward the Center
Take the lower left edge and fold it inward so it lines up with the center vertical crease. Repeat on the lower right edge. Then unfold both. These temporary creases help shape the fish body and prepare the paper for the next transformation.
Step 4: Fold the Upper Side Corners Inward
Now fold the upper left and upper right edges inward toward the center crease. At this point, the top portion begins to narrow and the paper starts looking less like a square and more like a deliberate plan.
Step 5: Collapse the Paper into a Fish Base or Windmill-Like Form
Using the creases you made, gently push the sides inward and flatten the model into a compact base. This is the stage that can feel slightly tricky the first time, but do not panic. Origami often has one moment where the paper seems to question your leadership. Stay calm, follow the creases, and flatten carefully.
Once collapsed, the model should look neat and symmetrical, with layered flaps that can be shaped into the body and tail of the fish.
Step 6: Form the Tail
Take one flap on the right side and fold it upward at an angle. Then fold the tip back in the opposite direction to create a pointed tail fin. Repeat with the upper flap if your model has a second visible layer that helps define the tail. These reverse folds create the classic forked-fish-tail look.
This is the fun part because the fish suddenly becomes a fish instead of “modern geometric confusion.”
Step 7: Shape the Body
Adjust the central folds so the body looks balanced. If one side seems puffier or crooked, gently reopen and refine the crease. A good origami fish usually has a rounded or diamond-like body and a tail that feels distinct from the main shape.
Step 8: Add the Finishing Details
Once the folding is complete, you can decorate your fish. Draw an eye, add scales, outline fins, or use patterned paper to create a tropical look. Metallic pens or soft colored pencils work especially well if you want decorative detail without soaking the paper.
Easy Tips for Better Origami Results
Make Crisp, Firm Creases
The cleaner your creases, the cleaner your fish. Press each fold with your fingertip, fingernail, or the edge of a ruler. Lazy creases usually lead to sloppy alignment, and sloppy alignment leads to a fish that looks like it had a rough morning.
Line Up Edges Carefully
Take an extra second to line up corners and edges before pressing a fold down. In beginner origami, most problems come from rushing. Slow folding almost always beats fast folding.
Use Lightweight Paper First
Thinner paper is more forgiving. Once you understand the fold pattern, you can experiment with patterned paper, double-sided paper, or even recycled magazine pages for more visual flair.
Practice the Same Model More Than Once
Your second origami fish will almost always look better than your first. Your third may look surprisingly polished. Your fourth may develop enough personality to deserve a name. Repetition helps your hands learn the sequence, which makes folding smoother and more enjoyable.
Common Mistakes to Avoid
Using the Wrong Paper Shape
Origami fish instructions usually begin with a square. If you start with a rectangle and pretend it is “basically the same thing,” the model may not line up properly. Paper has standards, and sadly, it is not flexible about geometry.
Skipping Guide Creases
Those early folds may seem boring, but they make later steps easier. Skipping them often causes uneven sides and awkward collapse points.
Pressing Too Hard Too Soon
Before you commit to a crease, make sure the edges are aligned. Once a sharp crease is in the wrong place, it can be hard to erase completely.
Expecting Perfection on the First Try
Origami is part craft, part puzzle, and part exercise in patience. A slightly uneven fish is still a fish. And honestly, handmade projects usually look more charming when they are not factory-perfect.
Creative Ways to Use Your Origami Fish
Once you learn how to make an origami fish, one fish is rarely enough. Here are some fun ways to use your folded creations:
- Wall display: Tape several fish to a wall in a flowing pattern to create a paper aquarium.
- Mobile: Hang fish from thread at different heights for a floating effect.
- Greeting cards: Glue a small origami fish to the front of a handmade card.
- Classroom decor: Pair the fish with ocean vocabulary, reading themes, or science units.
- Gift wrap accents: Attach a mini fish to ribbon for a playful finishing touch.
- Party table decor: Scatter bright origami fish across an under-the-sea party setup.
How to Make Your Origami Fish Look More Realistic
If you want to move beyond a basic beginner model, small design choices can make a big difference. Use patterned paper with scales, waves, stripes, or gradients. Draw gill lines with a fine-tip marker. Slightly curve the tail by gently shaping the paper with your fingers. Add a tiny mouth line or a dot eye on each side. These details give the fish more character without making the folding process harder.
You can also create different species-inspired looks. Gold paper can become a goldfish. Blue and silver paper can suggest a river fish. Bright tropical prints can turn your model into a cartoon reef fish. The fold may stay the same, but the personality can completely change.
Is Origami Fish Good for Kids?
Yes, especially when the model is simple and the paper is large enough to handle easily. Folding an origami fish can help kids practice following directions, recognizing shapes, sequencing steps, and using fine motor control. It also gives them a finished object they can personalize, display, or use in imaginative play.
For younger children, it helps to demonstrate one fold at a time and keep expectations relaxed. Some fish will look sleek and elegant. Others will look like they just swam through a washing machine. Both versions count as art.
Experience and Creative Reflections on Making an Origami Fish
The first time I made an origami fish, I expected a quick craft and got a tiny lesson in patience instead. On paper, the steps looked simple. In reality, I learned that “simple” and “easy on the first attempt” are cousins, not twins. My first fish was crooked, one side was puffier than the other, and the tail looked as if it had made a dramatic life choice. But once I finished it, I still liked it. Maybe that is part of the charm of origami: even the imperfect versions feel alive because you can see the decisions in every crease.
One of the best experiences with this project is how quickly it becomes relaxing. After the first model, your hands start to understand the sequence. You stop overthinking every fold and begin noticing the rhythm: line up the edge, press the crease, turn the paper, repeat. It is oddly calming. A few minutes in, the outside world gets quieter. You are not dealing with notifications, errands, or a giant to-do list. You are just convincing a square sheet of paper to become a fish, which is wonderfully specific and surprisingly satisfying.
Another thing I love about making origami fish is that the project grows with you. A beginner can make one with plain paper and a marker dot for an eye. A more experienced crafter can experiment with layered fins, textured paper, or a whole underwater scene. I have seen simple fish become place cards, window garlands, party decorations, and classroom art. I have also seen people use them for storytelling with kids, where each fish gets a name, a voice, and a wildly unnecessary backstory. Suddenly, the blue fish is named Captain Bubbles and has opinions about seaweed. That is the kind of creative energy paper folding can unlock.
There is also something satisfying about how affordable the craft is. You do not need a shopping spree. You need paper. That is it. Fancy supplies are nice, but they are optional. This makes the origami fish one of those rare projects that feels creative without becoming complicated or expensive. It is easy to practice, easy to share, and easy to redo when the first one goes sideways.
Most of all, making an origami fish reminds you that small projects can still feel meaningful. You start with something flat and ordinary, then slowly shape it into something playful and expressive. It is a tiny act of transformation. And on busy days, that can feel weirdly uplifting. A square becomes a fish. A quiet ten minutes becomes a reset. A simple fold becomes a reason to keep making things with your hands. That is a pretty good return on one piece of paper.
Conclusion
Learning how to make an origami fish is a fun way to begin exploring paper folding without getting overwhelmed by complicated steps. With one square sheet of paper, a few careful creases, and a little patience, you can create a charming fish that works as decor, a card embellishment, a classroom craft, or a relaxing personal project. Start with a simple model, focus on clean folds, and do not worry if your first fish looks a little quirky. In origami, quirky often means handmade in the best possible way.
Once you have folded one fish, try a second in a different color, then a third in a smaller size, then maybe a whole colorful school. That is how paper hobbies get you. Innocently. Quietly. With fish.


