Table of Contents >> Show >> Hide
- What You’ll Need
- Pom Pom Basics: The Fluff Is a Science
- 3 Easy Ways to Make Pom Poms
- Pro Tips for Round, Fluffy, “Store-Bought” Pom Poms
- The Anatomy of a Pom Pom Animal
- 7 Pom Pom Animals You Can Make (Step-by-Step)
- Make Them Stronger: Glue vs. Sewing vs. Tying
- Troubleshooting: When Your Pom Pom Animal Looks… Confused
- Fun Ways to Use Pom Pom Animals
- Real-Life Crafting Experiences: What Making Pom Pom Animals Is Really Like (And Why You’ll Love It)
- Conclusion
Pom poms are basically yarn’s way of saying, “I can be a cloud.” And once you realize a fluffy ball can become a bunny, an owl, or a tiny hedgehog with a bad attitude (in the cutest way), you’ll never look at leftover yarn the same again.
In this guide, you’ll learn three reliable ways to make yarn pom poms, how to get them evenly round (without rage-trimming), and how to turn them into a mini zoo of pom pom animals using simple felt and a few craft staples. This is an easy, low-cost craft that works for kids, adults, classrooms, and “I just need something relaxing to do while watching TV” evenings.
What You’ll Need
- Yarn (worsted weight is beginner-friendly; use scraps for multicolor effects)
- Scissors (sharp ones make your pom poms look expensive)
- Pom pom maker (optional, but fast) or cardboard (for DIY templates) or a fork (for mini pom poms)
- Strong thread (matching yarn works, but thread can cinch tighter)
- Felt sheets (for ears, beaks, paws, wings)
- Glue (craft glue for kids; hot glue for quick holdadult supervision recommended)
- Googly eyes or small beads (or cut felt circles)
- Pipe cleaners (optional: tails, whiskers, tiny legs)
- Needle + thread (optional: sturdier assembly than glue)
Pom Pom Basics: The Fluff Is a Science
Before you build your pom pom animals, it helps to understand what makes a pom pom look full and “finished.” A pom pom is just yarn loops tied tightly in the middle, then cut and trimmed into a sphere (or an oval, if you’re going for a chubbier animal body).
What affects the final look?
- Yarn thickness: Chunky yarn makes fast, bold pom poms; thinner yarn needs more wrapping for the same fullness.
- Wrap count: More wraps = denser pom pom. Too few wraps = scraggly “sad dandelion.”
- Tie tightness: The tighter the center tie, the better it holds its shape (and survives enthusiastic kid-handling).
- Trimming style: Careful trimming makes animals look polished. Uneven trimming makes them look like they just woke up late for school. Both are valid.
3 Easy Ways to Make Pom Poms
Method 1: Pom Pom Maker (Fastest and Most Consistent)
- Open the pom pom maker arms.
- Wrap yarn around one side until it looks nicely padded (not strangled, just full).
- Wrap the other side to match.
- Close the maker, then cut along the groove all the way around.
- Slide a strong piece of yarn/thread into the groove and tie very tightly with a double knot.
- Open the maker and remove your pom pom.
- Fluff, then trim into shape.
Method 2: Cardboard Donut Templates (Best for Custom Sizes)
- Cut two cardboard circles the size you want your pom pom to be.
- Cut a smaller circle out of the center of each to make “donuts.”
- Stack the donuts and wrap yarn around both rings repeatedly.
- When the center hole starts closing up, you’ve wrapped enough.
- Cut around the outer edge between the two cardboard rings.
- Slide a strong tie between the rings and knot it tightly.
- Remove cardboard, fluff, and trim.
Method 3: Fork Pom Poms (Perfect for Tiny Animals and Details)
- Wrap yarn around the fork tines (more wraps = fluffier mini pom pom).
- Slide a short piece of yarn between the middle tines and tie tightly.
- Cut loops on both sides and remove from the fork.
- Trim into a neat little puff.
Quick Decision Guide
| Goal | Best Method | Why |
|---|---|---|
| Make a bunch fast | Pom pom maker | Speed + consistent shape |
| Make unusual sizes | Cardboard donuts | DIY any diameter |
| Small animals / noses / tails | Fork | Tiny, controlled pom poms |
Pro Tips for Round, Fluffy, “Store-Bought” Pom Poms
- Trim like a barber: Rotate the pom pom as you trim, taking small snips. Big cuts are how you accidentally create a cone.
- Start with a cube: A weird but useful trick: trim it into a rough cube first, then soften corners into a sphere.
- Double-knot the center: If your center tie is loose, your pom pom will shed like a stressed-out cat.
- Mix yarns for texture: Combine two or three yarn colors for speckles, stripes, or “fur” depth.
- Shape on purpose: Not everything needs to be a perfect ball. Ovals make great bodies; smaller puffs make heads.
The Anatomy of a Pom Pom Animal
Most pom pom animals are built from the same formula:
- Body: 1 large pom pom (or oval)
- Head: 1 smaller pom pom (optionalsome animals are a single-pom-pom wonder)
- Face details: felt + eyes (glued or sewn)
- Ears/wings/feet: felt cutouts
- Tail/whiskers: mini pom pom or pipe cleaner
7 Pom Pom Animals You Can Make (Step-by-Step)
Each animal below includes a simple build plus optional upgrades if you want to get fancy. Choose one, then make a whole family. (Warning: once you make two, they start demanding names.)
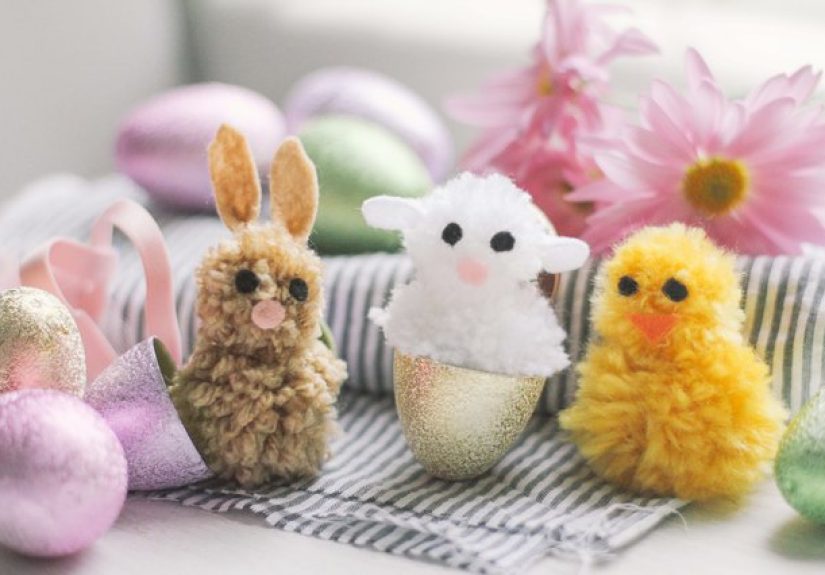
1) Classic Pom Pom Bunny
- Make pom poms: 1 large (body) and 1 small (head) in white, gray, tan, or pastel.
- Attach head to body: Tie the pom poms together using their center strings, or glue them.
- Cut ears: From felt, cut two long ovals. Add smaller inner-ear ovals in pink (optional).
- Add face: Glue on eyes. For a nose, use a tiny felt triangle or mini pom pom.
- Add tail: Glue a mini pom pom to the back, or leave it as a “mystery fluff bump.”
Upgrade: Use a toothbrush to gently fluff the yarn fibers for extra “bunny-fur” softness (test on a small area first).
2) Tiny Pom Pom Chick
- Make one medium pom pom in yellow (or any color if you’re raising a fashionable chick).
- Make a beak: Cut a small orange felt diamond, fold it in half, and glue.
- Add eyes: Googly eyes or tiny black beads.
- Add feet (optional): Bend orange pipe cleaner into little bird feet and glue underneath.
Pro tip: Trim less than you thinkslightly shaggy chicks look extra cute and fuzzy.
3) Woodland Pom Pom Owl
- Make two pom poms: 1 medium (body) and 1 smaller (head). Browns, grays, creams, or mixed yarns look great.
- Attach head to body using the center strings for durability.
- Cut felt details: two wings (teardrop shapes), a small triangle beak, and two eye circles.
- Layer the eyes: Use white circles behind darker circles for a bright-eyed look.
- Glue wings and face in place.
Upgrade: Add tiny “ear tufts” by tying in short yarn strands on top of the head.
4) Pom Pom Hedgehog
- Make one pom pom in brown, tan, or mixed yarn for a spiky-looking texture.
- Shape it: Trim the back round, but trim the front into a slight point to suggest a nose area.
- Cut a felt face piece: A small oval in cream felt; glue to the front underside.
- Add a nose: Tiny black felt dot or bead at the tip.
- Add one or two eyes on the felt face.
Pro tip: If you mix yarns (two browns + one cream), the “spines” look more realistic without any extra work.
5) Friendly Pom Pom Fox
- Make one large pom pom in orange for the body.
- Optional head: Make a smaller orange pom pom if you want a two-piece fox.
- White snout: Cut a white felt teardrop and glue to the front.
- Ears: Cut two orange triangles and two smaller white triangles; layer and glue on top.
- Tail: Make a mini orange pom pom and glue to the back; add a white felt tip or white yarn tuft.
Upgrade: Give your fox tiny felt paws so it can “sit” without rolling away dramatically.
6) Simple Pom Pom Bear
- Make two pom poms: 1 large (body) and 1 medium (head) in brown, black, white, or caramel.
- Attach head to body with the center strings or glue.
- Add ears: Two small felt circles or two tiny mini pom poms glued to the head.
- Add snout: Small oval felt piece in a lighter color; add a tiny nose.
- Finish with eyes and (optional) a little smile line using thread.
Pro tip: If your bear looks more like a potato, add ears. Ears fix everything.
7) Pom Pom Sheep (Fluffy Mode)
- Make one very dense pom pom in white or cream. (Yes, this is permission to wrap a lot.)
- Face: Cut a small oval in gray or black felt and glue to the front.
- Ears: Two little felt droplet shapes on the sides.
- Legs (optional): Short black pipe cleaners glued underneath.
Upgrade: Add a tiny bell or ribbon so your sheep can be an ornament or gift topper.
Make Them Stronger: Glue vs. Sewing vs. Tying
- Tying (best): If your pom poms have long center strings, tie head to body. It’s sturdy and kid-proof.
- Sewing (also great): A few stitches through the center holds well and looks clean.
- Gluing (fastest): Great for felt parts and quick builds, but heavy play can pop pieces off.
If kids are making these, consider using craft glue and giving it extra drying time, or pre-assemble “structural” parts (like head-to-body) and let kids decorate.
Troubleshooting: When Your Pom Pom Animal Looks… Confused
My pom pom is flat.
Wrap more yarn next time and tighten the center tie. Fluff aggressively, then trim.
It’s shedding everywhere.
Your center knot is probably loose. Tie again (or wrap the tie string around twice) and double-knot.
It won’t stand up.
Trim a tiny flat “base” on the bottom. Or add felt feet to stabilize it.
The face pieces won’t stick.
Felt likes a clean surface. Trim the yarn where the felt will sit, then glue. Hot glue sets faster, but use it carefully.
Fun Ways to Use Pom Pom Animals
- Keychains: Add a jump ring and a short cord loop.
- Gift toppers: Tape or tie a tiny animal onto wrapped presents.
- Ornaments: Add a hanging loop and make seasonal colors.
- Desk buddies: The best kind of office coworkerquiet and extremely fluffy.
- Classroom crafts: Great for fine motor skills (wrapping, tying, cutting felt shapes).
Real-Life Crafting Experiences: What Making Pom Pom Animals Is Really Like (And Why You’ll Love It)
If you’ve never made pom pom animals before, the first “experience” most people have is surprise at how quickly yarn turns into something that feels like a tiny plush toy. You start with a flat skein and a plan, and five minutes later you’re holding a fluff-ball and thinking, “Okay… I get why people hoard craft supplies.” It’s one of those projects where the transformation is so dramatic that it stays fun even when you’re repeating the steps.
Another common experience: the trimming phase becomes oddly therapeutic. There’s a moment when the pom pom looks messylike a cartoon tumbleweedand you wonder if you did something wrong. Then you begin trimming, rotating it in your fingers, snipping tiny bits, and suddenly it rounds out. It feels a little like giving a haircut to a very patient, very silent pet. Many crafters end up making “just one more” because trimming is where each animal gets its personality: a slightly pointed nose makes a hedgehog; a rounder face makes a bear; leaving it shaggy makes an instantly adorable chick.
Craft nights tend to reveal that pom pom animals are a sneaky social activity. People talk while they wrap yarn, compare fluff levels (“Mine is cloudier than yours!”), and swap felt scraps for ears and tiny noses. It’s also a forgiving craft for mixed skill levels. A beginner can make a simple one-pom-pom chick with felt eyes and feel successful. Someone who wants a challenge can mix yarn colors for patternslike a white snout on an orange fox or a two-tone owl facewithout needing advanced tools.
If kids are involved, the experience usually includes a little teamwork: an adult helps with the tight knot and the scissor cutting, while kids pick colors, place eyes, and decide whether the bunny needs a bow tie “because he’s going to a party.” It’s also one of those crafts where mistakes don’t ruin anythingthey create “rare species.” A lopsided pom pom can become a sleepy owl. A too-long ear can be “a superhero cape.” The end result is almost always cute because fluffy hides a multitude of sins.
The last experience people mention (often with genuine delight) is how these tiny animals end up being used. They start as a craft, then become something else: a backpack charm, a desk mascot, a Christmas ornament, a gift topper that the recipient refuses to throw away, or a little “worry pet” someone keeps on a shelf. Pom pom animals are small, fast, and joyfulexactly the kind of project that makes you feel like you made something real with your hands, even if you only had scraps and twenty minutes.
Conclusion
Making animals out of pom poms is the perfect combination of simple and satisfying: you learn one core skill (making a solid pom pom), then remix it into endless cute critters with a few felt shapes and creative tweaks. Start with a bunny or chick, get comfortable with trimming and tying, then level up to owls, hedgehogs, foxes, and beyond. Your leftover yarn will finally fulfill its destiny: becoming adorable.