Table of Contents >> Show >> Hide
- Why Manually Rewind a Cassette Tape?
- What You Need Before You Start
- How to Manually Rewind a Cassette Tape: 5 Steps
- Quick Example: Fixing a Loose Tape After a Player Jam
- Common Mistakes to Avoid
- When You Should Not Manually Rewind the Tape
- How to Store a Cassette After Rewinding
- Is Manual Rewinding Safe for Every Cassette?
- The Experience of Rewinding a Cassette by Hand
- Final Thoughts
There are two kinds of people in this world: people who have never touched a cassette tape, and people who instantly know why a pencil belongs next to one. If you are here, you are either rescuing an old mixtape, fixing a little tape slack, or trying to save a recording that matters more than your streaming playlist ever will. Good news: manually rewinding a cassette tape is still one of the easiest old-school tricks around.
The key is to do it gently. A cassette is not a jar of pickles. You are not trying to overpower it. You are simply guiding the tape back into proper tension so it can play, store, or survive another day without turning into a curly ribbon of regret. In this guide, you will learn exactly how to manually rewind a cassette tape in five simple steps, what tools work best, what mistakes to avoid, and when it is smarter to stop and let the tape retire with dignity.
Why Manually Rewind a Cassette Tape?
Manual rewinding is useful for more than nostalgia. It can help when a cassette player eats part of the tape, when the reels are loose and sloppy, when your player is dead, or when you want to tighten the tape before storage. It is also handy if you are checking an old cassette before playback and want to avoid feeding obviously slack tape into a machine that might make the problem worse.
In plain English, manually rewinding can help you:
- Take up visible slack in the tape window
- Rewind the tape without using a deck or batteries
- Reduce the chance of a jam on the next play
- Inspect an old cassette before using it
- Save a favorite recording from becoming spaghetti with a soundtrack
What You Need Before You Start
You do not need a workshop, a soldering iron, or a dramatic movie montage. You only need a few simple things:
- A cassette tape
- A hexagonal pencil, slim pen barrel, or empty pen case that fits snugly into the reel hub
- Clean, dry hands
- A flat, well-lit surface
- Patience, which is less exciting than gadgets but much more useful
A pencil is the classic choice because it is easy to grip and usually fits well enough to turn the reel without slipping. A pen barrel can work too. The goal is not perfection. The goal is a snug fit that lets you turn the reel slowly and smoothly.
How to Manually Rewind a Cassette Tape: 5 Steps
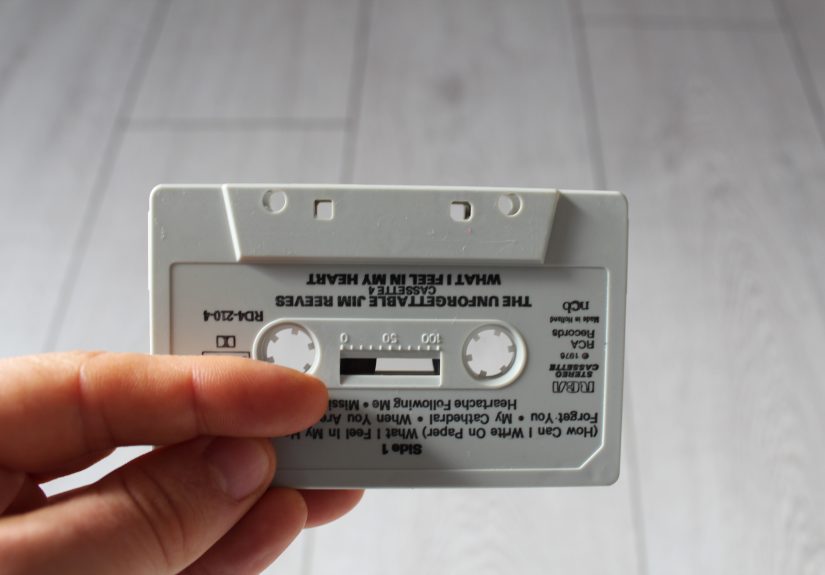
Step 1: Inspect the cassette before you touch the reels
Start by looking through the clear window of the cassette. Do you see loose tape drooping across the front? Is the tape neatly wound on both reels, or does it look wrinkled, crinkled, twisted, or bunched up? A little slack is normal and fixable. A visibly crumpled section is a warning sign.
Also check the shell itself. If the cassette housing is cracked, warped, or missing parts, be extra careful. If the tape looks moldy, sticky, or badly chewed, do not force it. Manual rewinding can help with minor slack, but it will not magically repair serious damage. Think of it as first aid, not a full orthopedic surgery for your mixtape.
Step 2: Insert the pencil or pen into the correct reel hub
Place the cassette flat with the exposed tape edge facing you. Insert your pencil or pen barrel into one of the reel hubs. If you are trying to remove slack, choose the reel that pulls the loose section back inside the shell. If you are unsure which side that is, turn one reel very slightly. The correct reel will tighten the tape smoothly. The wrong one will either do nothing useful or make the slack worse.
Do not jam the tool in aggressively. It should fit snugly, not like you are trying to win a strength competition against 1987.
Step 3: Turn slowly and keep the tension even
Rotate the reel in small, controlled turns. Slow is better than fast. The tape should wind neatly and evenly. Watch the exposed section as you turn. If the slack begins disappearing and the tape lies flatter in the window, you are doing it right.
This step matters because uneven tension is one of the easiest ways to make a cassette unhappy. If you crank too hard, you can stretch the tape, make the pack uneven, or worsen a wrinkle that might have stayed minor. Gentle, steady turns are the winning move.
Step 4: Guide the tape visually and stop if you see resistance
As you rewind, keep your eyes on the tape. You want it to wind cleanly onto the reel, not bunch up at the edge. If you feel resistance, hear a tiny snag, or see the tape pulling at an odd angle, stop immediately. That usually means something is misaligned, twisted, or damaged.
Never yank on the exposed tape with your fingers unless you are making a tiny correction and know exactly what you are doing. Pulling magnetic tape directly is a great way to stretch it, crease it, or leave fingerprints on it. Let the reel do the work. Your job is to guide, not wrestle.
Step 5: Rewind until the tape is snug, not drum-tight
Once the slack is gone and the tape looks evenly packed, stop. A good manual rewind leaves the tape neat and slightly taut. It should not look loose, but it also should not be wound so tight that the shell seems under pressure. Over-tightening can stress the tape and create new problems later.
At this point, you can either store the cassette properly or test it in a clean, reliable player. If the tape still looks crooked, wrinkled, or unstable after rewinding, do not keep forcing it. That is your sign to back off and consider repair, transfer, or retirement.
Quick Example: Fixing a Loose Tape After a Player Jam
Let us say your old portable cassette player spits out a tape with a loop hanging from the bottom. The tape is not ripped, just loose and dramatic. In that case, manual rewinding is perfect. You remove the cassette, place it on a table, insert a pencil into the reel that pulls the loop back in, and slowly turn until the loose ribbon disappears. If the tape lies flat again and no crumpling is visible, you have probably saved it from further damage.
That small fix can be the difference between one slightly annoying moment and the total destruction of a voice memo, language tape, sermon, family recording, or garage-band masterpiece that absolutely deserved better than being eaten by a dusty player.
Common Mistakes to Avoid
- Turning too fast: Speed is not impressive here. It just increases the chance of stretching or uneven winding.
- Using the wrong tool: If the pencil or pen slips constantly, try a better-fitting barrel rather than forcing it.
- Ignoring visible damage: Wrinkles, tears, sticky residue, or badly warped shells are not “small issues” when magnetic tape is involved.
- Touching the tape surface too much: Oils, dirt, and fingerprints are not helpful accessories.
- Replaying a damaged cassette immediately: If it already snagged once, a second attempt in the same machine is often how the disaster sequel gets made.
When You Should Not Manually Rewind the Tape
Sometimes the smartest move is to stop. Skip manual rewinding and seek repair or digitization help if:
- The tape is broken or split
- The cassette shell is cracked or separating
- The tape smells musty or shows signs of mold
- The reels do not move freely at all
- The tape looks sticky, badly creased, or shredded
- The recording is important enough that you only get one safe playback chance
If the cassette contains irreplaceable audio, such as family interviews, old band demos, lectures, or personal messages, it is often wiser to digitize it carefully rather than experiment too much. Heroics are fun in action movies. They are less fun when they erase your uncle’s only recorded life advice from 1992.
How to Store a Cassette After Rewinding
Once your cassette is neatly wound, give it a decent retirement plan. Store it upright in its case, away from direct sunlight, heat, moisture, dust, and magnets. Do not leave it in a hot car, on top of speakers, or in a damp basement where it can age like milk instead of fine vinyl-adjacent history.
Keep the cassette in a cool, dry, stable place. A shelf indoors is better than an attic, garage, or mystery closet with seasonal mood swings. If you have several tapes, store them vertically rather than stacked flat for long periods. Good storage will not reverse old damage, but it can prevent your freshly rewound cassette from getting worse.
Is Manual Rewinding Safe for Every Cassette?
Not every cassette, but many ordinary household tapes can handle a gentle manual rewind just fine. Commercial music cassettes, spoken-word tapes, and home recordings often respond well if the only issue is slack or a minor jam. The safer the tape looks, the safer the method tends to be. The worse the tape looks, the more cautious you should become.
A good rule is simple: if the tape looks merely loose, try a careful rewind. If it looks injured, preserve first and play later.
The Experience of Rewinding a Cassette by Hand
There is something strangely satisfying about manually rewinding a cassette tape. It is a tiny act, but it feels personal in a way modern tech rarely does. You are not tapping a screen or waiting for a progress bar. You are physically helping an object do what it was built to do. And if you grew up around cassette decks, boomboxes, Walkmans, language tapes, church recordings, or glove-box mixtapes, that little turn of a pencil can unlock an entire era.
For a lot of people, the experience starts with mild panic. You hit eject, and there it is: a ribbon of brown tape hanging out like the cassette has decided to spill its guts. Your first thought is usually not calm wisdom. It is something closer to, “No, no, no, not this one.” Maybe it is a mixtape someone made for you. Maybe it is an old recording of a grandparent. Maybe it is a weird garage sale tape labeled only “Road Trip ’91,” which honestly makes it even more important.
Then comes the ritual. You find a pencil. Not because the internet told you to, but because somewhere deep in your memory, a pencil and a cassette are supposed to know each other. You sit down at a table, hold the cassette in your hand, and start turning the reel with the kind of concentration people usually reserve for delicate surgery or removing a splinter from a toddler.
The experience teaches patience fast. You cannot bully a cassette into behaving. The more you rush, the more obvious it becomes that this is not a speed contest. You turn a little, pause, look through the clear window, turn a little more, and watch the tape settle back into place. It is surprisingly calming. It feels mechanical in the best way, almost meditative. Tiny action, immediate feedback, no algorithm involved.
There is also a certain humor in realizing how much trust people once placed in these plastic rectangles. Entire summers lived inside them. Road trips, breakups, radio countdowns, language lessons, field recordings, band practice, dictation notes, sermon series, and badly timed DJ interruptions all survived on tape that could absolutely be rescued by office supplies. That is both ridiculous and kind of wonderful.
When the rewind works, the payoff is outsized. The tape looks tidy again. The slack disappears. The cassette stops looking like a wounded bird and starts looking usable. Even before playback, there is relief. You feel like you have prevented a small tragedy. And if the recording plays afterward, the victory feels bigger than it probably should. But that is the charm of analog media. Small successes feel earned.
Of course, not every experience is magical. Some tapes fight back. Some are brittle, some smell old, some have shells that squeak suspiciously, and some appear to have lived the last twenty years in a car door pocket under a lava-like summer sun. Those tapes teach a different lesson: respect the limits of the medium. Manual rewinding is clever, but it is not a cure-all. Sometimes the most responsible thing you can do is stop, protect the tape, and transfer the audio before further damage happens.
Still, that hands-on experience matters. It reconnects you with the physical reality of recorded sound. Music and voices are not just files floating in invisible clouds. They were once grooves, wires, reels, cartridges, cassettes, and carefully wound tape. When you manually rewind a cassette, you are reminded that media used to demand participation. You had to flip sides, label things, store them well, and occasionally perform tiny acts of rescue with a pencil.
And maybe that is why the trick has endured. It is useful, yes, but it is also memorable. It turns a problem into a moment. You are not just fixing tape slack. You are taking part in a little analog tradition, one careful turn at a time.
Final Thoughts
Learning how to manually rewind a cassette tape is one of those simple skills that feels oddly heroic when you need it. With a pencil, a steady hand, and a little patience, you can fix minor tape slack, rescue a jammed cassette, and prepare old tapes for safer storage or playback. The important part is to stay gentle, watch for signs of damage, and know when to stop.
In other words, treat the tape like a memory, not a machine part. Because most of the time, that is exactly what it is.