Table of Contents >> Show >> Hide
- Can You Really Paint a Laminate Dresser?
- Best Supplies for Painting Laminate Furniture
- Step 1: Remove Drawers and Hardware
- Step 2: Clean the Laminate Thoroughly
- Step 3: Repair Chips, Dents, and Peeling Edges
- Step 4: Lightly Sand the Laminate
- Step 5: Apply a Bonding Primer
- Step 6: Choose the Right Paint
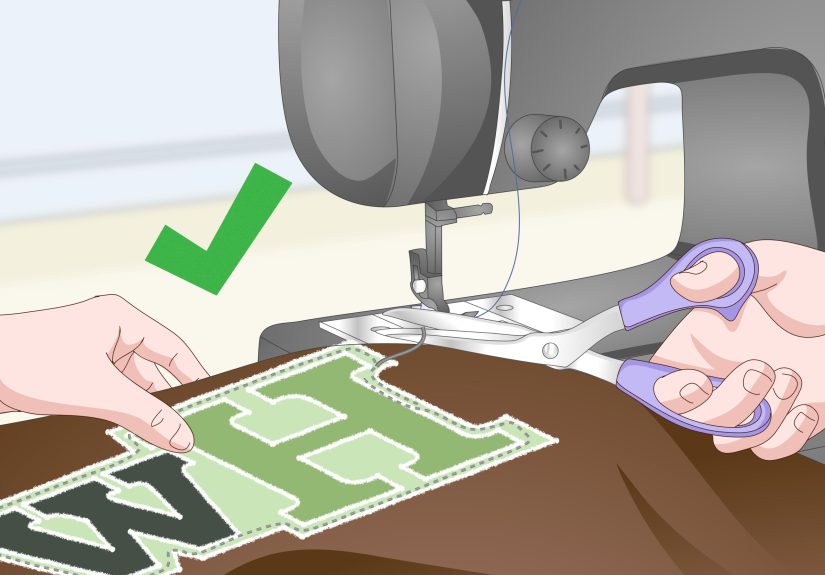
- Step 7: Paint Thin Coats
- Step 8: Seal the Painted Dresser
- Step 9: Let the Paint Cure Before Heavy Use
- Common Mistakes When Painting Laminate Furniture
- Dresser Design Ideas After Painting
- How Long Does a Painted Laminate Dresser Last?
- Extra Experience Notes: What I Learned From Painting Laminate Dressers
- Conclusion
Painting laminate furniture sounds like one of those projects that should be easyuntil your first coat of paint beads up like rain on a freshly waxed car. Laminate is slick, stubborn, and famously uninterested in your weekend makeover plans. But with the right prep, primer, paint, and patience, you can turn a tired laminate dresser into a stylish piece that looks boutique instead of “I rescued this from the curb at 10 p.m.”
This guide explains exactly how to paint laminate furniture, especially a dresser, using practical steps that work for beginners and experienced DIYers alike. We will cover supplies, sanding, priming, painting, sealing, curing, troubleshooting, and real-world lessons learned from dresser makeovers. The goal is simple: a smooth, durable finish that does not peel the first time you open a drawer.
Can You Really Paint a Laminate Dresser?
Yes, you can paint a laminate dresser, but you need to treat it differently from solid wood. Laminate is usually a thin plastic-like or resin-coated surface applied over particleboard, MDF, or engineered wood. Unlike real wood, it does not absorb stain, and paint will not naturally soak into it. That is why surface preparation is the star of the show.
The secret is adhesion. You are not trying to sand the laminate off. In fact, please do not do that unless you enjoy turning furniture into sad confetti. Instead, you lightly scuff the glossy surface so primer can grip, then use a bonding primer designed for slick surfaces. Once that primer has cured properly, furniture paint, cabinet paint, enamel, or high-quality acrylic paint can create a beautiful finish.
Best Supplies for Painting Laminate Furniture
Before you begin, gather everything you need. Nothing ruins DIY momentum faster than realizing your paint tray is missing after you have already taken out every drawer.
Tools and Materials
- Degreasing cleaner or mild dish soap and warm water
- Lint-free cloths or microfiber towels
- 220-grit sanding sponge or fine-grit sandpaper
- Tack cloth or vacuum with brush attachment
- Wood filler or repair putty for dents and chips
- Painter’s tape
- Drop cloth
- Bonding primer made for laminate, glossy, or difficult surfaces
- Furniture paint, cabinet paint, enamel, or durable acrylic paint
- High-density foam roller or fine-finish mini roller
- Angled synthetic brush for edges and corners
- Optional clear protective topcoat
- New knobs or pulls, if you want a full dresser glow-up
Step 1: Remove Drawers and Hardware
Start by removing all drawers, knobs, pulls, and any hardware you can safely take off. Label the drawers if they fit in specific slots. Older dressers can be picky, and drawer number three may not enjoy living where drawer number one used to live.
Put screws and hardware in a small container or zip-top bag. If you plan to replace the hardware, measure the distance between screw holes before shopping. This one tiny step can save you from drilling new holes later while muttering things that would not look good on a DIY inspiration board.
Step 2: Clean the Laminate Thoroughly
Cleaning is not optional. Dressers collect skin oils, dust, furniture polish, candle soot, makeup residue, and mysterious sticky spots that nobody in the house will admit causing. Paint cannot bond well to dirt or grease.
Wash the laminate surface with a mild degreasing cleaner or a mix of dish soap and warm water. Wipe every exterior surface, including drawer fronts, dresser sides, top, trim, and legs. If the dresser lived in a kitchen, garage, or child’s room, clean it twice. Let the surface dry completely before sanding.
Step 3: Repair Chips, Dents, and Peeling Edges
Laminate furniture often has battle scars: chipped corners, swollen particleboard, peeling veneer-like edges, or dents from years of loyal service. Fill small holes and dents with wood filler or a suitable repair compound. For peeling laminate edges, apply wood glue or contact adhesive, clamp the edge flat, and let it dry before painting.
Once repairs are dry, sand them smooth. The painted finish will only look as good as the surface underneath. Paint is powerful, but it is not a magician. It will not hide a crater; it will simply make the crater a different color.
Step 4: Lightly Sand the Laminate
Use 220-grit sandpaper or a sanding sponge to lightly scuff the laminate. Your goal is to dull the shine, not remove the entire surface. Use gentle, even pressure and sand in small sections. Pay special attention to corners, edges, and drawer fronts because these are the areas most likely to chip if they are not prepared well.
After sanding, the surface should look slightly cloudy or matte. If it still looks glossy enough to check your hair, give it another light pass. When finished, vacuum the dust and wipe the dresser with a tack cloth or damp microfiber cloth. Let everything dry before primer.
Step 5: Apply a Bonding Primer
Primer is the difference between a dresser makeover that lasts and one that flakes off like a bad sunburn. For laminate furniture, use a bonding primer made for slick, glossy, or hard-to-paint surfaces. Regular wall primer is often not enough.
Apply a thin, even coat using a foam roller on flat areas and an angled brush for corners, grooves, and trim. Avoid heavy coats. Thick primer can create drips, ridges, and a rubbery texture. Thin coats dry better and bond more reliably.
Let the primer dry according to the product label. Many primers feel dry before they are ready for paint, so do not rush. If the dresser is dark, glossy, or heavily used, a second coat of primer may be worth it. After the primer dries, lightly sand with 220-grit sandpaper to smooth tiny bumps, then wipe away dust.
Step 6: Choose the Right Paint
The best paint for a laminate dresser is durable, smooth, and designed for furniture, cabinets, or trim. Cabinet paint, enamel paint, waterborne alkyd paint, and high-quality acrylic furniture paint are all common choices. These paints generally dry harder than standard wall paint, making them better for drawers, tops, and surfaces touched often.
For finish, satin and semi-gloss are popular because they are easier to wipe clean than flat paint. Matte finishes can look elegant, but they may show smudges faster unless protected with a clear topcoat. Glossy paint is durable but shows every bump, brush mark, and tiny DIY sin, so use it only if your prep work is excellent.
Step 7: Paint Thin Coats
Apply the first coat of paint in a thin, even layer. Use a foam roller for drawer fronts, sides, and the top. Use a brush only where the roller cannot reach. If you brush the entire dresser, you may get visible brush marks unless that is the handmade look you want.
Do not panic if the first coat looks streaky. First coats often look questionable, especially over primer. This is normal. The second coat is where the dresser starts acting like it has a design degree.
Let the first coat dry fully, then lightly sand any rough spots with fine-grit sandpaper. Wipe away dust and apply a second thin coat. Some colors, especially white, navy, black, and deep green, may need a third coat for even coverage.
Step 8: Seal the Painted Dresser
A topcoat is optional but helpful, especially for a dresser top, kids’ furniture, rental furniture, or any piece that will see daily use. Use a water-based polyurethane, polycrylic, or clear furniture sealer compatible with your paint. Always test first if you are painting white or very light colors, because some sealers can yellow over time.
Apply the topcoat in thin layers with a high-quality synthetic brush or smooth applicator. Avoid overworking it. Too many brush passes can create streaks or bubbles. Let each coat dry according to the product instructions.
Step 9: Let the Paint Cure Before Heavy Use
Dry and cured are not the same thing. Paint may feel dry within hours, but it can take days or even weeks to fully harden. During the curing period, be gentle. Do not place heavy decor on the dresser top right away. Avoid sliding lamps, trays, jewelry boxes, or angry coffee mugs across the surface.
If possible, wait at least a few days before reinstalling hardware and putting the dresser back into full use. For high-traffic furniture, longer curing time is better. Your future self will appreciate the patience.
Common Mistakes When Painting Laminate Furniture
Skipping the Cleaning Step
Dust and grease are paint’s enemies. Even the best primer cannot bond well to a dirty surface. Clean first, paint later.
Sanding Too Aggressively
Laminate is thin. If you sand too hard, you can expose or damage the particleboard underneath. Light scuffing is enough.
Using the Wrong Primer
Laminate needs bonding primer. A basic primer may work on drywall but fail on slick furniture.
Painting Thick Coats
Thick coats take longer to dry and are more likely to drip, peel, or stay tacky. Thin coats create a smoother and stronger finish.
Reassembling Too Soon
Paint needs time to cure. If you install hardware too early, knobs and pulls can stick to soft paint or leave marks.
Dresser Design Ideas After Painting
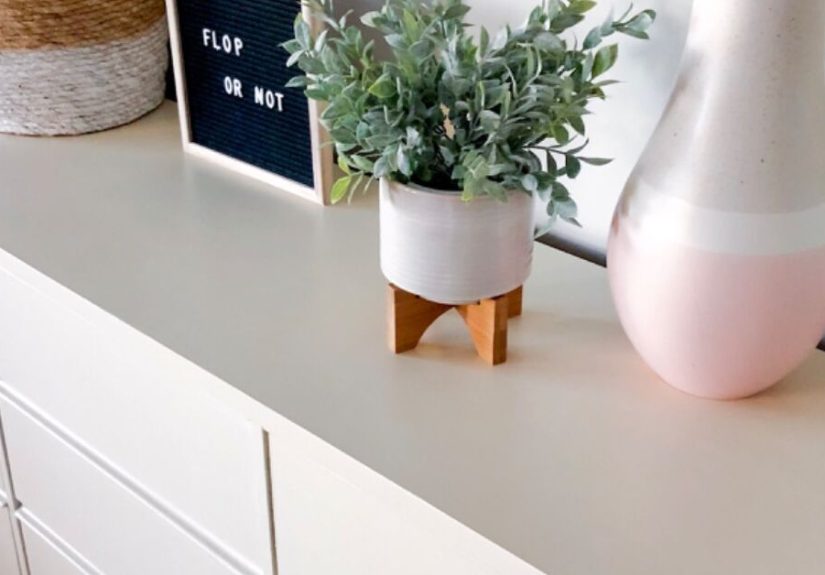
Once your laminate dresser is painted, you can customize it further. Try matte black paint with brass pulls for a modern look. Use soft sage green with wood knobs for a cozy cottage feel. Paint the body white and the drawer fronts a warm beige for a clean two-tone style. For a child’s room, consider a cheerful blue, dusty pink, or sunny yellow.
You can also add peel-and-stick wallpaper inside drawer sides, line the drawers with patterned paper, or install new legs for a more expensive look. Hardware makes a huge difference. A $30 set of knobs can make a $40 secondhand dresser look like it came from a boutique furniture shop with suspiciously perfect lighting.
How Long Does a Painted Laminate Dresser Last?
A painted laminate dresser can last for years if properly cleaned, scuff-sanded, primed, painted, sealed, and cured. Durability depends on the quality of the dresser, the products used, and how the furniture is treated. A dresser in an adult bedroom will usually age better than one in a toddler’s room where toy trucks occasionally become demolition equipment.
For best results, clean the finished dresser with a soft damp cloth instead of harsh cleaners. Use coasters or trays on top. If a chip appears, touch it up quickly before it spreads.
Extra Experience Notes: What I Learned From Painting Laminate Dressers
The biggest lesson from painting laminate furniture is that the boring steps matter most. Everyone wants to jump straight to the pretty paint color, but the cleaning, sanding, and priming decide whether the final piece looks polished or starts peeling in a month. A laminate dresser is not difficult to paint, but it does punish shortcuts.
One practical trick is to paint the dresser in stages. Start with the frame, then move to drawer fronts laid flat on a table or drop cloth. Painting drawer fronts horizontally helps prevent drips and gives the paint time to level out. If you paint them while they are standing upright, gravity may create little paint tears. Cute in a movie, not cute on furniture.
Another useful lesson is to check the dresser top under bright light after priming. Laminate tops often show roller lines, dust nibs, or small scratches that are invisible until paint goes on. A quick sanding between primer and paint can turn an average finish into a smooth one. Run your hand over the surface. If you can feel a bump, you will probably see it after painting.
For dark colors, choose a tinted primer if available. A gray primer under navy, charcoal, black, or forest green can reduce the number of paint coats needed. For light colors over dark laminate, use a high-hiding primer and expect two coats of paint. White paint is beautiful, but it is also dramatic. It likes attention.
Hardware upgrades are the easiest way to make the finished dresser look intentional. If the old pulls are dated but the holes are standard, replace them with modern knobs, cup pulls, or simple bar handles. If the existing hardware is unique, you can spray paint it separately. Just clean, scuff, prime if needed, and use a spray paint made for metal.
Temperature and humidity also affect the finish. Paint in a well-ventilated area, but avoid dusty outdoor spaces on windy days. A garage can be great if it is clean and not too humid. If the room is cold or damp, paint may dry slowly and remain tacky longer. Give each coat more time than you think it needs. DIY patience is cheaper than sanding off a gummy finish and starting over.
Finally, do not judge the piece too early. During the first coat, you may question your talent, your taste, and possibly your entire life plan. Keep going. Laminate furniture makeovers often look awkward halfway through. Once the second coat dries, the hardware goes back on, and the dresser is styled with a lamp or mirror, the transformation can be shockingly good.
Conclusion
Learning how to paint laminate furniture is mostly about respecting the surface. Laminate is slick, but it is not unbeatable. Clean it well, scuff it lightly, prime it with a bonding primer, paint thin coats, and allow enough curing time. Follow those steps and your dresser DIY project can go from forgettable flat-pack furniture to a custom piece with personality.
A painted laminate dresser is one of the most budget-friendly ways to refresh a bedroom, guest room, nursery, or entryway. You save money, keep furniture out of the landfill, and get bragging rights every time someone asks, “Where did you buy that?” Just smile and say, “Oh, this old thing? I painted it.” Then accept your applause gracefully.