Table of Contents >> Show >> Hide
- Before You Start: Know What Kind of Stainless Steel Finish You Have
- Tools and Supplies You May Need
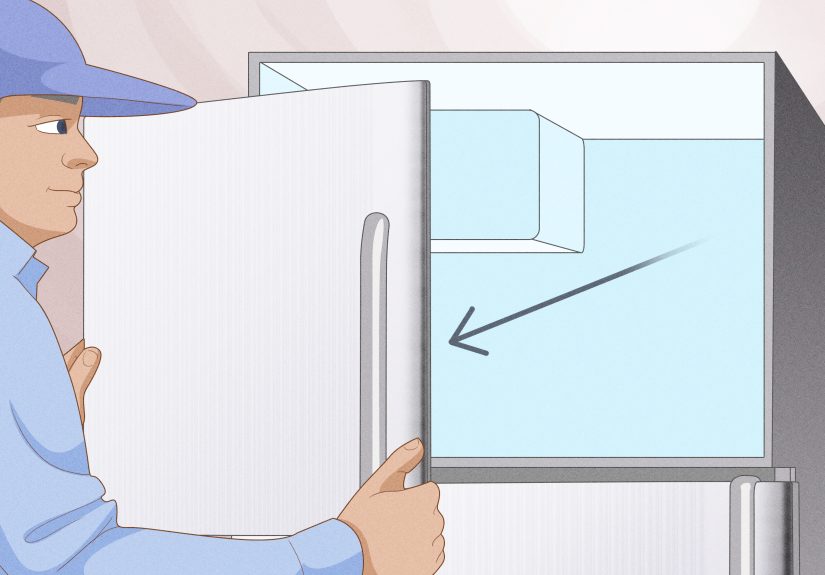
- Step 1: Clean the Refrigerator Door First
- Step 2: Find the Direction of the Grain
- Step 3: Try the Gentle Baking Soda Method for Light Scratches
- Step 4: Use a Non-Abrasive Stainless Steel Cleaner
- Step 5: For Deeper Scratches, Consider a Stainless Steel Scratch Removal Kit
- Step 6: Polish the Door for an Even Finish
- What Not to Use on a Stainless Steel Refrigerator Door
- How to Tell If a Scratch Is Too Deep to Fix at Home
- How to Prevent Future Scratches
- Common Mistakes When Removing Scratches from Stainless Steel
- Example: Fixing a Small Horizontal Scratch
- Real-World Experience: What Actually Works Best
- Conclusion
A stainless steel refrigerator door is supposed to be the polished, grown-up centerpiece of the kitchen. It stands there like a culinary bodyguard: cool, sleek, and quietly judging your takeout leftovers. Then one day, the light hits it just right and there it isa scratch. Maybe it came from a magnet, a delivery mishap, a kid with a toy, or that mysterious “nobody did it” person who apparently lives in every home.
The good news is that many light scratches on a stainless steel refrigerator door can be improved at home. The less-good news is that stainless steel is not magic steel. It has a grain, a finish, and sometimes a protective coating. Treat it too aggressively and a tiny scratch can become a shiny, cloudy patch that says, “Someone panicked with a scrub pad.”
This guide explains how to remove a scratch from a stainless steel refrigerator door safely, what products to use, what to avoid, and when to stop before your DIY project becomes a customer-service call. Whether your fridge has a tiny surface scuff or a deeper mark that catches your fingernail, the goal is the same: blend the scratch with the surrounding grain, restore shine, and keep the door looking like it belongs in a kitchen magazine rather than a crime scene.
Before You Start: Know What Kind of Stainless Steel Finish You Have
Not all “stainless steel” refrigerator doors are the same. Traditional brushed stainless steel usually has visible horizontal or vertical grain lines. This is the most repair-friendly type because light scratches can often be blended by working in the same direction as the grain.
Fingerprint-resistant stainless steel, black stainless steel, slate, painted metallic finishes, and coated stainless finishes are different. Many of these surfaces have a protective topcoat or tinted layer. If you sand, scrub, or use a scratch-removal kit on a coated finish, you may remove the coating instead of removing the scratch. That is like trimming your bangs in a hurry: technically possible, emotionally risky.
Do this quick finish check
- Look for grain lines. If you see fine lines running left to right or up and down, you likely have brushed stainless steel.
- Check your owner’s manual. Search your model number online if you no longer have the booklet.
- Test in a hidden area. Try any cleaner or polish on a small, inconspicuous spot before touching the front of the door.
- Avoid abrasive repair on black stainless. For black stainless steel, use only manufacturer-approved cleaners or touch-up solutions.
Tools and Supplies You May Need
You do not need a professional workshop to remove minor scratches from a stainless steel refrigerator door. In fact, the best tools are usually gentle, simple, and already hiding under your sink.
- Clean microfiber cloths
- Mild liquid dish soap
- Warm water
- Baking soda
- Non-abrasive stainless steel cleaner
- Stainless steel polish or mineral oil
- Non-scratch sponge or soft pad
- Commercial stainless steel scratch removal kit, if needed
- Painter’s tape, optional for marking the grain direction
Skip steel wool, gritty scouring powders, bleach, ammonia-based glass cleaner, oven cleaner, rough scrub sponges, and random garage chemicals with labels that look like they belong near a lawn mower. Stainless steel is durable, but the refrigerator door finish is still a decorative surface.
Step 1: Clean the Refrigerator Door First
Before you try to remove the scratch, clean the door. Fingerprints, oil, dust, food splatter, and cleaner buildup can make a scratch look worse than it is. Sometimes what looks like a scratch is actually a scuff, residue line, or streak from a previous cleaning attempt.
Mix a few drops of mild dish soap with warm water. Dip a microfiber cloth into the solution, wring it out well, and wipe the refrigerator door in the direction of the grain. Do not scrub in circles. Circular rubbing can create swirls that are more visible than the original scratch.
Once the surface is clean, wipe again with a damp cloth to remove soap residue. Then dry thoroughly with a fresh microfiber cloth. Water left on stainless steel can cause spots, streaks, or discoloration, especially if your tap water contains minerals.
Step 2: Find the Direction of the Grain
This is the most important rule in stainless steel scratch repair: always work with the grain, never across it. The grain is the pattern of fine lines in the metal finish. On many refrigerator doors, it runs horizontally from side to side. On some models, it runs vertically.
Stand close to the door and look at it from an angle. If needed, shine a flashlight across the surface. You should see tiny parallel lines. That is your road map. If the grain runs left to right, every cleaning, buffing, and polishing motion should run left to right. If it runs up and down, move up and down.
Think of the grain like carpet fibers. Brush the right way and everything lies smooth. Brush the wrong way and suddenly the whole room looks annoyed.
Step 3: Try the Gentle Baking Soda Method for Light Scratches
For fine surface scratches, baking soda can act as a very mild abrasive. It is gentle enough for many stainless steel surfaces when used carefully, but it still needs respect. Do not attack the door like you are sanding a deck.
How to use baking soda on a light scratch
- Mix two parts baking soda with one part water to make a soft paste.
- Apply a small amount of paste to a microfiber cloth.
- Rub lightly over the scratch in the direction of the grain.
- Use short, even strokes rather than heavy pressure.
- Wipe away the paste with a clean, damp cloth.
- Dry the surface completely.
- Repeat once or twice only if the scratch is improving.
If the scratch starts to fade, continue gently. If the area becomes dull, cloudy, or brighter than the surrounding surface, stop. You may be changing the finish rather than removing the scratch.
Step 4: Use a Non-Abrasive Stainless Steel Cleaner
A stainless steel cleaner can help reduce the appearance of small scratches, scuffs, and dull marks. Some products clean and polish at the same time, leaving a thin protective layer that helps disguise fine lines and fingerprints.
Apply the cleaner to a cloth rather than spraying heavily on the refrigerator. This gives you more control and prevents cleaner from dripping into handles, trim, or dispenser areas. Wipe with the grain, using smooth passes from one side of the door to the other.
After cleaning, buff with a dry microfiber cloth. Buffing is not just a fancy word people use when they want cleaning to sound expensive. It removes excess product and evens out the shine so the repaired area does not stand out.
Step 5: For Deeper Scratches, Consider a Stainless Steel Scratch Removal Kit
If the scratch is still visible after cleaning and gentle buffing, you may need a stainless steel scratch removal kit. These kits usually include abrasive pads in different grades, a lubricant or compound, and instructions for blending the scratch into the surrounding grain.
Use a kit only on uncoated, brushed stainless steel unless the product label specifically says it is safe for your finish. This matters. A scratch kit can improve true stainless steel, but it can ruin coated stainless steel by stripping or dulling the surface layer.
How to use a scratch removal kit safely
- Read the kit instructions from start to finish before opening anything.
- Clean and dry the refrigerator door.
- Confirm the grain direction.
- Start with the least aggressive pad or compound.
- Work only with the grain, using light, even pressure.
- Blend slightly beyond the scratch so the repair does not look like a small polished island.
- Wipe clean, inspect from different angles, and repeat only as needed.
- Finish with stainless steel polish to restore a consistent sheen.
The trick is patience. You are not erasing the scratch like pencil on paper. You are blending the surrounding finish so the scratch catches less light. The repair should be gradual. If you try to finish in thirty seconds, the refrigerator may win.
Step 6: Polish the Door for an Even Finish
Once the scratch looks better, polish the whole affected areanot just the tiny spot. Stainless steel polish, mineral oil, or a manufacturer-recommended polish can help even out the shine and make remaining fine scratches less noticeable.
Put a small amount of polish on a clean microfiber cloth. Wipe in the direction of the grain. Use a second dry cloth to remove excess. Too much oil or polish can leave a greasy film that attracts dust, fingerprints, and every curious hand in the house.
For the best visual result, polish the entire door panel rather than one small patch. That way, the repaired section blends naturally with the rest of the refrigerator.
What Not to Use on a Stainless Steel Refrigerator Door
Many stainless steel scratches are caused by cleaning tools, not kitchen accidents. The wrong product can turn one little mark into a permanent dull zone. Avoid the following:
- Steel wool: It can scratch deeply and may leave particles that rust.
- Scouring powders: They are usually too aggressive for appliance finishes.
- Bleach or chlorine cleaners: These can damage stainless steel and cause discoloration.
- Ammonia-based glass cleaner: It may streak or harm some finishes.
- Oven cleaner: It is far too harsh for a refrigerator door.
- Magic eraser-style pads: These can be more abrasive than they feel.
- Rough paper towels: Some can leave lint or fine marks; microfiber is safer.
How to Tell If a Scratch Is Too Deep to Fix at Home
Run a clean fingernail gently across the scratch. If your nail does not catch, the scratch is probably superficial and may respond well to cleaning, polishing, or light buffing. If your nail catches, the scratch is deeper. You may still be able to improve it, but full removal is harder.
Deep scratches, dents, gouges, and scratches on coated finishes may require professional repair, a replacement panel, or manufacturer touch-up guidance. This is especially true if the refrigerator is new or still under warranty. Before using abrasive pads, check whether the damage is covered by delivery, installation, or service policies.
How to Prevent Future Scratches
Once your refrigerator door looks better, prevention is the real victory lap. Stainless steel can stay beautiful for years with the right habits.
- Use only microfiber cloths for regular cleaning.
- Keep magnets away from coated or delicate finishes.
- Do not slide baskets, trays, or grocery bags against the door.
- Clean fingerprints regularly so grime does not require aggressive scrubbing later.
- Teach kids that the refrigerator is not a whiteboard, racetrack, drum set, or sticker museum.
- Use handles instead of pushing the door closed with rings, keys, or utensils in hand.
Regular cleaning with mild soap, warm water, and a microfiber cloth is usually enough. Wipe with the grain, dry thoroughly, and polish occasionally if your manufacturer allows it.
Common Mistakes When Removing Scratches from Stainless Steel
Mistake 1: Scrubbing in circles
Circular motions create swirl marks. Stainless steel appliance doors are brushed in one direction, so your motion should follow that direction.
Mistake 2: Starting with the strongest abrasive
Always begin with the gentlest method. You can move up in strength, but you cannot easily undo an over-buffed patch.
Mistake 3: Treating coated stainless like raw stainless
Fingerprint-resistant and black stainless finishes may have coatings. Abrasive scratch removal can permanently damage them.
Mistake 4: Polishing only one tiny spot
A small polished circle can be more obvious than the scratch. Blend the surrounding area and finish by polishing the full panel.
Mistake 5: Forgetting to dry the surface
Water spots and streaks can make the door look unfinished. Drying is part of the repair, not an optional dramatic flourish.
Example: Fixing a Small Horizontal Scratch
Imagine your refrigerator has a three-inch horizontal scratch near the handle. The grain also runs horizontally. First, clean the entire door with mild dish soap and warm water. Dry it with microfiber. Next, apply a small amount of baking soda paste to the scratch and rub left to right with light pressure. Wipe clean and inspect.
If the scratch fades but remains visible, use a stainless steel cleaner and buff the area again with the grain. If it still bothers you, use a scratch removal kit, starting with the finest pad. Work left to right, blending several inches beyond the scratch. Clean, dry, and polish the full door. The scratch may not vanish completely, but it should become much harder to see in normal kitchen lighting.
Real-World Experience: What Actually Works Best
In real homes, stainless steel refrigerator scratches rarely happen at a convenient time. They appear right before guests arrive, after a kitchen remodel, or two days after delivery when the appliance still smells new and everyone is treating it like a museum exhibit. The first emotional response is usually denial. The second is searching for “how to remove a scratch from a stainless steel refrigerator door” while standing directly in front of the fridge, squinting at the damage from nine different angles.
The most useful lesson from hands-on experience is this: clean before you repair. Many people jump straight to scratch removal products, but a surprising number of marks are actually scuffs, grease lines, adhesive residue, or streaks from an old cleaner. A proper wash with mild dish soap and warm water can reduce the drama immediately. Once the door is clean and dry, you can see what you are really dealing with.
The second lesson is that lighting matters. A scratch that looks terrifying under direct afternoon sun may be barely visible under normal kitchen light. Inspect the refrigerator from the angles where people actually see it. You do not need to make the door perfect under forensic lighting unless you plan to host dinner parties for detectives.
The third lesson is to respect the grain. Every successful repair depends on moving in the same direction as those tiny lines in the steel. When people rub across the grain or use circular motions, the repaired area can become hazy. That haze is often more distracting than the original scratch. Slow, straight strokes are boring, but boring is exactly what you want when repairing an expensive appliance.
For light scratches, the baking soda paste method is often enough to soften the mark. It works best when the scratch is shallow and does not catch a fingernail. The key is using a damp microfiber cloth and gentle pressure. If you press harder because “more effort must mean better results,” the stainless steel will not applaud. It will simply show new marks.
For scratches near the handle, stainless steel polish can make a big difference because that area collects oils from hands. After cleaning and light buffing, a thin polish layer can even out the shine. The scratch may still exist, but it reflects less sharply, which is what your eye notices most. In many cases, visual blending is more realistic than complete removal.
For deeper scratches, a commercial stainless steel scratch removal kit can help, but it requires patience. The safest approach is to start with the least aggressive pad, use very light pressure, and check progress often. It is better to do three careful passes than one heroic pass. Heroic passes are how refrigerator doors get “character.”
Another practical tip: repair a slightly larger area than the scratch itself. If you focus on the exact line only, you may create a narrow bright stripe. Blending the surrounding grain makes the result look intentional and natural. Afterward, polish the entire panel so the sheen matches from top to bottom.
Finally, know when to stop. If the scratch is on black stainless steel, fingerprint-resistant stainless, or a coated designer finish, do not sand or scrub unless the manufacturer specifically approves it. A visible scratch is annoying, but a missing coating is a bigger problem. When in doubt, call the manufacturer, check the warranty, or ask an appliance repair professional. Sometimes the smartest DIY move is putting the abrasive pad down and walking away like a responsible adult.
Conclusion
Removing a scratch from a stainless steel refrigerator door is all about patience, gentle materials, and following the grain. Start by cleaning the surface, identify the grain direction, try the mildest method first, and use a stainless steel scratch removal kit only when the finish is suitable. Avoid harsh chemicals, steel wool, rough pads, and circular scrubbing. With the right approach, many light scratches can be reduced or blended so well that only you know where they wereand honestly, you have more exciting secrets to keep.